Think Heroku meets Codespaces. A quick tutorial on how to get started on Porter with a simple MERN stack.
Setting up development environments and deploying them into production are probably the two biggest wastes of time of any development cycle. Configuring and installing modules on your local machine often goes wrong, and we have all experienced the headache of trying to deploy an application that works on your own machine but breaks in production.
With platforms like Vercel and Netlify, developing and deploying JAM stack applications are getting easier and easier. But what if you want to work on something more complex that requires multiple databases, caches, and workers? Heroku and Render do a better job automating a lot of the DevOps when you are working on more complex projects, but you still have to do the work of maintaining a development environment on your local machine and shipping it to production.
What if, instead, development happened in the cloud so that you don't have to run or install anything on your local machine? What if you could ship your application into production with a single click from the same platform you were developing on?
What is Porter?
Porter is a platform that lets you develop applications in the cloud while using your favorite local IDE. You can also host the apps you've developed on Porter with a single click from the same platform.
If you are familiar with Heroku, you can think of apps on Porter as Dynos you can directly develop in. This means your localhost now lives on a URL that you can publicly share, and your application's entire lifecycle from development to production happens on a single platform with no local set-up whatsoever.
Let's see this in action with a simple MERN stack example.
1. Create Containers
Everything that runs on Porter runs as Docker containers. If you aren't familiar with containers, you can think of them as lightweight VM's that are completely isolated from your host machine. These containers let you develop and ship code in consistent and predictable environments. In Heroku terms, containers behave a lot like Dynos, except Dynos were created before Docker came around and ate up the software industry. Porter is a modern PaaS (Platform as a Service) built on top of the Docker ecosystem.
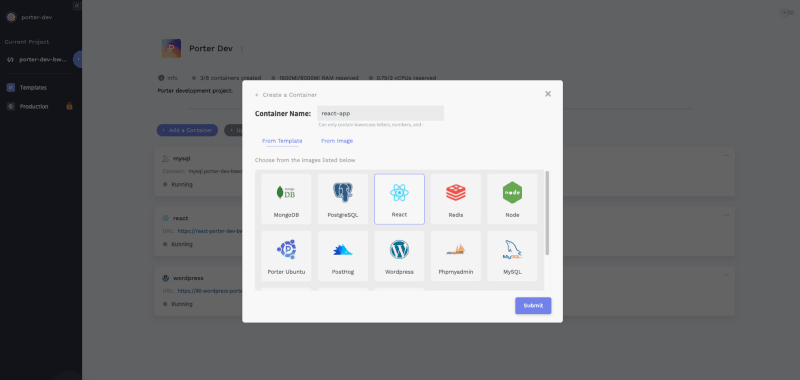
First, login to the Porter Dashboard. You will be prompted to create a project, then you will see the "Create a Container" button. When you click that button, you will see a variety of templates Porter provides by default. To spin up a MERN stack, simply select the React and MongoDB templates as shown below.
It may take up to a minute for these containers to load. Once they've loaded, each container will display a URL. This URL effectively acts as your localhost. In the case of the react container, the URL serves a simple create-react-app template as shown here: https://dev-to-react-porter-dev-bwxork4w.getporter.dev/ (Note that this URL is my development environment!).
In the case of the mongo container, the URL is a connection string that other containers can access as long as they are within the same project. We'll come back to this later.
2. Download the Porter CLI
I may have lied a little bit when I said you don't have to install anything on your local machine. You do need to install one tiny CLI to start developing in these remote containers, but I promise this is the only thing you'll need to install.
npm install -g porter-cli
The above command is for MacOS. For Windows and Linux, check here.
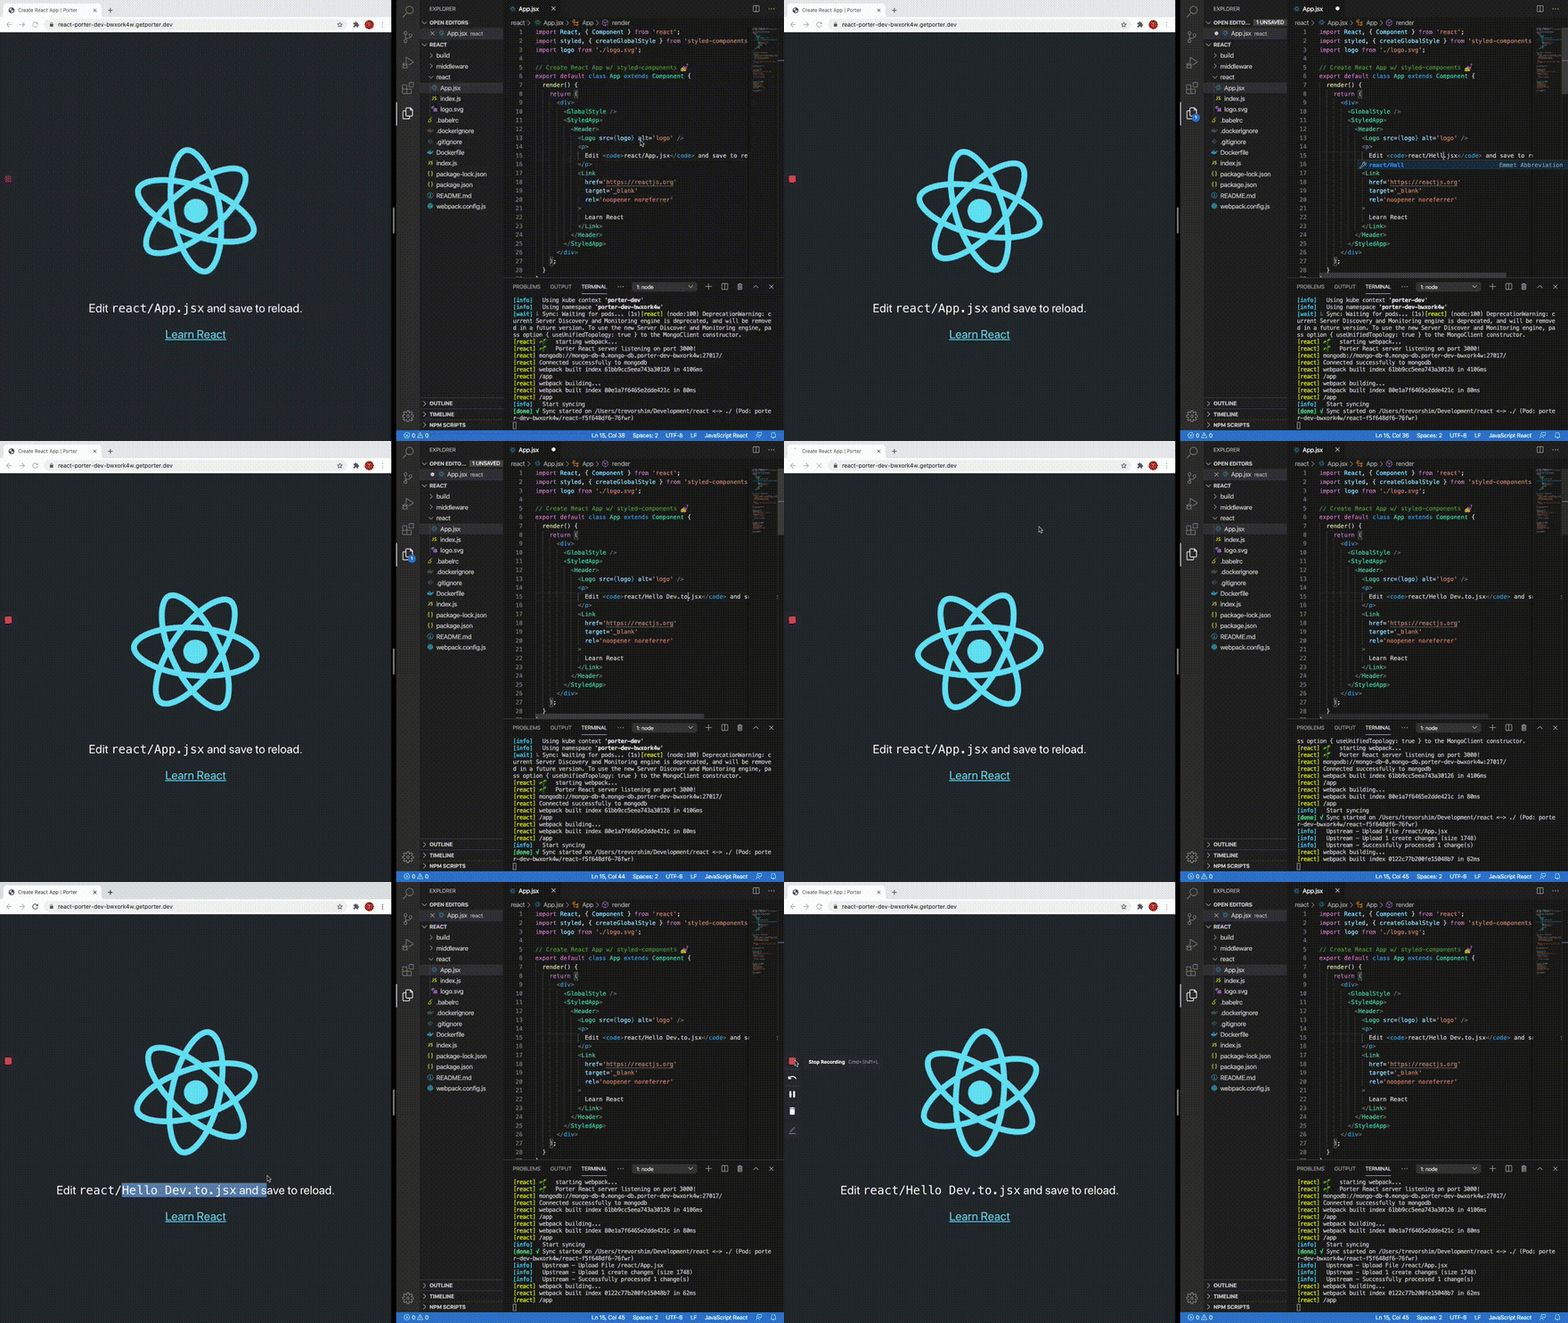
Porter lets you develop on remotely running containers without having to use a WebIDE. You can use whatever local editor you want to use. Our CLI will sync your local files with the files in the remote container so that every local edit you make gets propagated into the remote container.
First, login via the CLI:
porter login
Then create and navigate to an empty local directory and run
porter init
This will prompt you to select a container you want to link your local directory with. Select the name of the react container you have just created.
Once you have linked up the directory, you can start syncing your local file system with the remote container via
porter sync --bi-dir
This will start a bi-directional syncing process and download all the contents in the remote container into your local folder. Now, every change you make on your local directory will be instantly propagated into the remote container, and the container URL will hot-reload whenever there's a change.
To see the logs from the create-react-app process running inside the container, run
porter logs
3. Linking up MongoDB
Spinning up an entirely new MongoDB instance is arbitrary on Porter. If you want to start fresh, just make a new instance by clicking on the MongoDB template again. The connection string displayed on the container is available only to internal traffic - i.e. only the other containers that are within the same project can access this database. Copy this connection string by clicking on the icon boxed below.
To connect to database, you need to first npm install mongodb --save in the react container. To install new modules in this container, you simply need to run
porter enter sh
This will open up a shell inside the remote container, and you can run the commands you'd normally run on your local machine inside this remote shell, such as npm install. These kinds of commands might require more RAM and CPU than what is assigned to the container by default. You can allocate more resources from the "Resources" tab in container setting.
Now, you can use this connection string from the react container to connect to the database. To test the connection, let's go back to /index.js in the react container and add these lines of code.
var MongoClient = require('mongodb').MongoClient

// Connection URL you have copied
var url = 'mongodb://mongo-db-0.mongo-db.porter-dev-bwxork4w:27017/';

MongoClient.connect(url, function(err, db) {
  console.log("Connected successfully to mongodb");

  db.close();
});
You'll see the log message that confirms that proper connection has been established between the react and mongodb containers.
4. Using environment variables on Porter
Instead of using .env files, you can directly inject in environment variables into the container via the Porter Dashboard. As an example, click on the react container and navigate to the "Environment" tab. Write in a new MONGO_URL variable with the URL that you have copied from the mongodb container. The container will restart, and when you swap out the connection string and console.log the connection string, you will see the URL in the logs as you'd expect.
var MongoClient = require('mongodb').MongoClient

MongoClient.connect(process.env.MONGO_URL, function(err, db) {
  console.log(process.env.MONGO_URL);
  console.log("Connected successfully to mongodb");

  db.close();
});
In the logs, you will see that the connection has been established once again.
Try it out!
You can try setting up a simple MERN stack on Porter for free here: https://dashboard.getporter.dev. Here are the docs for your reference.


Latest comments (2)
Hey, that looks really cool! Thanks for sharing. What is included in the free deal?
Hey! Everything is free except hosting with a custom domain - hosting/developing on our own domain (*.getporter.dev) is completely free. The free tier is also limited at 1GB RAM and 0.5 CPU, which might not be enough for some projects. But if you like Porter enough and want to use it daily, we can talk and I can give you more resources. We are prioritizing iterating and learning from usage rather than revenue, so we're just looking for a few power users who can help us build a better product.