XAMPP is an all-inclusive package that facilitates the installation of FTP Server, PHP, Apache Web Server, Perl, MySQL, and phpMyAdmin for Windows, Solaris, Linux, and Mac OS X. Additionally, XAMPP provides interface to admin MySQL, PHP, and Apache Web Server. Even though XAMPP gets released on a frequent basis, you may still need to use the most updated PHP version until XAMPP distributes it directly. This article provides a short tutorial on the steps that are needed to update your older PHP version into latest version in XAMPP server.
“How can we update or upgrade older PHP version in XAMPP server?” This is the common question asked by web developers, particularly those who are beginners. We have noticed that a lot of people have this query running at the back of their minds and so we thought of publishing an easy-to-follow tutorial on updating the XAMPP PHP version on Windows and Mac.
Consider that you operating on the XAMPP server local host and in fact, this is a common approach followed by most WordPress developers. Still, most developers end up raising a query about how they can change the version in the XAMPP web server. This article covers 4 easy-to-apply steps to upgrade your older PHP XAMPP version. However, before we start with the tutorial, we would discuss why you should get your PHP version updated and the time within which you should get the version upgraded.
Reasons why you should Upgrade PHP older Version in the XAMPP server
Different specifications of a project that you work on would commonly determine the different requirements of your PHP version. Sometimes, you may be forced to get the PHP older version updated by users who may want to have a newer version. Many times, it is observed that as soon as the latest PHP version gets released, developers and users make no delay in getting the current versions updated in order to stay protected from security threats. Surprisingly, many web developers still continue to use older versions of XAMPP, which may run only on PHP version 5.
The main concern that bothers them is whether this PHP version would be updated in the latest version of their XAMPP without having to re-install it again. Notably, PHP 7 comes equipped with capabilities that are advanced than PHP v5. Every version features advanced capabilities and this is the reason why upgrading to the advanced version is beneficial, soon after its release. You can check the version by visiting the link. You will be directed to the new screen that would display the information of your current PHP version.
*Why is PHP 7 superior to PHP 5 and you should choose to upgrade to this version: *
*Beginners may find PHP v7 to be faster than PHP v5 or other versions. A code that is written in PHP v5 would perform better if it runs on PHP v7.
*PHP v7 allows users to deal with errors much easily compared to older versions. Those who still use PHP v5 know how much effort they need to put in order to rectify fatal errors.
*Older versions do not support anonymous class, which PHP v7 supports. The performance time gets accelerated by anonymous class and this is a common issue in other programming languages such as C#, JAVA, and more.
*PHP v7 usually supports large files that may have a size of 64 bit and are compatible with architecture of 64 bit operating system (OS). The lower version does not come equipped with this feature.
*The latest version features other advanced capabilities such as type declarations, null coalescing, etc.
We hope that you have now understood the importance of updating the XAMPP PHP version and so now we would proceed with the discussion about how users would be able to get the version upgraded. This is covered in 4 easy steps and we hope that you would not find any difficulty in following the tutorial.
4 Easy Steps for Updating XAMPP PHP Version (Windows OS)
The main reason why XAMPP is a true novelty is that it is not a production server, but a development server. This implies that the configuration can be easily changed and minor changes can be implemented without collapsing the live application. However, one thing which you should note is that it is always a good idea to get a backup created for your project or site files before you update the XAMPP version.
Step 1: Start by downloading the most recent PHP version
The first step is downloading the recent PHP binary version. Make sure that you are also downloading the thread/malware safe Zip based on the Windows version that you are using. This may be ( x64 for 64-bit and x86 for 32-bit), as depicted in the below image:

The image given above shows that VC14x64 Thread safe has been downloaded. This version goes well with 64-bit Windows version.
Step 2: Create the PHP Folder After Extracting ZIP File.
Go to the Windows desktop, and start creating a folder and give it a name such as PHP. The next step involves Unzipping the file and saving it inside the new folder. Check out the image below to get a better idea about this.
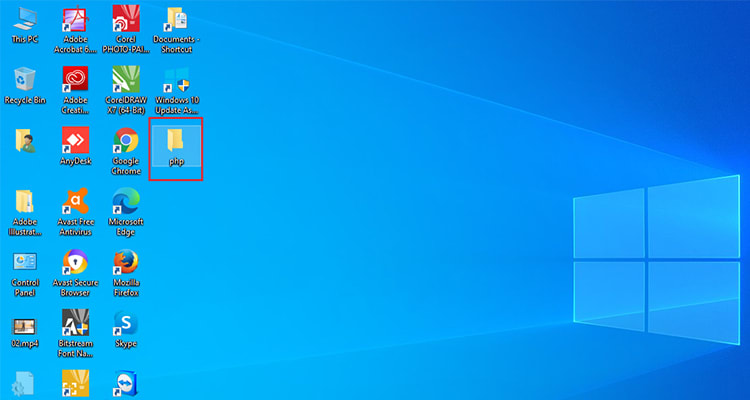
Step 3: Give a New Name to your older PHP Folder.
Open the XAMPP server folder and click on the older PHP folder. Give it a new name such as PHP_5. Next, paste the newly extracted folder on the XAMPP directory. This is clearly indicated in the image below:

Step 4: Apache HTTP Server Configuration.
At this stage, you should focus on configuring the Apache HTTP Server. You can do this by opening the control panel of XAMPP. Now, select Apache Config, and then select Apache (httpd-xampp.conf) option. You can get an idea about this step from the below image:

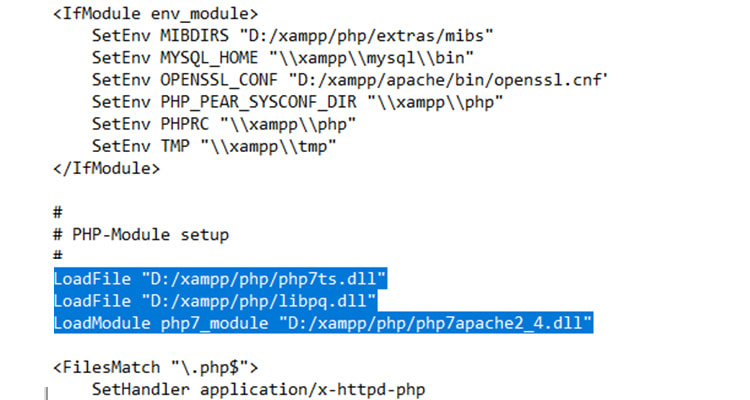
After this, you would find that a file named httpd-xampp.conf would open on the monitor. Next, select the setup for PHP-Module and try to paste the updated code lines in it after you delete the pre-existing code lines. This is clearly indicated in the image below.
Previous code lines:

Updated code lines:

In the next step, you should save it and get your XAMPP server restarted. And that’s it. Your task is accomplished.
What if you have Project Coding by PHP and you need to run it on Mac OS or with XAMPP?
You have to begin by choosing ‘Mount’ in the XAMPP dashboard. Next, look at the left of the Finder. Go to lampp and inside the htdocs. You will find a default PHP source code. You can insert your code on htdocs and then you can run your code. If you are handling a big project and have many files and folders to handle, then you should create a separate project folder
Final Words
The smooth functioning of your WordPress-based website depends a lot on whether you are proactive in getting the PHP version of your website updated. In this article, we guided you on manually updating your website, but you would find resources such as WordPress support services, which would handle such tasks on your behalf, thereby allowing you to pay attention to other critical tasks of your business. If you feel that you don’t have much time or patience to update the PHP version of your website, you can skip the do-it-yourself approach and use automated or online resources to get this job done without any hassle.
We hope that this article would provide you with the required assistance to get a version update in XAMPP. It’s also important you use the XAMPP latest version. If you are looking to build a new WordPress-based website, you may consider hiring the services of a reliable web design company that employs experienced professionals who can carry out annual website maintenance tasks on your behalf. In case you want any assistance or are facing any issue with the PHP upgrade, you should feel free to contact us. If you have a feedback or you want to share your experiences or instructions, we would be happy to hear from you. Our web developers and designers are always ready to support you.

Top comments (1)
Have you tried ServBay.dev?
A much easier tool for PHP developer, provides a much easier way, especially for beginners. It handles all versions of PHP, MariaDB, PostgreSQL, as well as Redis and Memcached. You can run multiple PHP instances simultaneously and switch between them effortlessly, without the need for any environment setup. This tool has simplified my PHP development and is definitely worth a try!