In the 1st part of the series we have presented the various ways you can deploy a Mendix application. If you haven't read it yet, it will be a good primer for the whole series.
We'll start by exploring on-premise deployments.
Why on-premise first?
Mainly it's because on-premise is the lowest level we can go to, meaning the web server and application level. This can help us learn what building blocks the application is made of and what it actually is.
What does on-premise mean?
An essential question to answer. With Mendix, you can consider on-premise any deployment on your own infrastructure that is generally not running Kubernetes or OpenShift and not using a Mendix Operator.
If you use them, we'd be talking about a Private Cloud deployment.
Mendix application dissected
To be able to deploy a Mendix application, it will be good for us to understand the technology behind.
Mendix applications are based on JVM: when you click 'Run' in Mendix Studio Pro, it will collect all the microflows, constants, even entities, and build them into an executable java application. (how that's done is interesting as well but it's better to leave that for another article)
This application can then be run as any other java application would be.
If we were to ssh into a Mendix application pod (or just a docker container), you'd see exactly a java process:
cat /proc/29/cmdline
/opt/mendix/build/.local/bin/java -Dfile.encoding=UTF-8 -Djava.io.tmpdir=/opt/mendix/build/data/tmp -XX:OnError=kill -s USR1 7 -XX:OnOutOfMemoryError=kill -s USR2 7 -DapplicationName=docker_example -XX:MaxMetaspaceSize=256M -Xmx512M -Xms512M -XX:+UseSerialGC -DMX_INSTALL_PATH=/opt/mendix/build/runtimes/10.20.0.60519 -jar /opt/mendix/build/runtimes/10.20.0.60519/runtime/launcher/runtimelauncher.jar /opt/mendix/build/
The last argument /opt/mendix/build/ of the command contains our whole application on the container (example app below called NoTicket):
ls /opt/mendix/build/web/pages/en_US/NoTicket/
Ticket_NewEdit.page.xml      Ticket_NewEdit.page.xml.gz   Ticket_Overview.page.xml     Ticket_Overview.page.xml.gz

ls /opt/mendix/build/model/
bundles/           dependencies.json  i18n/              lib/               metadata.json      microflows.json    model.mdp          operations.json    resources/
From this we can learn that it's basically a jar of the mendix runtime that runs a folder which contains our application's compiled code (the jvm bytecode) and the resources it needs (.js, .css files, pages in .xml format, etc...). When you build your app, it is packaged into an .mda file which is basically an archive of your application.
Does that sound familiar? If you're coming from Java EE (or Jakarta EE) background, this might make you think immediately of an application server like Tomcat.
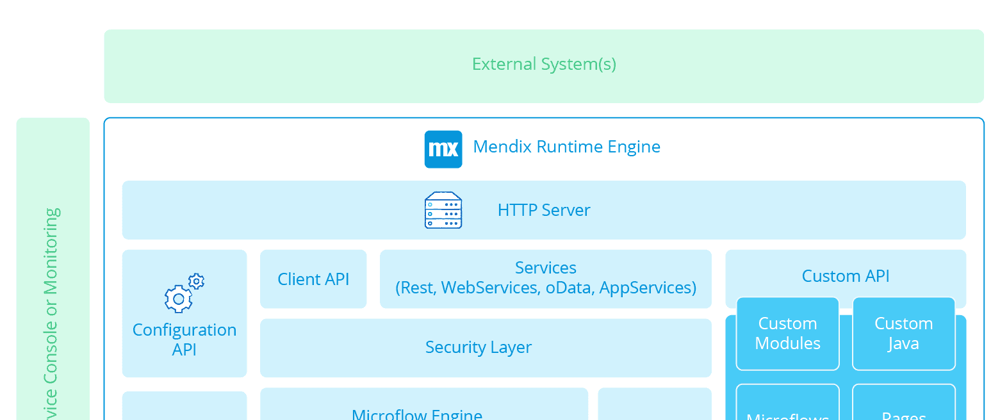
And you would be right, Mendix Runtime is actually an equivalent of an application server like Tomcat. Here's a representation on what it contains:
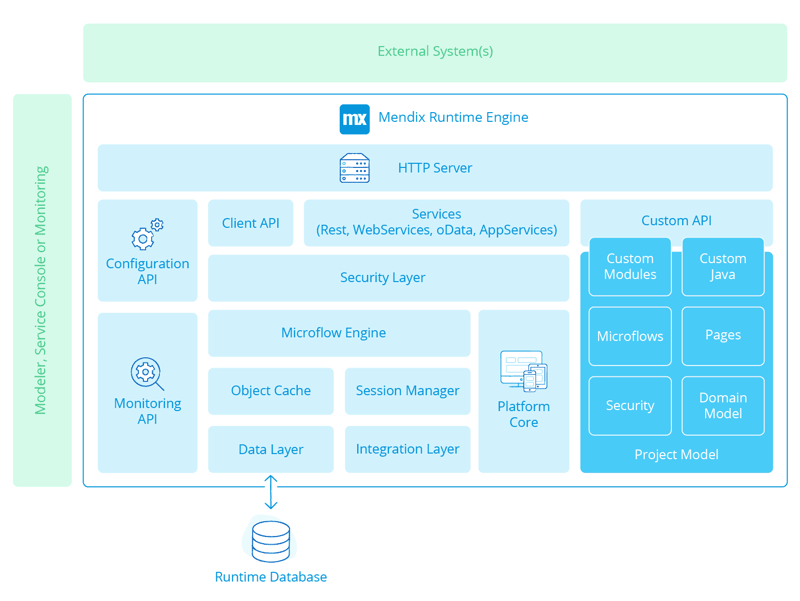
The HTTP server you see in the image uses Jetty as a library to handle http requests but it does not itself implement the Jakarta Servlet API. Hence, you cannot build a mendix application and deploy on a Tomcat, or deploy any other Java application on a Mendix Runtime.
How to deploy on premise
We have a few options to deploy on premise:
- Deploy on Linux as a Java process using m2ee-tools python utility.
- Deploy on a Microsoft IIS server.
- Deploy wherever you want using Docker (best solution in my view).
Mendix prides itself on being cloud-native out-of-the-box, and we should benefit from that as much as possible. While you can containerize any application in theory, with Mendix that's already taken care of - just build your image and deploy.
Therefore, I will only focus on the last option, using Docker. It has many advantages:
- It's better both for you and your system admin as you can isolate your app's environment from the machine it's running on.
- It bundles the app into a neat package that can be run on any machine.
- It's easy to split the build and deploy processes.
- Devs can modify the image to include any supporting processes in the container.
To build the app, we will use docker-mendix-buildpack. It will collect your application files, produce an .mda package, and build a docker image.
You can follow these steps:
- Clone docker-mendix-buildpack:
git clone https://github.com/mendix/docker-mendix-buildpack
cd docker-mendix-buildpack
- Clone your app's repo where you want to build it (you can get the git link from the Team Server section of your app in Mendix Portal):
git clone https://git.api.mendix.com/xxxx-yyyy-zzzz-yyyy.git
- Build your image:
docker build --build-arg BUILD_PATH=appFolder --tag mendix/mendix-appName:deploy .
On the 1st run, it's going to build some helper images, so it will take some time. On next runs it's going to be much faster.
Once you've done that, you can either run the image, or push it to your company's container registry if you have a different build and runtime server.
If it's a release version, make sure to give it a version (like 1.1.0 instead of a snapshot version like deploy).
To start it, simply run the docker image:
docker run -it \
  -e ADMIN_PASSWORD=Password1! \
  -e DATABASE_ENDPOINT=postgres://username:password@host:port/mendix \
  mendix/mendix-appName:deploy
How you can use it as part of you CI/CD process
You can easily automate the process with a simple bash script, integrate into a build tool like Jenkins, or Github Actions, Gitlab Workflows, etc...
docker compose
I also like to use docker-compose to quickly deploy a database alongside the app container. This way I can build and deploy a fully-functioning app in minutes.
Here's a sample script for reference:
---
version: "3.0"
networks:
  mendix-network:
    driver: bridge
services:
  postgres:
    image: postgres
    hostname: postgres
    container_name: postgres
    restart: always
    shm_size: 128mb
    environment:
      POSTGRES_PASSWORD: postgres
      POSTGRES_USER: mendix
      POSTGRES_DB: mendix
    volumes:
      - postgres-db:/var/lib/postgresql/data
    networks:
      - mendix-network
  mendix:
    image: mendix/mendix-appName:deploy
    hostname: appName
    container_name: appName
    ports:
      - "8080:8080"
    environment:
      ADMIN_PASSWORD: "some great password"
      DATABASE_ENDPOINT: postgres://mendix:postgres@postgres:5432/mendix
      mem_limit: 500m
    restart: always
    depends_on: [postgres]
    networks:
      - mendix-network

volumes:
  postgres-db:
Then you can simply run:
docker compose up -d
docker logs appName --follow
Kubernetes
Technically, once you have build a docker image (or an image in OCI format), you can just run it in your kubernetes cluster. Normally with Mendix though, you would use a Mendix Operator which would build the app and the image for you and start your app. This would all take place inside your cluster. It will be covered much more in depth in an upcoming article.
Conclusion
Mendix makes it easy to deploy cloud-native applications on your infrastructure. Using the docker-mendix-buildpack you can easily produce a docker image with your application, and deploy it wherever you want.
While on-premise deployments are not always the best option, they can be great for small applications, demos, proof of concepts, or if the client's infrastructure does not support Kubernetes or OpenShift deployments.
Hopefully, this information will help you understand the behind-the-scenes processes of a Mendix app build and deployment, aiding in debugging any deployment issues regardless of the chosen deployment option.
If you'd like more information, or need some help in setting up your deployments, don't hesitate to reach out.

Top comments (1)
Hi, thanks a lot for doing this article. Just want to let you know that you need the Mendix PAT to be able to clone your git repository. You can get your Personal Access Tocken on the Mendix Developer Profile. Please keep writing this nice articles about deployment on Docker!!! (Maybe a more detailed one based on a Windows box it will be also helpfull)