
This article is part of the October xamarin best practices challenge
Release, deployment, and distribution are some of the words we use to refer to the process of putting the latest features and enhancements of our application at the hands of our users. In the context of mobile apps, this translates to the process that allows our users to download the latest version of the app to see what’s new.
This is a process that tends to grow in complexity as our application evolves, needing more checks, validations, scripts to be run, testing environments to be created and so on, to ensure everything works and the users get the best experience possible. As you might expect, this causes the releases to become more delicate and error-prone (when done manually) as the time passes and therefore taking longer to arrive at our user’s hands.
With Appcenter your app is a couple of clicks away from your users, every time, in every platform.
Thankfully, it doesn’t have to be like this. With tools like Appcenter, we can automatize most (if not all) of the steps of our release process to significantly reduce its complexity. Here, we are going to walk through the process of creating a release using the appcenter email release and while at it, understand the configuration options available to us..
Connect your apps to appcenter
The first thing we need to do is access Appcenter’s website and log in using your preferred service. It currently supports Microsoft, Github, Facebook, and Google.
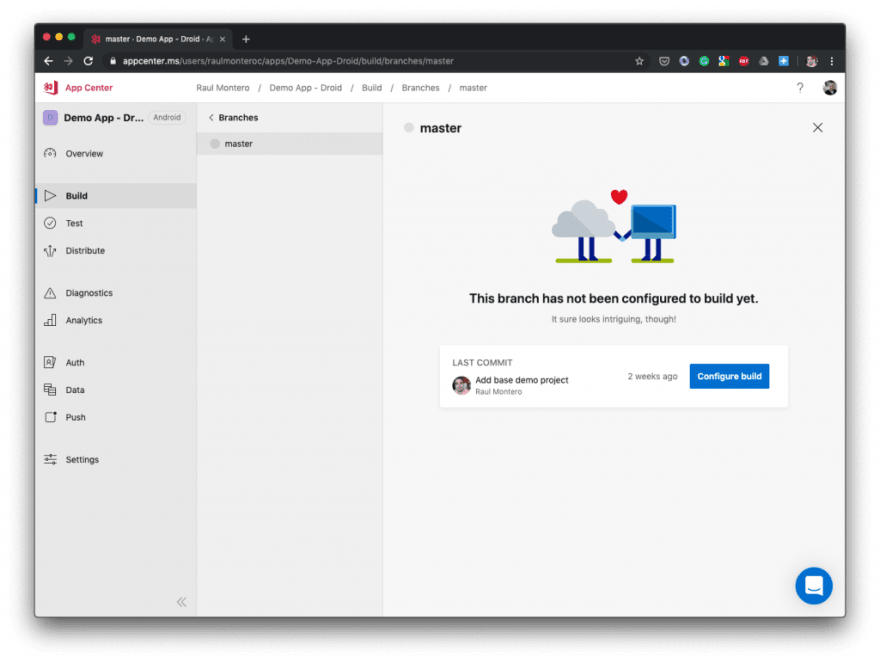
Once you are inside, you should see a screen similar to this one.

Click on the Add app button to start configuring our application.
You will notice you’ll need to configure an app for each platform you support, even if you are using a cross-platform technology. For our case, we are going to use xamarin with apps releases for android and iOS. Fill in the name and platform of the app and click Ok to display it on the dashboard.
This is how the app setup looks like for the android app. For iOS, the configuration is the same, except we’ll select iOS instead.

Once that’s done, your dashboard will be updated with two new applications, one for android and another for iOS.

The last thing we need to do is to connect these applications to the repository where the source code is located.
To do so, we select either one of the applications available on the dashboard and once inside select the Build option from the side menu. There you will find the available repository services Appcenter supports, find yours, look for your repository and click ok.

After that, you should be able to see all the branches available from your repository indicating that the connection was performed successfully.

Defining automatic builds
The next thing in the list is to configure the build so it knows how to build (and run) our app automatically, whenever new changes are added.
Since we are already in the build tab of our application (from the previous step), we just need to select which branch we want to build and click on the Configure Build button on the next screen.
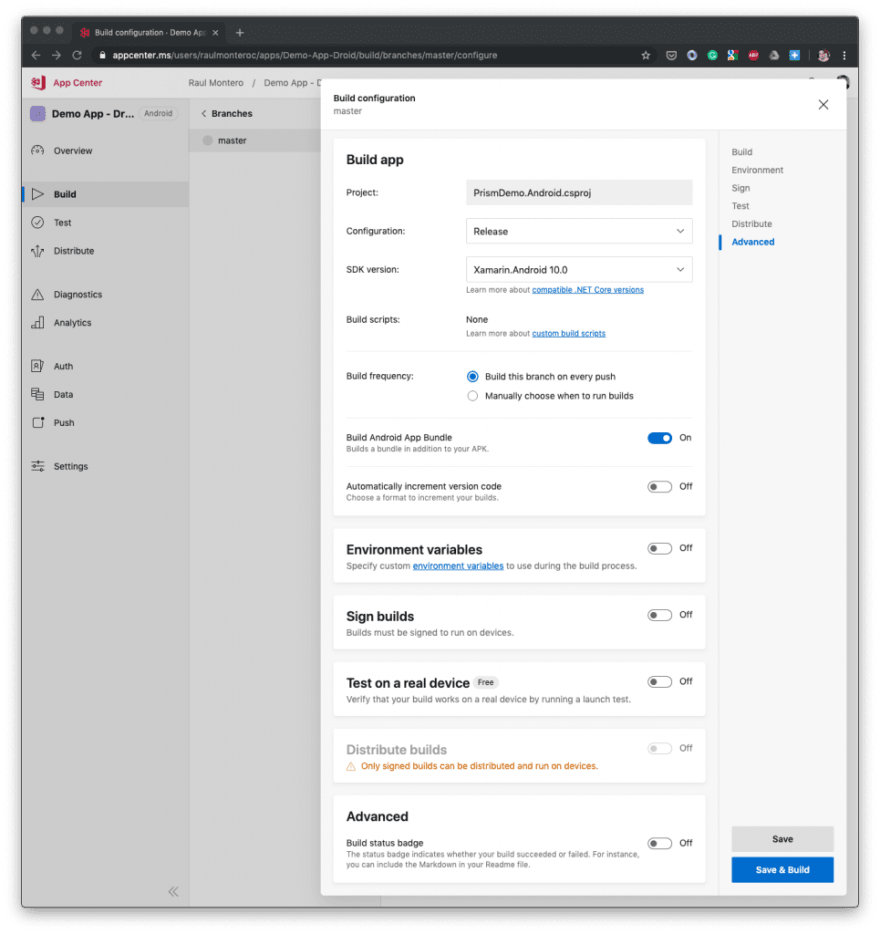
This action will display a side screen with all the options available for us to customize our build.

It can be a bit overwhelming at first, but it’s actually quite simple once you understand the basics around it. Let’s dive into each option to see them in detail
- Project : The .csproj file to build upon
- Configuration: The build configuration to use, either Debug or release for android and additional AdHoc and AppStore for iOS only
- SDK Version : The version of Xamarin.Android or Xamarin.iOSwe’ll be using to build our project.
- Build Scripts: Scripts to be run before or after the build is executed.
- Build Frequency: Either build this automatically on every push or manually whenever we click the build button directly on Appcenter.
- Android App Bundle: Specific to Android, tells Appcenter to use the new distribution mechanism for android apps. More info here
- Increment version code: Automatically increment the build version of the app each time the build is run. This is especially useful if you are distributing to the stores where each build number must be unique.
- Environment Variables: This allows you to provide placeholders in your configuration files that are later replaced with the values provided here. Really useful when dealing with sensitive data you don’t want to store in the repository or values that change depending on the environment the app is run on.
- Sign Builds: We will see more of this later. For now, you can think of sign build as a way to certify the app’s binary to be safe to use and not harmful for users.
- Test on a real device: Configure UI Test to run on real devices available on the Appcenter’s device farm.
- Advance: Build Status Badge: Link to the badge with current build status. This is usually found in readme-files in repositories.
With this new knowledge, it’s time to create our own build configuration that will let us know that our application was built correctly and was able to be launched on a real device.
Our setup will be as follows:
- Set the project to the android/iOS .csproj file
- Set the configuration to Release mode on Android and Ad Hoc for iOS.
- Set the build frequency to build on every push
- Enable the Android app bundle when building the android app
- Enable test on a real device to be sure it can be launched.
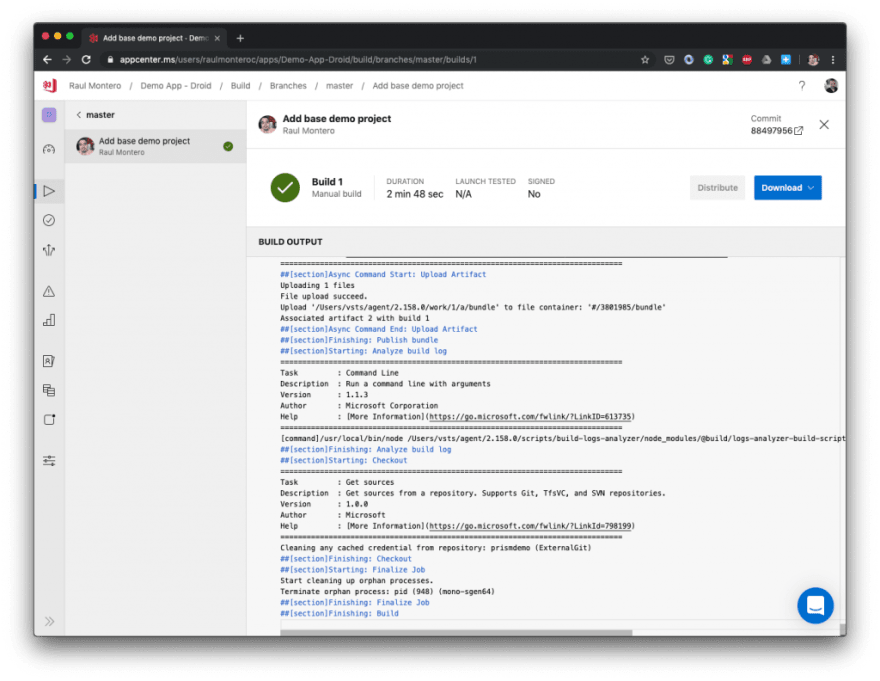
After setting the configuration, we should be able to create a build and be sure our app is building correctly without issues. Press the Save and Build button to start running the build and after it finishes, you should see a screen similar to the one below, with all the logs, details and final status of the build performed.
Add release configuration
Now that we are able to create builds automatically, we can focus on how to distribute it to users by email. To do so, we need two things:
- Sign Builds.
- Add Sign build configuration to our build process in AppCenter.
What is a signed build? Basically, it’s the signature of the author and it’s used to claim ownership of a given application. Without it, you can’t publish your app to either of the stores (AppStore or Play Store) or even run it on a real user’s device, so in order to distribute our app, we first need to have it properly signed.
The signing process of each platform is different and therefore requires different configuration steps to be performed for Appcenter to validate it as a signed build., we will see them in detail.
Sign Android builds
The signing process in Android is straight forward, we just need to generate a keystore file and connect it to the build configuration we already have in place.
To create the file you can follow the official android guide or if using Xamarin, you can use Microsoft’s guide using Visual Studio
With the keystore file at hand, we go to the build configuration (for our android app) in Appcenter and enable the sign builds option. We’ll need to attach the file and provide the keystore’s password and alias.

Sign iOS builds
Unlike Android, Apple doesn’t allow us to run our app on just any device, not even on our development environment, to do so, we must sign our builds using two files:
- Provisioning Profile (.mobileprovising)
- Certificate (.p12)
Those files are created in our account inside the Apple developers portal, there we will need to specify which devices can install our app and what kind of services it will be using, then we’ll download the mobileprovising which contains all these details, along with a certificate file that must be installed on our mac which validates our identity as a developer of our app.
For a detailed guide on how to get those files, you can see the official guide or use Microsoft’s guide for a more visual walkthrough.
Same as with android, now that we have the required files, we go to the build configuration (for our iOS app) in Appcenter and enable the sign build option, attaching the necessary files and providing the certificate password as well.

Releasing the app
With the signed builds in place we have only one thing remaining, distribute the app to our users. We do so by enabling the option “Distribute Build”.
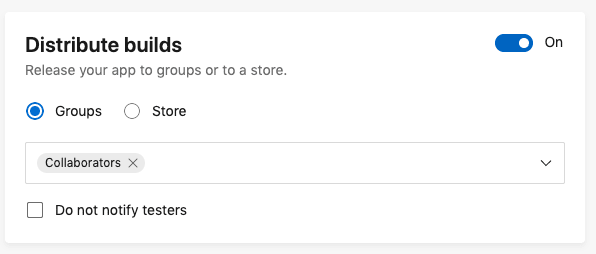
Here you will see two options: Groups and Store. With groups, we’ll distribute it to a specific number of users via email while store will connect to the platform’s application store and distribute it directly there.
In this case, we will focus on the first one, groups. This is a good option when you want to deliver internal builds for testing purposes or even to provide key people with the latest available build.
There are two things to take into account in order for this to work properly:
- On android, be sure to enable “applications from unknown sources” option on the device the app is going to be installed on.
- On iOS, be sure the provisioning profile type is either Apple distribution or iOS distribution and includes all the services your app is using.
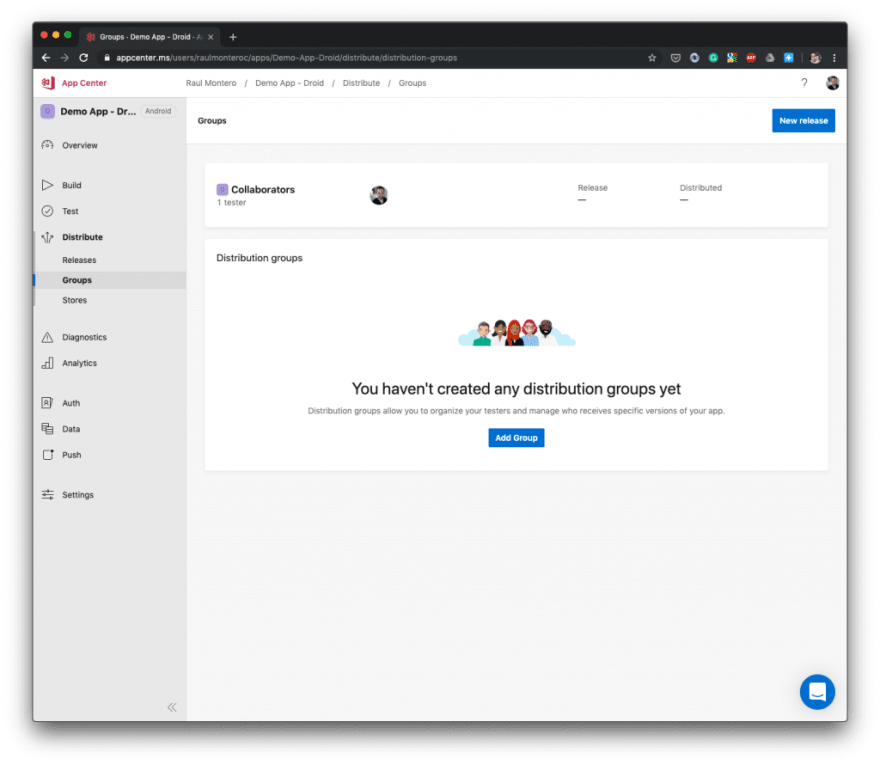
Finally, if you want to modify the distribution list, you can do so by going to the distribute/groups option on the side menu and create additional user groups and add as many members as you need.
Final thoughts
Awesome!, at this point, we have configured Appcenter to release a new version directly to our users every time a new change is added, automatically, without further interaction, allowing us to focus our efforts on other things, like creating more features and enhancements for our app.
The best thing is, once you get used to the process, it becomes a matter of minutes to configure an automatic release pipeline on any app you work with.
A thing to notice here is that the release we just did is simple, in a production application we might need extra configuration to be done before releasing the app to our users. Thankfully, Appcenter has a few tricks left that enable support for more complex scenarios, such as:
- Running pre and post scripts.
- Updating the value of different configuration variables, depending on the release type.
- Releasing the app directly to the platform’s application store for alpha, beta and production release.
Unfortunately, they didn’t make it into this post so it wouldn’t become too big and tedious to read. Nonetheless, they are important topics and we’ll be talking about these topics in a future post to make our release process as smooth as possible.

Oldest comments (0)