If you're new to Arduino, one of the best ways to start is by making an LED blink. This simple project helps you understand how to write and upload code to your board. Let's get started!
Step 1: Setting Up Your Arduino
To begin, you'll need:
- An Arduino Uno (or a compatible board)
- A USB cable to connect the Arduino to your computer
- The Arduino IDE, which you can download from Arduino’s official website
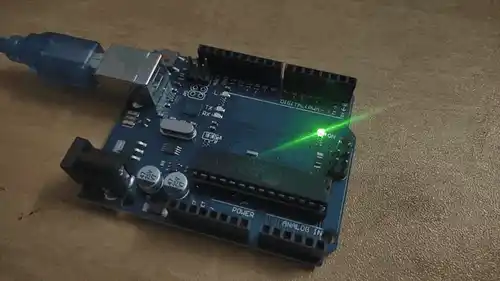
Once you have everything, plug the Arduino into your computer using the USB cable. A small green power light should turn on, indicating that your board is receiving power.
Step 2: Writing Your First Program
The goal is to make an LED blink. Most Arduino boards have a built-in LED connected to a specific pin. The following code makes the LED blink at different intervals:
// The setup function runs once when the board is powered on or reset
void setup() {
  pinMode(LED_BUILTIN, OUTPUT);  // Initialize LED pin as an output
}

// The loop function runs continuously
void loop() {
  digitalWrite(LED_BUILTIN, HIGH);  // Turn LED on
  delay(1000);                      // Wait 1 second
  digitalWrite(LED_BUILTIN, LOW);   // Turn LED off
  delay(500);                      // Wait 0.5 seconds
}
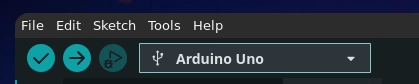
Step 3: Uploading the Code
- Open the Arduino IDE.
- Copy and paste the code into the editor.
- Select your board type under Tools > Board.
- Choose the correct port under Tools > Port.
- Click the Upload button (the right-facing arrow at the top of the IDE).
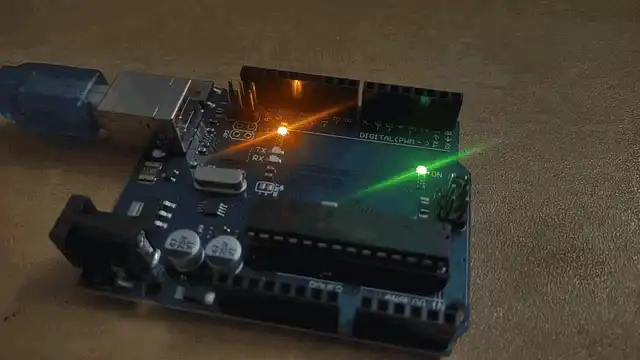
Once the code is uploaded, the LED on your board should start blinking—on for 1 second, off for 0.5 seconds.
Step 4: Experimenting with the Code
Try modifying the delay(1000); and delay(500); values to make the LED blink faster or slower. For example, changing the values to 500 and 100 will make the LED blink twice every second:
  delay(500);  // LED stays on for .5 seconds
  delay(100);  // LED stays off for .1 seconds
Conclusion
Congratulations! You've just completed your first Arduino project. This blinking LED example introduces the basics of programming an Arduino board. From here, you can explore more components like sensors, motors, and displays.
If you are a software developer who are into exploring different technologies as this one, Take a look at LiveAPI.
Its a Super-Convenient tool which you can use to generate Interactive API docs instantly! So if you are exploring a codebase, and it doesn't have a documentation ready, you can just use this to get it generated, and refer it for getting a better idea and saving time.
You can instantly try it out here!

Top comments (1)
Once you are comfortable with Arduino ide and understand how it works you should definitely try o platformIO vs code extention
platformio.org/ you love it even more