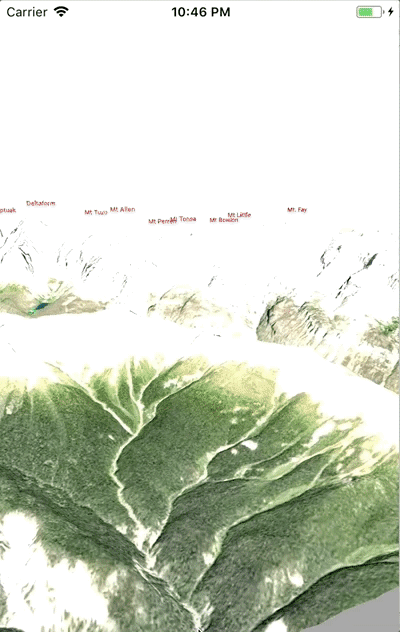
In the final challenge for the Mapbox Explore Outdoors 2018 challenge we were asked to create a 3D map of our hometown POIs. For this challenge, I created a 3D visualization of the Valley of the 10 Peaks in Banff National Park (aka Reddit Lake).

To get you excited, this is what the final product will look like (gif may take a bit to load)!
First let's create a single view application named ExploreOutdoors. Close XCode, navigate to your project directory and create this podfile.
Open the terminal and run: pod repo update && pod install

Now open up XCode and make sure it compiles. Also, don't forget to add your Mapbox access token to your info.plist
Alright, once everything is compiling we are ready to get coding. Let's start by creating a SceneView.
Setting up a scene is simple, we need a scene, a view to add that scene to and a camera. A camera is a sceneview node and it uses a SCNVector3. This sounds intimidating but X is your horizontal axis (left and right), Y is your vertical access (up and down) and Z is your depth (forward and backwards). We setup our camera to be staring straight at our map and a couple of steps back (that's where we get the Z: 3).
We also add some light to our scene. After we've setup our camera and light we add them to the sceneview with scene.rootNode.addChildNode(cameraNode). You should be able to build and run your app now and see absolutely nothing. HOW EXCITING!
Ok, now that we got that out of the way let's make our scene do something fun that will impress people at parties. I'm going to throw a lot of code at you but don't worry, I'll try my best to explain it!
Yikes! Let me explain.
var minLat = 51.20
var minLon = -116.28
var maxLat = 51.32
var maxLon = -116.12
This is just the NW and SE corners latitudes and longitudes of the bounds of our 3D map.
A terrainNode is a special SceneKit node that Mapbox has built which allows us to put a map image onto a 3D Node. We set it up with the bounds of our map using this line : terrainNode = TerrainNode(minLat: minLat, maxLat: maxLat, minLon: minLon, maxLon: maxLon)
Next we scale it down a bit, this is because if the images are too big they take forever to render on a phone. Then we add what the side, bottom and ground will look like for out terrain using this method: terrainNode.geometry?.materials = defaultMaterials() we've picked some lovely tones of gray and black. Next let's add it to the scene with the familiar scene.rootNode.addChildNode(terrainNode).
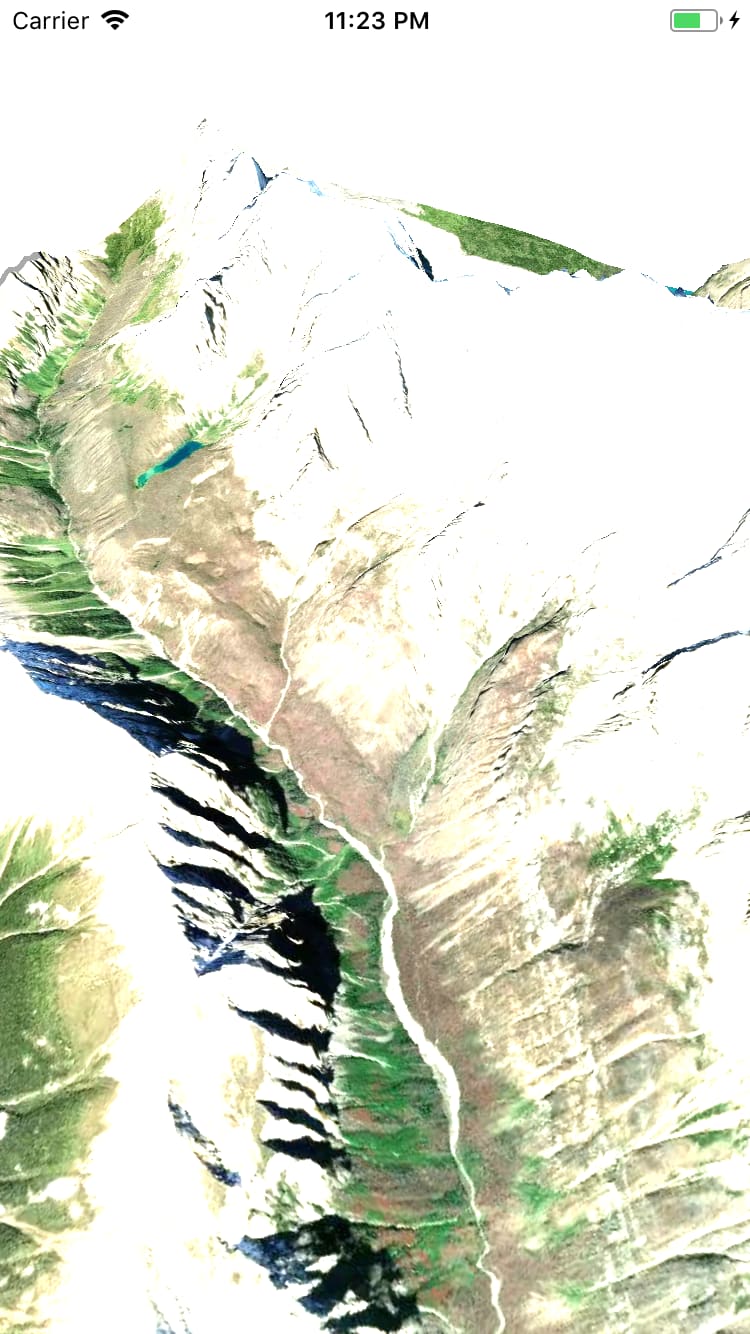
Now comes the magic! We use the Mapbox function fetchTerrainHeights to grab the 3D heights of the terrain. They've done all the hard work for us! The we use the fetchTerrainTexture to grab the mapbox satellite map of our area and place the images onto our terrain. If you build and run the app now you should get a 3D view of the Valley of the 10 Peaks! How neat is that? That's pretty neat.
Ok, one last thing to do. Let's label each peak and add the labels to the 3D map. Add this method to your ViewController:
This code builds a dictionary of each peak using the peak name and it's GPS coordinates. We create a marker above the map, set the name to the name of the peak and set the text colour to red. We then set it's scale and height above the terrain so it floats above the map. Don't forget to call this method in the completion block of fetchTerrainHeights
That's it! You've made a 3D Map! Let me know if you have any questions.

Top comments (0)