Today we are going to get started with FastAPI and Docker, but first let’s start by learning some basics.
What is FastAPI?
FastAPI is a modern, fast (high-performance), web framework for building APIs with Python 3.6+ based on standard Python type hints. It is a perfect python frameworks for building RESTful APIs as it is fast and ease to use and learn.
It takes advantage of Python type hints for parameter declaration which enables data validation (via Pydantic) and OpenAPI/Swagger documentation.
It is built on top of Starlette, which supports the development of asynchronous APIs.
Docker is an open source platform for developing, shipping, and running applications. Docker enables you to separate your applications from your infrastructure so you can deliver software quickly.
Docker provides the ability to package and run an application in a loosely isolated environment called a container. The isolation and security allow you to run many containers simultaneously on a given host. Containers are lightweight and contain everything needed to run the application, so you do not need to rely on what is currently installed on the host. You can easily share containers while you work, and be sure that everyone you share with gets the same container that works in the same way.
Docker file is a text file that contains all the commands used to create an image.
Docker image is a read-only template with instructions for creating a Docker container.
A Docker container is a runnable instance of an image. It is isolate from other containers and from its host machine.
That’s a brief introduction to docker.
Next we are going to dockerize FastAPI application.
First we are going to create a folder where our application will be placed. We will name our folder “FastAPI_Docker”
mkdir FastAPI_Docker
With our directory ready we’ll move inside it and create a virtual environment. NB. These commands are for windows operating system.
python -m venv venv
Now we need to activate our virtual environment by issuing the following command
venv\Scripts\activate
After activating our virtual environment it’s now time to install FastApi and its dependencies. FastAPI uses uvicorn as a server to run its code.
Execute the following commands.
pip install fastapi
pip install “uvicorn[standard]”
Next we need to export our dependencies to requirements.txt file to be used later in docker.
pip freeze > requirements.txt
Its now time to write our first FastAPI code.
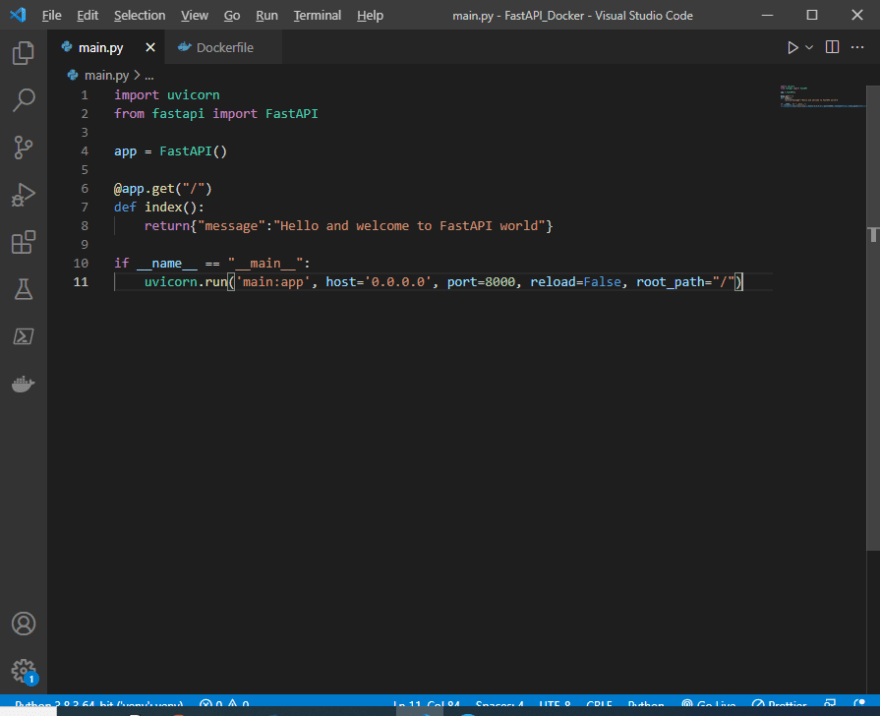
Create a file main.py and have these lines of codes in it.
main.py

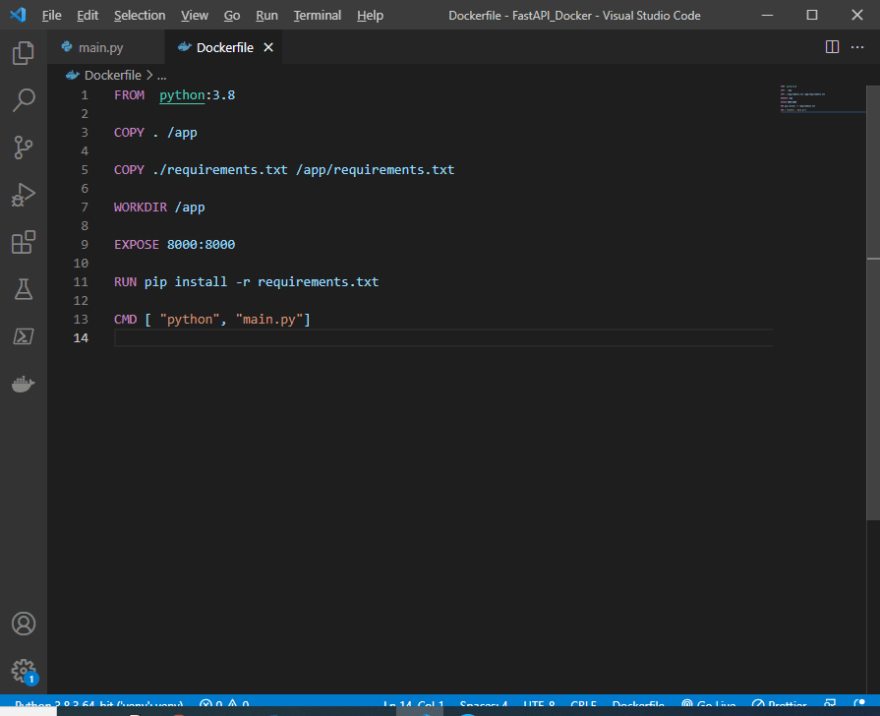
Now it's time to create our dockerfile to be use to create the image.
Dockerfile

Lets build our docker image and name it fastapi
docker build -t fastapi .
After it is done building we can run it with the following.
docker run -p 8000:8000 -ti fastapi
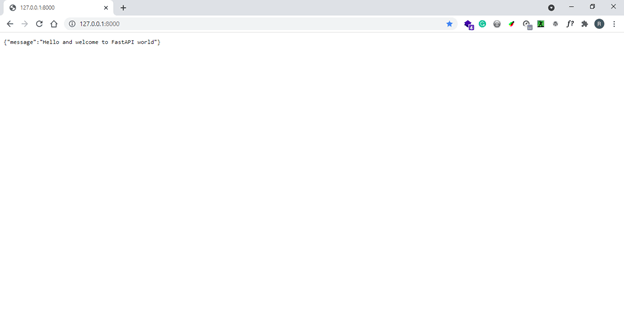
When we navigate to the url of http://127.0.0.1:8000 in our browser we can see the output below which is our up running from a docker container.


Top comments (0)