In this piece, we will build a REST-ful API using Spring Boot and Spring MVC, then perform integration testing by making requests to our endpoints and verifying the responses. For this project, we will need JUnit, MockMvc, H2, and a few other dependencies. Let's get started!
Dependencies
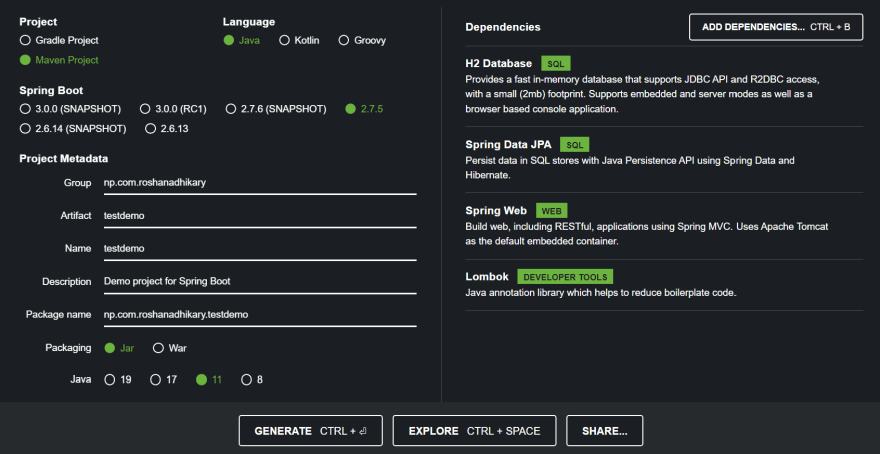
First, go to the Spring Initializr and generate a Spring Web application using the following dependencies:- Spring Web
- Spring Data JPA
- H2 Database
- Lombok
We will create a REST-ful API, expose some endpoints, and test those endpoints using MockMvc.For persistence support, we will use the H2 in-memory database, and for interacting with the database, we will use the repositories provided by Spring Data JPA. I will be using Lombok for reducing the amount of boilerplate code I would be writing otherwise.
Controllers
For the purposes of brevity, we will be exposing just the following endpoints and HTTP actions:- GET /batteries - Returns a list of all Battery resources in database
- GET /batteries/:id - Returns the Battery resource identified by id path variable
- POST /batteries - Persists a Battery resource in database and returns the persisted resource
Resource
As you can see from the Controllers section, we will be working on a Battery resource for our API. The Battery resource will have the following fields:Also, using the JPA annotations @Entity, @Table, @Column, etc., we map the POJO to our database entity of name batteries.
Repository
One of the most useful features of the Spring Data JPA project is the Repository pattern that comes with its implementations out-of-the-box. This way, we can quickly bootstrap a CRUD functionality without having to writing queries by ourselves.Let us define the repository for our Battery entity by extending the JpaRepository interface.
Having defined this repository, we can now access a bunch of predefined methods that implement CRUD functionality (e.g., save, saveAll, deleteById, delete, etc.)
Bootstrap the database
To test our application, we will need some preloaded records. Let us create a Bootstrap configuration class that loads records into our database every time the application starts.When a class is annotated with @Configuration, it means that the Spring IOC container can expect some bean definition inside the class. And so we give a bean definition using the @Bean annotation on the initDb method that returns an object of type CommandLineRunner.
CommandLineRunner is a functional interface with a method named run. When the Spring context is loaded, Spring Boot invokes the run method of all beans of type CommandLineRunner.
Application properties
For our application to work, we need to pass some application properties, including those for the database URL, username, password, and driver class name. Additionally, you can pass properties to enable the H2 console through which you can access the database using a GUI.Testing our API
The spring-boot-starter-test starter module included in our pom.xml file includes JUnit, AssertJ, Hamcrest, etc. All of these libraries help us write effective test cases for our projects.For this particular project, start with the main test class:
Using @AutoConfigureMockMvc, we can enable auto-configuration of the Spring MVC test framework. MockMvc does request handling but uses mock request and response objects. No actual server is started.
Testing GET /batteries/:id
With the above test case, we verify that the response for GET /batteries/1 HTTP action contains the same id, name, postcode, and capacity values as in our database (the one we preloaded).
Testing GET /batteries
Testing POST /batteries
Then, we use andExpect to verify our expectations with the JSON response. The response status should should be 201 CREATED. And since our API returns the very object that was persisted, the name, postcode, and capacity parameters should match.


Top comments (0)