Introduction
In this blog post we will look into how to implement ASP.NET Core Identity in a web app for adding authentication and authorization feature. Users can create an account and login with a username and password. This article is especially focusing on newcomers and anyone new wants to learn or thinking of using Identity in their .NET program. This is a series of blog post so please look into other for more information.
What is ASP.NET Core Identity?
When we build an application one of the key factors is that "how to handle the user management?", that means manages users, login, logout, passwords, profile data, roles, claims, tokens, email confirmation and more. So, to help ease these user management process we can use ASP.NET Core Identity a membership system.
Development Setup
For this example, we will be creating a ASP.NET Core MVC Web App using Visual Studio 2022 and .NET 6.0
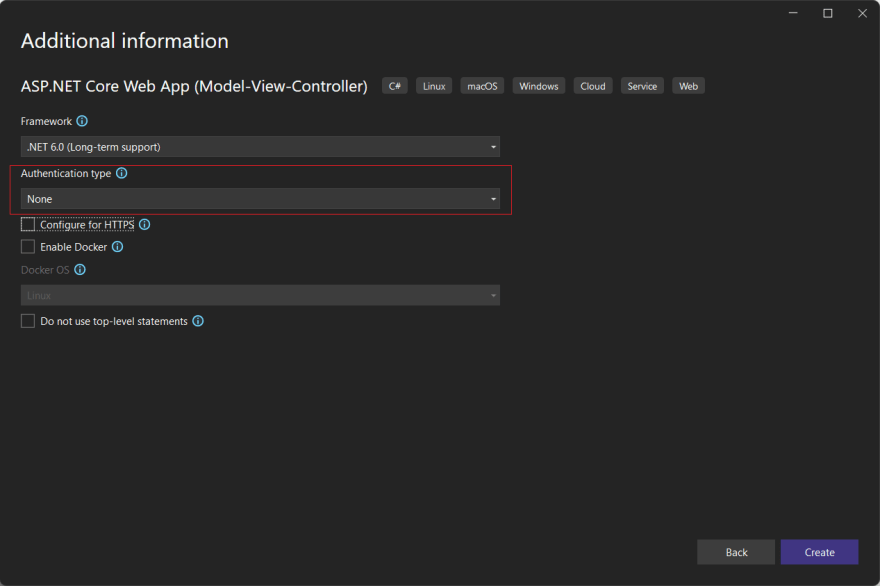
Step 01: When creating an ASP.NET Core Web App (MVC) we will not select the Authentication type and set it as "None" as we will be looking from scratch how to set up the Identity feature in the application. For simplicity we will uncheck the "Configure for HTTPS" and "Enable Docker"
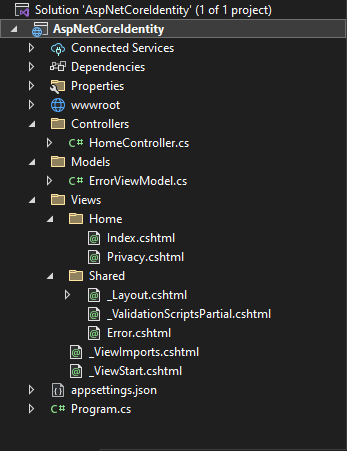
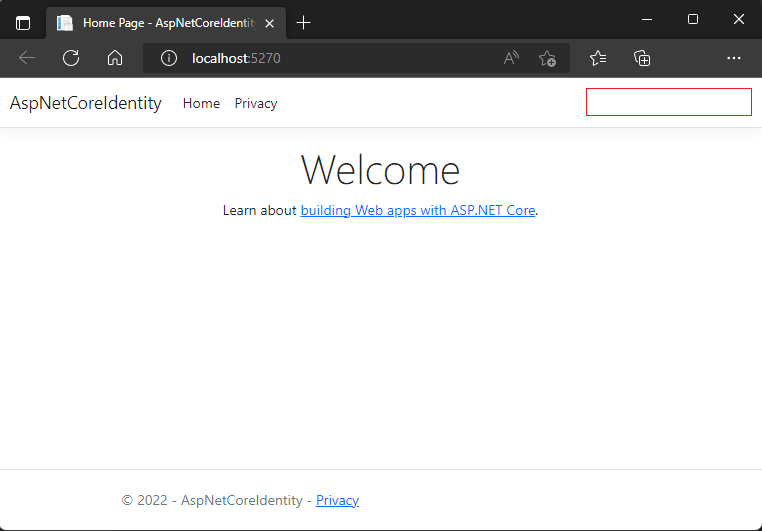
After creating we will have a basing MVC web application without any authentication feature.
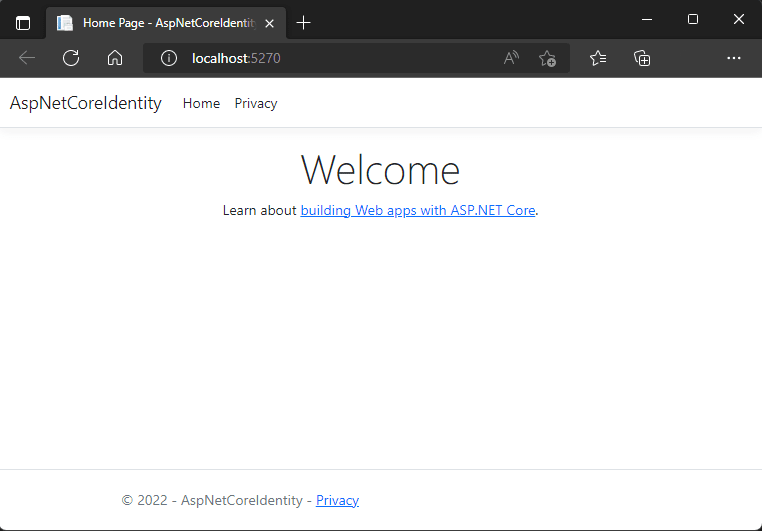
And running the project will show the following webpage:
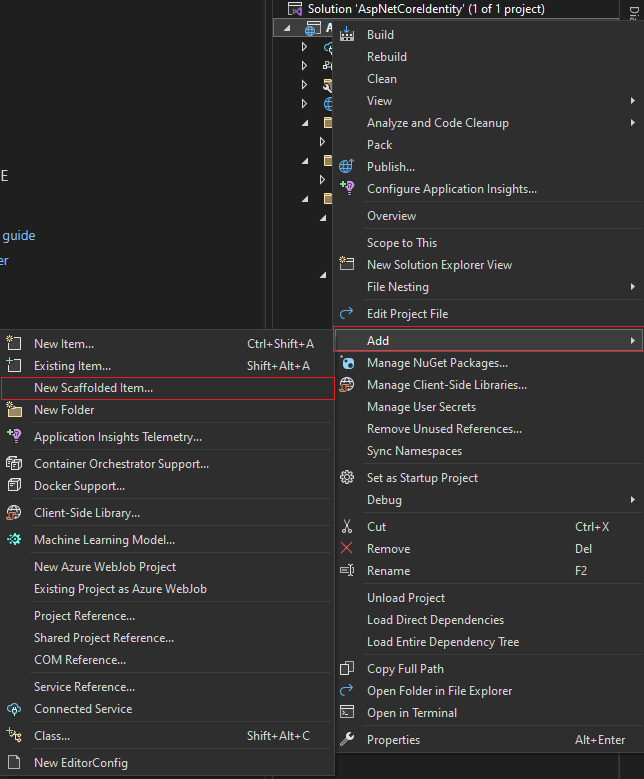
Step 02: Now we will add Identity feature by Scaffolding. So, right click on the project and go to "ADD" and select "New Scaffolded Item". In the following window select "Identity" and press "Add". In order to scaffolded to run a nuget package "Microsoft.VisualStudio.Web.CodeGeneration.Design" need to install. This will get automatically install when adding scaffolded item.

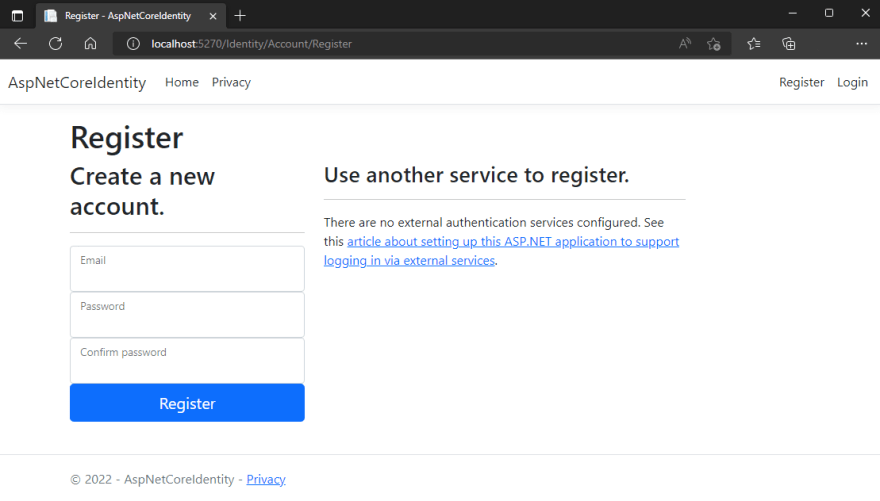
From the following select the Identity features that we would like to add in our web app. For this example, we will be selecting "Login", "Logout", "Register". We also need to specify the following:
- Layout page: a layout page for the identity files so, we will be selecting our existing shared "_Layout.cshtml" page that got created by default with the project.
- Data Context Class: By selecting + button it will generate the context class name and we will rename it to "AspNetCoreIdentityDbContext"
- User class: By selecting + button we are setting the user model class name to "AspNetCoreIdentityUser"
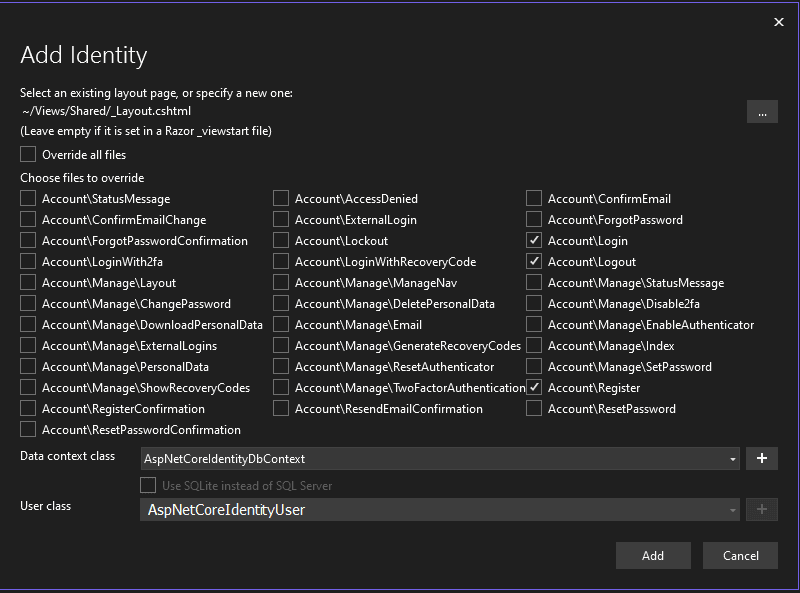
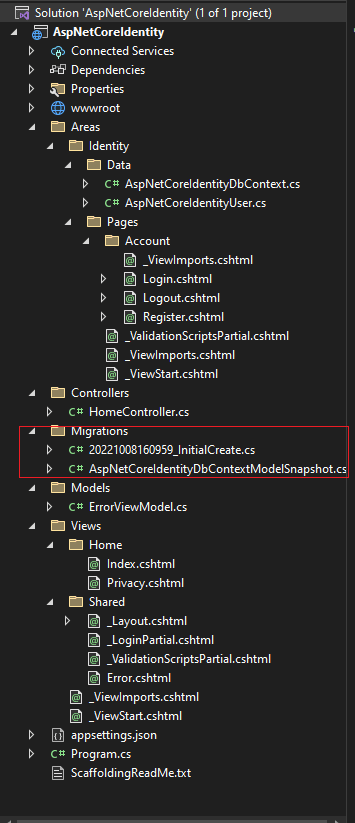
Click on "Add" now our identity scaffolded. And we have the following structure changes in the project
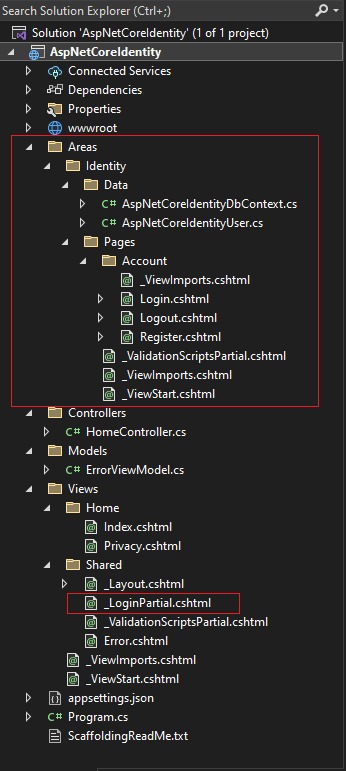
Here we have "AspNetCoreIdentityDbContext" for our database. By which we will access our SQL Server. Then we have "AspNetCoreIdentityUser" which inherits from "IdentityUser" which implements the code for Login, Logout, Register and more. Now run the app and we need to add "Register" "Login"
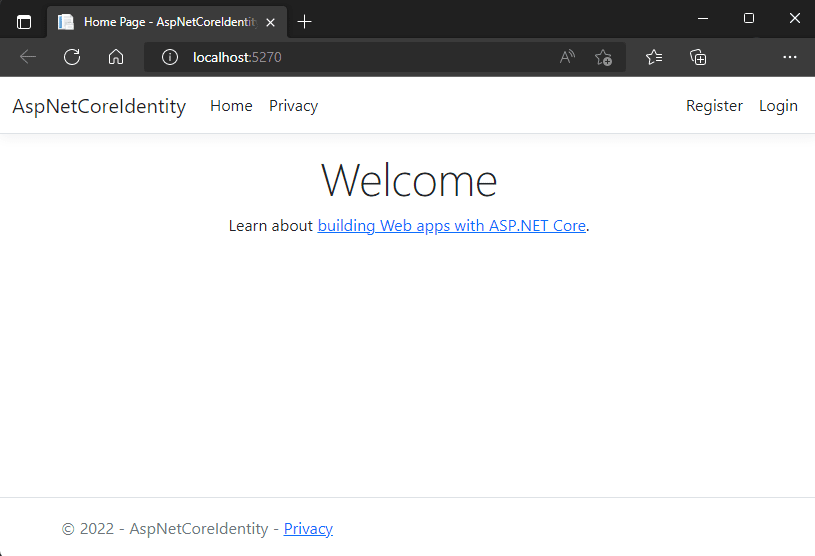
To add this go to the header section in "_Layout.cshtml" under "Views" -> "Shared" and made the following changes.

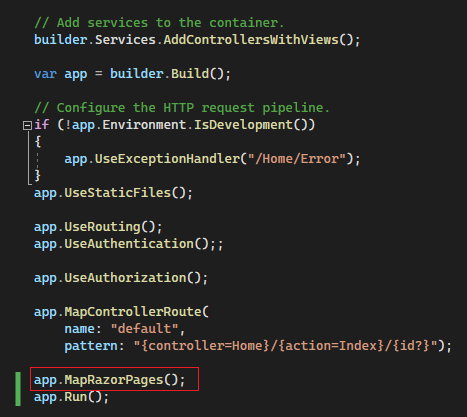
But wait clicking "Register" and "Login" link does not work. This is because Identity is implemented in ASP.Net Core MVC is with "Razor" pages. So, we have an MVC application which needs Ragpr page supports and for this we have to inject our program with razor page support by adding "app.MapRazorPages();" in the Program.cs
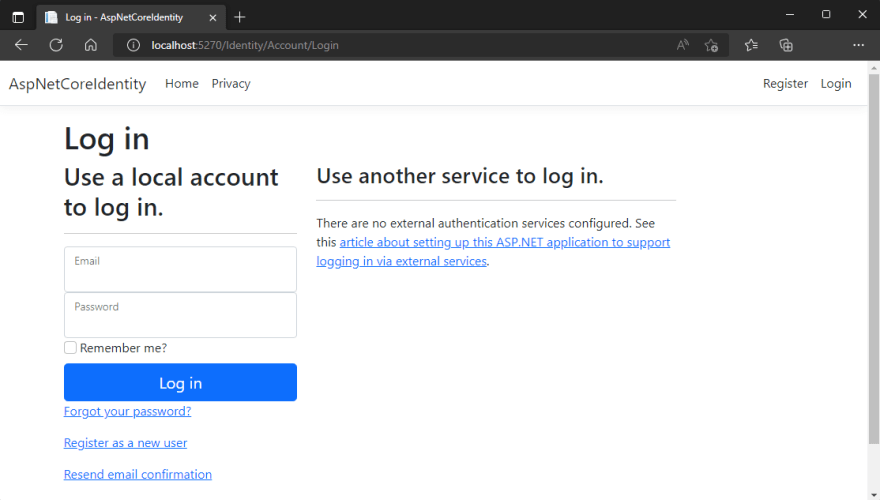
Now clicking Register and Login button redirects to the respective pages.
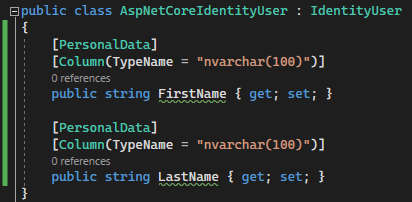
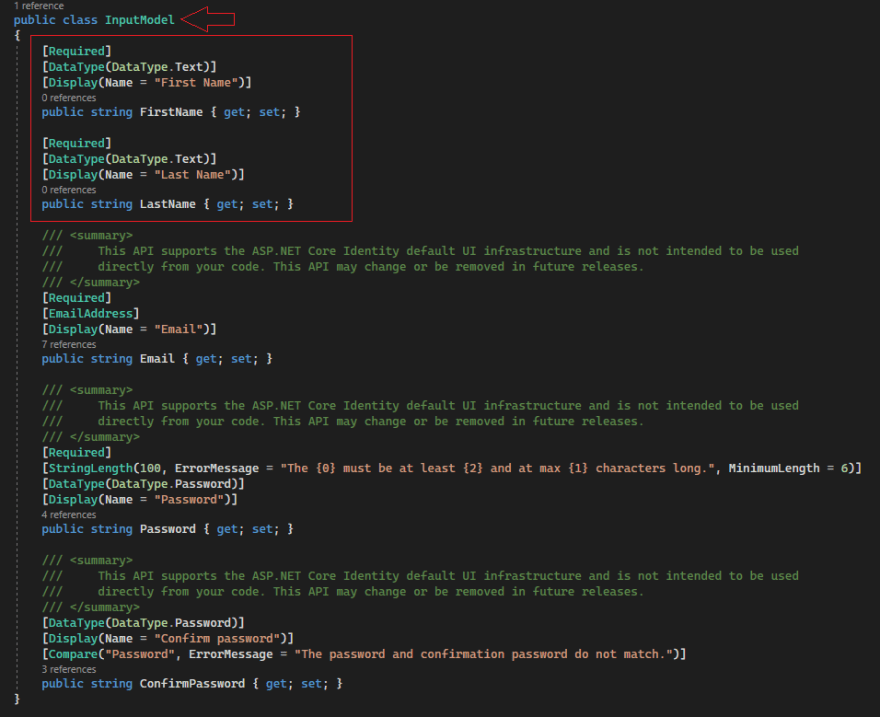
Step 03: By default in Register page Identity adds only Email, Password and confirm passowrd fields. But we will add "First Name" and "Last Name" field. To do this we first need to a "First Name" and "Last Name" property in the "AspNetCoreIdentityUser" model class.
Once we have the entity properties set we can create our database. For this go to appsettings.json for our connection string. Here we have a default connection added by scafollded. Here we have our server "mssqllocaldb" which is a local db and database "AspNetCoreIdentity".
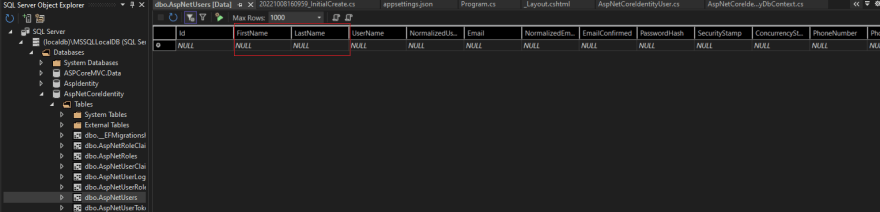
And in the "InitialCreate" file we can see the our "First Name" and "Last Name" added to the "AspNetUsers" table.

Step 05: Now our database is ready. We will now work on our Register page and two new field "First Name" and "Last Name". First we need to change our input model and add definition for "First Name" and "Last Name". As Register is a razor page we will go to the backend code and make the following changes.
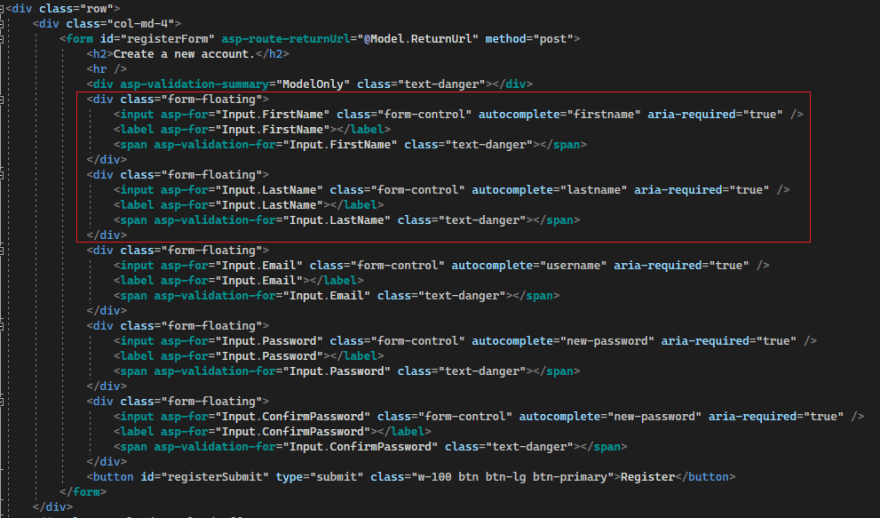
Now goto the HTML page and add these two fields.
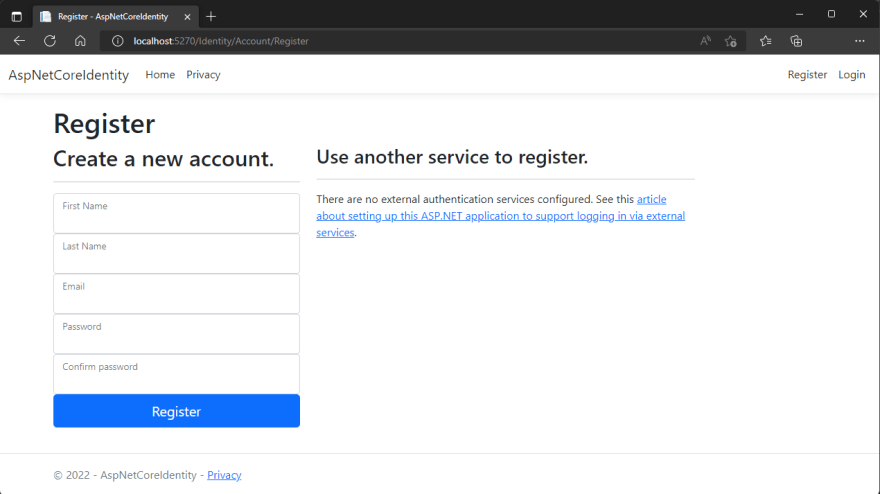
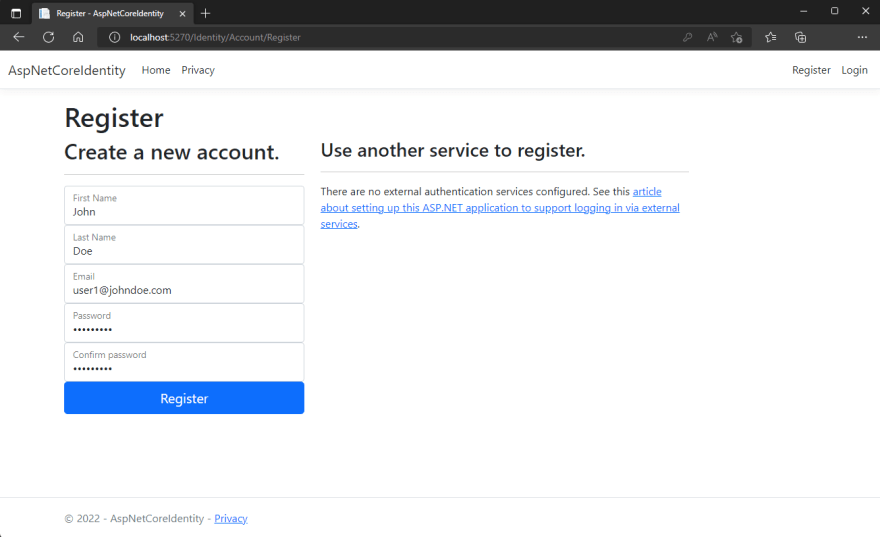
Let's build the application goto Register page and we now see the new fields.
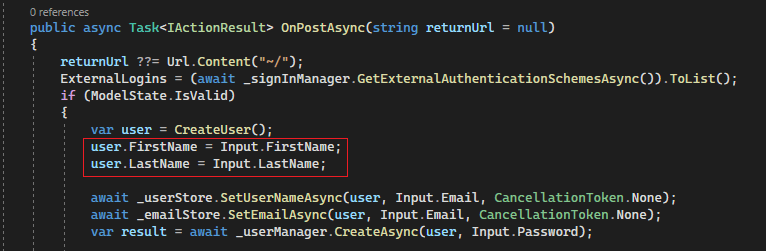
Step 06: Before creating a new user we need to modify our backend as we need to configure our firstname and lastname. Goto "OnPostAsync" in Register.csghtml.cs page and add the following code.
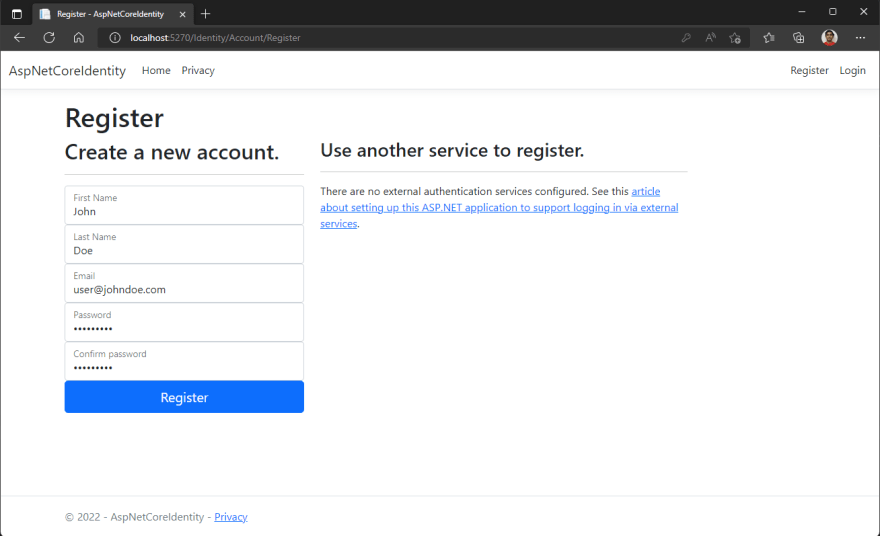
Now create a new user:
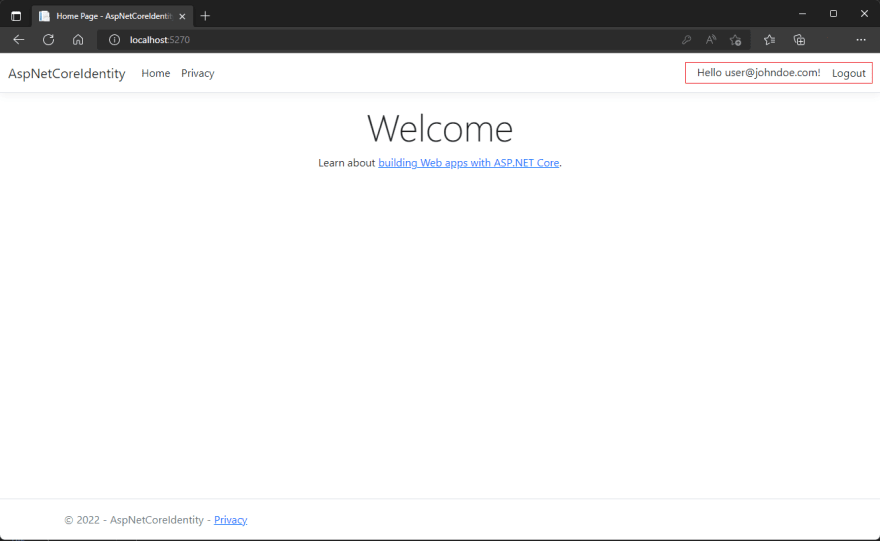
Our user is successfully registered and this is temporary confirmation page. Click confirm account. Later we will disable this email confirmation option.

Now goto Login page and put our user credential and click Login and we successfully login to our user.
Step 07: Now we will look into how to disable Email confirmation. First logout from your application and goto Program.cs. Here we will see that in AddDefaultIdentity section we will set RequireConfirmedAccount to false.
![]()
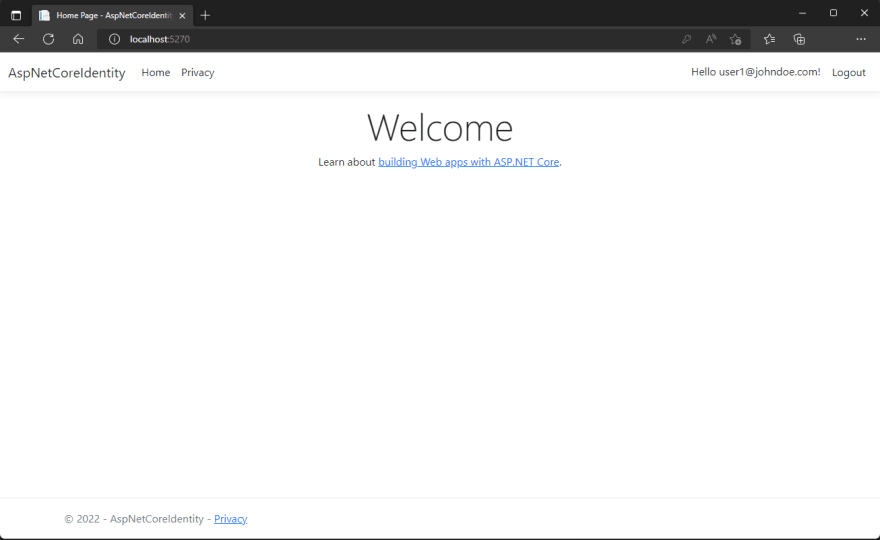
Now build the application and goto Register page and create another new user.
After registering we directly redirect to main page.
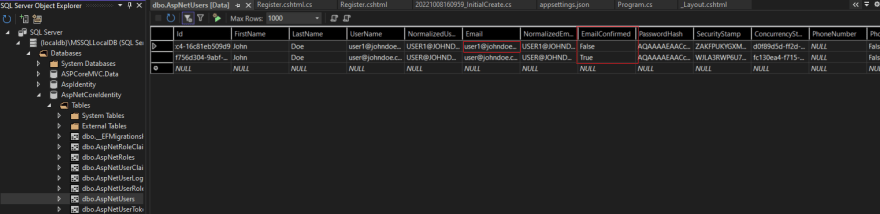
And our data looks like below in our database:
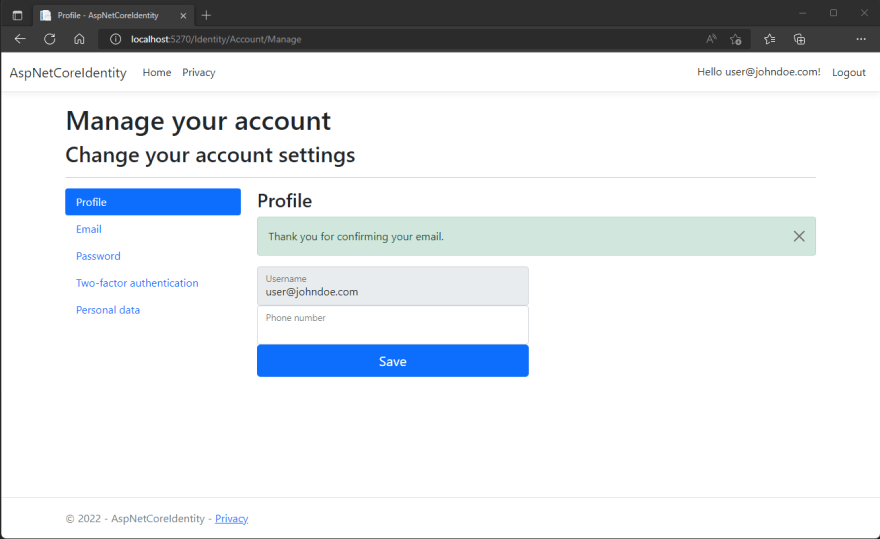
Step 08: Now lets look into our identity features. Click on username which will take you to the manage profile page. Here you will see vairous option to manage our credentials like Profile, Email, Password, Two-factor authentication, personal data
Fix Anonymous Authentication:
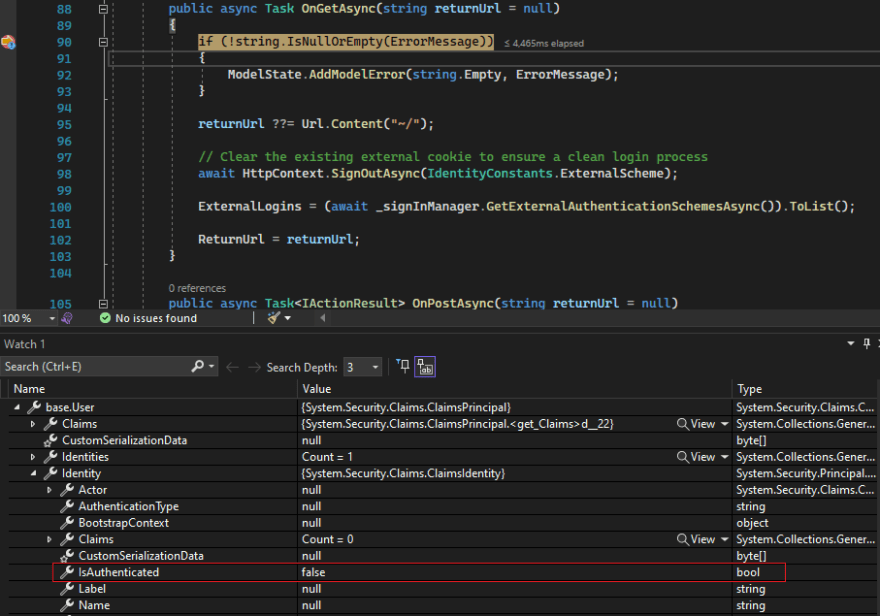
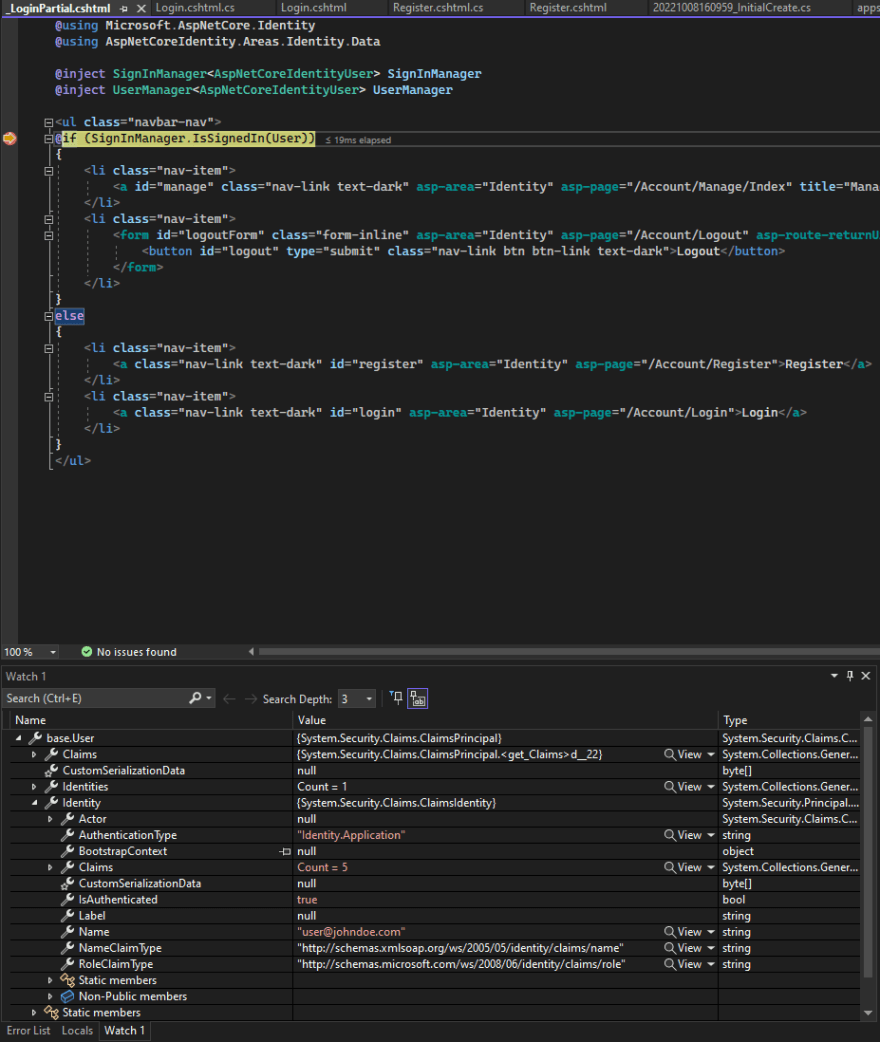
As we can see user can login successfully but our identity is still anonymous as we can see from the following watcher windows for user identity value from base class.
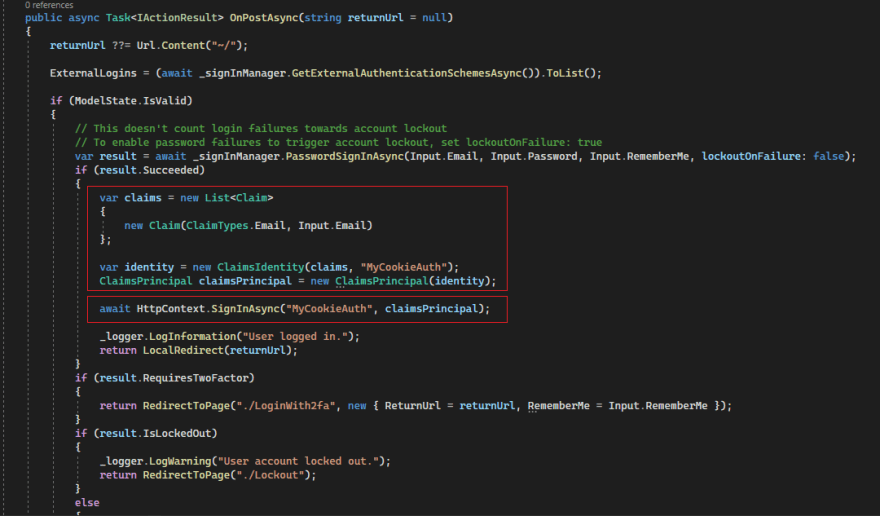
For this we need to create a cookie and server will look into this cookie to authenticate. Goto Login.cshtml.cs page and add the following Claim, Identity and Claims principle in "OnPosyAsync". Then use HttpContext.SignInAsync() which will serialize the claims principles into string and encrypt that string and save that as a cookie into httpcontext object.
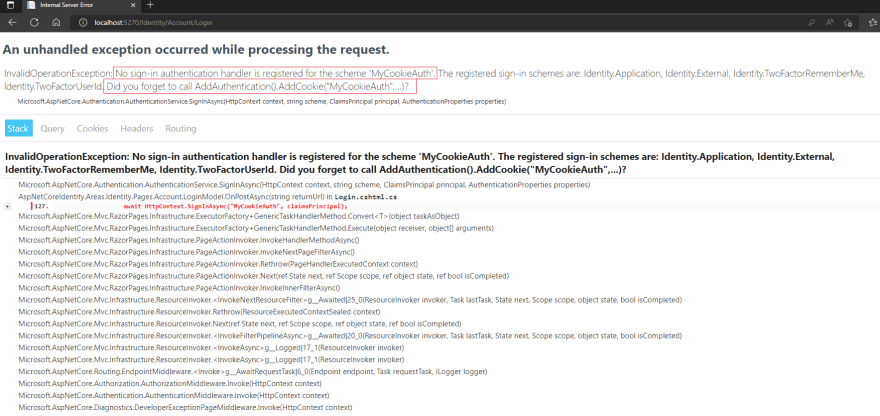
Now when you try to login you will get the following exception page.
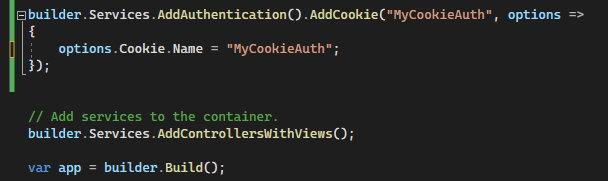
To fix this goto to Program.cs
Now run the app again and login you now can see that you are not anymore logged in as anonymous
Concluiton:
Here we implemented user verification process. Then we injected the cookie authentication handlers so user do not logged in as anonymous. ASP.NET Core provides many tools and libraries to secure ASP.NET Core apps such as built-in identity providers and third-party identity services such as Facebook, Twitter, and LinkedIn.

Top comments (0)