
This post discusses how to use Fauna and Azure Functions. Fauna provides transactional NoSQL on a global scale with the added bonus of providing ACID transactions out of the box which implies that Fauna can be used for transactions that require high integrity like banking applications. You can read more about Fauna here.
Fauna is quite generous in their free tier. If you are coming from an SQL background, you can read up the comparison between Fauna’s language called FQL and SQL DB here.
Below is a summary of what we would be building using Fauna and Azure Function:
We are building a todo list app that allows users to login and view their own created todo list. A business logic would be implemented to prevent a user from having access to another user's todo list.
An authorization token would be used to grant users access to only their own todo list.
Communication to Fauna would be made using the GraphQL API provided by Fauna.
Azure Functions would serve as the middleman between Fauna and your client for login and signup requests.
FaunaDB can be used in the client without a server but then there might be cases where you would need to send emails to new users during signup or logins and that is why I chose to use Azure Functions to handle logins and signups.
The flow
The client makes a request to Azure Function to retrieve an authorization token which would enable communication between client and Fauna.
Azure Function handles two requests from the client: Signup and login. The signup request stores users information and credentials on Fauna and the login request returns an authorization token to the client.
The client uses the token to make subsequent requests to Fauna.
This tutorial covers:
How to create a todo list on Fauna
How to setup a GraphQL API on Fauna
Relations in GraphQL schema in Fauna using directives
How to create custom resolvers for your schema using the resolver directive provided by Fauna
A little bit of Fauna’s domain specific language called FQL
How to use Attribute-based access control to restrict a user to having access to personal data
How to Setup Azure functions
How to use Apollo Client in Azure functions
Step 1: Creating an Account and Database
- Create an account on fauna by clicking here. After registering you would be redirected to your dashboard
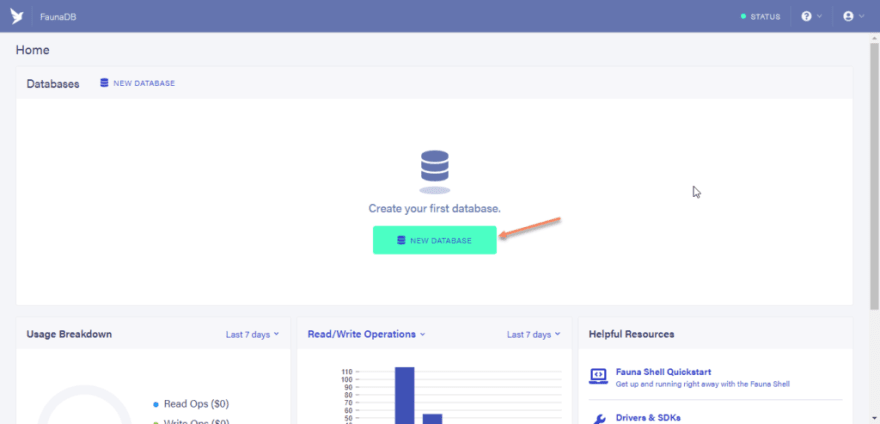
Click on the “NEW DATABASE” button.
Typing “TODO” as the name of the database to be created.
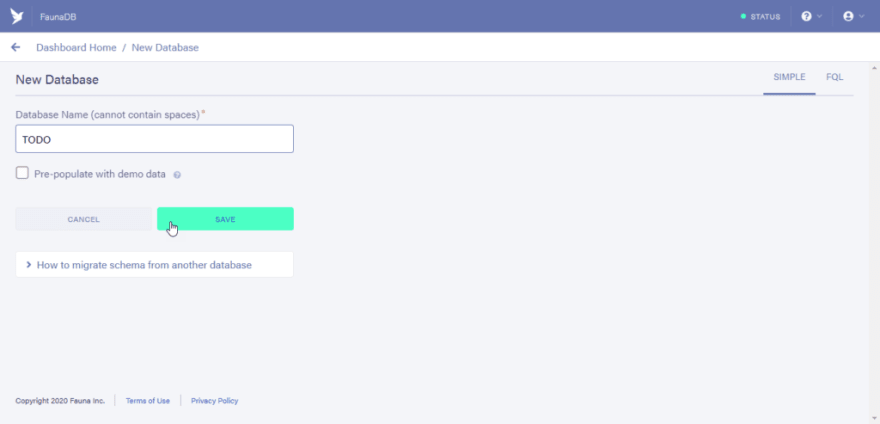
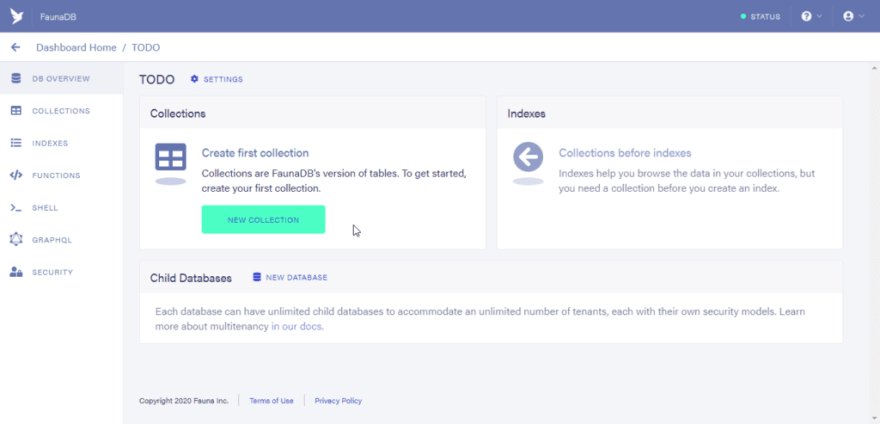
- After clicking on the save button you would now have access to the dashboard of your newly created database.
Step 2: Importing GraphQL Schema
Not only does Fauna give you access to your data via REST API, it also offers a GraphQL service which you can use to query your database. And if you are a GraphQL fan guy you’ll probably love this feature.
Now the awesome thing I love about Fauna’s GraphQL service is the automatic creation of default resolvers for your schema, which means you don’t need to create your own resolver except you want to integrate some custom logic.
We would continue by creating a schema which I would break in chunks and explain
type User {
  username: String! @unique(index: "unique_username")

  password: String!

  todos: [Todo] @relation
}

type Todo {
  text: String!

  completed: Boolean!

  user: User!
}

type Query {
  todos: [Todo!]
}

input CreateUserInput {
  username: String!

  password: String!
}

input LoginUserInput {
  username: String!

  password: String!
}

type Mutation {
  createUser(input: CreateUserInput): User! @resolver(name: "create_user")

  loginUser(input: LoginUserInput): String! @resolver(name: "login_user")
}
Copy the schema above and paste it locally in your computer using the name “schema.gql”.
Below is the explanation of the schema fields above
type User {
  username: String! @unique(index: "unique_username")

  password: String!

  todos: [Todo] @relation
}
In the username field, the unique directive is used to enforce this constraint.
The unique directive accepts an index argument. I chose to use “unique_username” to create the index but you can use whatever name you like.
In Fauna, an Index is used to improve the lookup performance of data in the database. So rather than use the ID of a document (which is similar to a record in an SQL database) to find a specific document or group of documents, with the Index feature you can lookup data using their attributes. For instance, the “unique_username” Index would allow us to search for data via username rather than References( similar to an ID). To know more about types in Fauna click here.
In the todos field, the @relation directive shows that it is not just a list of Todos but a Relation field. It also means that a user can have from zero to any amount of todos.
type Mutation {
  createUser(input: CreateUserInput): User! @resolver(name: "create_user")

  loginUser(input: LoginUserInput): String! @resolver(name: "login_user")
}
There are only two mutations listed above but after the schema is imported in Fauna extra mutations needed for CRUD (create, read, update and delete) operations would be added.
createUser: This mutation allows the creation of a new user in the database. Since it is a custom mutation we would need to add our custom resolver to it using the @resolver directive. The name, “create_user” is the name of the function that we would have to create to handle the mutation.
loginUser: This mutation allows the creation of authorization tokens which would grant users permission to have access to personal data( todos). The @resolver directive was also used here to handle the login mutation. We are yet to define the function properly.
Note that when the schema is imported, other mutations would be created, Indexes would be created, Functions would be created too waiting to be defined properly.
One thing you should note is that any type created that isn’t using an @embedded directive creates a collection in the database. The directives used in Fauna are not standard GraphQL directives but unique to just Fauna
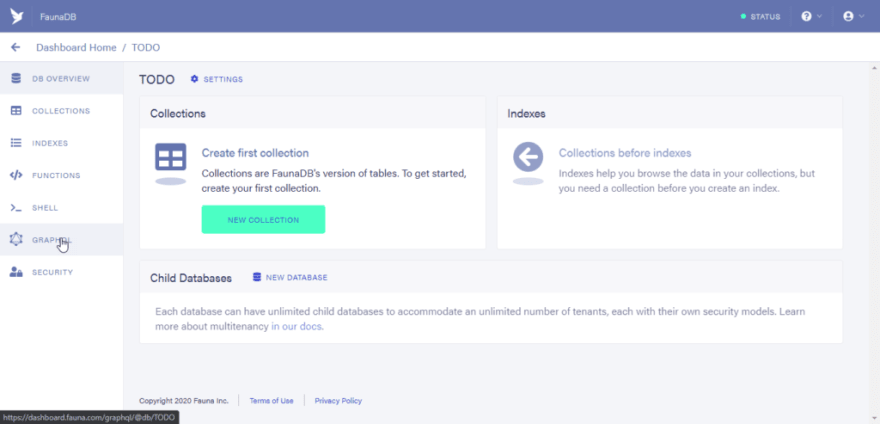
Next click on the GraphQL Menu.
Next click on the “Import Schema” button

Your file explorer dialog box would open up waiting for you to select the “schema.gql” file.
Select the “schema.gql” file and wait for Fauna to open up the GraphQL playground.
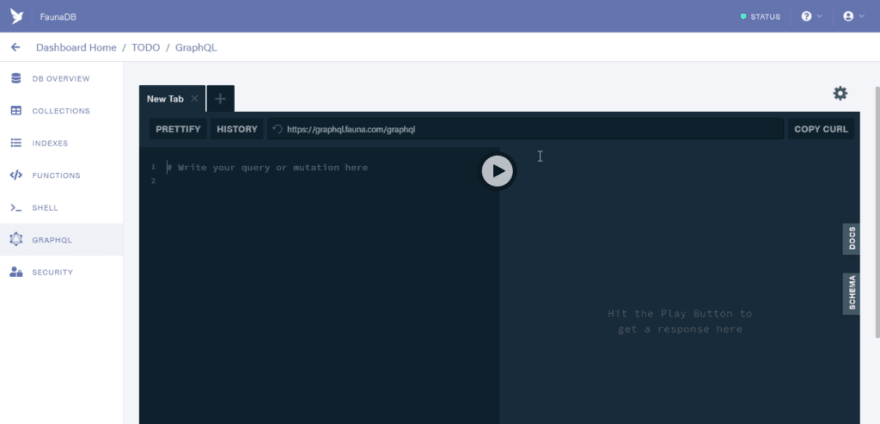
Finally click on the Schema button by the right side of the playground and see the computed schema.
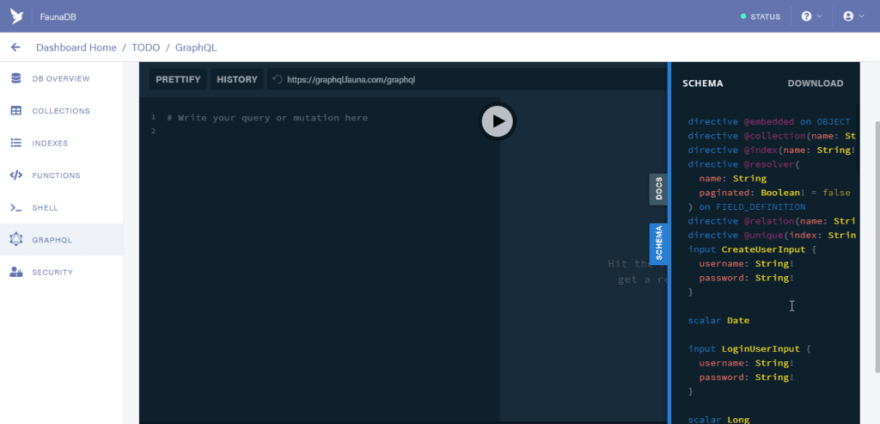
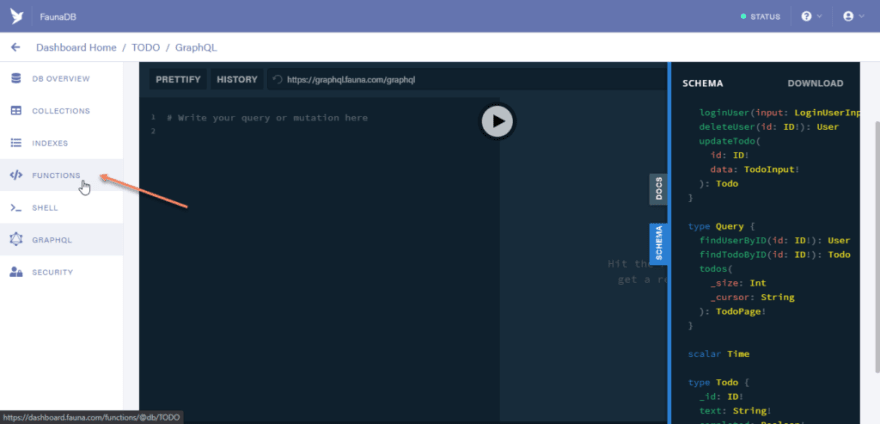
You can see some new mutations created to enable CRUD operations and new fields created in the Query type.
The resolvers for the CRUD mutations are handled by Fauna. You don’t need to create a custom resolver except the default one isn’t tailored to what you need.
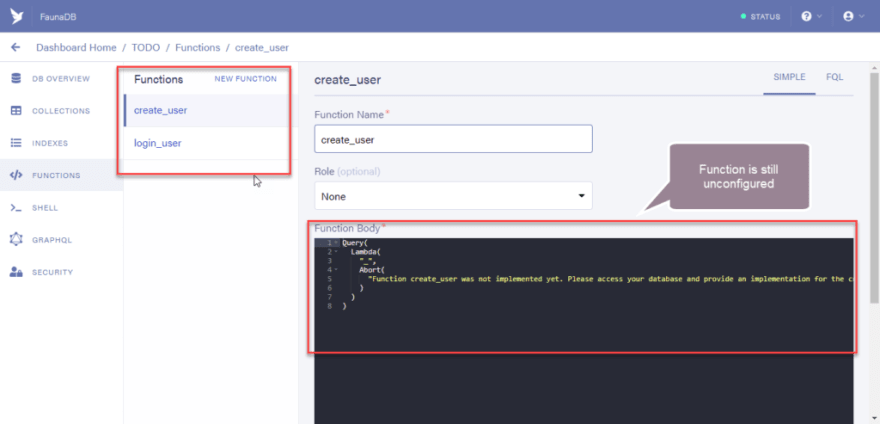
Currently, the functions created for the custom mutations( createUser and loginUser ) aren't working as needed. So in the next step, we would update the created functions to work properly
Step 3: Update Custom Functions
So why I say update and not create is because Fauna by default creates custom resolver functions for you if defined in the Schema but doesn’t make it functional.
Okay, so let us confirm if the resolver functions were created.
Click on the functions menu.
And you should see the unconfigured functions available
To update the function to work properly we would be writing in Fauna’s custom language called FQL.
FQL might seem esoteric to write in but with a little bit of practice, you would see that it is quite easy.
FQL is an adoption of the functional programming paradigm and provides a large library of default functions for developers to use. Some examples of the functions are:
Reduce: If you are familiar with the Reduce function in JavaScript you would also be glad to see that Fauna has an inbuilt function that does the same thing. The reduce function in FQL iterates through a set of values in an array and returns a single value. Imagine being able to compose power mathematical computations in an easy way using the FQL functions.
Map: The map function iterates through an array and also accepts a lambda function that defines how each value of the array is manipulated. The map function returns a new array.
Lambda: The lambda function in FQL is an anonymous function that performs lazy execution of custom code
There are tons of functions in Fauna that give you the freedom to perform lots of manipulation and tasks easily. You can check out this link to know more about Fauna’s FQL syntax.
Next, click on the “SHELL” menu and see an interactive shell that allows admins to write commands in FQL.
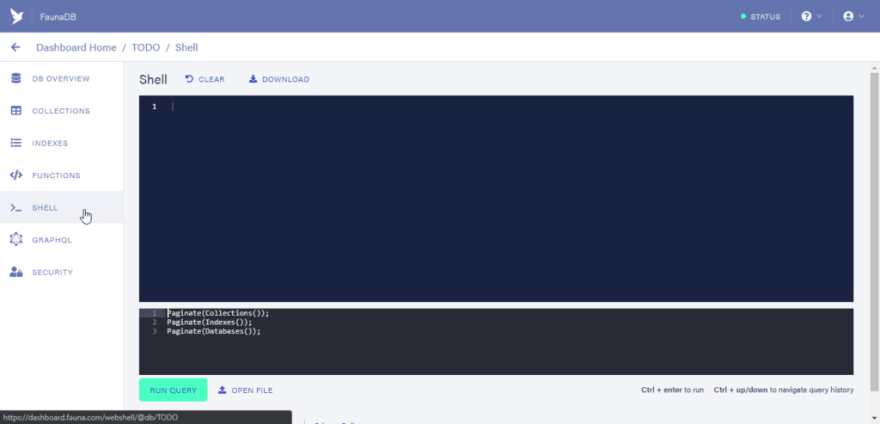
In the button area of the shell area you would see some default functions that populate line 1 through 3.
The Functions are:
Paginate(Collections())
Paginate(Indexes())
Paginate(Databases())
Custom functions in Fauna are built using a combination of default functions. To know more about Functions in Fauna click here.
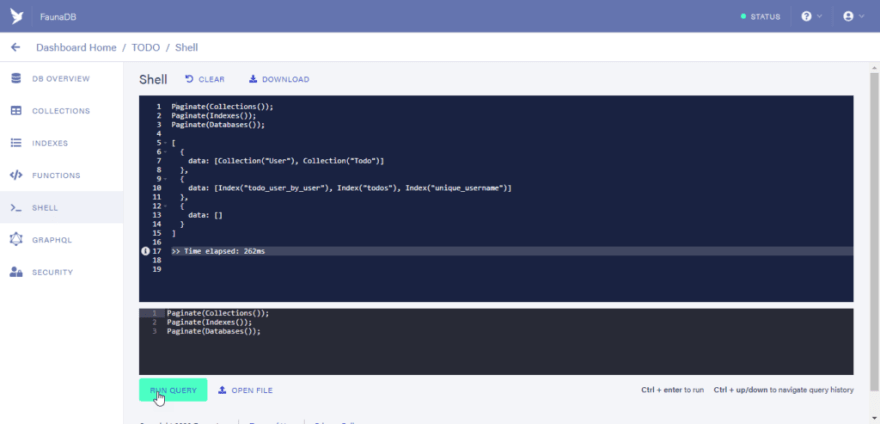
The Paginate function returns a list of results. The Collections function returns a set reference of the collections in a database. You need to call it with the Paginate function to see the list of collections in a database.
The Indexes function when called in the Paginate function returns a list of created indexes in a database.
The Databases function when called in the Paginate function returns a list of databases in a database. Fauna allows nested databases so you can actually create a database in a database.
OK, So click on the “RUN QUERY” button to see the output of the functions to be executed.
We would be updating the “create_user” and “login_function” created by mutation to suit our needs.
Custom functions in Fauna are called User-defined functions(UDF) and when creating a UDF for a GraphQL resolver, the UDF must accept an array or arguments, the same order and number defined in your GraphQL schema.
The two UDF’s can be seen below:
//create_user function
Update(Function("create_user"), {
body: Query(
Lambda(
["input"],
Create(Collection("User"), {
data: {
username: Select("username", Var("input")),
},
credentials: {
password: Select("password", Var("input")),
},
})
)
),
});
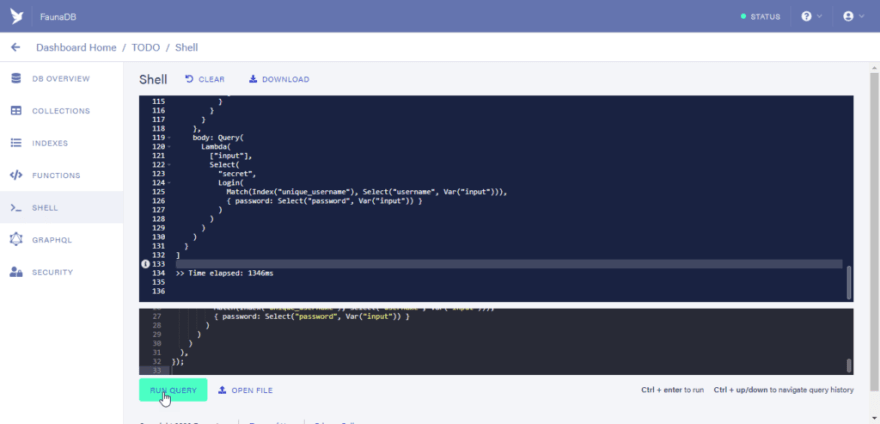
//login_user function
Update(Function("login_user"), {
body: Query(
Lambda(
["input"],
Select(
"secret",
Login(
Match(Index("unique_username"), Select("username", Var("input"))),
{ password: Select("password", Var("input")) }
)
)
)
),
});
We would be dealing a lot with documents when using Fauna. So below is what a document looks like:
{
  "ref": Ref(Collection("User"), "281178277009162753"),
  "ts": 1604411351335000,
  "data": {
    "username": "Obi"
  }
}
Every document has a ref/reference property, which is a combination of the location where a document is found along with its unique id.
A little explanation of some of the built-in functions seen in the UDF above:
Update function: The Update function accepts two params as an argument: a ref and a param_object. The param object contains the fields that should be updated in an identified document.
Function function: The Function function accepts the name of a function as an argument and returns the ref to the function.
Lambda function: The Lambda function accepts two arguments: params and an expression to be evaluated. It returns the evaluation of the expression.
Query function: The Query function wraps lambda functions. They prevent the wrapped function from being immediately executed while making them available in UDF’s, index-bindings and Attribute-based access control predicates.
Select function: The Select function extracts a single value from a document. A document has similarities with javascript objects.
Create function: The create function adds a new document to a collection. It accepts two arguments which are: the collection and the param_object. The param_object also includes a credential property which is used to set the permission of a document.
Login function: The login function accepts two arguments: the ref of the document and the param_object which contains the password used in the protected document. This function returns the access tokens for a user.
Match function: The match function finds the search term used to match documents in the provided index. It takes in the index and search term as an argument and returns the ref if found documents.
Index function: The index function returns a valid reference to documents registered to the index.
To know more about Fauna Functions and examples click here.
Next, we would run the functions above in the shell. clear the default functions in the shell and paste the UDF’s above. Then click on the “RUN QUERY” button.
At this point, we are ready to start running GraphQL queries in the playground.
Step 4: Creating users and todos
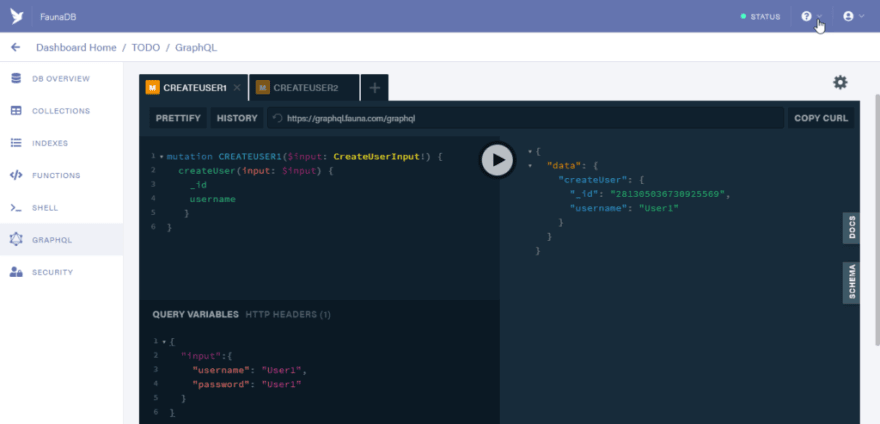
Click on the “GRAPHQL” button to access the GraphQL playground.
Lets start out by creating two users. Paste the code below in the first tab
mutation CREATEUSER1($input: CreateUserInput!) {
  createUser(input: $input) {
    _id
    username
  }
}


Let the variables be:

{
    "input": {
        "username": "User1",
        "password": "User1"
    }
}
And click on the run button to process the mutation.
You should also note that adding the password field to the mutation would cause an error. This is because the “create_user” function makes use of the password field as a credential. This implies that the data of the password field can’t be queried.
The _id field was created automatically for us by Fauna and that would be used in creating a user to todo relation
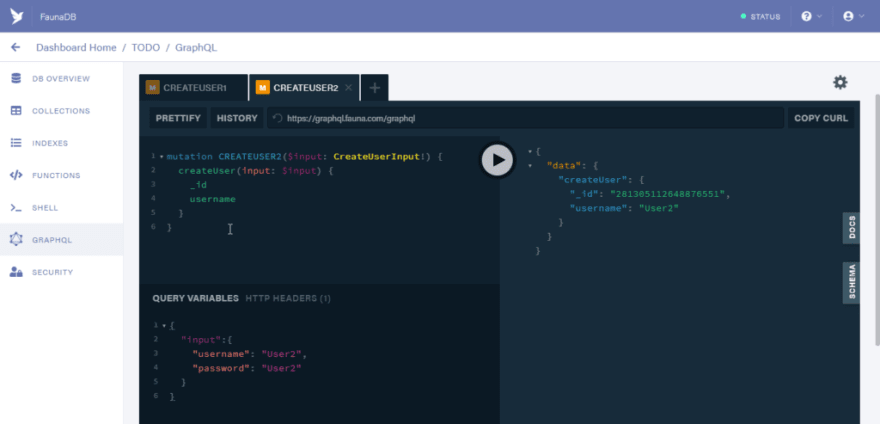
mutation CREATEUSER2($input: CreateUserInput!) {
  createUser(input: $input) {
    _id
    username
  }
}
Use this as the variable
{
    "input": {
        "username": "User2",
        "password": "User2"
    }
}
Click on the run button to process the mutation
Next, let us create todos for “User1”. Open a new tab and copy the code below
mutation CREATETODO1($data: TodoInput!) {
  createTodo(data: $data) {
    text
    completed
    user {
      username
    }
  }
}
The variable should be
{
    "data": {
        "text": "User1 todo",
        "completed": false,
        "user": {
            "connect": "281305036730925569"
        }
    }
}
Note that the id used in the connect property should defer in your own case. The id I used for the connect property is the id generated during the creation of “User1”. So use the id generated for you when creating “User1”
Click on the run button to process the mutation

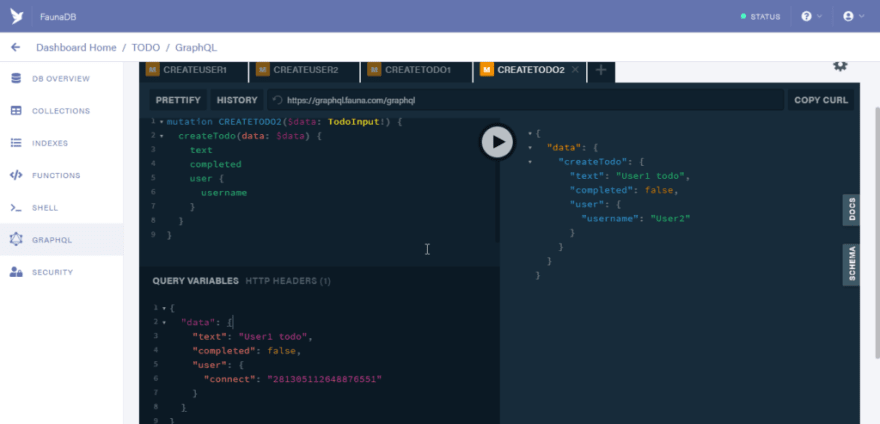
Open a new tab and copy the code below to generate a todo for “User2”
mutation CREATETODO2($data: TodoInput!) {
  createTodo(data: $data) {
    text
    completed
    user {
      username
    }
  }
}
Use the code below as the variable
{
    "data": {
        "text": "User1 todo",
        "completed": false,
        "user": {
            "connect": "281305112648876551"
        }
    }
}
Also here I used the id generated for “User2” to link this todo to “User2”
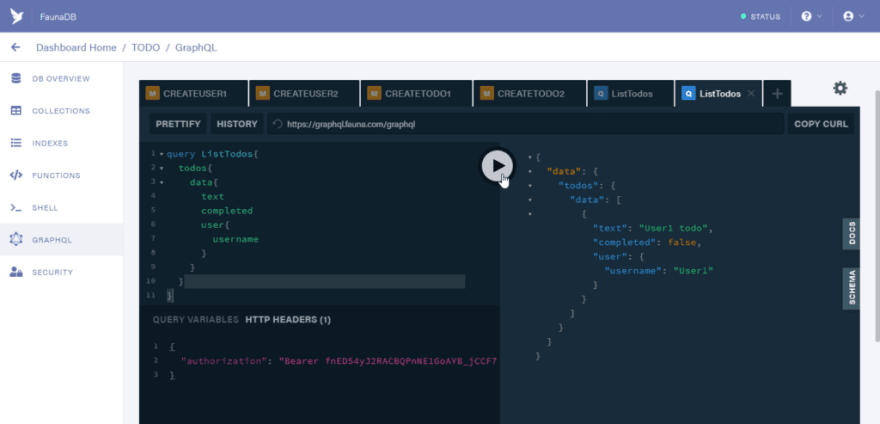
Next let us run a query to list all todos. Open a new tab and paste the code below
query ListTodos {
  todos {
    data {
      text
      completed
      user {
        username
      }
    }
  }
}
Run the query and you should have the result below
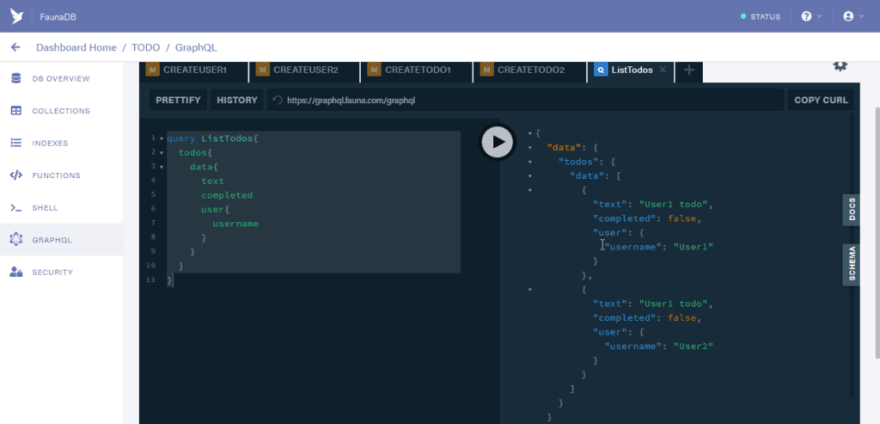
So at this point you might be asking yourself why we are able to query the data of users.
The reason behind this is due to the fact that by default the GraphQL playground makes use of server keys to make requests.
You can see that in the HTTP headers tab section.
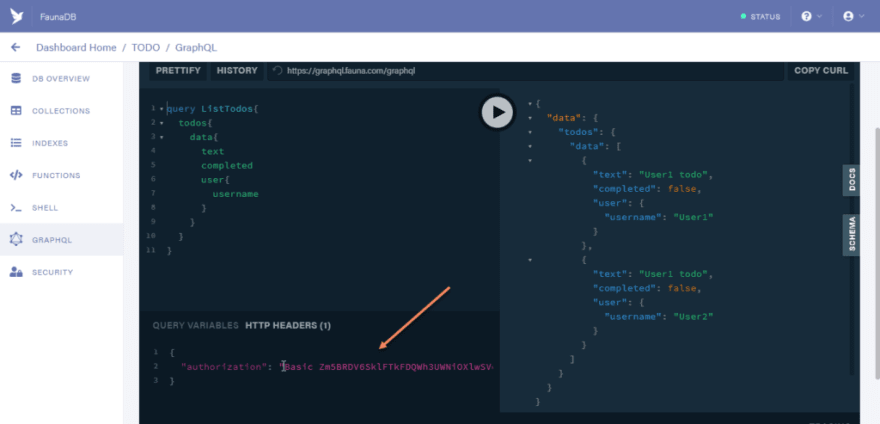
In the next step, we would deal with using user tokens during request and adding access constraint to requests. To know more about the authorization header click here.
Step 5: Using ABAC to define access constraints
ABAC stands for Attribute-based Access Control. Attribute-Based Access Control is an extension of the role-based access control(RBAC) where the attributes or fields of a user document can be used to determine access privilege to data in the Fauna. To know more about ABAC click here.
A user would need to login to Fauna to obtain access tokens. We established a login mutation to take care of that. to know more about the Login function click here.
So next, we would define access roles to registered users in the database by using the “CreateRole” inbuilt function. The code below defines the privileges given to users.
CreateRole({
  name: "todo_access",

  membership: [{ resource: Collection("User") }],

  privileges: [
    {
      resource: Collection("User"),

      actions: { read: true },
    },

    {
      resource: Index("todos"),

      actions: { read: true },
    },

    {
      resource: Collection("Todo"),

      actions: {
        create: true,

        delete: Query(
          Lambda(
            "todo_ref",

            Equals(Select(["data", "user"], Get(Var("todo_ref"))), Identity())
          )
        ),

        write: Query(
          Lambda(
            "todo_ref",

            Equals(Select(["data", "user"], Get(Var("todo_ref"))), Identity())
          )
        ),

        read: Query(
          Lambda(
            "todo_ref",

            Equals(Select(["data", "user"], Get(Var("todo_ref"))), Identity())
          )
        ),
      },
    },
  ],
});
The function above creates a Role named “todo_access”. The membership property defines which authenticated resource are members of a given role. Since user data is stored in the User collection, the only membership location used would be Collection(“User”).
Privileges define the actions permitted by an authenticated user to perform. the privileges property takes in an array of objects which define various permission levels.
So I set the read action to be true for the Collection(“User”) and Index(“todos”) resource.
{
    resource: Collection("User"),
    actions: {
        read: true
    },
},
{
     resource: Index("todos"),
     actions: {
         read: true
    },
},
This would grant GraphQL queries direct access to these two resources. As you can see no condition is defined for access to the resources above.
When a user is trying to read, write or delete data from the Collection(“Todo”) resource, a function is called to verify if the user has access to that particular document.
{

    resource: Collection("Todo"),

    actions: {

    create: true,

    delete: Query(

        Lambda(

            "todo_ref",

            Equals(Select(["data", "user"], Get(Var("todo_ref"))), Identity())

         )

    ),

    write: Query(

            Lambda(

             ["old", "new", "todo_ref"],

             Equals(Select(["data", "user"], Get(Var("todo_ref"))), Identity())

        )

    ),

    read: Query(

            Lambda(

                "todo_ref",

                 Equals(Select(["data", "user"], Get(Var("todo_ref"))), Identity())

             )

    ),

    },

    },
So how the function works is that it compares the id of the user related to a particular document or todo to the id returned from the Identity() function call.
The Identity function call returns a reference to a user document using the authorization tokens sent when making a request to Fauna using the GraphQL API.
To know more about various privileges and membership click here.
Next, let us copy the CreateRole function defined earlier and run it in the shell. Delete the former query in the shell and paste the new function in the shell. Also, clear the previous query output to have a neater interface
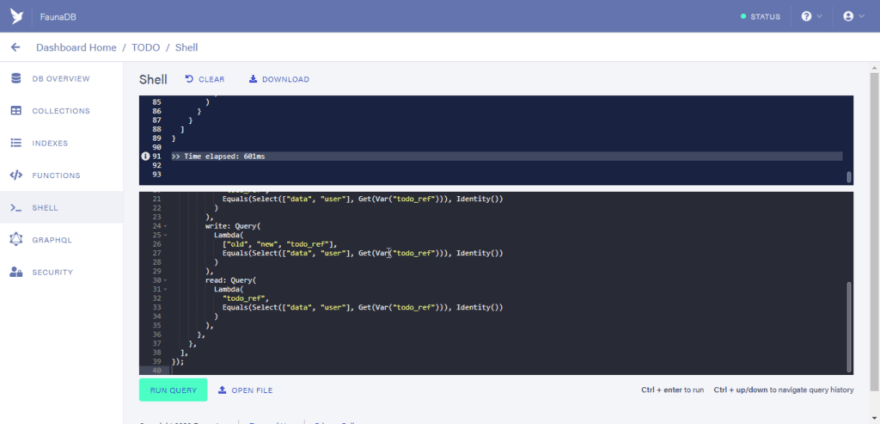
Step 6: Testing the set privileges
To see if the privileges are working properly we would need to run the login mutation for “User1”
So open the GraphQL playground and create a new tab. Paste this mutation code inside it.
mutation LOGINUSER1($input: LoginUserInput!) {

   loginUser(input: $input)

}

Use this variable below to get the login token for User1

{

   "input": {

      "username": "User1",

      "password": "User1"

   }

}
Run the mutation and you should see the login token displayed for the User1
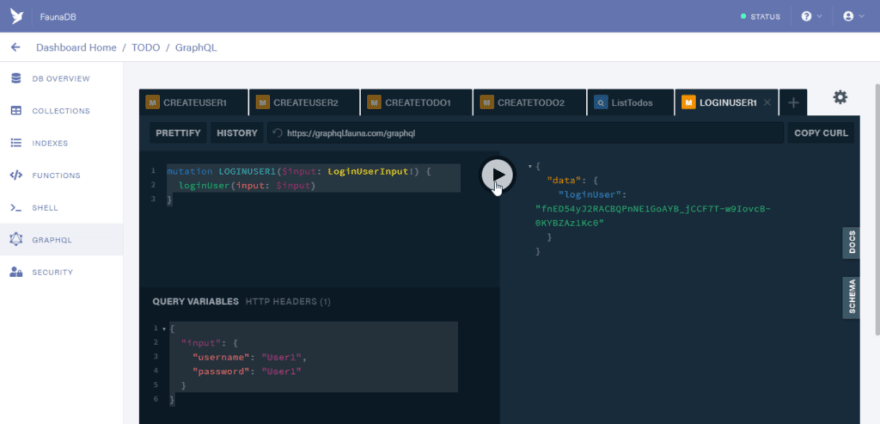
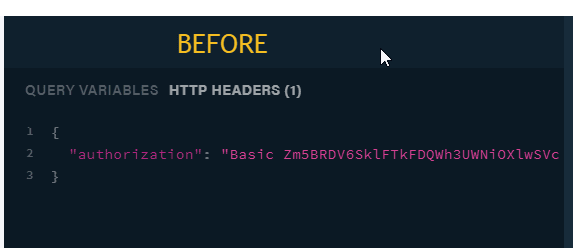
Copy the login user token. It would be used as the Bearer token in the Authorization header.
Click on the HTTP HEADERS tab and Change the “Basic” keyword to “Bearer” also change the default token beside the “Basic” keyword to the token obtained from the login mutation.
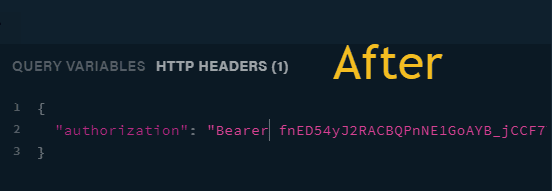
Now you are set to run queries using the identity of User1
Paste the code below in the same tab that you set the authorization header and run the code below. You would see that only to-dos for User1 would be listed.
query ListTodos {
  todos {
    data {
      text
      completed
      user {
        username
      }
    }
  }
}
So now we have the attribute-based access control setup.
But recall that the initial plan of this tutorial is to handle the login and createuser mutation from Azure functions.
Once your client( maybe an app) obtains the token from Azure functions then subsequent requests would be made directly to the database using Fauna’s GraphQL API.
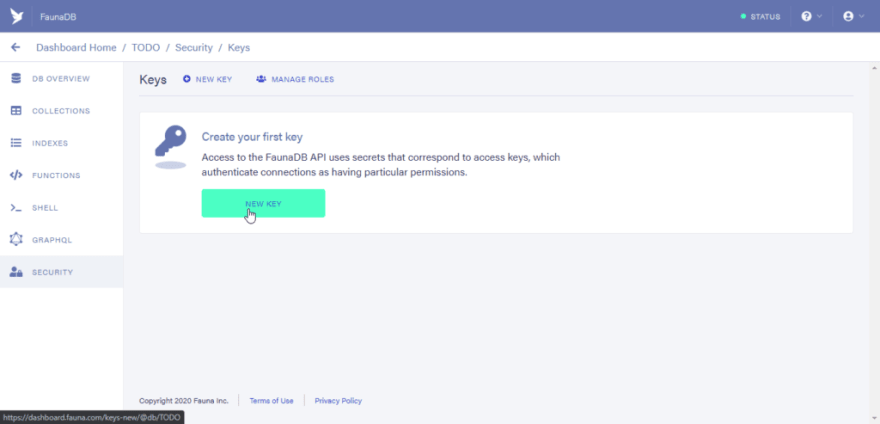
Step 7: Obtaining server tokens
To run the createuser and login mutation from Azure functions we would need to make use of a server token to grant us access
Click on the Security tab and click on the “New Key” button”
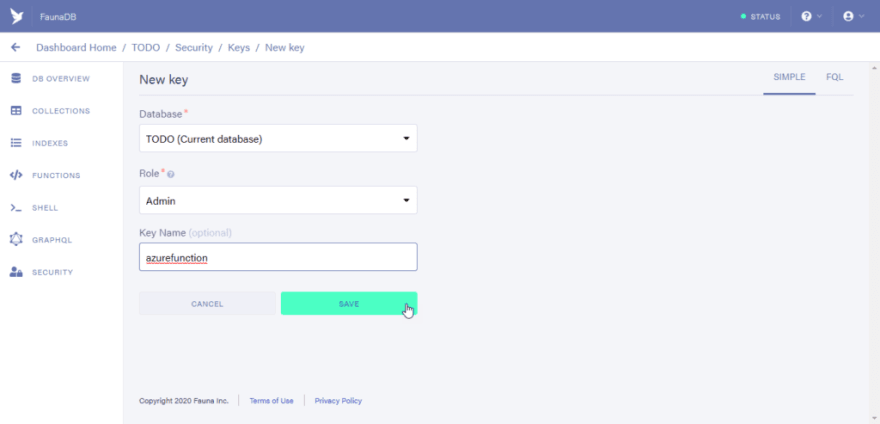
In the key name field you can type in any name of your choice, then click on the save button.
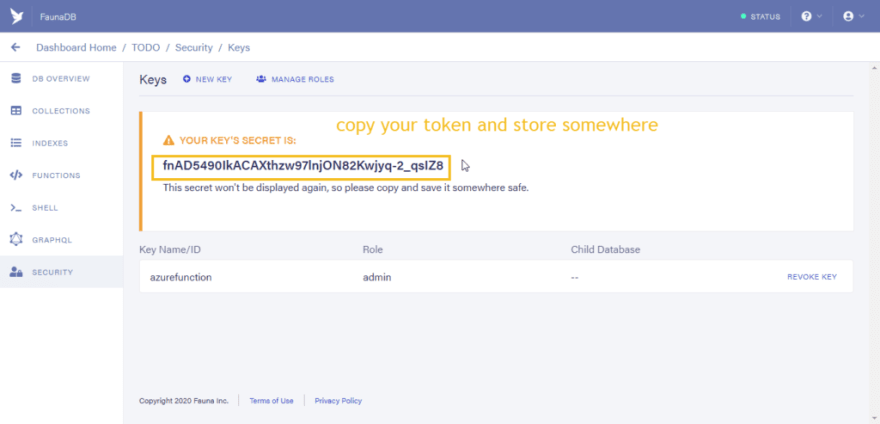
You would see your created tokens. Save that token somewhere as it would be used in Azure functions.
Step 8: Setting up Azure functions
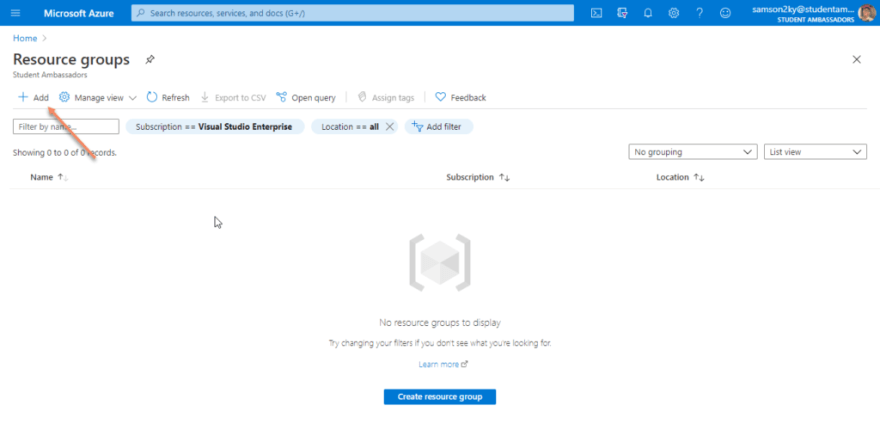
For the sake of grouping resources, use this link to navigate to the resource group page on the Azure portal. Click on the add button.
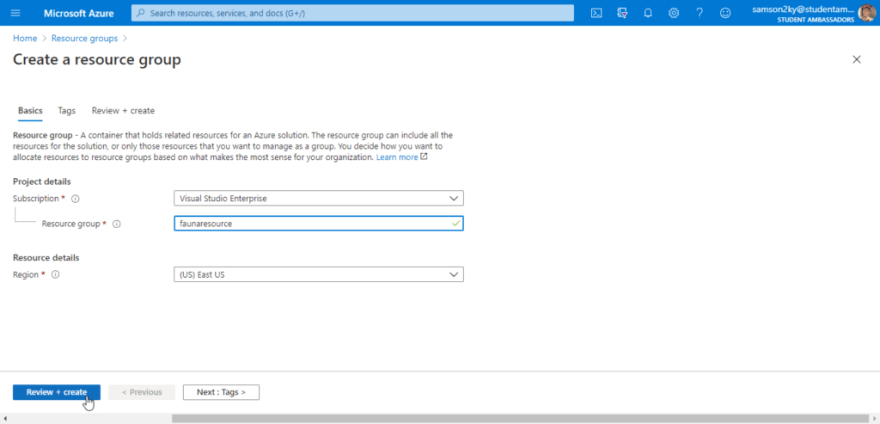
Type in the name of the resource group in the page you would be redirected to. I chose “faunaresource” as the resource group name. Click on the review + create button. And finally, click on the create button.
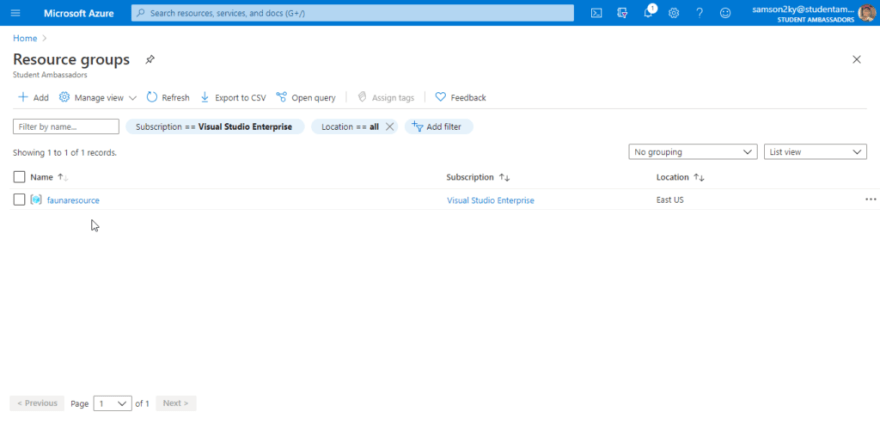
Wait a little bit for your resource group to be created. Once it is created you would be redirected to the resource group page again and you should see the “faunaresource” group name.
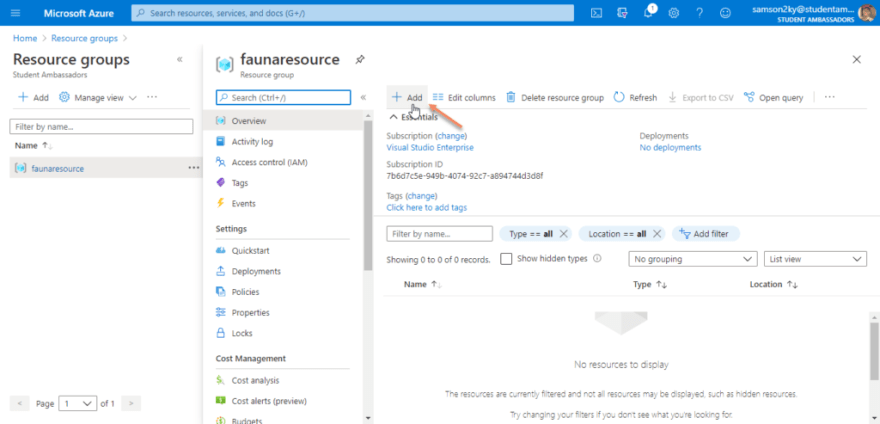
Click on the “faunaresource” group name and click on the Add button on the right pane.
You would be redirected to a new page that displays a list of resources. Click on Function App to create an Azure Function resource or you can search it in the search bar.

You would be redirected to a new page to fill in the function details. I chose “faunagrapql” as the Azure function app’s name and NODE.js as the runtime. After that, click on the review+create button to create the function. Finally, click on the create button.
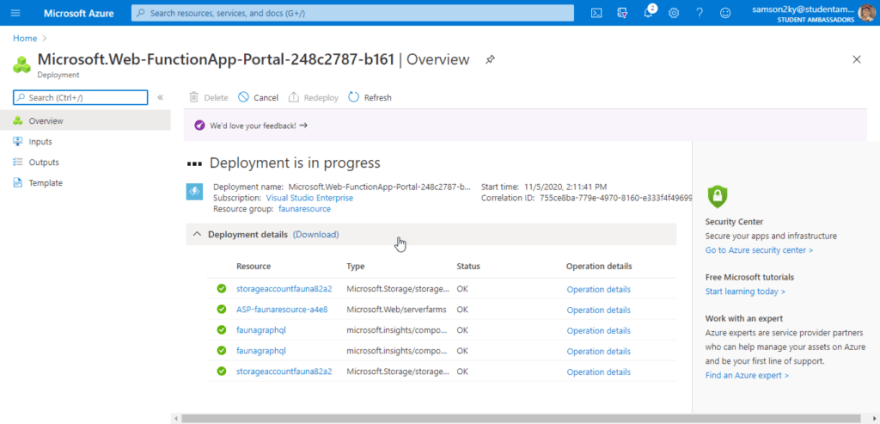
You would be redirected to a new page that reads “Deployment in progress”
Wait a little bit until the “Go to Resource” button displays
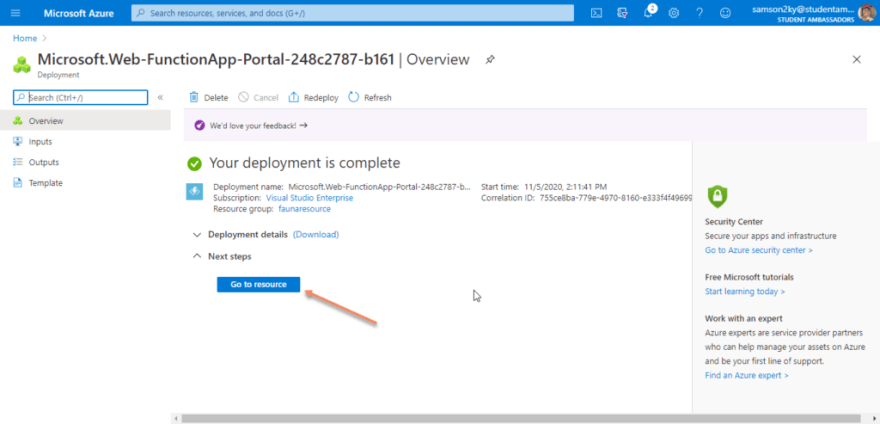
You would be redirected to the created function’s dashboard. Click on the functions menu on the left pane.
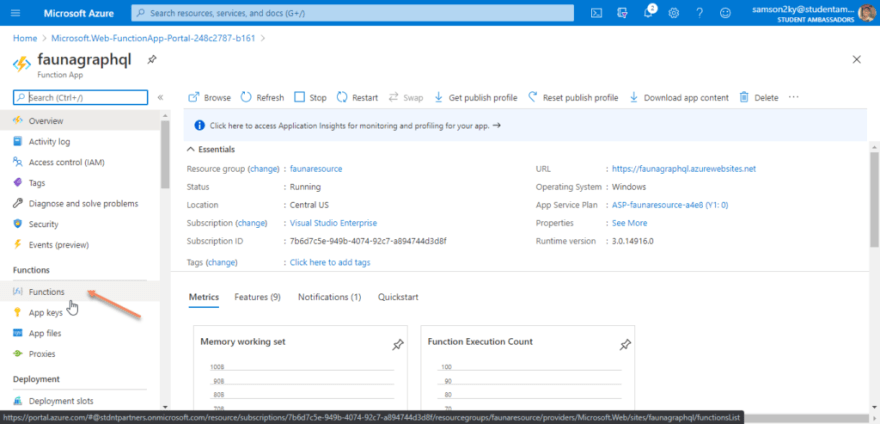
Clicking on the functions menu would display an interface that allows you to create functions for an Azure function app. Click on the Add button displayed on the top of the dashboard.
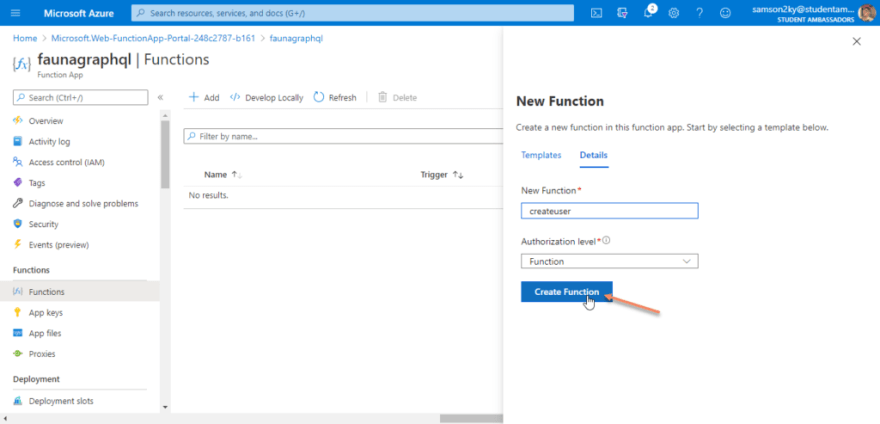
A right pane would appear. The pane contains various standard templates for creating an Azure function. We would be using the HTTP template so click on the HTTP trigger card.

After clicking on the HTTP trigger card, use “createuser” as the name of the function. But you can decide which name you want to use. Click on the Create functions button and wait for your function to be created
Go back to the previous overview dashboard and repeat the function creation process for our second mutation. I named the function “loginuser”.
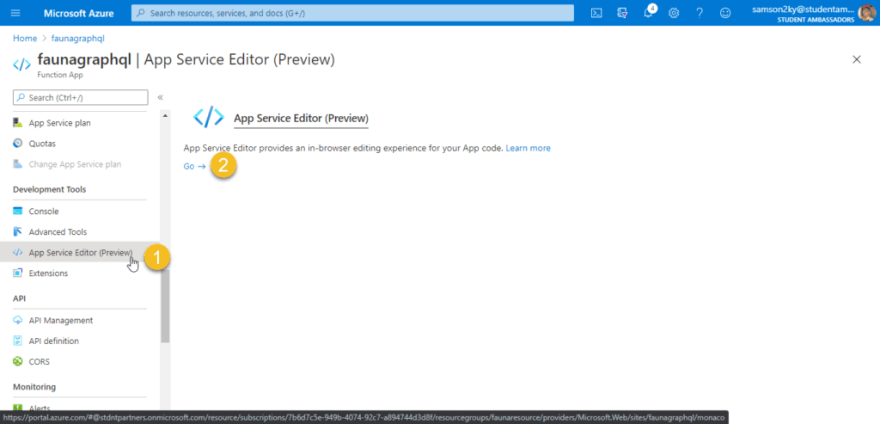
Once you are done creating the login function go back to the Function app overview dashboard. On the left pane, scroll down and click on the “App Service Editor” menu. After that click on the Go button. And you would be redirected to a new interface.
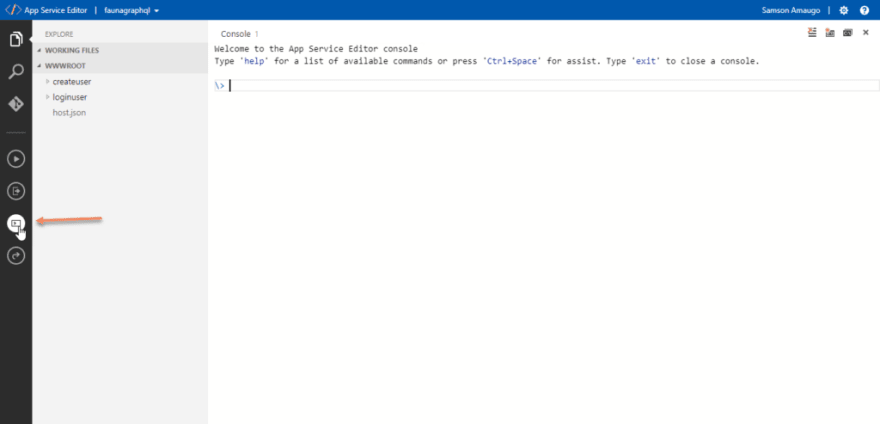
Once you’re in the editor click on the “open console” button on the left pane. The console would enable us to install some node modules that would be used for our project.
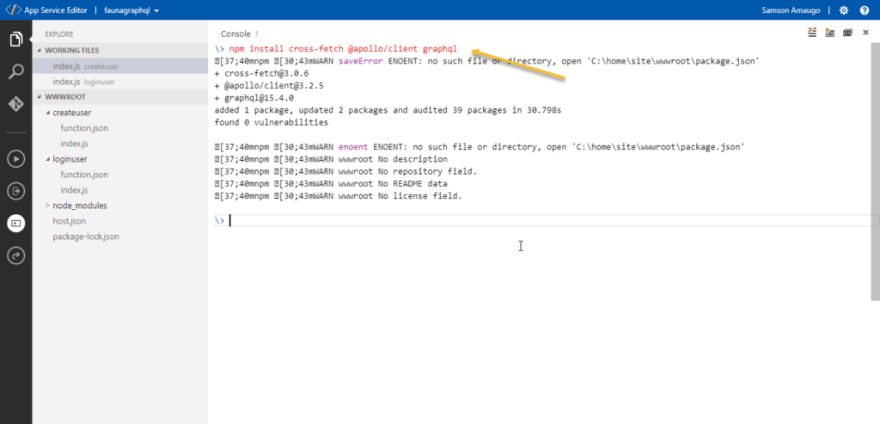
Install these dependencies: cross-fetch and @apollo/client
Apollo client requires that a fetch API is available but since this environment is a node and not a windows environment, we would be making use of the cross-fetch node module. Which provides a fetch API for a node environment.
Run the code below in the console
npm install cross-fetch @apollo/client graphql
After installing the node modules open the “createuser” folder and click on the index.js file. Delete the default code available in the editor and paste the code below into the editor.
let {
  ApolloClient,

  gql,

  HttpLink,

  InMemoryCache,
} = require("@apollo/client/core");

let fetch = require("cross-fetch");

const client = new ApolloClient({
  link: new HttpLink({
    uri: "https://graphql.fauna.com/graphql",

    headers: {
      authorization: "Bearer fnAD5490IkACAXthzw97lnjON82Kwjyq-2_qsIZ8",
    },

    fetch,
  }),

  cache: new InMemoryCache(),
});

module.exports = async function (context, req) {
  context.log("JavaScript HTTP trigger function processed a request.");

  let signUpMutation = gql`
    mutation CREATEUSER($input: CreateUserInput!) {
      createUser(input: $input) {
        username
      }
    }
  `;

  let graphRequest;

  try {
    graphRequest = await client.mutate({
      mutation: signUpMutation,

      variables: {
        input: {
          username: req.body.username,

          password: req.body.password,
        },
      },
    });
  } catch (errror) {
    graphRequest = error;
  }

  context.res = {
    // status: 200, /* Defaults to 200 */

    body: graphRequest,
  };
};
Now there are some things that you would notice about the code above.
I imported @apollo/client/core instead of @apollo/client. This is because @apollo/client/core entry allows you to use the Apollo client without requesting for react to be installed.
The HttpLink constructor allows the configuration of a custom fetch API and setting of headers.
I made use of the server token created from Fauna’s dashboard to set the authorization header. So use your own server code there.
The function above is designed to receive the username and password from the request body which it uses to make a GraphQL request to Fauna (registering a user) and sends the response to the client.
Next, let us set up the function that would retrieve the login token from Fauna and send it to the client.
Open the “loginuser” folder. Click on the index.js file and paste the code below
let {
  ApolloClient,

  gql,

  HttpLink,

  InMemoryCache,
} = require("@apollo/client/core");

let fetch = require("cross-fetch");

const client = new ApolloClient({
  link: new HttpLink({
    uri: "https://graphql.fauna.com/graphql",

    headers: {
      authorization: "Bearer fnAD5490IkACAXthzw97lnjON82Kwjyq-2_qsIZ8",
    },

    fetch,
  }),

  cache: new InMemoryCache(),
});

module.exports = async function (context, req) {
  context.log("JavaScript HTTP trigger function processed a request.");

  let loginMutation = gql`
    mutation LOGINUSER($input: LoginUserInput) {
      loginUser(input: $input)
    }
  `;

  let graphRequest;

  try {
    graphRequest = await client.mutate({
      mutation: loginMutation,

      variables: {
        input: {
          username: req.body.username,

          password: req.body.password,
        },
      },
    });
  } catch (errror) {
    graphRequest = error;
  }

  context.res = {
    // status: 200, /* Defaults to 200 */

    body: graphRequest,
  };
};
The code above is created to receive the username and password from the request body. It uses these credentials to make a GraphQL request to Fauna (login a user). The retrieved user token is sent to the client to enable it to make direct authorized requests to Fauna.
Also, note that the code saves automatically as you write.
Now we need to test the function and see if it works.
Step 9: Test the function
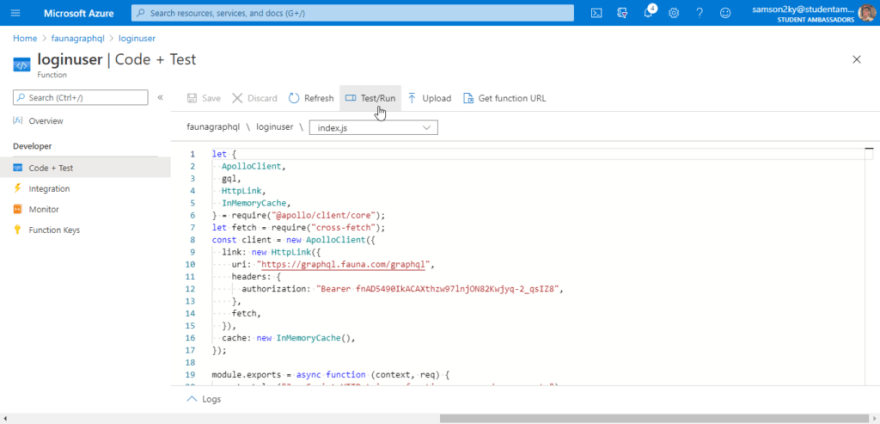
Let us test the login function. Go to the “faunagraphql” azure function, click on the functions menu and select the “loginuser” function.
In the new page select “Code + Test” menu and wait for the editor to load.
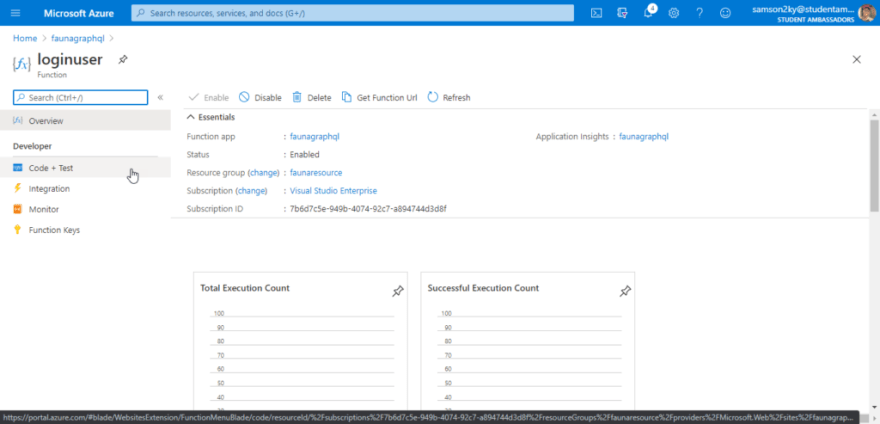
You should see an editor with prepopulated code to handle the login mutation. Click on the “Test/Run” button.
A right pane would appear. In the right pane scroll down to the body section and paste this code in the body section to see what the request would return.
{

   "username":"User1",

   "password":"User1"

}
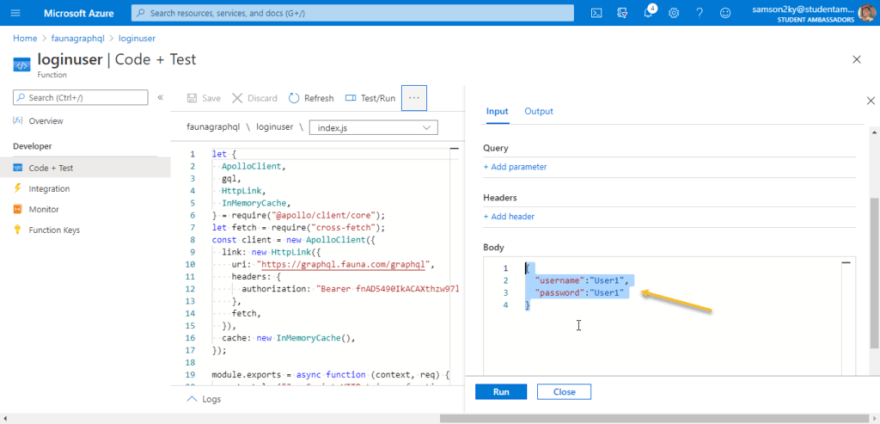
Click on the run button and wait for a response.
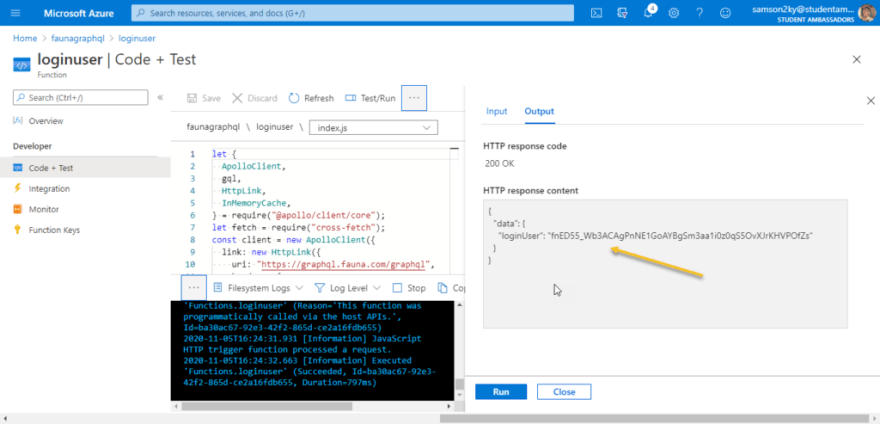
Copy the loginUser token and paste in fauna’s GraphQL playground as the authorization token.
Try and run this query
query ListTodos {
  todos {
    data {
      text
      completed
      user {
        username
      }
    }
  }
}
And you should see that it only displays the todo of “User1”.
To see the Function’s URL, go to the “loginuser” function dashboard and click on the copy URL option at the top of the dashboard.
You would see the URL to your Azure function which you can use in your client.
By the time you would be reading this post, the created tokens I used won’t be functional.
Thanks for reading through and learning a little bit about the awesomeness of Fauna.

Top comments (0)