A few months ago, I found a nice little open-source tool on GitHub called AZTK, which provides a fast and easy way to provision low-cost Apache Spark clusters on Microsoft Azure.
In this blog post, I would like to show you, how to install the Azure Distributed Data Engineering Toolkit (AZTK) on your Windows-, Linux- or MacOS-based system, and how to provision your first Apache Spark cluster with it.
Azure Distributed Data Engineering Toolkit (AZTK)
The Azure Distributed Data Engineering Toolkit (AZTK) is a python CLI application for provisioning on-demand Spark on Docker clusters in Azure. It’s a cheap and easy way to get up and running with a Spark cluster, and a great tool for Spark users who want to experiment and start testing at scale.
This toolkit is built on top of Azure Batch but does not require any Azure Batch knowledge to use.
For more details, please have a look on [GitHub].
Notable Features
- Spark cluster provision time of 5 minutes on average
- Spark clusters run in Docker containers
- Run Spark on a GPU enabled cluster
- Users can bring their own Docker image
- Ability to use low-priority VMs for an 80% discount
- Mixed Mode clusters that use both low-priority and dedicated VMs
- Built in support for Azure Blob Storage and Azure Data Lake connection
- Tailored pythonic experience with PySpark, Jupyter, and Anaconda
- Tailored R experience with SparklyR, RStudio-Server, and Tidyverse
- Ability to run spark submit directly from your local machine’s CLI
Getting Started
Install Python 3
Before you install the Azure Distributed Data Engineering Toolkit, you need Python 3, as well as pip3, installed on your system.
To do this, please have a look at Python.org.
Virtual Environment (optional)
After that, I recommend to create a separate virtual environment for the toolkit.
python3 -m venv aztk
Once you’ve created a virtual environment, you may activate it.
On Windows, run:
aztk\Scripts\activate.bat
On Unix or MacOS, run:
source activate aztk
Install AZTK
Now you’re ready to install the Azure Distributed Data Engineering Toolkit (AZTK) with a simple:
pip install aztk
Initialize AZTK
After you installed the toolkit, you’re ready to create your first Aztk environment.To do that, you simply call
aztk spark init
This command creates a .aztk folder in your current directory with the following file structure:
- cluster.yaml
- core-site.xml
- jars
- .null
- job.yaml
- secrets.yaml
- spark-defaults.conf
- spark-env.sh
- ssh.yaml
If you want to create a machine wide configuration, you add the –global parameter to the command.
Azure Resources and Credentials
To be able to work with the toolkit, you have to provision a few Azure resources, e.g. Azure Batch, Azure Storage Account, an Service Principal, etc.
The easiest way to do this, is to login to the Azure Portal and execute the following command in the Azure Cloud Shell.
wget -q https://raw.githubusercontent.com/Azure/aztk/v0.7.0/account_setup.sh -O account_setup.sh &&
chmod 755 account_setup.sh &&
/bin/bash account_setup.sh
After answering a few questions, the command return the required settings, which you add/update in the .aztk/secrets.yaml file.

Provision your first Apache Spark cluster
Finally we’re ready to provision our first Apache Spark cluster using the AZTK.
aztk spark cluster create --id mycluster --size 0 --size-low-priority 5 --vm-size standard_d12_v2
- With the id parameter, you specify an unique ID (within your Azure Batch account) for your cluster.
- The size parameter specifies the amount of dedicated virtual machines (which are charged at the full price).
- The size-low-priority parameter specifies the amount of Low-Priority Virtual Machines (which are charged at the 20% of the regualar price). This, of course, comes with a disadvantage. If Azure needs the virtual machines for another customer, they will be deleted.
- The vm-size parameter specifies the type of the virtual machines to use.

You’re also able to use the Azure N-Series virtual machines to provision GPU enabled clusters.
Getting Cluster Information
As soon as a cluster is provisioning, existing or deleting, you can use the following commands to get more details:
aztk spark cluster list

aztk spark cluster get --id mycluster

Connect to the cluster
With the following command, you’re able to ssh-connect to the master node of your cluster, as well as do a port forwarding to the services (and plugins) on the cluster.
aztk spark cluster ssh --id mycluster

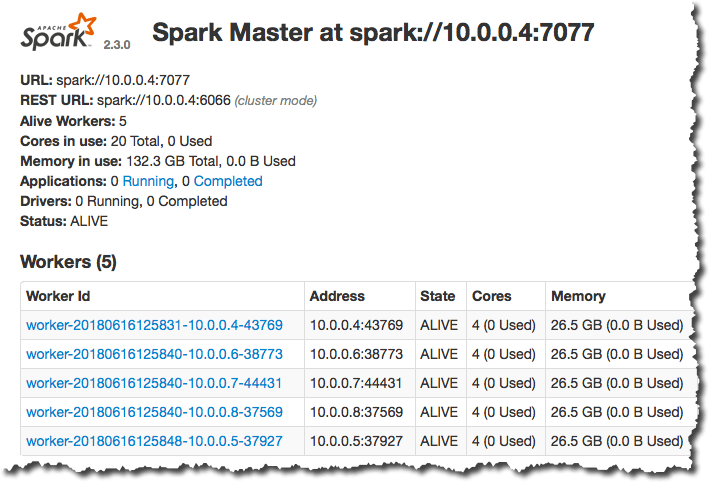
After the connection has been established, you can use the port forwarding to access services like the Spark Web UI.

Deleting a cluster
Last but not least, don’t forget to delete the cluster if you don’t need it anymore.
aztk spark cluster delete --id mycluster
Demo
To see a demo of how to setup AZTK and provision your first Spark cluster, I created a short video:


Top comments (0)