In the dynamic realm of web development, harnessing the power of webhooks has become increasingly essential. A webhook is a mechanism that enables real-time communication between two systems, allowing one system to notify another about specific events or updates. This robust method of information exchange has found its place in a myriad of applications, from enhancing user experiences to automating workflows.
The Power of Webhooks:
Beyond their technical intricacies, webhooks empower developers to streamline processes, automate tasks, and enhance the overall efficiency of their applications. From real-time updates in collaborative platforms to triggering automated workflows in e-commerce systems, the versatility of webhooks is truly remarkable.
By mastering the steps to create a webhook and understanding its potential applications, developers can unlock a world of possibilities in the ever-evolving landscape of web development. As technology continues to advance, embracing tools like webhooks becomes not just a choice but a necessity for those seeking to stay at the forefront of innovation.
Creating a Webhook in Sitecore XM Cloud
CMS Configuration
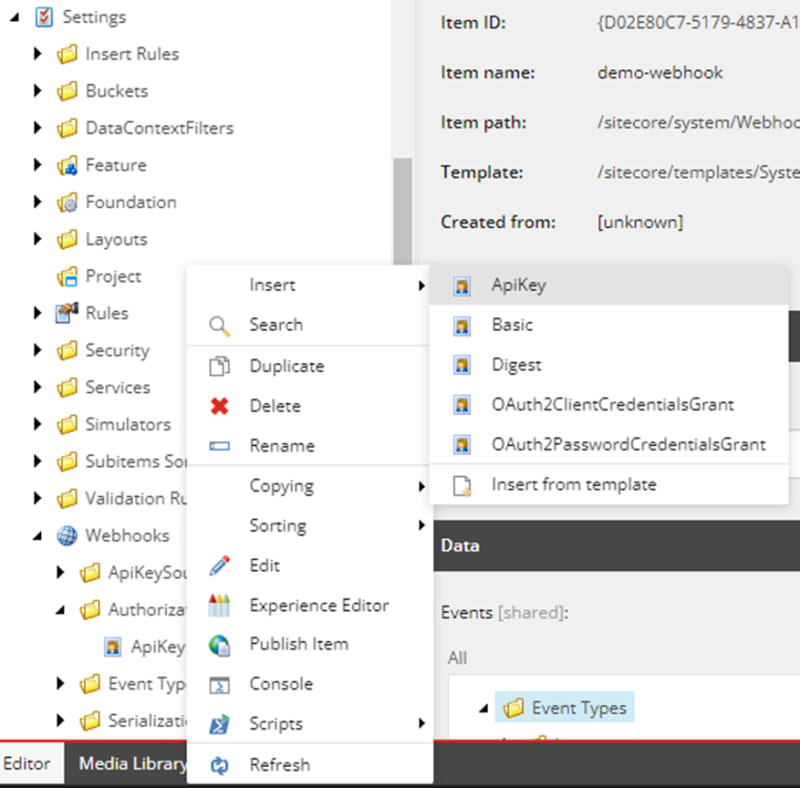
- Create an authorization method, in this case, an ApiKey under sitecore/system/system/Webhooks/Authorization/, and select from the different options depending on the needs.
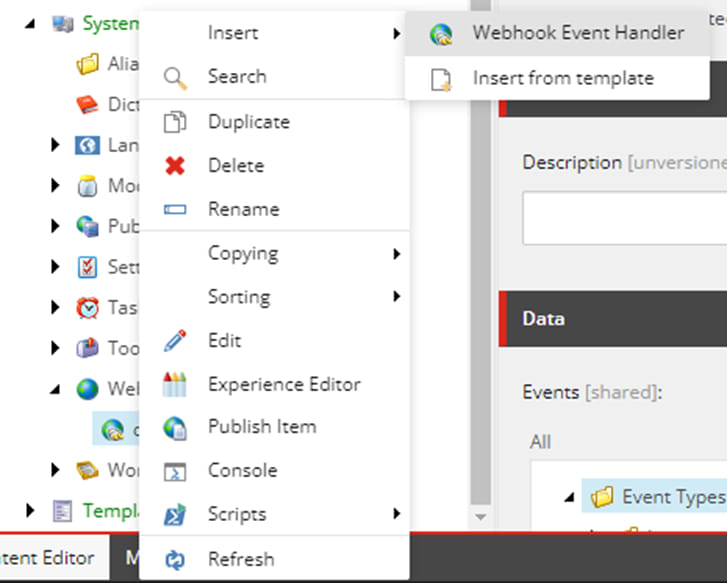
- Under /sitecore/system/webhooks/ create a Webhook event handler
- Configuring the webhook
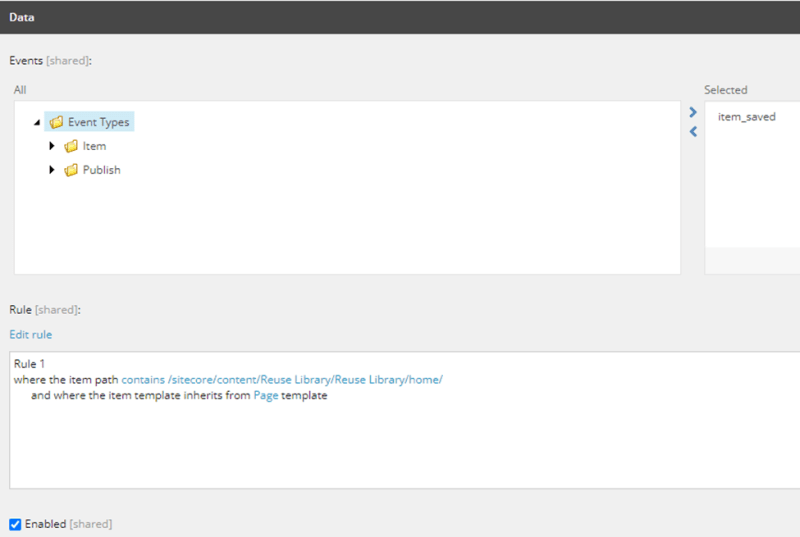
First, we need to define what event will trigger the webhook. In this case, we're using 'item_saved,' but you can find a list of all the available events here: Webhook event handler configuration fields
. After that, it is important to configure a rule. These rules are used to determine when this webhook will be triggered. This is a key step because if no rule is set, then any 'item_saved' event will trigger the webhook, and depending on what we're doing with it, we can have performance issues.
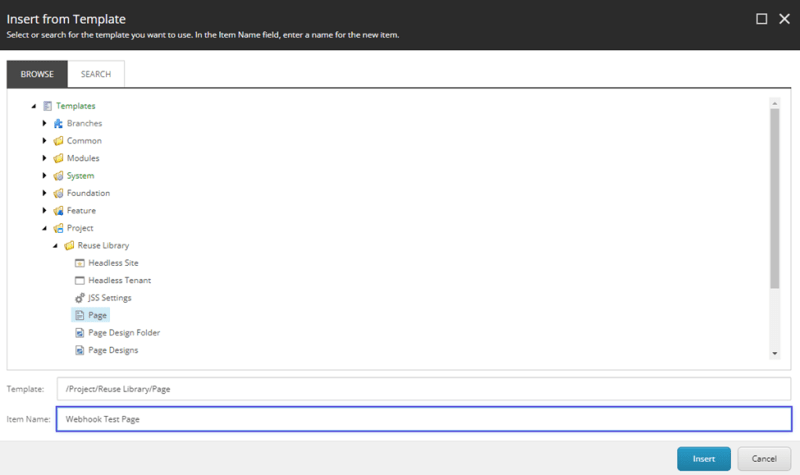
In this case, the rule states that we're creating/updating an item under the 'Home' of the 'Reuse Library' page and specifying which template the item inherits from. Therefore, not all items created under 'Home' will trigger the event.
Another crucial step is to check the 'Enabled' checkbox. If it's not checked, then the webhook won't work.
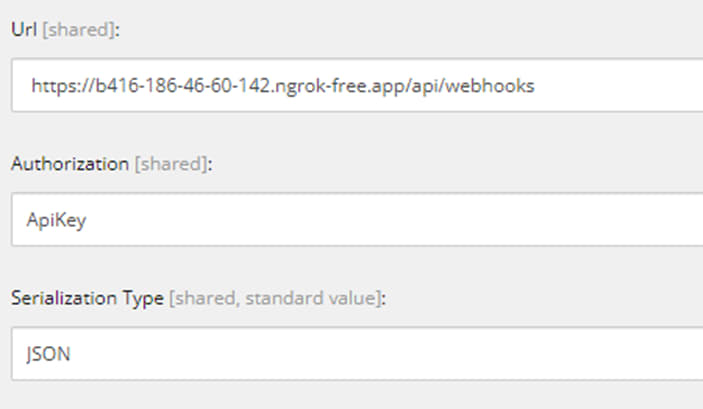
The next configurations are the URL that the webhook will send the request, the authorization type; in this case, it is the ApiKey we created earlier, and the serialization type that can be XML or JSON.
Example of an endpoint to receive the information of the webhook.
For this demo, I created a new Next.js project to establish a simple endpoint. This trigger sends a POST request, so I just created the POST handler in the Next.js endpoint.
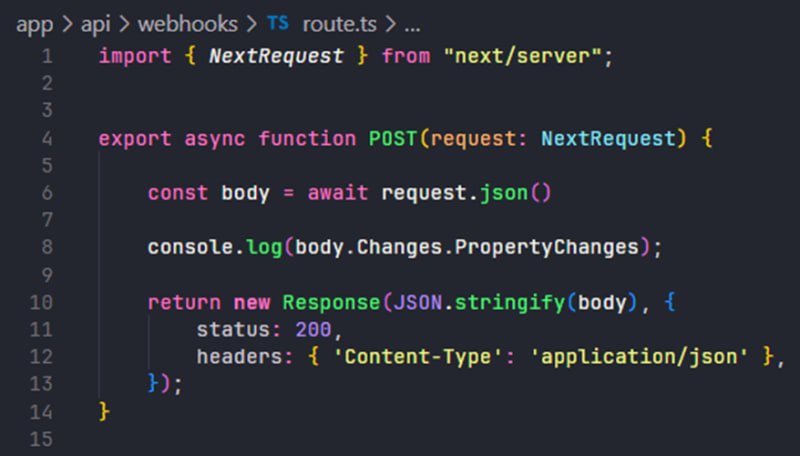
In this case I’m reading the Changes.PropertyChanges fields.
Based on the conditions I used when testing the endpoint, creating an item using the Page template and logging the PropertyChanges, we can see this:
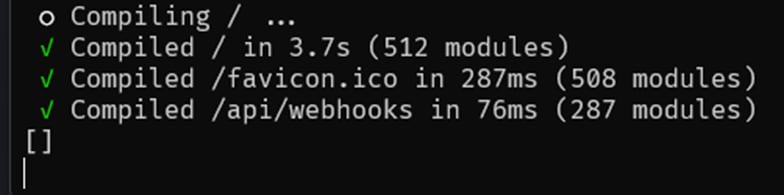
An empty array.
Changing the name in the CMS results in us getting this information now:
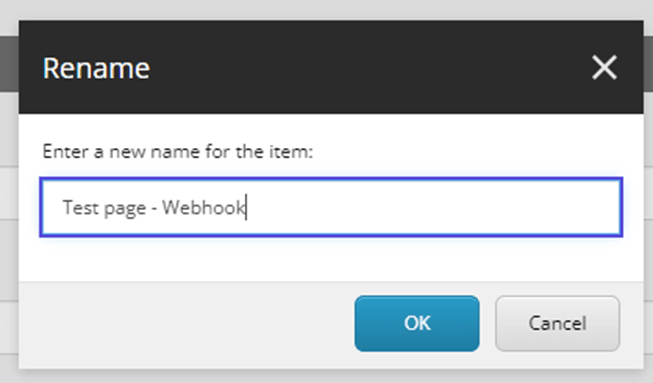
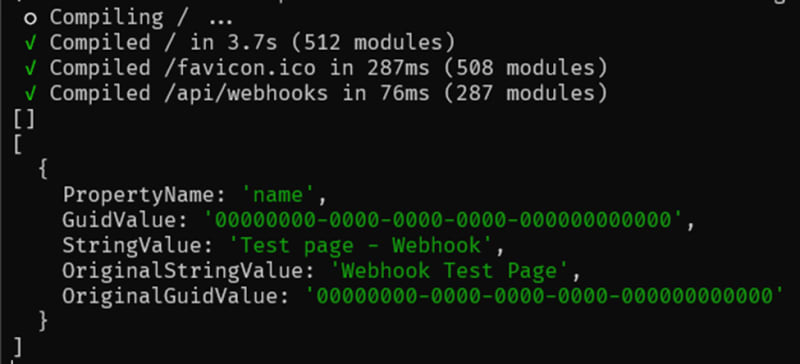
I receive the new name, and in this case, it states that I changed the name of the item. This is just one small example of how to capture the information sent by Sitecore when using a webhook with this trigger. You can integrate this feature with a variety of things; for instance, depending on the template of the item being created, you can establish an alert system or something to keep track of changes in different items. Possibilities are endless; this is just a brief example.

Top comments (0)