
Introduction
In today’s collaborative work environments, securing sensitive data while enabling efficient teamwork is critical. Microsoft SharePoint, a widely used platform for document management and collaboration, offers robust permission settings to control access to content. By default, SharePoint inherits permissions from parent sites, libraries, or folders, but there are scenarios where custom permissions for individual files are necessary—such as restricting access to confidential documents, complying with data governance policies, or managing project-specific resources.
This guide provides a step-by-step approach to creating and managing custom permissions for files on SharePoint sites. You’ll learn how to break inheritance, design tailored permission levels, assign access to users or groups, and maintain a secure yet flexible environment.
Understanding SharePoint Permissions
Key Concepts:
- Permission Inheritance: By default, files inherit permissions from their parent library, folder, or site. Custom permissions require breaking this inheritance.
- Permission Levels: These define actions users can perform (e.g., Read, Edit, Full Control). SharePoint allows customization of these levels.
- Users vs. Groups: Assign permissions to SharePoint groups (recommended) or individual users for streamlined management.
When to Use Custom Permissions:
- Restricting access to sensitive files (e.g., financial reports, HR documents).
- Granting temporary access to external collaborators.
- Enforcing the principle of least privilege.
Step-by-Step Guide to Creating Custom Permissions
1. Plan Your Permissions Structure
- Identify Requirements: Determine which files need unique access and who requires permission (users/groups).
- Follow Least Privilege: Grant only the necessary level of access (e.g., Read instead of Edit).
- Use Groups: Create or leverage existing SharePoint groups for easier management.
2. Break Permission Inheritance
To apply custom permissions to a file, you must first break inheritance from its parent library/folder:
- Navigate to the SharePoint document library.
- Right-click the target file and select Manage Access (modern interface) or Shared With > Advanced (classic experience).
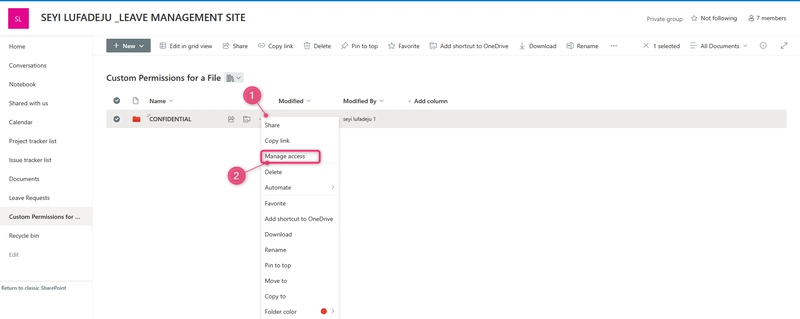
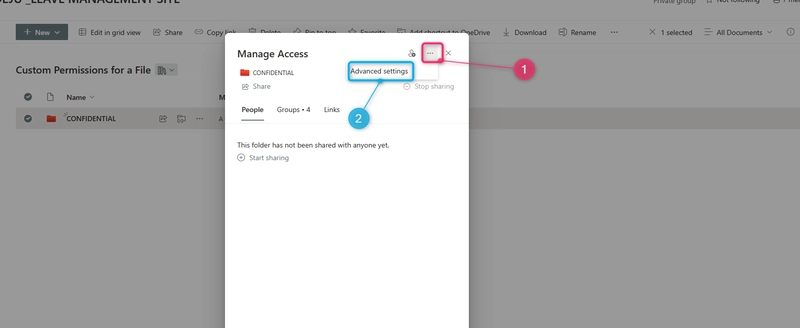
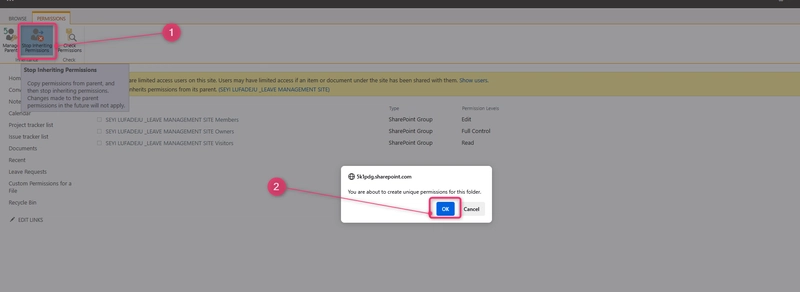
- Click Stop Inheriting Permissions to sever the link to the parent’s permissions.
3. Create Custom Permission Levels
If default levels (e.g., Read, Contribute) don’t meet your needs, create a custom permission level at the site level:
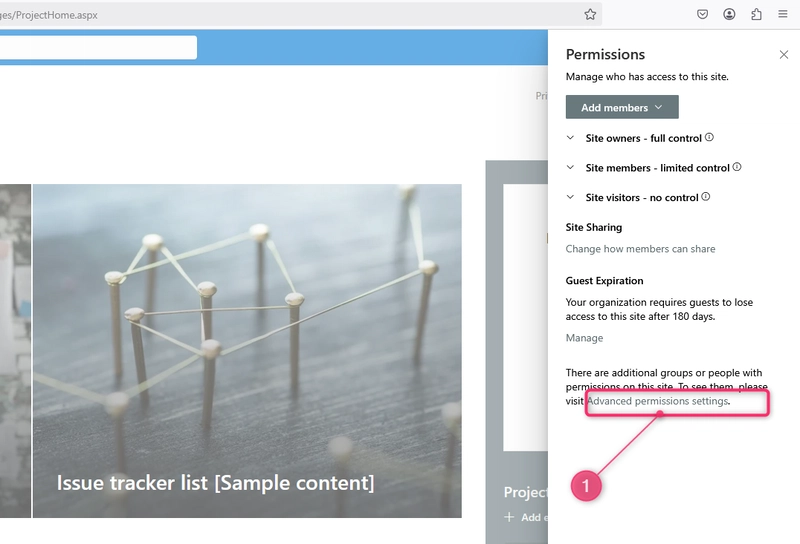
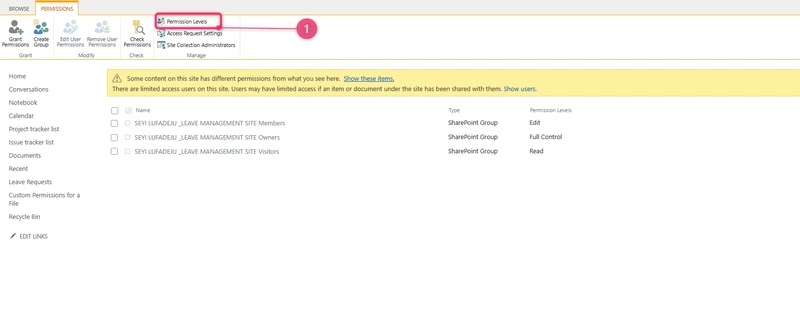
- Go to Site Settings > Site Permissions > Advanced Permissions Setting > Permission Levels.
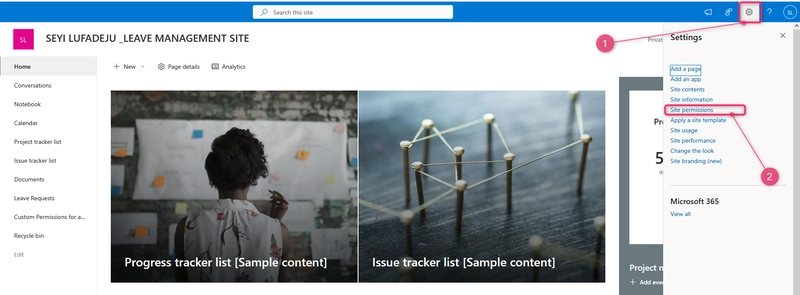
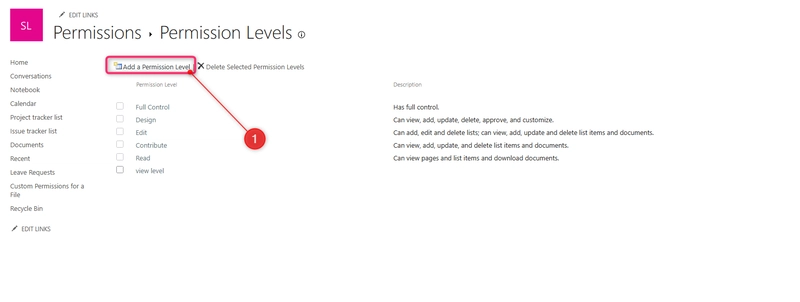
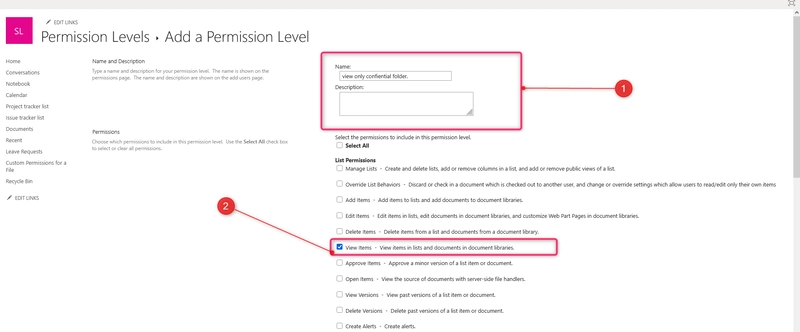
- Click Add a Permission Level, name it (e.g., "View Only – No Download"), and select specific permissions (e.g., View Items but not Open or delete).
- Save the level.
4. Assign Permissions to Users/Groups
- On the file’s permissions page (Advanced Settings),click on users to Remove Users Permission
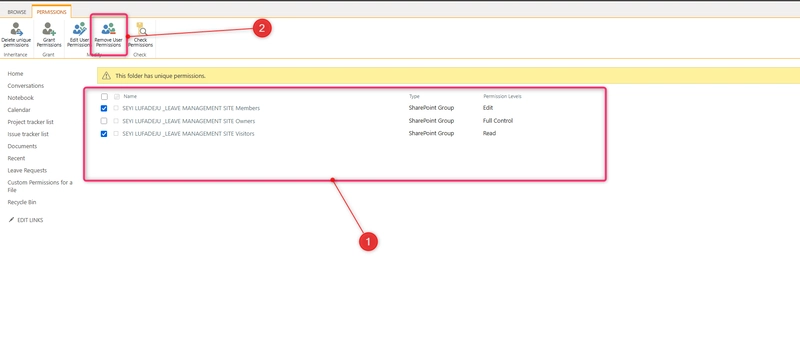
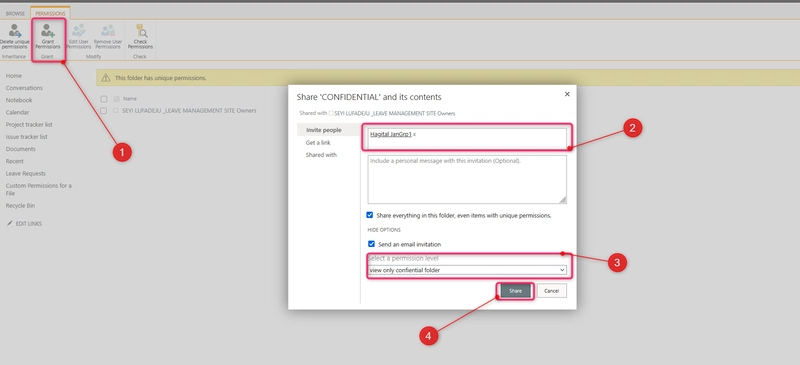
- click Grant Permissions
- Enter the names/emails of users or groups.
- Select the desired permission level (e.g., custom "View Only" or default "Read").
- Click Share to apply.
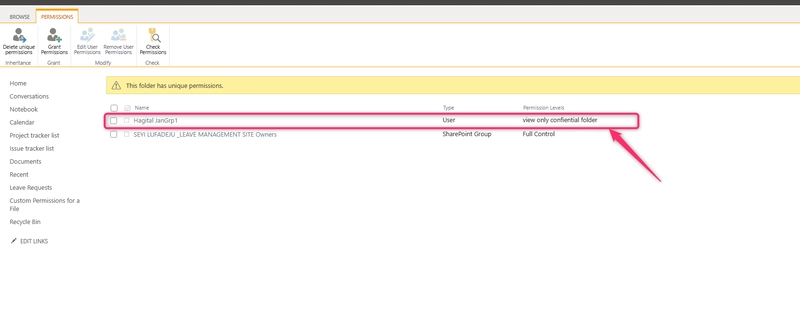
5. Apply Permissions to the File
After breaking inheritance and assigning permissions, the file will now have unique access settings.
Repeat for other files as needed, but avoid over-customizing to prevent complexity.
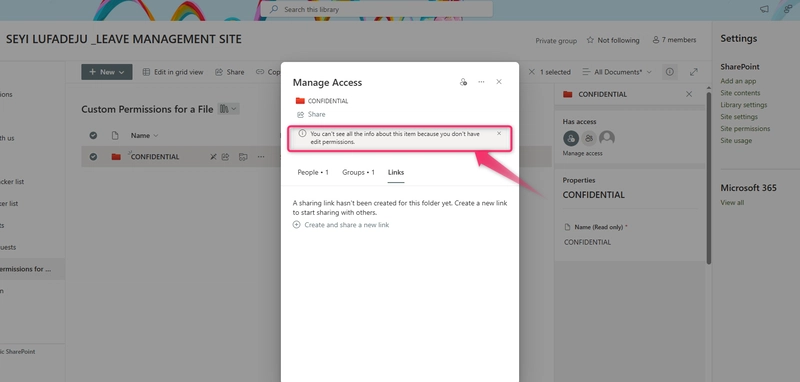
6. Test and Validate
Log in as a test user to verify access.
Use SharePoint’s Check Permissions tool (under Site Permissions) to audit access.
7. Maintain and Monitor
- Regular Audits: Review permissions quarterly to remove outdated access.
- Documentation: Track custom permissions in a spreadsheet or SharePoint list.
- Leverage Tools: Use SharePoint’s Access Requests and Sensitivity Labels for scalable governance.
Conclusion
Custom permissions in SharePoint empower organizations to balance security and collaboration effectively. By breaking inheritance, tailoring permission levels, and assigning access strategically, you can safeguard sensitive files while enabling seamless teamwork. However, over-customization can lead to administrative overhead, so always prioritize simplicity and regular audits.
With this guide, you’re equipped to implement granular file-level permissions confidently. Combine these practices with SharePoint’s broader governance tools—such as sensitivity labels and compliance policies—to build a secure, efficient, and user-friendly document management ecosystem.

Top comments (0)