
Laravel is a free, open-source PHP web framework, intended for the development of web applications following the model–view–controller architectural pattern for companies and developers all over the world.
Installtion:
The Laravel framework has a few system requirements. All of these requirements are satisfied by the Laravel Homestead virtual machine, so it's highly recommended that you use Homestead as your local Laravel development environment.
However, if you are not using Homestead, you will need to make sure your server meets the following requirements:
- PHP >= 7.2.5
- BCMath PHP Extension
- Ctype PHP Extension
- Fileinfo PHP extension
- JSON PHP Extension
- Mbstring PHP Extension
- OpenSSL PHP Extension
- PDO PHP Extension
- Tokenizer PHP Extension
- XML PHP Extension
Laravel using Homestead
Laravel strives to make the entire PHP development experience delightful, including your local development environment. Vagrant provides a simple, elegant way to manage and provision Virtual Machines.
Laravel Homestead is an official, pre-packaged Vagrant box that provides you a wonderful development environment without requiring you to install PHP, a web server, and any other server software on your local machine. No more worrying about messing up your operating system! Vagrant boxes are completely disposable. If something goes wrong, you can destroy and re-create the box in minutes!
Homestead runs on any Windows, Mac, or Linux system, and includes Nginx, PHP, MySQL, PostgreSQL, Redis, Memcached, Node, and all of the other goodies you need to develop amazing Laravel applications.
First Step
Before launching your Homestead environment, you must install VirtualBox 6.x, VMWare, Parallels or Hyper-V as well as Vagrant. All of these software packages provide easy-to-use visual installers for all popular operating systems.
We are going to install Virtual Box 6.1.4 and Vagrant on Ubuntu 18.04 and Windows 10.
Ubuntu:
- Virtual Box - 6.x - https://www.virtualbox.org/wiki/Downloads
sudo dpkg -i virtualbox-6.1_6.1.4-136177\~Ubuntu\~bionic_amd64.deb
- Vagrant - https://www.vagrantup.com/downloads.html
sudo dpkg -i vagrant_2.2.7_x86_64.deb
Windows:
It is straight forward, download the .exe from the respective website and open the downloaded file, follow the instruction and you are done.
Installing The Homestead Vagrant Box
Once VirtualBox and Vagrant have been installed, you should add the laravel/homestead box to your Vagrant installation.
$ vagrant box add laravel/homestead
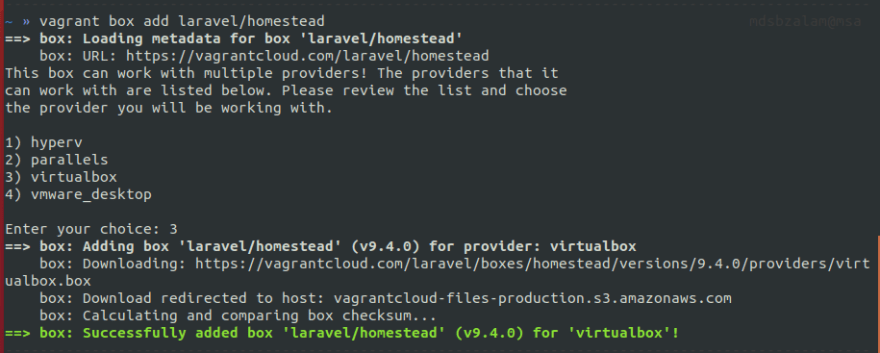

Note: Select 3, as we have installed Virtual Box and will be using that.
Installing Homestead
You may install Homestead by cloning the repository onto your host machine. Consider cloning the repository into a Homestead folder within your "home" directory, as the Homestead box will serve as the host to all of your Laravel projects:
Mac/Linux:
git clone https://github.com/laravel/homestead.git ~/Homestead
Windows:
git clone https://github.com/laravel/homestead.git Homestead
You may checkout the release branch which always contains the latest stable release
cd ~/Homestead
git checkout release
Once you have cloned the Homestead repository, run the bash init.sh or init.bat command from the Homestead directory to create the Homestead.yaml configuration file. The Homestead.yaml file will be placed in the Homestead directory:
// Mac / Linux...
bash init.sh

// Windows...
init.bat

As you can see, we have Homestead.yaml file now.
Homestead.yaml
---
ip: "192.168.10.10"
memory: 2048
cpus: 2
provider: virtualbox

authorize: ~/.ssh/id_rsa.pub

keys:
    - ~/.ssh/id_rsa

folders:
    - map: ~/code/laravel7
      to: /home/vagrant/laravel7/code

sites:
    - map: homestead.test
      to: /home/vagrant/code/laravel7/public

databases:
    - homestead

features:
    - mariadb: false
    - ohmyzsh: false
    - webdriver: false

# ports:
#     - send: 50000
#       to: 5000
#     - send: 7777
#       to: 777
#       protocol: udp
Windows users should not use the ~/ path syntax and instead should use the full path to their project, such as C:\Users\user\Code\project1.
Homestead.yaml on Windows
---
ip: "192.168.10.10"
memory: 2048
cpus: 2
provider: virtualbox

authorize: C:\Users\mdsbz\.ssh\id_rsa.pub

keys:
    - C:\Users\mdsbz\.ssh\id_rsa

folders:
    - map: C:\Users\mdsbz\code\laravel7
      to: /home/vagrant/code/laravel7

sites:
    - map: homestead.test
      to: /home/vagrant/code/laravel7/public

databases:
    - homestead

features:
    - mariadb: false
    - ohmyzsh: false
    - webdriver: false

# ports:
#     - send: 50000
#       to: 5000
#     - send: 7777
#       to: 777
#       protocol: udp
If you change the sites property after provisioning the Homestead box, you should re-run vagrant reload --provision to update the Nginx configuration on the virtual machine.
Using automatic hostnames works best for "per project" installations of Homestead. If you host multiple sites on a single Homestead instance, you may add the "domains" for your web sites to the hosts file on your machine. The hosts file will redirect requests for your Homestead sites into your Homestead machine. On Mac and Linux, this file is located at /etc/hosts. On Windows, it is located at C:\Windows\System32\drivers\etc\hosts. The lines you add to this file will look like the following:
Open /etc/hosts and add
192.168.10.10 homestead.test
It should look like this:
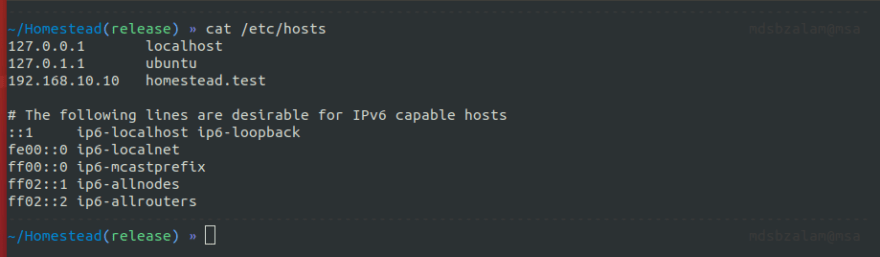
Once you have added the domain to your hosts file and launched the Vagrant box you will be able to access the site via your web browser: http://homestead.test
Once you have edited the Homestead.yaml to your liking, run the vagrant up command from your Homestead directory. Vagrant will boot the virtual machine and automatically configure your shared folders and Nginx sites.
Connecting Via SSH
vagrant ssh
Once installed, the laravel new command will create a fresh Laravel installation in the directory you specify. For instance, laravel new blog will create a directory named blog containing a fresh Laravel installation with all of Laravel's dependencies already installed:
laravel new blog
Creating Applications Including Authentication
If you are starting a brand new application and would like to include the authentication scaffolding, you may use the --auth directive when creating your application. This command will create a new application with all of the authentication scaffolding compiled and installed:
composer require laravel/ui
laravel new blog --auth
Creating Applications with Auth0 as Authentication

Laravel using XAMPP and Composer
First thing first, let's install XAMPP and Composer. I will be installing on Windows, this works on Max/Linux as well.
-
XAMPP

-
Composer:
- Windows Installer:
- The installer will download composer for you and set up your PATH environment variable so you can simply call composer from any directory.
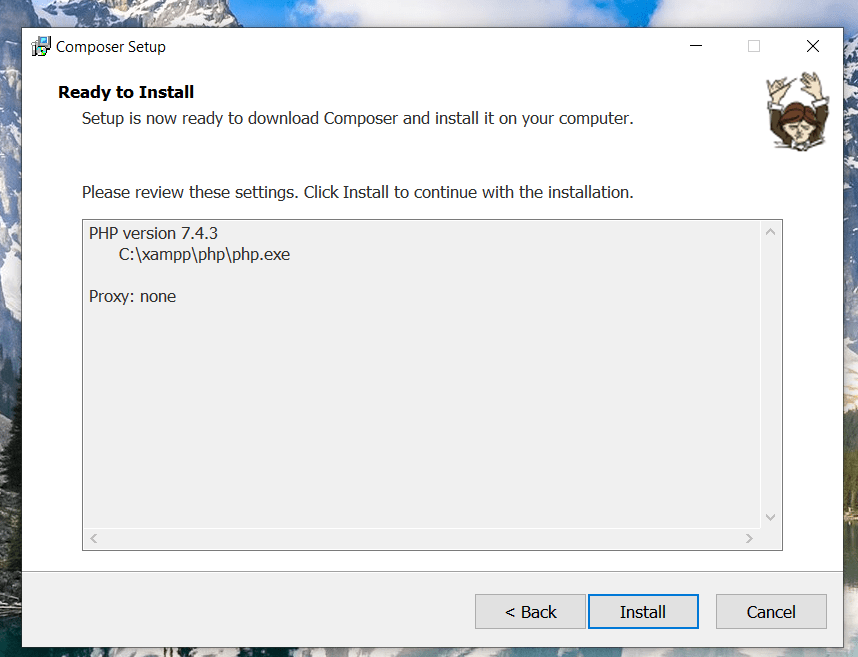
- Download and run Composer-Setup.exe - it will install the latest composer version whenever it is executed.
- Command-line installation
- To quickly install Composer in the current directory, run the following script in your terminal.
- Windows Installer:
php -r "copy('https://getcomposer.org/installer', 'composer-setup.php');"
php -r "if (hash_file('sha384', 'composer-setup.php') === 'e0012edf3e80b6978849f5eff0d4b4e4c79ff1609dd1e613307e16318854d24ae64f26d17af3ef0bf7cfb710ca74755a') { echo 'Installer verified'; } else { echo 'Installer corrupt'; unlink('composer-setup.php'); } echo PHP_EOL;"
php composer-setup.php
php -r "unlink('composer-setup.php');"
While installing Composer on windows. Please follow the following steps:


Creating Applications via Composer Create-Project
Now, Open up Power Shell, and run:
composer create-project --prefer-dist laravel/laravel blog
Creating Applications Including Authentication
If you are starting a brand new application and would like to include the authentication scaffolding, you may use the --auth directive when creating your application. This command will create a new application with all of the authentication scaffolding compiled and installed:
composer require laravel/ui
composer create-project --prefer-dist laravel/laravel blog --auth
Creating Applications with Auth0 as Authentication
Awesome!, You are now ready to create Laravel 7 Applications.

Top comments (0)