
Full stake dev guide
Solana - Dapp architecture
Tech stake-:
Nextjs, Anchor, Rust, and Phantom, solana tool suite, Solana web3.js
Overview
Building an NFT Minting and Transfer DApp on Solana with Next.js, Anchor, and Rust
Welcome In this guide, we'll walk you through building a dApp (decentralized application) on the Solana blockchain for minting and transferring non-fungible tokens (NFTs). We'll utilize the following technologies:
- Solana: The high-performance blockchain platform
- Next.js: A popular JavaScript framework for building fast and efficient React applications
- Anchor: A framework that simplifies smart contract development on Solana using Rust
- Rust: A powerful and memory-safe programming language used for Solana smart contracts
- Phantom: A popular Solana wallet for interacting with your dApp
- Solana Tool Suite: A collection of command-line tools for interacting with the Solana network
- Solana web3.js: A JavaScript library for interacting with the Solana blockchain from the front-end
What We'll Build:
Throughout this guide, we'll create a basic dApp that allows users to:
- Mint their own unique NFTs: Users will be able to mint NFT.
- Transfer NFTs to other users: Users will be able to securely transfer ownership of their NFTs to other Solana wallet addresses.
Ready to embark on this exciting journey into the world of Solana NFT development? Let's dive in!
The Dapp-guide code-repo available here
https://github.com/shivamSspirit/spl-tokens
Solana Dapps
Solana DApps: What Makes Them Special?
Solana dApps work like other blockchain apps but have their own unique features. Here's a simpler breakdown:
Similarities:
- They're decentralized apps, just like others on blockchain networks.
- They operate with decentralized governance and operation.
Differences:
- Solana uses its own special blockchain technology, unlike other platforms.
- Building Solana dApps requires specific tools and languages like Rust and Anchor, different from other blockchain systems.
Focus on Solana DApps:
This guide explores Solana dApps, helping you understand and create your own cool apps on this powerful blockchain platform.
Solana DApp Use Cases:
- Solana dApps are applications on the Solana blockchain.
- They serve purposes such as finance, gaming, trading digital assets, and buying/selling digital items.
- These dApps cater to various needs, including finance, gaming, and digital markets.
Some core pillers to build solana - dapp
Foundations of Running Things in a DApp:
Solana Tools:
- Rust
- Anchor
- Node.js
- Solana DApp Scaffold
Purpose Behind This:
The Solana Tools:
- These tools help prepare for building on a distributed ledger.
- For instance, Solana CLI is essential.
- Before diving into DApps, it's crucial to understand basic Solana CLI commands.
- Getting hands-on experience with web3 wallets and some test funds in those wallets helps interact with the live Devnet blockchain.
There are various ways to start building on Solana, but here, we'll focus on:
- Setting up the local system to build on the Solana Devnet cluster. (A cluster is simply a single-node replication of the blockchain.)
Checkpoint-0 check environment
Before You Begin, Install the Following Tools:
- Node
- Yarn
- Git
- Rust
- Solana Tools
- Anchor
Verify These Installations:
yarn -V
node --version
git --version
rustc --version
solana -V
anchor --version
Then, download the challenge to your computer and install dependencies by running:
git clone git@github.com:shivamSspirit/spl-tokens.git
cd spl-tokens
npm install (if error, use -f flag)
Now, you have an Anchor Solana DApp.
About DApp:
DApp Features:
- Connect to the DApp with the Devnet network using your Solana wallet (Phantom is recommended).
- Mint NFT SPL tokens
- Transfer tokens to another user or friend.
NOW
After setting up Solana tools and CLI, follow these steps:
- Visit: https://docs.solanalabs.com/cli/wallets/file-system
- Generate your file system wallet by using:
solana keygen
This command will generate a keypair, which is an account keypair used for signing transactions.
- In a blockchain development environment, we mainly build and manage transactions.
- Type:
solana address
You will receive your generated wallet public key, which looks like this:
OgxvVbhxGacHb92hzxogWQgVyuq4v4NdbYmPX6Hsv5Bz
Now, you have a file system wallet ready to interact with Solana DApps.
The Development Pillars of Solana
Solana tools provide a comprehensive understanding of how Solana operates under the hood. It offers:
- Wallet integration
- Blockchain node replication
- Low transaction costs
- Faster transaction completion
With raw Solana development (the traditional approach), we focus on:
- On-chain program processing
- Utilizing the BPF loader
The Program Entrypoint
In the Solana runtime, only the Solana program entrypoint is visible and called.
This entrypoint accepts a generic byte array containing serialized program parameters, including the program ID, accounts, instruction data, and more. Each loader comes with its own wrapper macro, which:
- Exports the raw entrypoint.
- Deserializes the parameters.
- Calls a user-defined instruction processing function.
- Returns the result.
Parameter Deserialization
In each loader, there's a helper function that simplifies the deserialization of the program's input parameters into Rust types. The entrypoint macros then automatically invoke this deserialization helper.
Data Types
The loader's entrypoint macros invoke the program-defined instruction processor function with the following parameters:
program_id: &Pubkey,
accounts: &[AccountInfo],
instruction_data: &[u8]
NoTe-:
The program ID is the on-chain deployed program ID.Accounts: If you're new to building on Solana, understand
that everything in Solana revolves around accounts.
Developers (users of web3) mainly manage accounts. There are
various types of accounts in Solana, which you'll grasp once
you delve deeper into the platform.The general-purpose program instruction data that will be referenced by accounts.
Before you transition from the Ethereum ecosystem:
You need to understand that in Solana, programs (similar to smart contracts in Ethereum) separate logic from data. However, for both, we require accounts for creating logic and managing data.
Move To Modern
This is about traditional Solana development with native Rust.
Now, Armani provides us with wings by creating a super useful Solana development framework:
Anchor by Armani.
When building with native Rust, complexities arise with serializing and deserializing accounts data.
However, with Anchor, you gain access to many useful features for building Solana programs, including the capability to develop full-stack DApps using the Anchor framework.
Now root here and clone this repo
git clone git@github.com:shivamSspirit/spl-tokens.git
💡 This is an Anchor DApp architecture.
At the start, you don't need to know about all files. As we progress, we will cover them.
Initially, keep in mind these files:
-
The main setup for the DApp is automatically provided by Anchor.
- app
- programs
- test
- utils
- anchor.toml
The first directory is app. This contains the client interaction with the Solana on-chain deployed program.
programs: This directory contains the Solana program that we want to build for this DApp.
test: This directory is for testing the on-chain program before deploying it to the client.
utils: This directory contains utility helper methods we need to manage DApp functionality.
-
anchor.toml is the DApp-runner file, which will build the DApp environment for:
- Building
- Deploying
- Testing
- Managing Solana programs.
The program we want to build for this guide is the SPL NFT mint and transfer.
You can learn more about Solana NFTs here.
As for the DApp features, let's walk through them:
Users will connect their Phantom wallet extension (compatible with Solana wallets) and switch their cluster to Devnet. Once connected, users can mint and transfer the NFT to another user.
Do you know what mint means? If not, it's important to learn.
Now, what are the important things you need to learn and be aware of?
First, from the smart contract side
As you are aware, Anchor provides us with good functionality.
It is built using Rust and abstracts some utilities in certain Rust macros and traits.
Reviewing Anchor-Compatible Solana Programs
The program will consist of three parts:
- The program module
- The account structs
- The declare ID macro
In the program module, you will utilize accounts data and manage that data (the business logic).
For the account structs, in Anchor, we can provide a context (like an object) of accounts for better validation of accounts running the DApp, eliminating the need to provide an array of accounts.
The declare ID macro creates an ID field that stores the address of your program. This is the first code you'll see when you generate a new Anchor project on your own.
// Use this import to gain access to common Anchor features
use anchor_lang::prelude::*;

// Declare an ID for your program
declare_id!("Fg6PaFpoGXkYsidMpWTK6W2BeZ7FEfcYkg476zPFsLnS");

// Write your business logic here
#[program]
mod hello_anchor {
    use super::*;
    pub fn initialize(_ctx: Context<Initialize>) -> Result<()> {
        Ok(())
    }
}

// Validate incoming accounts here
#[derive(Accounts)]
pub struct Initialize {}
Go to anchor.toml and learn about it here.
This will generate a provider for all Anchor commands to interact with the Solana DApp.
[provider]
cluster = "devnet"                   # The cluster used for all commands.
wallet = "~/.config/solana/id.json"  # The keypair used for all commands.
You know about wallets, right? This is our filesystem wallet path. Find it in your system and put the path of your generated keypair here.
Next, we have the cluster. You also know about the Solana blockchain node (a distributed state replication). We're discussing the test file here, so Anchor allows you to build a script for testing environments in Anchor Solana DApps.
Some features you need to set up to instruct the IDL generation of the backend system on what to add or not.
Next is the programs section:
tomlCopy code
[programs.devnet]
spltokens = "3ocdHhxYMDArmD5JXrAgrw1caHE3C76HvMD1dquEhX3S"
This includes the addresses of the programs in the workspace.
The programs.devnet is used during testing on devnet where it's possible to load a program at genesis with the --bpf-program option on solana-test-validator.
NOW Dive into Program
Now, let's dive into our SPL NFT mint and transfer program.
First, ensure you've cloned and installed the dependencies on your own system. If not, set it up according to your operating system requirements.
Navigate to the program directory and then to spltokens/src/cargo.toml. This file contains the packages (dependencies) and crates you'll need to use and manage with imports in our Anchor programs.
Next, go to the lib.rs file. This serves as the entry point file for our Solana program. Here, you'll encounter three key components of an Anchor program, which you learned about earlier in this guide: imports, program ID, and program module.
Here's a snippet of what you'll see:
use anchor_lang::prelude::*;
pub mod instructions;
pub use instructions::*;
These are some imports including primitives and local module imports needed to build our program.
Next, you'll encounter our program ID:
declare_id!("3ocdHhxYMDArmD5JXrAgrw1caHE3C76HvMD1dquEhX3S");
Lastly, you'll see the program module named spltokens, which contains some instructional methods to build things around SPL tokens (both non-fungible and fungible). For our current focus on learning DApp architecture, we're interested in just two methods:
#[program]
pub mod spltokens {
    use super::*;

    pub fn mint_nft(ctx: Context<MintNFT>, name: String, symbol: String, uri: String) -> Result<()>
    {
        mint_nft::mint_nft(ctx, name, symbol, uri)
    }

    pub fn mint_token(ctx: Context<MintToken>, _decimals:u8, name: String, symbol: String, uri: String, amount: u64) -> Result<()>
    {
        mint_token::mint_token(ctx, _decimals, name, symbol, uri, amount)
    }

    pub fn transfer_tokens(ctx: Context<TransferToken>, amount: u64) -> Result<()>
    {
        transfer_token::transfer_tokens(ctx, amount)
    }
}
These methods are responsible for minting NFTs, minting tokens, and transferring tokens, respectively.
use super::*;
This will inherit and apply all under-the-hood methods for building contract business logic.
Now, let's first move to...
 pub fn mint_nft(ctx: Context<MintNFT>, name: String, symbol: String, uri: String) -> Result<()>
    {
        mint_nft::mint_nft(ctx, name, symbol, uri)
    }
This is simply a Rust function, as in programming languages. It takes some parameters and assigns those parameters into instruction methods.
Now, let's navigate to the instruction instruction/mint_nft. Check lines 64 to 101. This section covers the account creation phase in the Anchor program. For NFTs, we need to build accounts around:
- Solana native program
- Token program
- System program
- Token metadata program
- Metaplex program
We won't delve deeply into account creation in this DApp architecture guide. You'll need to experience use cases to build around accounts.
After the account phase (which takes input from the client and sends them to provide business logic to process), behind the scenes, accounts are assigned to Solana native programs to serve their required or lifetime information of that program.
Now, let's talk about the business logic:
The algorithm is as follows:
- First, we receive some parameters and context.
- In the first parameter, we can only provide account context.
- Then, in the subsequent parameters, we put some general data and arguments that we process around NFT metadata (we won't explain what a master edition is here, just the mint and transfer mechanism).
For minting:
- We need to create a CPI (Cross-Program Invocation) context to call the token program to create a token mint account to simply store the mint key and a reference for that token metadata.
- We are setting up the context account and then making a CPI to the Metaplex program to create the metadata account for this NFT.
This is all about NFT minting as a developer.
💡 Now we are moving to spl token transfer
Let's discuss ins/transfer-tokens.
Here, we're simply creating another CPI context to call the token program methods for transferring SPL tokens under the token program environment
NOW we are Able to
To build and deploy your Solana program locally,
follow these steps:
- Run
anchor buildin the root folder namedspl tokens. - After a successful build, run
solana config getto get your cluster configuration details. - Open another terminal in the same folder and run
solana-test-validator. This will start your local cluster.
Now that you're all set to deploy your Solana program:
- First, get some devnet SOL from the faucet by running
solana airdrop 4. - After a successful airdrop, run
anchor deploy. This will give you a program ID, which contains all the information about your program in the Solana blockchain.
Next, update the program ID in your anchor.toml and Solana program entrypoint Rust file. Then, rebuild the Solana program and redeploy it.
Now, let's discuss testing:
- Navigate to the
testdirectory in the root folder and then to the test file. - Here, we'll engage in two test cases: mint NFT and transfer NFT.
- We'll set up a provider for the program and create a program API to send transactions through RPC requests to our Solana on-chain program. We'll fetch types from our Anchor build in the
targetfolder.
Regarding the testing process:
- We'll create accounts and set up UMI client wrapper for building things around token metadata.
- Then, we'll curate our first transaction by calling our Solana program methods and sending accounts and required params to mint an NFT.
Moving on to the transfer test case:
- We'll set up the minted token mint public key and create required ATAs (Associated Token Accounts) and destination accounts to curate and send transactions to the deployed on-chain program.
This concludes the backend setup. Now,
Let's move to our DApp client interaction:
- Navigate to the
appdirectory. This is a Solana DApp scaffold project architecture, preconfigured for building frontend using Next.js, TypeScript, and Solana-compatible wallet providers and package dependencies. - Learn about this scaffold architecture and how to integrate it with the frontend. You can explore components like the NFT mint button and NFT card.
- Manage the IDL (Interface Description Language) generated by the Solana program to bridge the other side of the program: the client side.
Understanding Requirements and Similarities
How It's Similar to Anchor Tests
Remember the Anchor tests we discussed? They involved creating and transferring tokens using specific commands (RPC calls). We're going to use these same types of commands here.
Adding More Layers to Our DApp
We're enhancing our DApp by adding an extra layer. This isn't just for show – it helps display the current state of the DApp in the user interface.
First Steps: Setting Up
Before we dive in, let's make sure everything is ready:
- Check your computer's Node version.
- Install the Phantom extension and set up a new wallet.
- Go to the settings in your wallet and switch the cluster to Devnet – this is our playground for development.
Exploring the App Directory
Now, let's get to the heart of our setup – the Next.js framework we're using. It's based on a template provided by Solana Labs. In our project, you'll see a folder named "app" – this is where the magic happens.
Inside the "app" directory, our DApp combines several technologies:
• Solidity and Solang for the contract logic
• Next.js and Tailwind for the website part
• Anchor, Zustand, and Solana Wallet Adapter for connecting everything together
We'll be focusing on specific files in this directory:
• For integrating the contract:
◦ [idl] – This file describes the interface of our contract.
◦ [contracttypes] – Here, we define the types used in our contract.
• For running the DApp state:
◦ [_app.tsx] – The main file that runs our DApp.
◦ [context] – This manages the shared data within our app.
• For the user interface and helper functions:
◦ [ui view] – The visual part of our DApp.
◦ [component] – These are the building blocks of our user interface.
Setting Up Wallet, Provider, and Program API for Transactions
Integrating the Contract:
First, when you run anchor build for your contract, Anchor creates a "target" folder for your Solana program. In this folder, you'll find the deploy script, the IDL (Interface Description Language) file, and a directory for types.
IDL is like a blueprint for our program. It describes how our program should work.
We need to connect the blockchain part of our DApp (which runs in its own special environment) to the frontend (which uses different tools and languages). The IDL file acts as a bridge, using RPC protocols to make this connection.
RPC (Remote Procedure Call) is a set of methods we use to send requests to the Solana network.
The IDL file includes all the instructions and the program ID. The "types" directory gives us special Anchor types for sending these RPC calls.
Setting Up the Cluster and Wallet
To connect everything, we need:
A cluster, which is like a specific area of the blockchain network where we send our transactions.
A wallet for interacting with the DApp, which signs transactions and provides a public key.
By combining these, we set up an Anchor provider, which simplifies integrating the contract.
Using Wallet and Contexts
In our context directory, we define certain contexts and export them for use in other parts of our DApp. We need the network (our cluster) and the wallet (using Solana Wallet Adapter) for this. These are already set up, with configurations in their respective files.
In Next.js _app.tsx file
We use a main context provider in our Next.js _app file. Once we have the wallet and connection ready, we move to the next step.
Getting the Program API:
In the mintNftbutton component, we start by importing our contract's IDL.
import idl from "../../idl.json";
We then establish a connection, configure the wallet, and import necessary methods from various packages.
Set up the program id (the ID of our deployed Solana program).
const programId = new PublicKey(idl.metadata.address);
Use these hooks to access the connection and wallet states.
const { connection } = useConnection();
const wallet = useWallet();
const { publicKey, sendTransaction } = useWallet();```


Acquiring the Program API:
Create a provider with `new AnchorProvider(connection, wallet as any, opts);` using the wallet and connection. Then use the Anchor Program API to create an instance of our Solana program API.


```tsx
const getProgram = () => {
    const provider = new AnchorProvider(connection, wallet as any, opts);
    const program = new Program(idl as Idl, programId, provider);
    return program;
};
Generating an RPC Call
Now, you can make an RPC call with the program:
const tx = await program.methods
        .mintNft(MetaData.name, MetaData.symbol, MetaData.uri)
        .accounts({
          signer: wallet.publicKey,
          mint: mintKeypair.publicKey,
          associatedTokenAccount,
          metadataAccount,
          masterEditionAccount,
          tokenProgram: TOKEN_PROGRAM_ID,
          associatedTokenProgram: ASSOCIATED_TOKEN_PROGRAM_ID,
          tokenMetadataProgram: MPL_TOKEN_METADATA_PROGRAM_ID,
          systemProgram: anchor.web3.SystemProgram.programId,
          rent: anchor.web3.SYSVAR_RENT_PUBKEY,
        })
        .signers([mintKeypair])
        .rpc();
This is similar to a function call in rust:
  pub fn mint_nft(ctx: Context<MintNFT>, name: String, symbol: String, uri: String) -> Result<()>
    {
        mint_nft::mint_nft(ctx, name, symbol, uri)
    }
Remember, these operations are asynchronous because we're using Solana's Web3 JS.
we can use same setup for build our next instruction to transfer nft to another solana wallet
like this
const tx = await program.methods
.transferTokens(new BN(1))
.accounts({
from: publicKey,
fromAta: sellerTokenAccount,
toAta: buyerTokenAccount,
tokenProgram: TOKEN_PROGRAM_ID
}).rpc({ skipPreflight: true });
How you can use the Dapp-:
Go to app dir
Start the project:
npm run dev
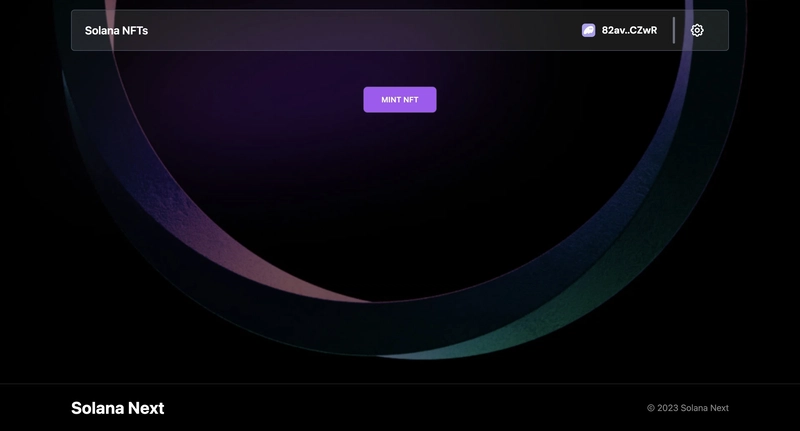
Open http://localhost:3000 with your browser to see the DApp.
Using the DAPP
Connect your wallet to the DAPP by clicking on the "Select Wallet" button.
You can switch the network of the dapp from the header.
Now click on Mint NFT, once you sign the transaction a Token Account will be created for the NFT and NFT will be minted in your wallet.
You can see the minted NFT and the NFT details on the screen
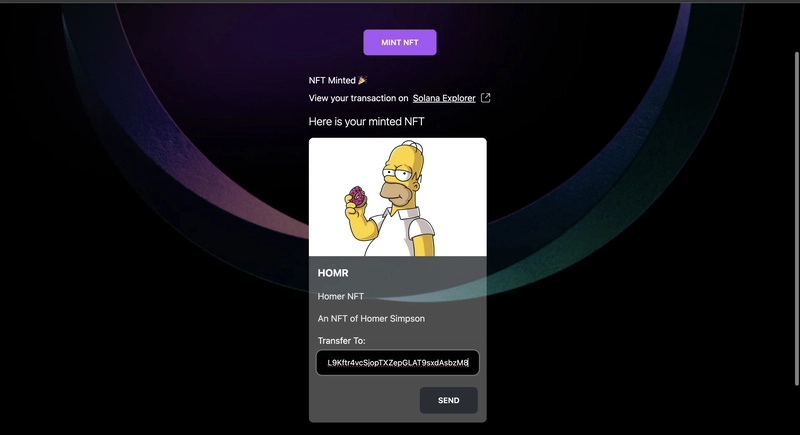
To transfer the NFT to another wallet, enter the wallet address in the input box, click SEND, and after signing the transaction your NFT will be transferred to another wallet.
After transfer the screen will look like this

Creating the similar DApp
- To create the similar Dapp you need to have pre knowledge of react and basic of spl token and solana NFTs.
- You can use the code from the repository and modify it according to your need.
- You can also use the code from the repository and deploy it on vercel or netlify to create your own DApp.

Top comments (0)