React.js is an open source JavaScript library for creating user interfaces. It was created by Facebook back in 2013.
Demand for React developers is skyrocketing, which means that having knowledge of this library is definitely going to be worth it! Some of the popular websites built using ReactJS include Dropbox, Netflix, and Instacart – and the list goes on.
Now, the common question that comes to everyone's mind is do we really need a JavaScript library, just for creating user interfaces? We can do the same using just HTML and CSS, right?
So what makes React so popular rather than just using vanilla HTML, CSS, and JavaScript? For that, let's first look at the 2 main features of React:
Declarative Views
Component Based Approach
Of course there is more to React than this, but we'll focus on these two features here. Before moving on and learning more about these features, we must clearly understand the browser DOM.
What is the DOM?
The DOM (Document Object Model) represents the web page as a tree structure. Any piece of HTML that we write is added as a node, to this tree.
With JavaScript, we can access any of these nodes (HTML elements) and update their styles, attributes, and so on. This means that the DOM enables JavaScript to access and modify the web page easily.
Now, any tree must have a root node, right? Here, the root node is document. Are you wondering where this document node came from? Well, it's part of the browser. Any HTML tag you write is going to be a direct or indirect child of the root node document.

DOM tree with root node as document
The below image shows the equivalent conceptual tree structure of the DOM:

Browser DOM tree
Now hopefully you have a clear understanding of the browser DOM. So let's dive into the two main features of ReactJS that we're gonna discuss today, namely its component-based approach and declarative views.
Component-Based Approach
Everything in React is a component. A web page is a collection of components.
Think of a component like a regular function in any programming language. What are the main advantages of functions? Reusability, abstraction, and avoiding redundant code, right?
Same with components in React. Don't get confused with the code in the below images, as we are using a mix of HTML and JavaScript. Hang in there, we will come to that in a second.

The above image represents a component called Card (since the function name is Card). As mentioned earlier, functions or components can be reused any number of times. That is exactly what we are doing in the below image. We are reusing the Card component () four times. Keep in mind that, writing is equivalent to . (Stick to the former notation, since it's more common).
Card Component reused multiple times
Congrats if you thought of this! The four components are written inside another component called Home (since the function name is Home, ). Congrats again if you thought of this!
Of course you can reuse the component, which in turn is a collection of many components. That is, we can nest any number of components inside other components.
Now comes a big question: if components are going to be nested like we mentioned, what is the topmost component? It's the component (provided by React). Any custom component that you write is going to be a direct or indirect child of the App component in React.
On a high level, the whole component structure looks like a tree with the root node as App.
Also keep in mind that component names have their first letter capitalized. This convention is used to distinguish between a React component and a regular HTML tag.
What happens if you don't capitalize the first letter of a component name? There will be an ambiguity, whether it is an HTML tag or a React component.
In the below image, the Navbar, Carousal, Services and so on are all components. Components altogether form the home page or Home component of a website. Neat, isn't it?

Home page consisting of Navbar, Carousal, Services etc components
Components are laid out in the order in which they should appear in the page. Here, the Navbar comes first, at the top, then the Carousal comes below the Navbar, so on and so forth.
If you carefully observe the above images, we are using a mix of both JavaScript and HTML. This is known as JSX (Javscript XML). This is just a nice way to

Weird isn't it ? This is JSX
In the above image, we are assigning HTML to a variable named element, just like we assign values to variables in JavaScript. Of course, you can now reuse this variable (element) anywhere in your code like this:
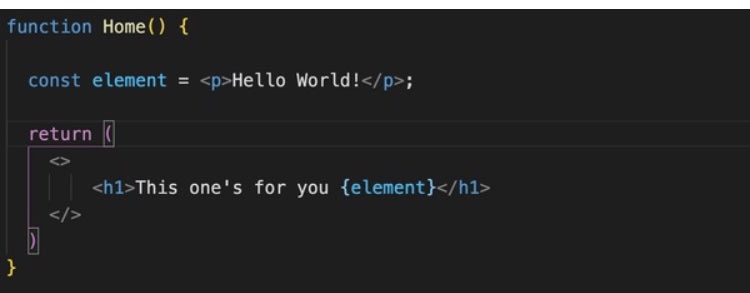
Output of the above code
And that's it about components in React. Now let's move onto the next feature.
Declarative Views in React
In React, we don't actually interact with the browser DOM. Yes, you heard it right! We interact with the virtual DOM, which is an exact copy of the browser DOM, but in memory.
Yeah! We are dealing with a new DOM, other than the browser DOM. This means that any React component that we write is inserted as a child to the virtual DOM.
You must be wondering, what why do we need this virtual DOM when we already have the browser DOM? The virtual DOM is the reason React renders so quickly and efficiently.
When we update the browser DOM (when not using React), it takes a significant amount of time to lay out the elements and repaint the screen for the user to see changes. This involves a huge section of the DOM tree being repainted.
But, when using React, updates happen in the virtual DOM first. Then, the browser DOM and virtual DOM are diffed or compared to see if there are any updates made to virtual DOM that must be reflected or updated in the browser DOM.
If there are any, only then are updates made to the browser DOM to match the virtual DOM. And these updates are only made at places where updates are to be carried out. This means that the entire browser DOM is not updated as previously mentioned. This improves speed and efficiency.

Only part of the DOM is getting updated, instead of whole
Advantages of React
Now that you know the main features of React, let's understand the advantages of using it.
Code Maintainability, because we can now reuse components and break complex logic into smaller parts.
Fast and Performant, because only part of the browser DOM is updated instead of the whole thing.
One way Data Flow, which means that data flow is possible only from the parent component to child components. That is, components are nested, with the top most component being App. This keeps everything modular.
Easy to learn and use, development time is less and learning curve is small.
Suppose you want to build a complex web application. You want it to be fast and performant, and you don't have a lot of time to develop it. In this case, React should be on top of your list!
Now you hopefully understand why React is so popular even though we can build a website with just HTML, CSS, and JavaScript.
Now let's see, how to set up React on your machine and create a brand new project.
How to Start a New React Project
Step 1 – Install Node
Before even thinking about React, you must have Node installed properly. This is because by installing Node you also get npm, which is a package manager for JavaScript. Think of it as an application you can use to download additional libraries, which you might need in your project.
Download and install it from here: https://nodejs.org/en/download/ (Download the LTS version).
After installation, open your terminal (Mac or Linux) or command prompt (Windows) and type in npm -v and it should output something like this:

Step 2 – Create your React app
Now, it's time to install a tool which makes it easy to build a React project. Congrats! You may have guessed that I'm talking about create-react-app.
Type in the command npm install create-react-app and wait for few seconds.

Step 3 – Set up your React web app
Now let's start setting up our very first React web application. Let's name it myreactapp.
For starting a new React project, type in the following command: npx create-react-app myreactapp.
The general syntax is npx create-react-app (and note that it's npx not npm, don't get confused :) ).


Continuation of above image
Step 4 – Open your new React app
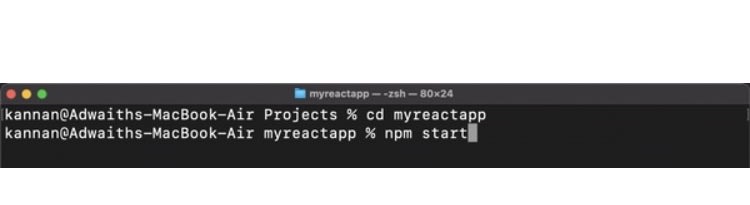
Now it's time to see our React app in action. For that, move into the created project (myreactapp as we created it in the previous step) by using the command cd myreactapp and type in the following: npm start.
Now this command opens up a browser with our newly created React App:

And that's it! You have successfully setup React on your machine, and have started a brand new project.
And now you are ready to grasp bigger concepts in React! Happy hacking

Latest comments (0)