1. Installing Freighter
In this section, we will guide you through the installation process of Freighter, a non-custodial Stellar wallet extension that will empower you to engage with Soroswap.Finance
Step 1: Installing Freighter on your Browser
Freighter works as a Extension in Chrome (Google Chrome, Brave) and Firefox:
Visit the Freighter Official Website, to install Freighter into your browser.
Click on "Create Account" and choose a secure password.
Step 2: Safeguarding Your Wallet
Upon creating your account, you will be presented with a secret recovery phrase. This phrase acts as a backup for your wallet's private key, allowing you to restore your wallet in case of loss, theft, or device damage.

Follow these important guidelines to protect your funds:
Save the Seed Phrase: Keep your seed phrase in a safe place. Treat it as a valuable key to your funds and store it confidentially.
Secure Storage: Store the seed phrase in a secure location, such as a locked drawer or a password-protected digital storage solution. Ensure it is shielded from unauthorized access and potential loss.
Exercise Caution: Remember, anyone with access to your seed phrase can gain control over your wallet and its contents. Take the necessary precautions to safeguard it diligently.
Step 3: Confirming Your Seed Phrase
To ensure accuracy, you will be asked to confirm your seed phrase in the same order. This step guarantees that you have correctly noted down your recovery phrase.

Step 4: Accessing Your Wallet
Congratulations! You are now ready to use your Freighter wallet. Follow these final steps:
- Open the Freighter extension in your browser.

Your account will be displayed, labeled as "Account 1," along with your unique account address. This address serves as an identifier for receiving funds or transactions from other users or entities on the blockchain network.
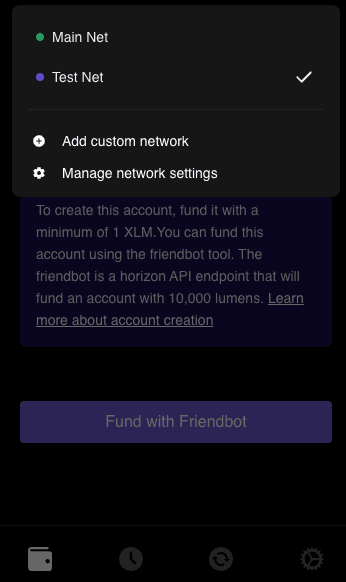
Click on the "Main Net" button located at the top right corner to explore the networks:
Mainnet: The live and fully operational blockchain network where real transactions occur.
Testnet: A simulated environment for testing and experimentation
- Since Soroswap is currently in the Soroban Testnet environment, we will proceed with the tutorial using the Testnet setting. By utilizing the testnet, we can safely explore and demonstrate the functionalities of Soroswap without any concerns about real-world financial implications.
Step 5: Let's Dive into the Tutorial
Congratulations! You are now fully equipped to embark on an exciting journey with Soroswap on the testnet. Get ready to explore and make the most of Soroswap's comprehensive range of features within this secure testing environment. Let's dive right into the tutorial and unlock the full potential of your Soroswap experience!

Top comments (0)