
The more complex our systems get, the more resource intensive our processes and requests become. Shifting from human-prone errors, we will find ourselves dealing with the unexpected ways users interact with our system or limitations placed on the external API our projects interact with. Additionally, we might opt to control how users interact with these resources.
This tutorial shows you how to build a request-throttling API. We will implement a blog application with Strapi to show how to limit client requests to specific endpoints with Redis. Along the way, we will discover and use Redis, understand what request objects contain, and intercept the requests made against our application.
Prerequisites
For a practical approach to request throttling, we shall implement a blog application with Strapi and Redis. Thus, before we start, you should have the following installed locally:
- An understanding of JavaScript and a Node.js -ready environment.
- Redis installed and running on your host machine.
- Basic understanding of Strapi.
Request Throttling - The 429
Request throttling is the process of limiting the number of requests that a client can make to a server within a given amount of time. It is a means of control of the utilization of resources used by a specific client, where the server takes precedence while the client obliges - the server before the client. We do this for several reasons:
- We want to prevent server overload: Common resource-intensive requests that perform data manipulation, such as image processing against the CPU or RAM.
- Our product costs should be kept in check: This is often the case when interacting with a 3rd party API like Google Maps, LinkedIn, etc.
- Prevent server abuse - The Denial Of Service attack, DoS: For example, our server application returns weather information about a location based on the user's IP address. To prevent multiple calls to this API by whatever client is using it, we can limit the count of the requests per period of time.
We, therefore, handle the multiple concurrent requests as a 429, meaning too many requests have been made within the time frame.
Approaches to throttling
- Hard throttling - the requests will never reach the throttle limit.
- Soft throttling - the number of requests can exceed the throttle limit by a specific percentage.
- Dynamic throttling - requests are processed even if the request limit is reached, provided the server has available resources.
Algorithms in throttling
a) Fixed window algorithm:
In plain terms, within a given period, say, 0800 - 0805HRS, our algorithm will limit the number of requests against the 5 minutes provided regardless of whether the requests started at 0800 or 0804HRS.
b) Sliding window algorithm:
When a request is made against our server, we count the number of times against the initial request. Rather than placing all our trust in the timestamp, we start the time counter when the initial request is made.
Along with the aforementioned, we have the leaky counter or token bucket algorithm, which can be used as a throttling algorithm but fall out of the scope of this piece.
What is Redis?
Redis is an in-memory data store often used as a cache or database. It is designed for high performance and can store and retrieve data quickly. We can store session data in web applications, cache frequently accessed data, and implement real-time features such as chat and messaging. It is also commonly used as a message broker, much like RabbitMQ, in distributed systems.
Project setup - Scaffolding our Strapi Project
Let us go ahead and scaffold the project.
    npx create-strapi-app blog-api --quickstart
    # OR
    yarn create strapi-app blog-api --quick start
Using either of the above will generate a Strapi project, blog-api in the current working directory and launch our Nodejs project on the default port, http://localhost:1337/admin..
Go ahead, create your administrative account and open your dashboard.

Creating a collection and the blog API
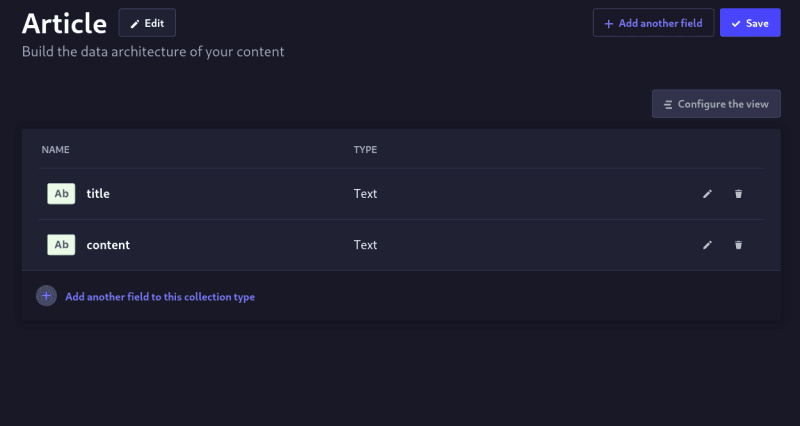
Because this is a simple blog application, we will create a schema, a collection type, that holds an article. Our article will have a title and its content, both of type text.

For the field, such as the title, hit continue and add the name. You can modify the title from the Advanced Settings tab to be unique and required.

We do the same for the content field, only this time, we specify it as a long text field. We should end up with the below article content type.
Hit save, wait for the server to restart and create an article.
By default, Strapi creates a User collection type(next to the article collection type). Based on this, let us create a new entry and, for this guide, add this user to the Authenticated role.

To fetch articles using the API and as an authenticated user, we need to give the administrator API access to articles.
Navigate to Settings, User & Permission plugin > Roles and modify the Authenticated role to have access to all articles and a single one both in read mode.

All said and done, launch your Postman or whatever client you have for testing API.

Create a collection and name it Strapi tests.

Hit save, and navigate to your created collection to create a request. We shall create two endpoints:
- Login with the URL http://localhost:1337/api/auth/local.
- Articles with the URL: http://localhost:1337/api/articles.
For the login authentication, our params will look like below, where the identifier and password are the username and password, respectively. Go ahead and authenticate your user.

Afterward, hit the article API to see your articles using the jwt from your user as a bearer token.
Understanding Middleware - Intercepting Requests
Middleware is code that sits between your business logic, your back-end, and your client application. Its purpose is to perform tasks such as logging (which user is doing what), caching, or request limiting, as we are about to do.
In Strapi, we have two kinds of middleware: the global Strapi middleware and the Route level middleware. More details of this difference can be found here.
Let’s focus on route middleware and cap how many times users get to query for articles from our page.
npx strapi generate
The result would look as below:

Select middleware, and proceed to fill in its details as below:

The file generated should look as below:
    // src/api/article/middlewares/request-limiter.js
    'use strict';

    /**
     * `request-limiter` middleware
     */

    module.exports = (config, { strapi }) => {
      // Add your own logic here.
      return async (ctx, next) => {
        strapi.log.info('In request-limiter middleware.');

        await next();
      };
    };
Before our requests hit the database, we shall place our middleware, rate-limiter, on our API route for article. So we transform our route src/api/article/routes/article.js from its default:
    "use strict";

    /**
     * article router
     */

    const { createCoreRouter } = require("@strapi/strapi").factories;

    module.exports = createCoreRouter("api::article.article");
To a version that includes our middleware:
    "use strict";

    /**
     * article router
     * src/api/article/routes/article.js
     */

    const { createCoreRouter } = require("@strapi/strapi").factories;

    module.exports = createCoreRouter("api::article.article", {
      config: {
        find: {
        /*
        where the array below specifies the path of the request-limiter file,
        src/api/article/middlewares/request-limiter.js , exclulding
        the middleware section of the path
        */
          middlewares: ["api::article.request-limiter"],
        },
      },
    });
The above implies that every time our API calls find to return a list of articles, our custom middleware will be called. You can modify this to work on any other methods, such as findOne, create, update , and delete, which are all part of the core routers.
You can also find out the path of your middleware using the CLI that comes along with Strapi.
npx strapi middlewares:list
Repeating our call to api/articles will show the info log: In request-limiter middleware on our terminal.
Integrating Redis with Strapi
With Redis installed, we need a client between it and the Node application. Thus, in comes ioredis, a community-driven Node client for Redis. We also go ahead and install Moment.js, a JavaScript library around time.
npm i ioredis moment
A typical request will contain the header, method, body, params, and user object, to mention a few details. In Strapi, this is attached to the ctx.request object and is called from either the controller or policies (more on this can be seen here).
Back to the request-limiter, our focal point will be ctx, a context-object with all the requested information. Within this, we will look for the user attached to a request and modify the response object based on the count of requests our API will allow. We will answer:
- How many requests should a user make in a given period of time?
- What response should we give when they exceed this count?
We will use Redis to store the user id against their requests count. To boilerplate, we try to get the user based on their ID from Redis and perform operations around that. In the event something fails, we catch the error.
    'use strict';

    /**
     * `request-limiter` middleware
     */

    const redis = require("ioredis");
    const redisClient = redis.createClient();
    const moment = require("moment");

    module.exports = (config, { strapi }) => {
      return async (ctx, next) => {
        try {
          strapi.log.info("In request-limiter middleware.");
          // check if redis key exists
          // will return 1 or 0
          const userExists = await redisClient.exists(ctx.state.user.id);
          if (userExists === 1) {
            strapi.log.info("User exists in redis.");
          }
          else {
            strapi.log.info( "User does not exist in redis.");
          }

          await next();
        } catch (err) {
          strapi.log.error(err);
          throw err;
        }

      };
    };
Note the following line, where we use Redis to check for the existence of a user based on their id.
const userExists = await redisClient.exists(ctx.state.user.id)
Once a user hits the server, we check whether we have a record of them doing so. If we do, we check the count of requests they have within the time period (1 minute). Let us begin with what happens when the user exists.
For this implementation, we will use the fixed-window algorithm; a user can hit our server X times within a given period, no matter when they start.
    strapi.log.info("User exists in redis.");
    const reply = await redisClient.get(ctx.state.user.id);
    const requestDetails = JSON.parse(reply);
    const currentTime = moment().unix();
    const time_difference = (currentTime - requestDetails.startTime) / 60;

    // reset the count if the difference is greater than 1 minute
    if (time_difference >= 1) {
      const body = {
        count: 1,
        startTime: moment().unix(),
      };
      await redisClient.set(ctx.state.user.id, JSON.stringify(body));
      next();
      // increment the count if the difference is less than 1 minute
      // where 10 is the number of requests we allow within the time frame
    } else if (time_difference < 1 && requestDetails.count <= 10) {
      requestDetails.count++;
      await redisClient.set(
        ctx.state.user.id,
        JSON.stringify(requestDetails)
      );
      next();
      // return error if the difference is less than 1 minute and count is greater than 3
    } else {
      strapi.log.error("throttled limit exceeded...");
      ctx.response.status = 429;
      ctx.response.body = {
        error: "Unable to process request",
        message: "throttled limit exceeded...",
      };
      return;
    }
Now that our user is known to exist, we fetch and parse the request history attached to them. We also use momentjs to get the current time. Based on this, we get the difference from the start time of their initial request and divide it by 60 to convert it to seconds.
There are three ways this can pan out:
- The time between the initial and current requests is over one minute.
- The time between the initial and current requests is less than a minute, and the count of requests is also less than the threshold.
- If all the above conditions are not met, the user has hit our endpoint more than the threshold we allow in the period set (1 minute).
In the first case, we reset the user's request information and start counting from 1 once more. In the second, we will simply update the request information of this user and update their request count; in the third, we let them know that they have reached the limit.
What if our user does not exist?
Now, we have to account for the instance where Redis, our in-memory store, has no record of this user ever making a request. In this case, we create a new key-value pair with their id, count of requests (starting at one as this is their first request), and the current Unix time as the start time.
    // user does not exist. Add a new key-value pair with count as 1

    const body = { count: 1, startTime: moment().unix() };
    await redisClient.set(ctx.state.user.id, JSON.stringify(body));
Result
Altogether, our limiter will look as below, having refactored the request count to a global constant.
    'use strict';

    /**
     * `request-limiter` middleware
     */

    const THROTTLE_LIMIT = 3;
    const redis = require("ioredis");
    const redisClient = redis.createClient();
    const moment = require("moment");

    module.exports = (config, { strapi }) => {
      // Add your own logic here.
      return async (ctx, next) => {
        try {
          // check if redis key exists
          const userExists = await redisClient.exists(ctx.state.user.id);
          if (userExists === 1) {
            const reply = await redisClient.get(ctx.state.user.id);
            const requestDetails = JSON.parse(reply);
            const currentTime = moment().unix();
            const time_difference = (currentTime - requestDetails.startTime) / 60;

            // reset the count if the difference is greater than 1 minute
            if (time_difference >= 1) {
              const body = {
                count: 1,
                startTime: moment().unix(),
              };
              await redisClient.set(ctx.state.user.id, JSON.stringify(body));
              next();
              // increment the count if the time_difference is less than 1 minute
            } else if (time_difference < 1 && requestDetails.count <= THROTTLE_LIMIT) {
              requestDetails.count++;
              await redisClient.set(
                ctx.state.user.id,
                JSON.stringify(requestDetails)
              );
              next();
              // return error if the time_difference is less than 1 minute and count is greater than 3
            } else {
              strapi.log.error("Throttled limit exceeded...");
              ctx.response.status = 429;
              ctx.response.body = {
                error: 1,
                message: "Throttled limit exceeded...",
              };
              return;
            }
          }
          else {
            strapi.log.info("User does not exist in redis.");
            const body = {
              count: 1,
              startTime: moment().unix(),
            };
            await redisClient.set(ctx.state.user.id, JSON.stringify(body));
            next();
          }
        } catch (err) {
          strapi.log.error(err);
          throw err;
        }

      };
    };
Testing the Request Limiter
You can navigate to Postman, authenticate and hit the /api/articles endpoint again. With multiple requests exceeding the limit and within the same minute, you’ll get an error message below with the status 429.
    {
        "error": "Unable to process request",
        "message": "throttled limit exceeded..."
    }
Conclusion
We have created a blog API, authenticated a user, looked through the request object, created custom middleware to intercept their request, and limited concurrent requests from this user.
For reference, you can read through the code for this article on marvinkweyu/blog-api.
Learn more about here:
- Strapi Internals: Customizing the Backend.
- Route-Based Middleware to Handle Default Population Query Logic.


Top comments (0)