We have all seen 3D movies, illusion images, and know-how good they look, and this gave me the idea to make some tool that makes images shift their perspective as the user moves his head. Imagine how cool it will look.
What will be the effect?
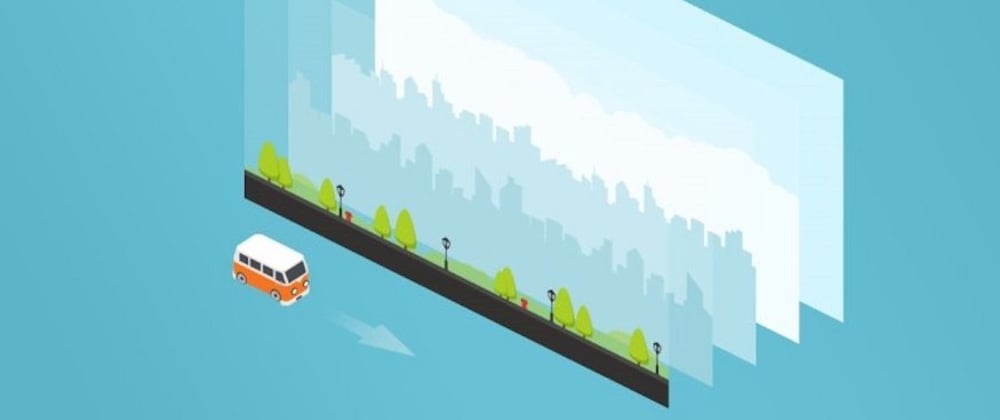
We are all familiar with the term Parallax which is simply the different amount of change in the apparent position of the object, which depends on how far we are from it.
So if we can gain the same effect in 2D images that the different layers of images shift differently, then we can have a sense of dept in those images and a cool effect that we want.
Let’s break down the process
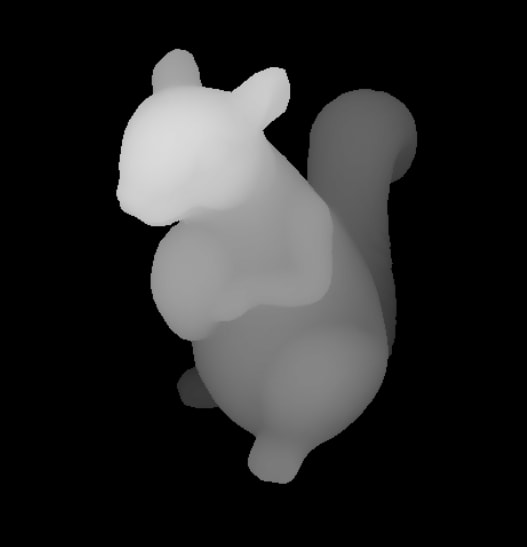
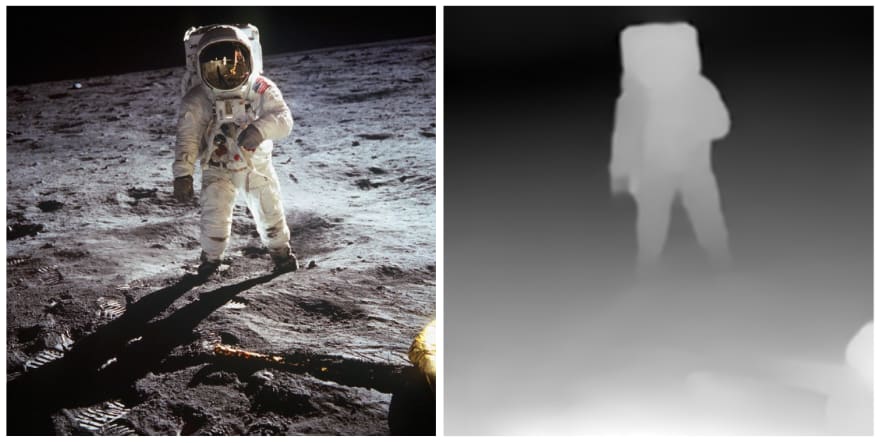
So first, we need to break an image into different layers and, we need a depth map of the 2D image for that. A depth map is simply a black and white image where the whiteness of the images tells how close the object is to POV. After we got the basic layers, we need to inpaint the missing parts from each layer. So finally, we have broken a single image into different layers. Now we can show different layers on top of each other, which will look the same as the original image. Now we can use our camera for face detection and measure how the movement of the user’s head and then shift those layers to match the new POV.
Let’s see how to code this tool
So first, we need to import some files, So copy this code into your file.
I recommend using OpenCV of version 4.1.0.25 because there are few bugs in later versions when we use face_cascade. For other libraries, you can use any version but try to use the newer ones.
import os, sys
import numpy as np
import pygame as pg
import cv2
Now we need to load the image and the depth map and resize them to match the size. For now, we will provide a depth map to our code, but you can generate your own using a model MiDaS, which I have used in my main tool. You can have a look at my GitHub repo.
img = cv2.imread('moon.jpg', flags=cv2.CV_8UC4)
depth_map = cv2.imread('moon_depth_map.png')
depth_map = cv2.cvtColor(depth_map,cv2.COLOR_RGB2GRAY)
img = cv2.resize(img, depth_map.shape[:2])
Now, after we have loaded the depth map, we can create masks for different layers by thresholding the depth map at different Thresholds.
While making one layer we need two masks, one of this layer and the second of the previous layer to inpaint the missing parts. We will take the last layer outside the loop so we can extract all the remaining parts in this layer.
layers = []
prev_thres = 255
div=30

for thres in range(255 - div, 0, -div):
   ret, mask = cv2.threshold(depth_map, thres, 255,          cv2.THRESH_BINARY)

   ret, prev_mask = cv2.threshold(depth_map, prev_thres, 255, cv2.THRESH_BINARY)

   prev_thres = thres
   inpaint_img = cv2.inpaint(img, prev_mask, 10, cv2.INPAINT_NS)
   layer = cv2.bitwise_and(inpaint_img, inpaint_img, mask = mask)
   layers.append(conv_cv_alpha(layer, mask))

# adding last layer

mask = np.zeros(depth_map.shape, np.uint8)
mask[:,:] = 255

ret, prev_mask = cv2.threshold(depth_map, prev_thres, 255, cv2.THRESH_BINARY)

inpaint_img = cv2.inpaint(img, prev_mask, 10, cv2.INPAINT_NS)    layer = cv2.bitwise_and(inpaint_img, inpaint_img, mask = mask)
layers.append(conv_cv_alpha(layer, mask))

layers = layers[::-1]
We have reversed the layers so we can arrange them in order of last to the first layer. While we are adding the layer to the list, we are using a function ‘conv_cv_alpha’ this will add the alpha value (make RGB to RGBA) and make parts of the layer transparent using the mask.
def conv_cv_alpha(cv_image, mask):
    b, g, r = cv2.split(cv_image)
    rgba = [r, g, b, mask]
    cv_image = cv2.merge(rgba,4)

    return cv_image
Now comes the part of face detection and showing the image. For face detection, we will use haarcascade. download them from their official Github repository.
To download them, right-click “Raw” => “Save link as”. Make sure they are in your working directory.
Now we will load haar cascade for face detection and make a function that will return the face-rect from the image.
face_cascade = cv2.CascadeClassifier( 'haarcascade_frontalface_default.xml')

def get_face_rect(img):
    gray_img = cv2.cvtColor(img, cv2.COLOR_BGR2GRAY)
    face_rects = face_cascade.detectMultiScale(gray_img, 1.3, 5)
    if len(face_rects) == 0:
        return ()
    return face_rects[0]
Now we have to show the image that will shift according to the user’s head. We will use OpenCV to read cam and then Pygame to render each frame on top of each other. To calculate the shift for each layer, we will calculate the shift of head from the center of the frame and then scale it down to get a small shift value. After that, we will multiply the index value of each layer to get the shift value for the respective layer, you can also multiply some constant value in that for better results.
We will create a Pygame window slightly smaller than the original image and load the camera. We have used scale, so you change its value to make the final result bigger.
scale = 1
off_set = 20
width, height = layers[0].get_width(), layers[0].get_height()        win = pg.display.set_mode((int((width - off_set)*scale), int((height - off_set)*scale)))
pg.display.set_caption('Parallax_image')
scaled_layers = []
for layer in layers:
             scaled_layers.append(pg.transform.scale(layer, (int(width*scale), int(height*scale))))
cap = cv2.VideoCapture(0, cv2.CAP_DSHOW)
We will set some constants. you can play with these constants to get different results.
x_transform = True     # allow shift in x-axis
y_transform = False    # allow shift in y-axis
sens = 50              # the amount of scale down of shift value
show_cam = False       # show your face cam
shift_x = 0
shift_y = 0
run = True
Finally, the main loop to render all layers.
while run:
    for event in pg.event.get():
        if event.type==pg.QUIT:
            run = False
    ret, frame = cap.read()
    frame = cv2.cvtColor(frame, cv2.COLOR_BGR2RGB)
    initial_pos = (frame.shape[0]/2, frame.shape[1]/2)
    face_rect = get_face_rect(frame)
    if len(face_rect) != 0:
        x,y,w,h, = face_rect
        face_rect_frame = cv2.rectangle(frame, (x, y), (x + w, y + h), (255,255,0), 3)
        shift_x = (initial_pos[0] - (x + w/2))/(sens*scale)
        shift_y = (initial_pos[1] - (y + h/2))/(sens*scale)
    win.fill((255, 255, 255))

    for i, layer in enumerate(scaled_layers):
        new_x = -off_set/2
        new_y = -off_set/2
        if x_transform:
            new_x = 0 + shift_x*i
        if y_transform:
            new_y = 0 + shift_y*i
        win.blit(layer, (new_x, new_y))

   face_rect_frame = cv2.resize(face_rect_frame, (100, 100))
   if show_cam:
       win.blit(conv_cv_pygame(face_rect_frame), (0, 0))
   pg.display.update()
cap.release()
cv2.destroyAllWindows()
pg.quit()
There it is, the final result.
I have created a more advanced version of this tool where you can just choose the image and it will automatically create the parallax image, the depth map will be automatically generated.
You can check more on my GitHub repo.
Feel free to contact me🔥. LinkedIn Twitter Instagram
You can check my other projects and stay tuned for more.👀


Top comments (1)
Thanks for this awesome write-up!