
Amazon EC2 Virtual Machines can help you to host a site. There are so many ways to host a site into EC2. Most common and easy ones were documented by me in this blog of mine, by end of which you will be able to view your website up and running in your browser by hitting it's public IP.
However, practically how many actual websites do we view by typing out their IPs? None, right?
The actual address of any website is a complex IP address, difficult to remember and interpret. Hence we have the Domain Name System (DNS) which maintains all the Domain Names and translates the Domain Names to the IP address of our site. This domain name is simple, interpretable and easily to remember name for our website.
Also, we saw that the IP address we were hitting on the browser was showing as Connection not Secure. This simply means the protocol by which our web pages were loading was HTTP protocol. HTTP or HyperText Transfer Protocol is the simple, but not secure protocol to load our pages. HTTPS is the HTTP + Secured type of HTTP protocol which encrypts our information and thus is more reliable and better way to loading and using the web pages. HTTPS uses the protocol called Transport Layer Security (TLS), also known as Secure Sockets Layer (SSL).
So, in this blog ( is a continuation of my previous blog ) we map the IP address of our site to Domain Name and also make the Connection Secure (HTTPS).
Map the IP address to a Domain Name
Step 1 : Get a Domain Name
You need to purchase a Domain Name of your choice. You can get paid Domain Names from sites like GoDaddy or Hostinger or directly from AWS. It is recommended to use a paid Domain Name for professional use. However to practice you can use free Domain Names from sites like FreeNom. Here, I have used the Domain Name from FreeNom. You need to create an account and Register for a New Domain in Services. Then you can find your domain name in services and My Domains.

Step 2 : Route 53
AWS provides the service of Route 53 which is the scalable Domain Name System of the cloud. It helps you to map the IP address to the Domain Name. Below are the steps to do so:
1. Create a Hosted Zone in Route 53 :
Search for the service of Route 53 and select Create Hosted Zone from the Route 53 dashboard. Now, provide your Domain Name and Create the zone.

2. Update the Name Servers :
Once you create the Hosted Zone, you will be able to see the Records. Select the Record with Type NS. You will be able to see the Value of the Name Servers on the right.
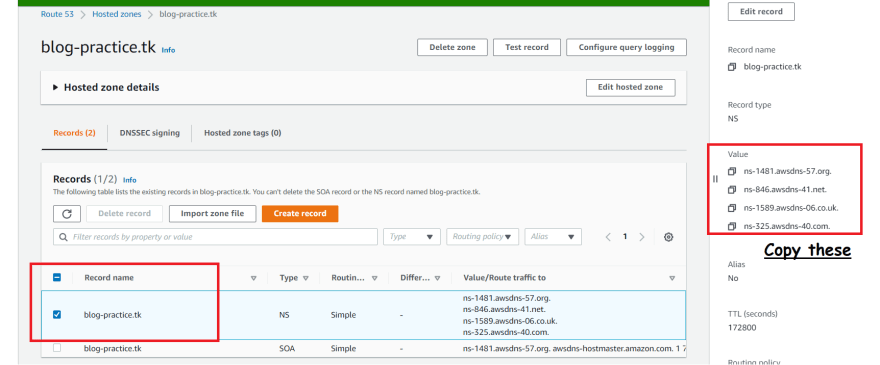
Now, go to your Domain Registrar (FreeNom in my case) and select on Manage Domain. Now, select Management Tools and then Name Servers. Copy the Values of the Name Servers seen in your AWS Hosted zone and paste in the Values of Name Server in the Registrar.

3. Add Records :
Now, click on Create Records in the Route 53 records. You need to create another record (other than the default one) and add the Record name www to it. For both of the records provide the public IP Address of your EC2 as the Value. Now, Create the Records.


Now, on hitting your Domain Name in the browser you can find your website up and running.
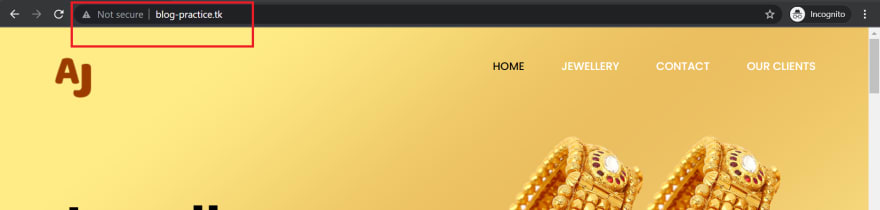
But, as you can see the connection is showing Not Secure. Now, let's make this secured.
Make the connection secure
- Step 1 : Request a SSL certificate
Making the connection secure basically means changing the HTTP protocol to HTTPS. For this we will need a SSL certificate.
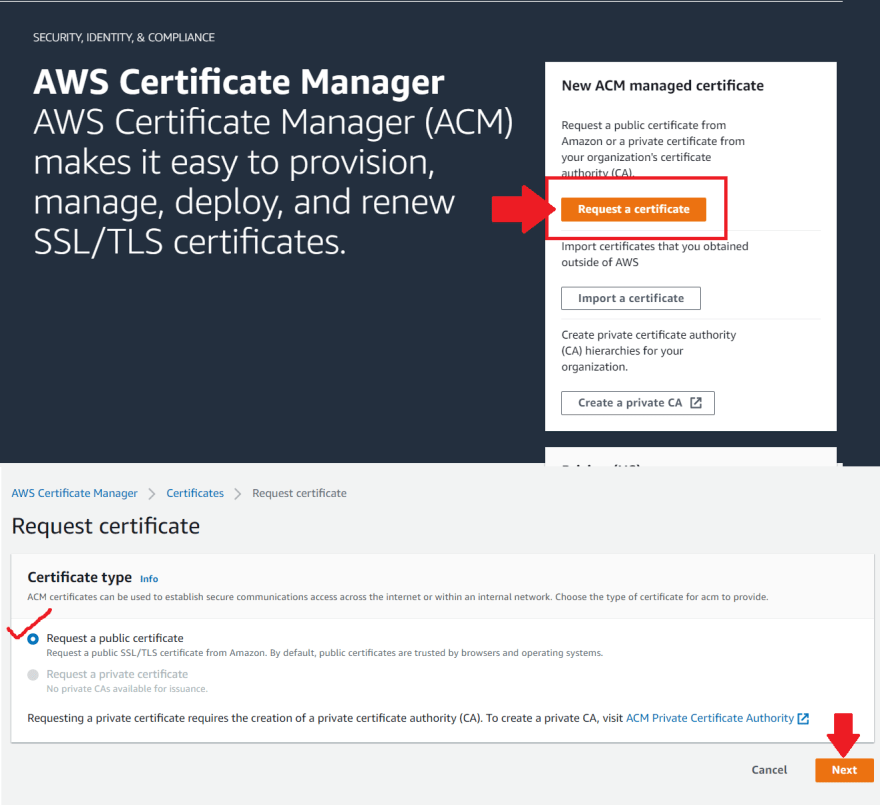
Go to Certificate Manager in Services. Now, click on Request a Certificate. Then Select the default option of public certificate and click on Next.
Now, add the fully qualified Domain Name. Then click on Add another name and fill the Domain Name along with the wild card character "*." before your Domain Name. Then click on Request.

Next, select your certificate and select Create Records to Route 53 (under the Domain Names) and click on Create Records.
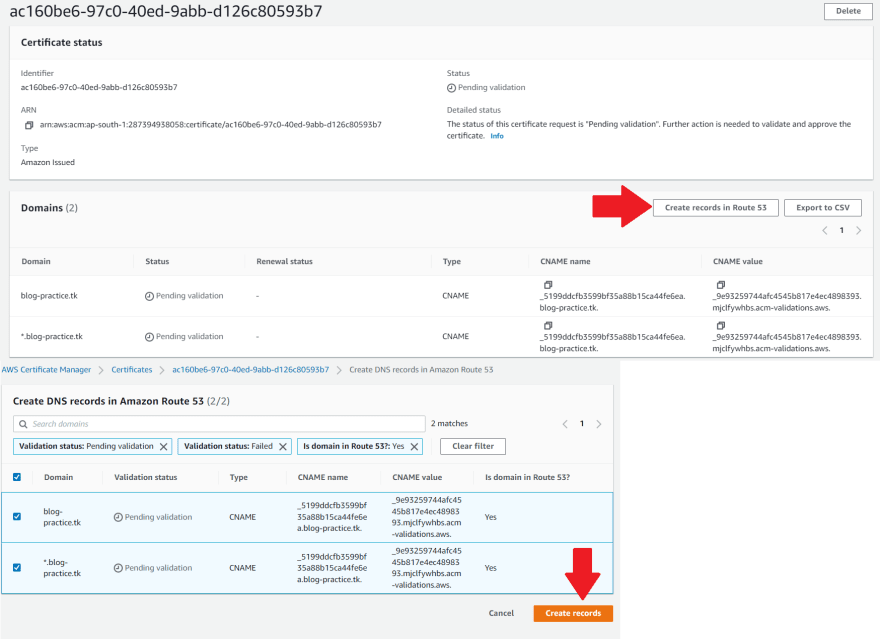
Now, wait for the Certificate to be issued.
- Step 2 : Create a Load Balancer
Once the certificate is issued, in order to attach the certificate we will need to create a load balancer.
Select Load Balancer from the EC2 dashboard and click on Create Load Balancer. Select the Application Load Balancer and Create.
Give a name to your Load Balancer, Select Internet Facing and IPv4. Under Network routing choose default VPC(or any existing VPC of your EC2) and select all the subnets.

Now, create a new Security Group with HTTP and HTTPS - Anywhere as inbound rules.
Now, in Listener Create a new target group. Give a name to your target group leave all the default options and click on next. Now choose your instances and click on include below as pending and create the target group.

Now, back in load balancer select the newly created target group for listener HTTP. Now, click on Add Listener and Create a HTTPS listener with the same newly created target group.
Under the Secure Listener Settings select your SSL certificate in the drop down.

Finally create the Load Balancer and wait for it to become Active.
Once the Load Balancer is Active you need to modify the HTTP listener of your Load Balancer (this enables anyone hitting your website to be redirected to HTTPS).
Select your Load Balancer and choose the option of Listeners and select the HTTP Listener. Now click on View/edit rules of the HTTP.

Now, add Rule and select Host Header in IF and Redirect to in THEN.
Add the values of your Domain Names as the one you had created in the Records of Hosted Zone as Host Header. Select HTTPS with port 443 in Redirect to. Then click on Save.

- Step 3 : Update the Records of Route 53
Select the Records of type A that you had created (inside the Hosted Zone Records) one by one and click on Edit Record. Follow the steps as given below one by one.
Click on Edit Record and in the Value, select the Alias. Then choose Application and Classic Load Balancer as Endpoint. Next choose your region and finally select the created Load Balancer. Then Save the changes.

Repeat the steps for both of the Type A Records.
Finally on hitting the Domain Name you will find your site Secured!

That's all in this blog. Hope this helps you!

Top comments (0)