
Table Of Content
- Introduction
- Setting up Django Project Locally
- GitHub Upload Guide
- Deploying Project on PythonAnywhere Guide
- Conclusion
- References
Introduction
“Pythonanywhere” is a popular cloud-based platform that allows developers to host Python applications effortlessly. It provides a user-friendly environment for deploying Django applications, making it a preferred choice for both beginners and seasoned developers. This document is a step by step guide on how to deploy django application on "pythonanywhere".
Step 1: Set up your Django Project (Local Changes)
- Create a Projects Directory
Create a directory to keep your Django projects organized and navigate into it.
mkdir -p ~/Desktop/Projects
cd ~/Desktop/Projects
I have created Projects Folder in Desktop and run the commands above, you should see something like:
![]()
- Set Up and Activate a Virtual Environment
Create a virtual environment to isolate your project's dependencies.
python3 -m venv env
source env/bin/activate
You will see (env) at the beginning, this ensures that you are on activated virtual environment.
![]()
- Install Django
With the virtual environment activated, install Django.
pip install django
Wait until the installation is complete:

- Create a New Django Project
Now, create your Django project named "deploy_on_pythonanywhere".
django-admin startproject deploy_on_pythonanywhere
if you encounter an error similar to:
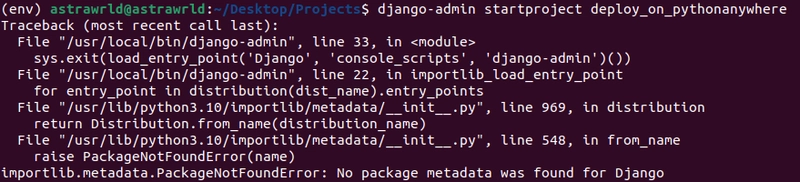
Don’t panic, run the command below starting with the path where you installed django:
~/Desktop/Projects/env/bin/django-admin startproject deploy_on_pythonanywhere
- Navigate into the Project Directory
Change the directory to the newly created project.
cd deploy_on_pythonanywhere
-
Create a New App within the Project
Create a new app named "deploy_on_anywhere".python manage.py startapp deploy_on_anywhere
Generate
requirements.txtFile
Generate the requirements.txt file to list all the dependencies.
Ensure you are on same path as manage.py before running the command below:
pip freeze > requirements.txt

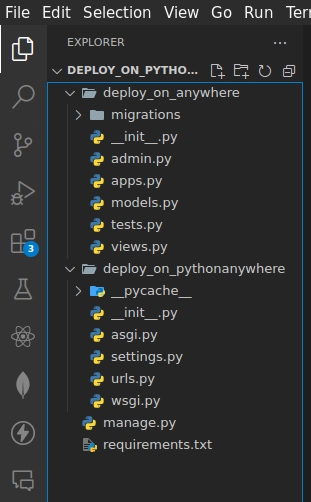
Finally, Open your locally created Project on editor of your Choice, I will go with Visual Studio Code.
The file structure of your project should look like:
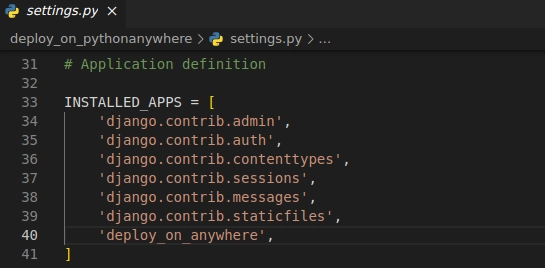
- Configure “deploy_on_anywhere” app in your project settings.
Navigate to:
deploy_on_pythonanywhere/settings.py
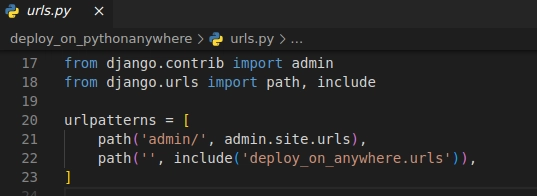
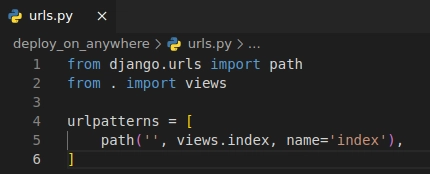
- Configures the URLs in your project settings.
Navigate to:
deploy_on_pythonanywhere/url.py
- Set up the app’s URL configuration for your app:
Navigate to urls.py or create one if it doesn’t exist:
deploy_on_anywhere/urls.py
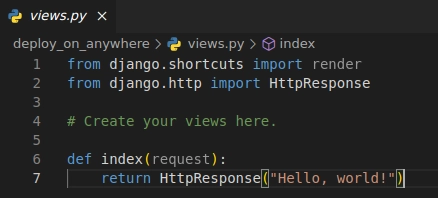
-
Create your first view for the app:
Views are a critical component that handles the logic for processing user requests and returning appropriate responses.
Navigate to:
deploy_on_anywhere/views
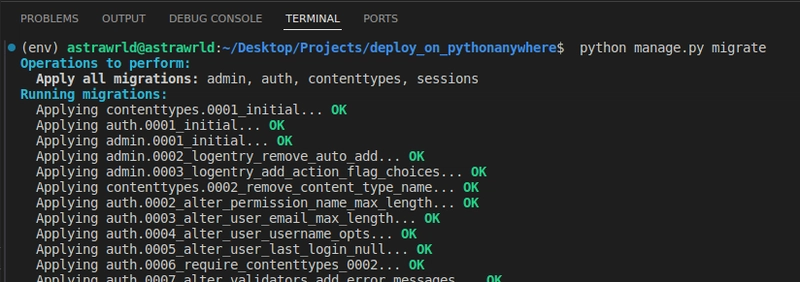
- Apply database migrations:
Database migrations in Django are a way to propagate changes you make to your models (like adding a field or changing a field type) into your database schema.
Run the following command on the integrated terminal:
python manage.py migrate
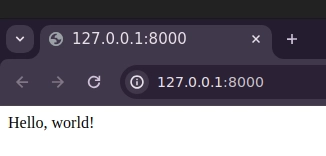
-
Run the development server:
python manage.py runserver

STEP 2 : UPLOADING PROJECT ON GITHUB.
Create new Repository on your Github account, name it deploy_on_anywhere
You can choose either Private or Public repo, I will choose public for everyone to view my project, I will attach the link to the project in reference.
Save the changes.
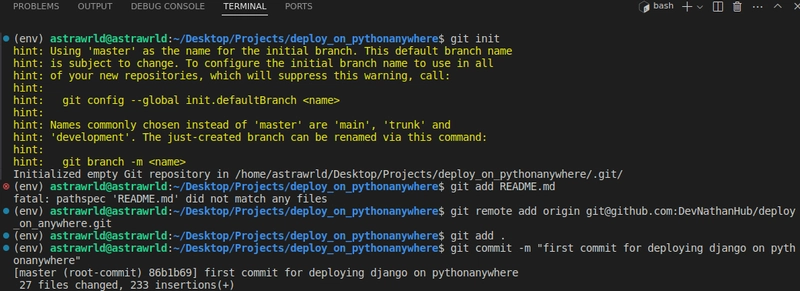
Back on your IDE integrated terminal, run the commands below;
(Note: you must have git installed on your machine and also globally configure it. refer to {Link to git setup documentation on reference}.
![]()
git init
git add README.md
git remote add origin git@github.com:DevNathanHub/deploy_on_anywhere.git
git add .
git commit -m "first commit for deploying django on pythonanywhere"
git branch -M main
git push -u origin main
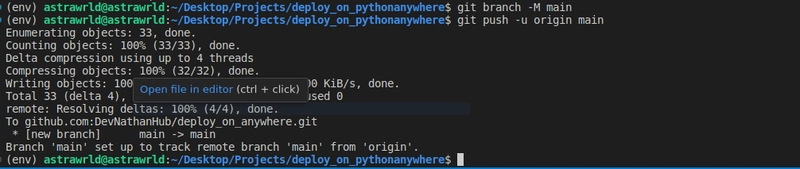
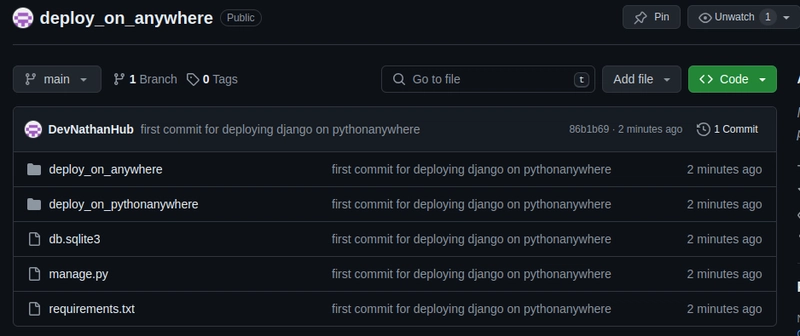
Finally, Refresh your github after few minutes and you will see the changes updated,
Step 3: DEPLOYING PROJECT ON "Pythonanywhere"
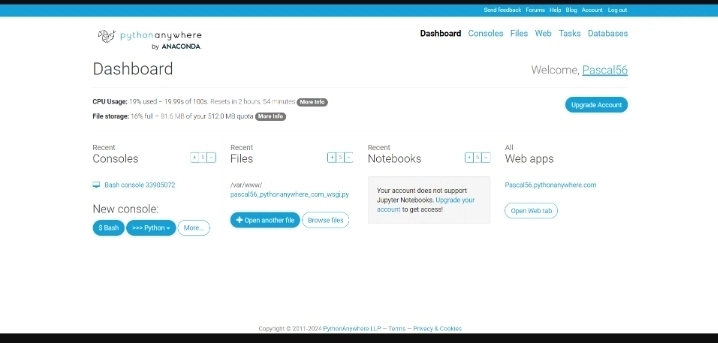
Create an account on "Pythonanywhere".
After registering you can see the page dashboard below:
On the dashboard page on the top right next to Dashboard click Console and select Bash.
Clone your own project, copy the link from your github repository;
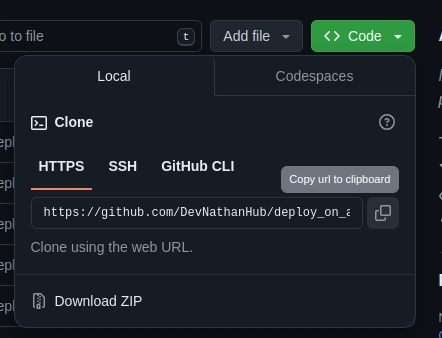
Then run the command on bash;
git clone [paste the copied link]

Create and setup environment variables and copy the path of your directories which you installed on bash similar to how you did locally. The commands and their respective outputs are shown below:

Navigate to your project directory and install requirements using the commands below:
cd deploy_on_anywhere
pip install -r requirements.txt
On the dashboard page, top right click on the Web option and select " Add a new web app".
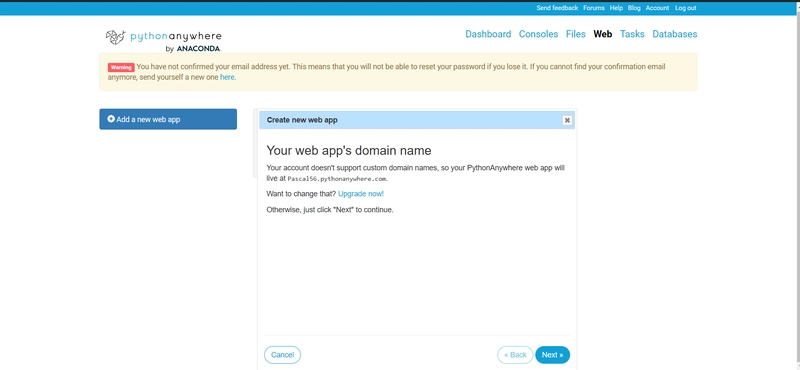
Click on next and follow the procedure
Select Django as the framework:
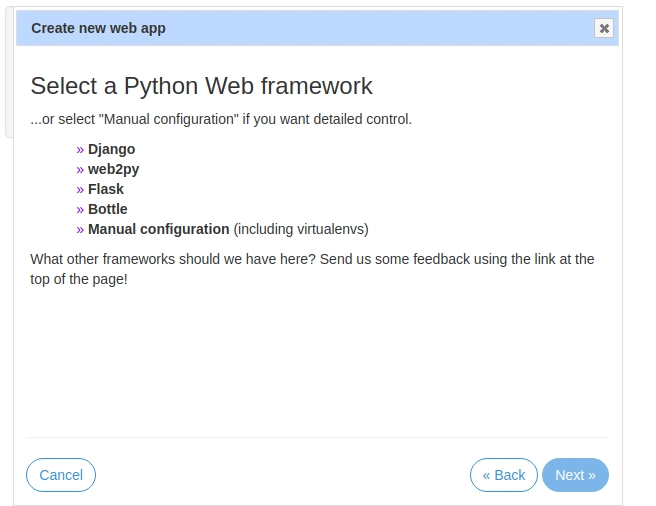
Select the python version to use. In this case, we are using Python version 3.10

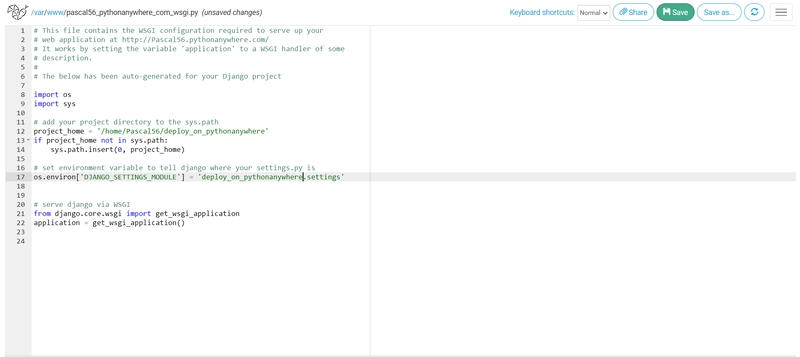
Open the WSGI Configuration file under the web section.

Edit WSGI configuration file on line no. 12 and 17 replace the word mysite with your project name which you cloned from GitHub.
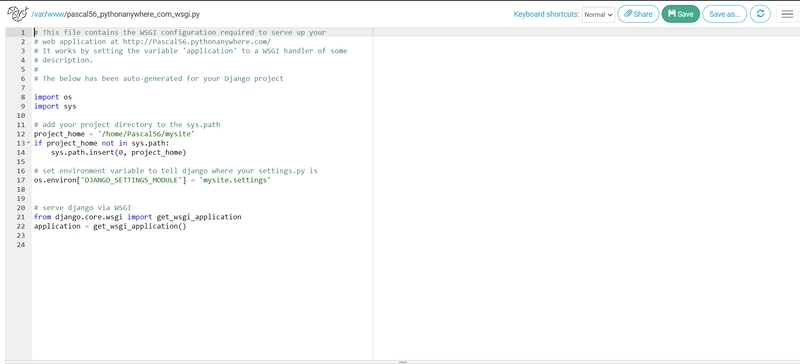
Now it looks like this and then click on save:
Select Virtualenv section under Web:
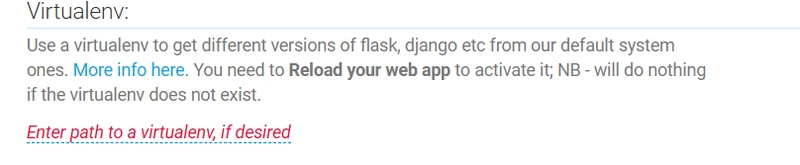
Enter the path of Virtualenv as we created using bash (refer above pwd command for path)
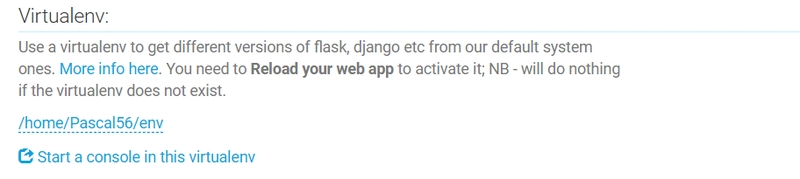
Click on Reload under the Web section and visit the link.

Conclusion
By following this comprehensive guide, you should now have a fully functioning Django project set up and running on "pythonanywhere.com".
References:
- How to Install git on;
Linux, Windows and macOs.
Startup Github Repo Click Here.
Create Account on Python Anywhere
YouTube Video Reference on How to Deploy Django Project Watch Tutorial.
https://www.geeksforgeeks.org/how-to-deploy-django-project-on-pythonanywhere/

Top comments (0)