วันนี้ผมจะมาแนะนำและวิธีการใช้งานเบื้องต้นของ plugin ที่น่าสนใจตัวหนึ่งที่มีชื่อว่า
"Google Maps for Flutter"
โดย plugin ตัวนี้จะให้ Google Maps ที่เป็น Widget มาให้เราได้เปิดใช้งานแผนที่ของกูเกิ้ล
ขั้นตอนการติดตั้ง
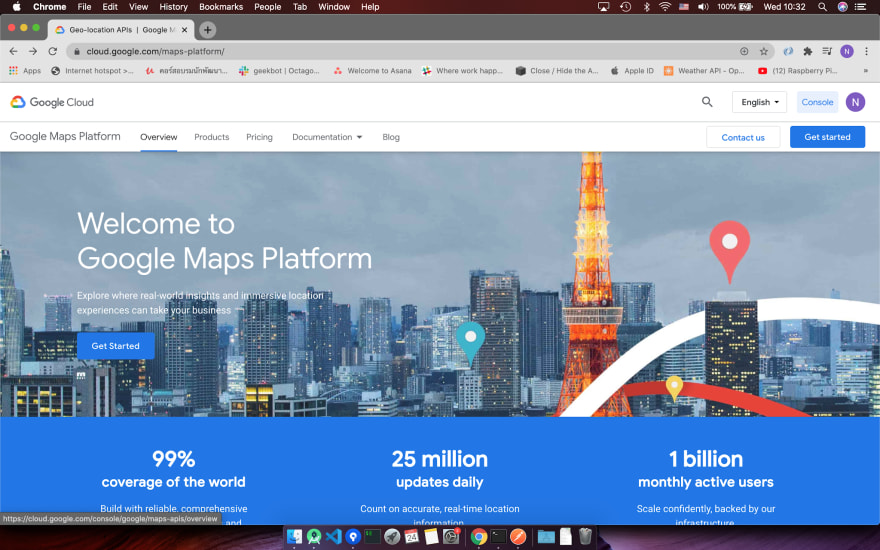
อันดับแรก เราต้องทำการขอ API Key ที่ลิ้งค์ https://cloud.google.com/maps-platform/
เมื่อเข้ามาหน้าเว็บไซต์แล้วให้เข้าไปที่ Console (ตรงขวามุมบนของหน้าจอ)
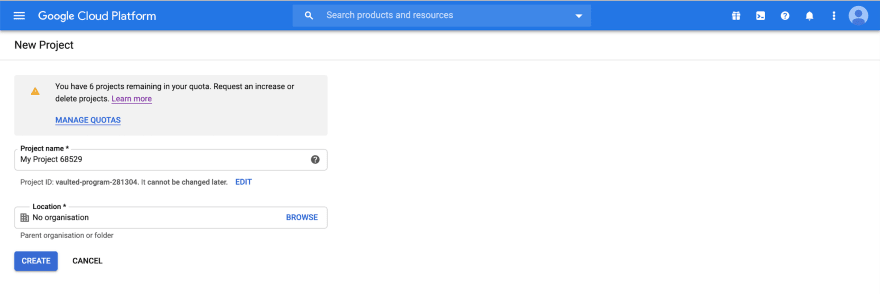
สร้าง Project ของเราขึ้นมาก่อน
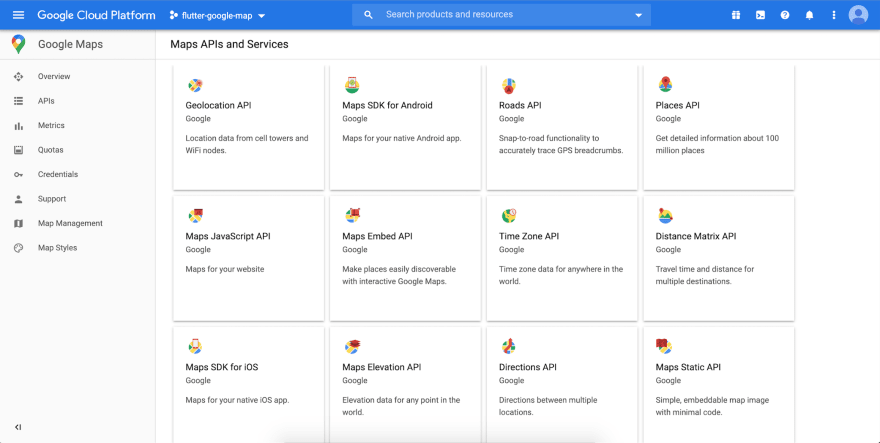
เมื่อทำการสร้างเสร็จแล้วให้เปิดแท็บด้านขวามือ แล้วเลือกเมนูที่ชื่อว่า Google Maps
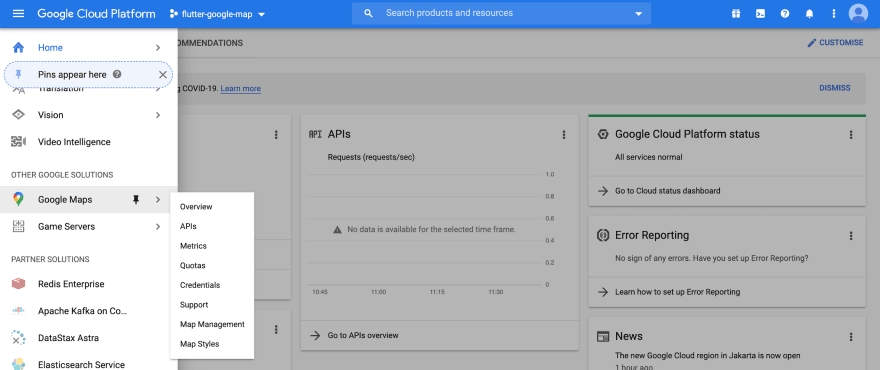
Google Maps จะมี API ให้ใช้หลายตัว เราสามารถเข้าไป Enable เพื่อที่จะเรียกใช้ API เหล่านั้นได้
แต่ตอนนี้เราจะเลือก Enable Maps SDK for Android / IOS เพื่อที่จะเอา API Key ไปเรียกใช้งาน API เหล่านี้
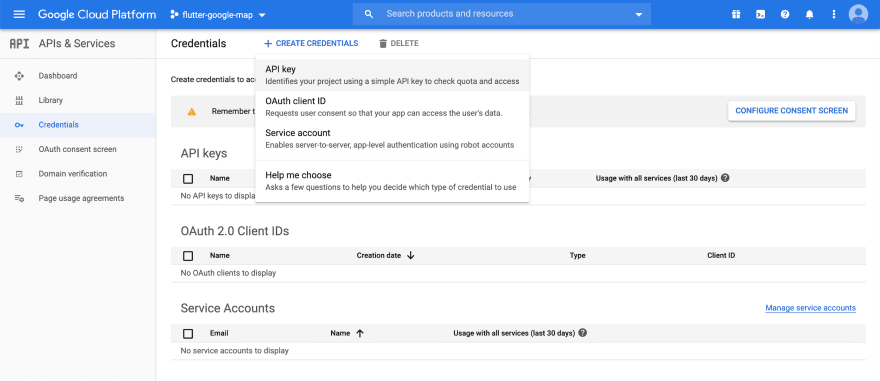
ต่อมาให้เข้าไปที่เมนู Credentials เพื่อที่จะสร้าง API Key เอาไปแปะในโค้ดให้เชื่อมต่อกับ Google Cloud Platform
กดเลือก Create Credentials -> API Key
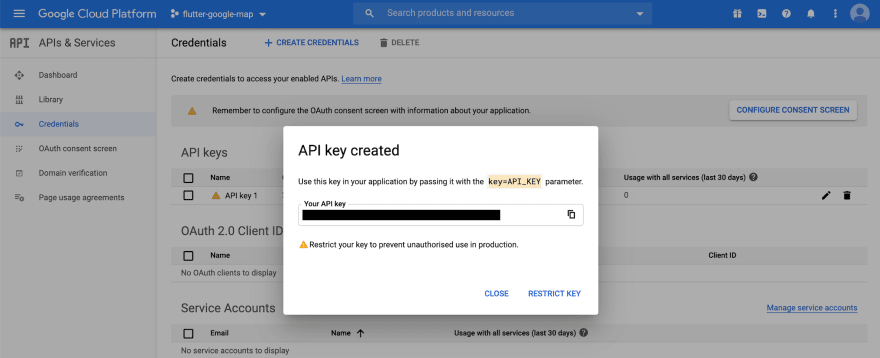
เราก็จะได้ API Key มาเท่านี้ก็จะสามารถเชื่อมต่อกับ Google Map Api ได้
มาในส่วนของการเขียนโค้ดกันบ้าง
สำหรับ Android ให้เข้าไปเพิ่ม API Key ที่ไฟล์ AndroidManifest.xml ในโฟลเดอร์
Android (android/app/src/main/AndroidManifest.xml)
.
└── android
    └── app
        └── src
            └── main
                └── AndroidManifest.xml
ให้เพิ่ม <uses-permission/> เพื่อขอ permission
กับ <meta-data/> เพื่อเพิ่ม API KEY เข้าไป
<manifest xmlns:android="http://schemas.android.com/apk/res/android"
    package="com.example.fluttergooglemap">

    <uses-permission android:name="android.permission.ACCESS_FINE_LOCATION"/>
    <uses-permission android:name="android.permission.ACCESS_COARSE_LOCATION"/>

    <application
        android:name="io.flutter.app.FlutterApplication"
        android:label="fluttergooglemap"
        android:icon="@mipmap/ic_launcher">

        <meta-data android:name="com.google.android.geo.API_KEY"
            android:value="YOUR API KEY"/>

        <activity
            android:name=".MainActivity"
            ...
สำหรับ IOS เข้าไปที่ไฟล์ AppDelegate.swift (ios/Runner/AppDelegate.swift)
.
└── ios
    └── Runner
        ├── AppDelegate.swift
        └── Info.plist
เพิ่ม API KEY เข้าไป GMSServices.provideAPIKey("YOUR KEY HERE")
@UIApplicationMain
@objc class AppDelegate: FlutterAppDelegate {
  override func application(
    _ application: UIApplication,
    didFinishLaunchingWithOptions launchOptions: [UIApplication.LaunchOptionsKey: Any]?
  ) -> Bool {
  GMSServices.provideAPIKey("YOUR API KEY")
    GeneratedPluginRegistrant.register(with: self)
    return super.application(application, didFinishLaunchingWithOptions: launchOptions)
  }
}
และเข้าไปที่ไฟล์ info.plist เพิ่มคำส่ัง เพื่อขอ permission
<dict>
     <key>NSLocationWhenInUseUsageDescription</key>
          <string>This app needs your location to test the location feature of the Google Maps plugin.</string>
          <key>io.flutter.embedded_views_preview</key>
          <true/>
     ...
เข้าไปที่ไฟล์ pubspec.yaml
ติดตั้ง google_maps_flutter: ^0.5.28+1 (เวอร์ช้่นล่าสุดเมื่อ May 21, 2020)
dependencies:
  flutter:
    sdk: flutter

  google_maps_flutter: ^0.5.28+1

  ...
import Libray
import 'package:google_maps_flutter/google_maps_flutter.dart';
สร้างตัวแปรประเภท GoogleMapController คือ class ที่เอาไว้สร้าง Future อีกที เอาไว้ควบคุมการทำงาน
class _MyHomePageState extends State<MyHomePage> {

  Completer<GoogleMapController> _controller = Completer();
Library จะมี Widget มาให้ชื่อว่า GoogleMap()
ทดลองพิมพ์ตามโค้ดด้านล่างนี้
@override
Widget build(BuildContext context) {
return Scaffold(
appBar: AppBar(
title: Text(widget.title),
),
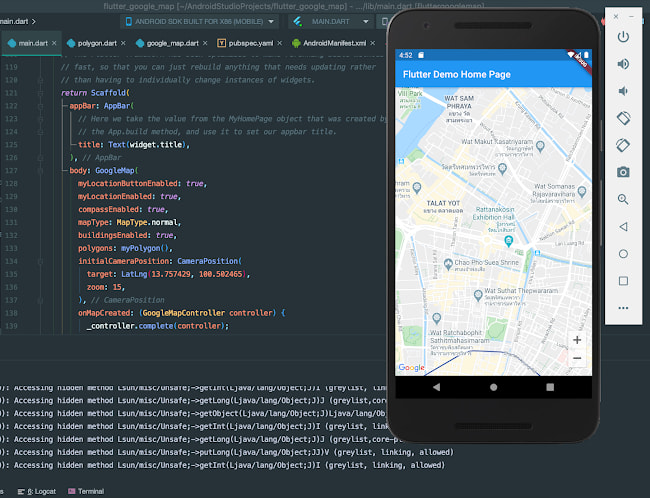
body: GoogleMap(
initialCameraPosition: CameraPosition(
target: LatLng(13.757429, 100.502465), //กำหนดพิกัดเริ่มต้นบนแผนที่
zoom: 15, //กำหนดระยะการซูม สามารถกำหนดค่าได้ 0-20
),
onMapCreated: (GoogleMapController controller) {
_controller.complete(controller);
},
),
);
}
เริ่มต้น GoogleMap จะต้อง initialCameraPosition เสมอ โดยกำหนดพิกัดจุดเริ่มต้นสถานที่จะให้ GoogleMap แสดงขึ้นมา แล้วลอง Run
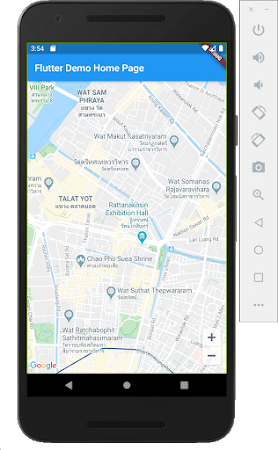
เพียงเท่านี้ก็จะสามารถเปิดกูเกิ้ลแมพได้ บทความนี้จะเป็นการติดตั้งเบื้องต้น และบทความต่อไปจะเป็นการใช้งานเบื้องต้นเกี่ยวกับ GoogleMap, Polyline, Marker

Top comments (0)