Overview
With the help of this step-by-step guide, you’ll create a self-running workflow that automatically uploads new Dropbox files to your designated Egnyte location using webMethods.io Integration.
Prerequisite:
- webMethods.io Integration tenant – sign up here for a free trial if you’re new (use the advanced form for more options).
- Egnyte account
- Dropbox account
Steps to follow
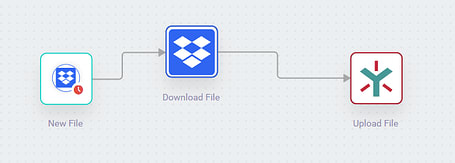
- Login to your webMethods.io Integration tenant, create a new project or choose an existing one and create a blank workflow. If you need a refresher on how to get to this point, this guide can be a great introduction.
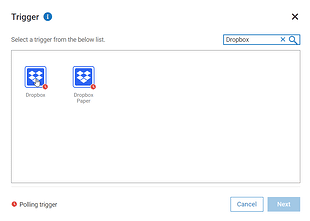
- Click on the small setting icon on the Start step and choose the Dropbox trigger.
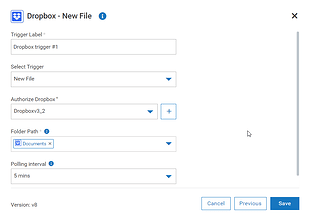 Select New file as a trigger and complete the authorization – connect webMethods.io Integration with your Dropbox account and choose the folder path. Here, you can also set a polling interval from the dropdown menu - this time interval determines how often you want this trigger to check for new files.
Click Save. You should see the test trigger window.
To test your trigger, you need to perform the trigger action. Open your Dropbox cloud and add a new file to the folder:
Select New file as a trigger and complete the authorization – connect webMethods.io Integration with your Dropbox account and choose the folder path. Here, you can also set a polling interval from the dropdown menu - this time interval determines how often you want this trigger to check for new files.
Click Save. You should see the test trigger window.
To test your trigger, you need to perform the trigger action. Open your Dropbox cloud and add a new file to the folder:
 Go back to the webMethods.io Integration workflow and click Test. You should see the output data (the new file information) from the trigger which webMethods.io Integration will use to configure and test the rest of the workflow. Click Done.
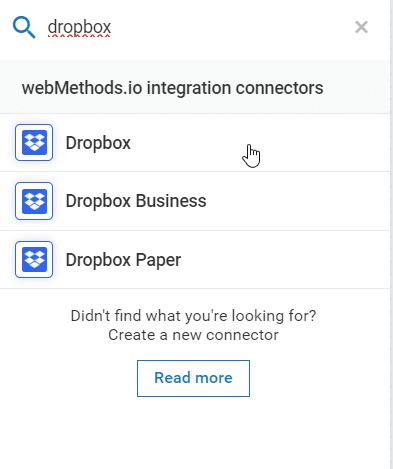
 - Before uploading the new Dropbox file to Egnyte, we need to download it. Search for the Dropbox connector and add it to the canvas with the drag and drop feature. This automatically connects with the trigger.
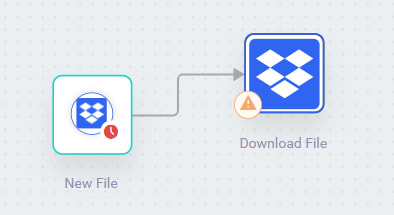 Click on the small settings icon on the Dropbox connector, select _ Download file _ as action, and complete the authorization – connect webMethods.io Integration with your Dropbox account.
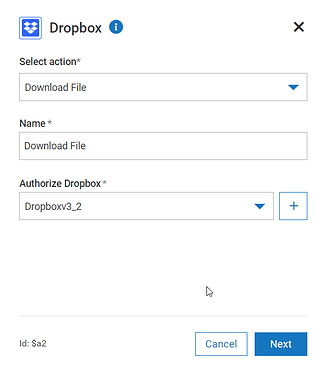 Click Next.
Now you can proceed with the action configuration – use the Incoming data panel and drag and drop the file path string from the trigger output to the Source file path field:
Click Next.
Now you can proceed with the action configuration – use the Incoming data panel and drag and drop the file path string from the trigger output to the Source file path field:
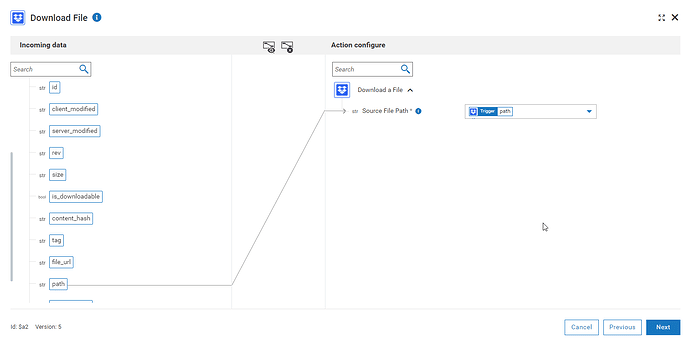 Click Next , Test and then Done.
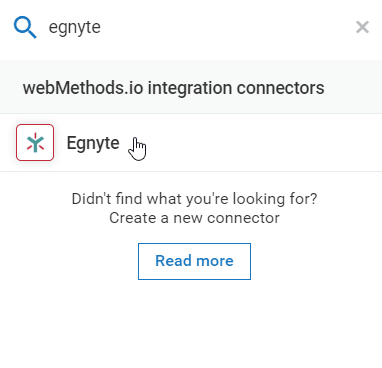
 - Now we will upload the file to Egnyte - search for the Egnyte connector and add it to the canvas with the drag and drop feature. This automatically connects with the previous step.
 Click on the small settings icon on the Egnyte connector, select _ Upload file _ as action, and complete the authorization – connect webMethods.io Integration with your Egnyte account. You need to provide your Egnyte domain name.
 Click Next.
Now you can proceed with the action configuration – use the Incoming data panel and drag and drop the filepath string from the trigger output to the Source file path field and the filename string to the Destination File Name field:
Click Next.
Now you can proceed with the action configuration – use the Incoming data panel and drag and drop the filepath string from the trigger output to the Source file path field and the filename string to the Destination File Name field:
 Click Next , Test and then Done.
 - Connect the Egnyte connector to the Stop step. Don’t forget to save your workflow.
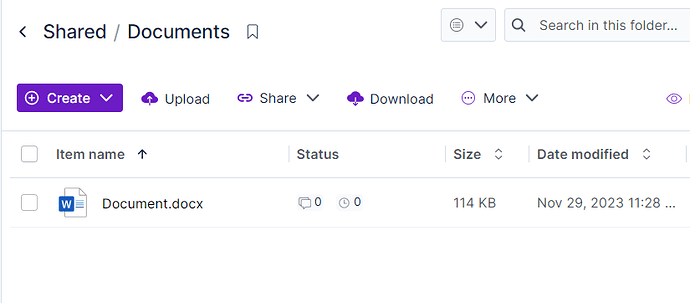
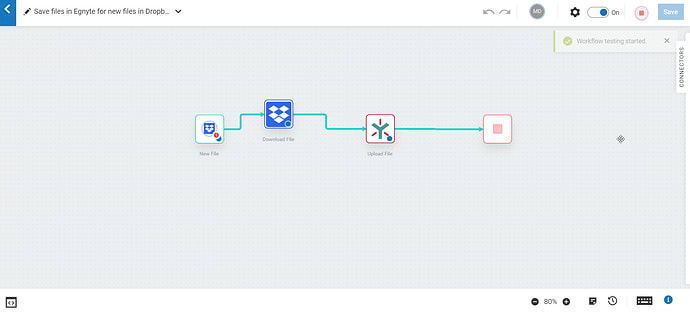 You are now ready to test your workflow – click on the play button in the right upper corner and review the result. If you have configured the workflow correctly, you should see the newly added file to your Egnyte folder:
 Please note that this may take some time.
And that’s it – how easy is to connect your file servers.
Please note that this may take some time.
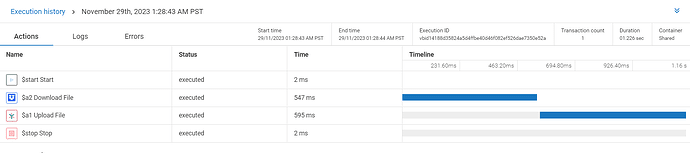
And that’s it – how easy is to connect your file servers. - At the bottom-left corner of the screen you can find the Execution history of the workflow:
 From here you can monitor the executions status and view error details if needed:
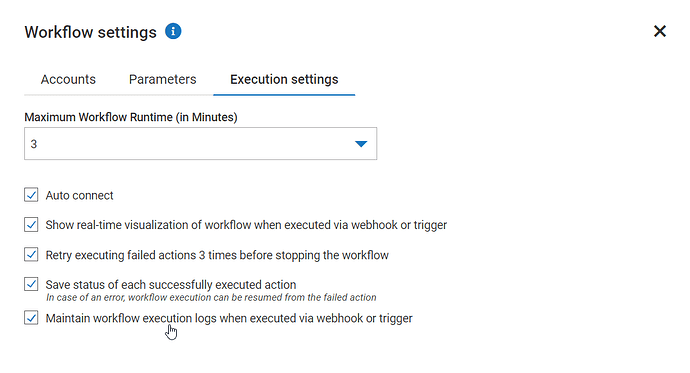
 Please note that workflow execution logs must be enabled from the workflow execution settings:


Related articles
For more webMethods.io Integration workflow examples involving Egnyte and Dropbox, refer to the following articles:
- Set up automatic Slack/Cisco Webex Teams notifications for new Egnyte files with webMethods.io Integration
- Upload Gmail Attachments to Dropbox Automatically with webMethods.io Integration
- Save Cisco Webex Teams Documents to Dropbox with webMethods.io Integration
- Integrate Pipedrive with DropBox/OneDrive through webMethods.io Integration

Top comments (0)