Part 1 : Introduction to Listings
Hello Flutter people! I’m back with a brand-new Flutter blog series, and this one is going to be special. We’re diving into a topic you’ll find in just about every real-world app: listings. Whether you’re displaying products, contacts, messages, or in our case, Pokémon (a.k.a. the greatest thing in the world), building smooth, scalable lists is a core skill for any Flutter developer.
In this first part of the series, we’ll focus on how to fetch and display data using Flutter + Bloc, and build a list that updates in real time, handles state efficiently, and delivers a great user experience. We’ll dive into ListView.builder, state management patterns, performance optimizations, and even sprinkle in some UI polish, all using the PokéAPI as our data source.
Ready to catch ’em all? Or should I say... display them all? Eh, forget about it, let’s get started with our Pokédex. 😅

What are we building?
Before we dive into the code, let’s take a moment to understand what we’re building and how it all comes together.
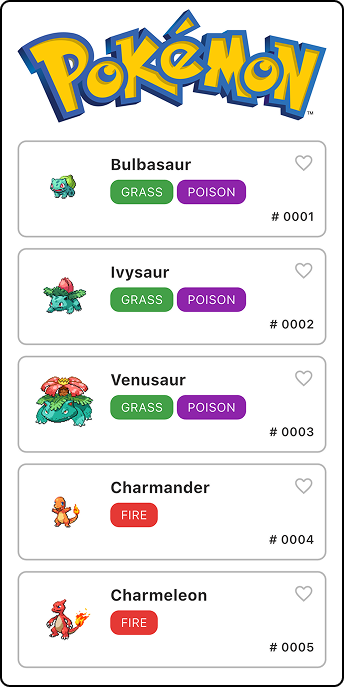
We’ll be using the open-source PokéAPI to fetch and display a list of Pokémon. Each card will include the Pokémon’s name, image, number, and types. As a little bonus, we’ll also make each card interactive by adding a favorite icon that users can toggle on or off, and all of this will be handled using Bloc for state management.
Now, don’t worry too much about the UI or styling. This blog will focus on data flow, and state handling. I’ll provide a link to the full GitHub repo at the end of the post with all the code, so you can dig in when you're ready.
How Does the PokéAPI Work?
The PokéAPI gives us everything we need, but not in a single request. Instead, we’ll use two API calls:
- The first call gives us a list of Pokémon URLs, just enough to know which ones are available.
- The second call fetches the details of each Pokémon individually using those URLs (name, ID, types, image, and more).
It might sound like extra work, but trust me, this gives us the flexibility to load detailed data only when we need it. It’s a great example of working with a two-step API flow, which you’ll run into often when working with public APIs or pagination.
How do we handle those API calls?
Like I mentioned earlier, we will use Bloc to handle our listing state. The states we will need are:
-
PokemonListInitial→ the default state before anything happens -
PokemonListLoading→ shown while data is being fetched -
PokemonListSuccess→ returns the full list of Pokémon -
PokemonListError→ triggered when something goes wrong (e.g. no data, API failed)
As simple as it gets right? It gets even simpler when it comes to events. We only need a single event to kick off the initial fetch when the app launches:
class InitialFetch extends PokemonListEvent {
  final int firstPokemon;

  const InitialFetch(this.firstPokemon);
}
The int represents how many Pokémon we want to fetch on the first load. This lets us tell the Bloc:
“Hey, fetch the first n Pokémon starting from this index.”
Perfect setup for pagination later on 👀 🫢 (spoiler for Part 2?)
Let’s look at the event handler that handles this logic:
  void _onInitialPokemonFetch(
      InitialFetch event, Emitter<PokemonListState> emit) async {
    emit(PokemonListLoading());

    try {
      final List<String> pokemonUrls =
          await PokemonRepositories().fetchPokemonUrls(event.firstPokemon);

      if (pokemonUrls.isNotEmpty) {
        final List<PokemonEntity?> fetchedPokemons = await Future.wait(
            pokemonUrls
                .map((url) => PokemonRepositories().fetchPokemonDetails(url)));

        pokemonList.addAll(fetchedPokemons.whereType<PokemonEntity>());

        emit(PokemonListSuccess(pokemons: pokemonList));
      } else {
        emit(PokemonListError(message: "There are no more pokemons"));
      }
    } catch (e) {
      emit(PokemonListError(
          message: "Failed to fetch Pokémon: ${e.toString()}"));
    }
  }
Here’s what’s happening, step-by-step:
- We emit the loading state to let the UI know something is happening in the background.
- We fetch all the Pokémon URLs based on the number provided inside the PokemonRepositories.
- We fetch the full details for each of those URLs (in parallel) using Future.wait.
- We filter out any nulls (just in case) and add the valid Pokémon to our list.
- We emit the
PokemonListSuccessstate with the final list.
By the way, this is how this Pokémon model looks like:
class PokemonEntity {
  final String id;
  final String name;
  final List<PokemonType> types;
  final String image;
  final bool isFavorite;

  const PokemonEntity({
    required this.id,
    required this.name,
    required this.types,
    required this.image,
    required this.isFavorite,
  });

  PokemonEntity copyWith({bool? isFavorite}) {
    return PokemonEntity(
      id: id,
      name: name,
      types: types,
      image: image,
      isFavorite: isFavorite ?? this.isFavorite,
    );
  }
}
How Do We Display the Pokémon in UI?
Once we have the data ready, it’s time to put it on the screen. And for this, we’ll use one of Flutter’s most powerful and efficient widgets: ListView.builder. But why this one?
Because unlike a regular Column or ListView(children: [...]), ListView.builder doesn’t build everything at once. It only builds the widgets that are currently visible on screen, and recycles them as you scroll.
This makes it perfect for long or infinite lists. Here is a quick breakdown of how everything works:
...
if (state is PokemonListSuccess) {
    return ListView.builder(
        itemCount: state.pokemons.length,
        itemBuilder: (context, index) {
            return Container(
                margin: EdgeInsets.only(top: index != 0 ? AppSpacing.md : 0),
                child: PokemonCard(
                  pokemon: state.pokemons[index],
                ),
              );
            },
          );
        }
...
-
itemCounttells Flutter how many items it should expect -
itemBuildergets called only when a new widget is needed
Flutter recycles previously built widgets as you scroll, this is why ListView.builder is so memory-efficient. This is pretty awesome if you ask me. But can we make it even more awesome?? Well, in Flutter everything is possible.
What if I told you... we could control how many pixels ahead Flutter preloads your list items?
Enter the cacheExtent ...
The cacheExtent controls the number of pixels outside the visible area that Flutter will preload list items. You can think of it like a "scroll buffer." If the screen height is 800 pixels and your cacheExtent is set to 300, Flutter will start building list items 300 pixels before they become visible.
By default, cacheExtent is set to 250 pixels, which works fine in many cases. But depending on your UI, this number might need some tuning. This is a powerful tool, but it comes with responsibility. It’s important to adjust it based on your specific scenario:
- If your list items are small, lightweight, or don’t use heavy assets like images, the default value might be perfect.
- If your list items are larger, or you're using images, shimmer loaders, or animated widgets, you may want to increase the cacheExtent to something like 300–600 pixels for a smoother UX.

⚠️ Tip: Going too high on cacheExtent may lead to increased memory usage, especially with complex lists. Try to keep it below 600 unless you’ve benchmarked for your specific case.
Extra Pro Tip: Add Keys to Your List Items
Why use a key? Because it gives Flutter a reliable way to track which widget is which, especially when your list updates dynamically. Without keys, Flutter identifies widgets by their position in the list (index). But once your list starts changing (like adding, deleting, or reordering items) relying on the index becomes dangerous.
Common issue: You delete the 3rd item in your data, expecting it to be the Pokémon with ID 0003.
But Flutter sees "item at index 2" and reuses the wrong widget, maybe deleting or updating the wrong card.
It might sound like a small difference, but it's a bug with a big UX impact.
The solution? Use a Unique Key Per Item
Now Flutter knows exactly which widget maps to which Pokémon, even if the order changes, or the list is updated.
The final List should look like this:
if (state is PokemonListSuccess) {
          return ListView.builder(
            cacheExtent: 350,
            itemCount: state.pokemons.length,
            itemBuilder: (context, index) {
              return Container(
                margin: EdgeInsets.only(top: index != 0 ? AppSpacing.md : 0),
                child: PokemonCard(
                  key: ValueKey(state.pokemons[index].id),
                  pokemon: state.pokemons[index],
                ),
              );
            },
          );
        }
Now that our Pokémon list is up and running, let’s make it feel more alive.
Toggling Favorites Pokémon
We’re going to add the ability to toggle a favorite icon on each Pokémon card, and we’ll do it the right way. Using Bloc, immutability, and the power of Equatable.
This isn’t just about clicking a heart icon.
It’s about learning how to update a single item in a list, emit the right Bloc state, and rebuild only what’s necessary.
First of all, we start by defining a new event in our Bloc. This event simply carries the pokemonId of the card we want to toggle.
class ToggleFavoriteStatus extends PokemonListEvent {
  final String pokemonId;

  const ToggleFavoriteStatus(this.pokemonId);

  @override
  List<Object> get props => [pokemonId];
}
Then, we add this event inside our PokemonListBloc.
  void _onToggleFavoriteStatus(
      ToggleFavoriteStatus event, Emitter<PokemonListState> emit) {
    if (state is PokemonListSuccess) {
      final currentState = state as PokemonListSuccess;

      final updatedList = currentState.pokemons.map((pokemon) {
        if (pokemon.id == event.pokemonId) {
          return pokemon.copyWith(isFavorite: !pokemon.isFavorite);
        }
        return pokemon;
      }).toList();

      emit(PokemonListSuccess(pokemons: updatedList));
    }
  }
Now, even though we’re emitting the same state class, you might be wondering:
“Why does this actually work? Shouldn’t Bloc ignore it since we didn’t change the state type?”
Great question, and this is where Equatable and immutability come into play.
When we emit the new PokemonListSuccess state, we’re passing in a brand-new list instance with a modified Pokémon object inside it. Since our Bloc state class overrides props like this:
@override
List<Object> get props => [pokemons];
Bloc uses Equatable to compare the new list against the previous one. And because it’s a different list object (new reference), Bloc considers it a new state, and triggers the rebuild.
Flutter then efficiently rebuilds only the widgets that need updating, thanks to:
- The ListView.builder reusing widgets
- Our use of ValueKey(pokemon.id) to help Flutter track which widgets changed
This is the power of immutability and Equatable working together. You change only what’s necessary, and Flutter takes care of the rest.
So yes, we’re using the same state type (PokemonListSuccess) again, but with new data inside, and that’s exactly what Bloc is built for.
Wrapping up Part 1
And there you have it! We’ve built a clean, efficient, and scalable listing system using Bloc, Equatable, and Flutter’s powerful rendering engine.
From setting up the API flow with the PokéAPI, to handling list state with Bloc, and finally making the list interactive with favorite toggles, we’ve covered the essential concepts that power most real-world listing features in mobile apps.
This wasn’t just about displaying some data. We explored how to:
- Manage state cleanly with immutable patterns
- Trigger UI updates the smart way with Equatable
- Optimize list rendering with ListView.builder, keys, and cacheExtent
If you’ve followed along this far, congratulations! You’ve just added another level of skill to your Flutter toolbox. But we have a lot more work to do if we want to create the most complete and efficient Pokédex. In the next part, we will cover the pagination feature. Stay tuned!
If you enjoyed this article and want to stay connected, feel free to connect with me on LinkedIn.
If you'd like to dive deeper into the code and contribute to the project, visit the repository on GitHub.
Was this guide helpful? Consider buying me a coffee!☕️ Your contribution goes a long way in fuelling future content and projects. Buy Me a Coffee.
Feel free to reach out if you have any questions or need further guidance. Also, I would love to see if you have any ideas for the next parts. What features would you like to add on this Pokémon journey?

Top comments (4)
I don't get it what's the point of this override. Wouldn't it have worked fine without it?
Hey Leo, great question!
So, by default, the Equatable sets the
props => [ ]
This means that if we don't adjust it to the variable that handles our State, it won't act on the things that we want to trigger.
But when
PokemonListSuccessis emmited through_onToggleFavoriteStatus()we pass a different List instance than the one that's already being emmited, so the state change would have worked regardless of the override, correct? From my understanding the override is used purely for optimisation purposes, even though that's not really clear to me either.Moreover what's the Superclass at work here that allows us to override
props? DoesPokemonListEventextend some class, or is it a generic override that all class can inherit? Thanks! :-)The override is necessary because it tells Equatable which values inside the state should be used to determine equality. Without it, Equatable assumes all instances of the state are the same, and the UI won't rebuild, even if your data changes.
So, that being said, let's answer another question. Do we actually need Equatable? Because like you said, we use a different list every time.
Well, we actually do need Equatable because without it, we will have to change the state every time we want to trigger some changes in the UI. The bloc itself, doesn't allow us to apply changes in the UI without changing the whole state instance. But in our example, we want to keep the Successful state all the time, and still apply UI changes in the list.