![Cover image for [Part 1] NextJS + Golang Service in Kubernetes - Setup](https://media2.dev.to/dynamic/image/width=1000,height=420,fit=cover,gravity=auto,format=auto/https%3A%2F%2Fdev-to-uploads.s3.amazonaws.com%2Fuploads%2Farticles%2Fzxbvritbqzvc05tn40ix.jpg)
Introduction
Deploying a web application to Kubernetes some times may not be so straight-forward for people that are just starting with it. In this series we are gonna be deploying a Kubernetes cluster to a live environment (yes!) for you to have a real-life experience with Kubernetes - outside of your minikube and localhost - and hopefully by the end of this series you will be able to use the resulting project as a base for your future projects.
We will be utilizing cloud providers that might incur some costs and the decision on which provider to pick is mainly due to its setup cost - all of the components which will incur costs will be provisioned with Terraform so that you can easily instantiate and destroy them every time you want to test something — keeping the costs of “experimentation” as low as possible.
I am designing this series towards software developers with some level of experience but that may not have been introduced to the world of DevOps.
Technologies and Concepts
Before we start, I would like just to ponder a bit about the technologies, tools and providers we are gonna be utilizing in this project.
- Golang Golang is one of the fastest-growing languages for the past years and has a really good learning curve for people coming from other languages and people that are just beginning with software development. Other than that, its a fast, with a low memory footprint, type-safe language that allow you to have well built software that is easy to predict and incorporate modern best practices in software development.
Coming from a PHP development world I always find it troublesome to deploy applications with loads of networking caveats and components like web servers, proxies and etc - until I started migrating to Golang some years ago. Different than the PHP built-in web server — reason why for a production PHP application is highly recommended to use an external web server like Apache or NGINX — the Golang built-in web server is fast, reliable and production ready with no need of external configuration files or anything like that to get you up and running.
-
Next.js (React)
In the game of JavaScript frameworks there are some that standout - but on top of most lists you will always read the name Next.js. Next is a React Framework that has been growing into peoples tastes and more and more people are dropping their React, Create React App and going to Next.js for a more robust solution - it’s community has been growing exponentially with the years by it’s intuitive usage, performance at scale and the ecosystem Vercel - the company that developed and maintain the project - provides and the amazing documentation that cover most (if not all) scenarios.Here are a couple of features that standout from the rest of the frameworks:- Incremental Static Regeneration (ISR): One of the most important things in a front-end deployment is the speed of the page and how optimal it’s view port initial rendering is, among other factors —most people opt for building static websites for this reason. But static websites usually have the problem that whenever you want to show a new page (like a new blog post) - you will have to rebuild the entire website and deploy once again. With ISR, you can easily define re-validation periods so that your front-end knows when to check if there is a new content to be “statically generated” and automatically make available without having to re-deploy/rebuild your application.
-
Built-in Image Optimization Component: Quite often you will find yourself trying to get the right balance between an image size and it’s quality and also find a lazy-load scheme/library for your images. This can be quite annoying and disruptive for the development workflow. For this scenario, Next.js provides a
<Image>component that automatically optimize the image to be shown in.webpformat - which usually already contribute to 30% of size decrease of the image in comparison with.jpegand the images are automatically lazy-loaded.
-
Kubernetes (K8s)
Kubernetes is the market standard/leader when it comes to container orchestration - with its declarative/imperative approach to managing objects. But it also provides some other goodies that usually are left unmentioned:- Ingress: Usually, in projects that do not use Kubernetes, if you had several services running and would like to put them behind a single API, the most standard approach would be to introduce an API Gateway or something like this - with Kubernetes, there is no need to do that to achieve the same effect, with Ingress you can specify internal routing rules just like you would with API Gateway.
- Scaling and self monitoring: You can scale your resources horizontally and vertically with ease - in most cases allowing you to define the min and max amount of resources you can potentially dedicate for a resource like a pod or node. In addition to that if one of your resources, let’s say, a pod - crashes, it will instantly (or in a matter of seconds) spawn a new one to replace it.
- Transparent control over cloud resources: Services like AWS EKS detect when a specific external resource is specified in your Kubernetes manifest and it will “auto-magically” spawn that resource outside of your Kubernetes cluster - one example is the LoadBalancer kind. You can read more about it here.
There are, of course, many other benefits to use Kubernetes in your projects. I personally like to bring them into my personal projects because once you have a manifest/Helm charts that follow your architectural preference/wishes, it’s just applying it and you have all the infrastructure to run your applications. If you are a total beginner with Kubernetes I would highly suggest you to go through it’s concepts.
- Terraform
Infrastructure-as-Code (IaC) is the key for you to make your infrastructure reproducible and easy to manage. Nowadays any project that has some sort of configuration or instruction that require me to go through a panel and perform something manually for a project I usually look up if the service provides a Terraform Provider. You can find a wide range of providers - from NewRelic, Auth0 to more standard ones like AWS, GCP and Scaleway. It will allow us to create the infrastructure for this project and destroy it with 2 simple commands - ensuring that our costs don’t get out of control and we remove all resources once we are done.
For this specific project we are gonna be using Scaleway and AWS provider - maybe the NewRelic (we will have to see as we go 😄 ).
-
Cloud ProvidersAs mentioned above - we are gonna be making use of Scaleway Elements to provision our Kubernetes cluster, but what I did not tell you so far is that we are also going to utilize AWS to provision our Serverless database. So, yes, our solution will be multi-cloud and because I am cheap we are going to be using the smallest instances/configurations they provide - but you are more than welcome to use the one you want - at your own expense 😂
- Scaleway: Actually a provider I haven’t heard about so much in the past because all tutorials and buzz is usually with AWS and GCP. But nonetheless, Scaleway is a really good and reliable service that different than most cloud providers, it gives you a really transparent and predictable pricing structures and instances that are specifically built for testing/experimentation. One of it’s drawbacks is that they do not have such a wide range of services as AWS - so, if your solution need something specific like a Kafka Cluster - I would rather recommend you to look in another Cloud Provider (ie. AWS EKS to access AWS MSK). You can manually try out the different instance sizes to see how much it will cost you per year/month and so on.
- AWS: No need for introductions at this point - the reason we are going to use AWS it is mainly for its cheap Aurora Serverless database - MySQL flavored - paying only for what we utilize and probably being covered by the free-tier quotas 😊 It’s important to note that in theory with the Kubernetes cluster we could instantiate pods with MySQL containers (or any DB) - but this comes with it’s own burden - we would need to manage the storage of our cluster - this is not recommended for Kubernetes beginners and probably I will be covering this in a future post.
Overview
In this image you can have a better idea of what we are gonna be building - I omitted some components such as Network configuration, Certificates (cert-manager) and our NewRelic side-cart.

All of the code we are going to be creating for this series is gonna be available in this repository - and you can navigate through the series progress by checking out the git tag related to the post part (ie. Post part 1 = tag 1.0.0, Post part 2 = tag 2.0.0). So without further ado - let’s get our hands dirty 😎.
Setup
Project
You can create the following folder structure:
|—— clients
|—— services
|——————- api
Terraform
The first thing we will need is actually to install Terraform - it’s usually quite straight-forward. You can either go to Terraform website and install a specific version or you can install tfswitch which allow you to easily install and switch versions of Terraform from your terminal.
In addition to that, you can install the VS Code Extension or the JetBrains Plugin to provide you syntax highlight.
For the purpose of this series - we are gonna be using Terraform 1.1.9. So after you are done with the installation you should be able do to the following command:
terraform version
## Terraform v1.1.9
## on linux_amd64
Now let’s create our main Terraform file - this file will be used to configure our Cloud Providers so that we can actually create the resources necessary for our project. Run the command from the root of your project structure.
touch .infrastructure/main.tf
Now let’s fill this file with the AWS and Scaleway providers configuration - you can find more detail about the providers and all of its documentation in their respective pages.
Let’s start first with the AWS provider:
terraform {
  required_providers {
    aws = {
      source = "hashicorp/aws"
      version = "4.11.0"
    }
  }
}

provider "aws" {
  # We are gonna change this in the next steps
}
And then the add the Scaleway Provider:
terraform {
  required_providers {
    aws = {
      source = "hashicorp/aws"
      version = "4.11.0"
    }
    scaleway = {
      source = "scaleway/scaleway"
      version = "2.2.1-rc.3"
    }
  }
}

provider "scaleway" {
  # We are gonna change this in the next steps
}

provider "aws" {
  # We are gonna change this in the next steps
}
Now you can go into the .infrastructure folder and perform the following command - which will download the providers.
cd .infrastructure
terraform init
After doing that, you will notice that a new folder .terraform and a .terraform.lock.hcl is created. The .terraform folder container mainly the binaries that allow us to communicate to the provider APIs. We don’t need to version this 2 files - so let’s create a .gitignore
echo ".terraform" >> .gitignore
echo ".terraform.lock.hcl" >> .gitignore
In terms of tooling, we are set here. We still need to configure the providers with our credentials, and to retrieve those credentials we will need to dig on the console for each provider.
AWS Account Setup
If you already have credentials (Access Token and Secret) for your AWS Account you can completely skip this section - it’s just important to ensure that your user has the policies described below.
Let’s create your account first - go to AWS website. And click on “Complete Sign Up” on the top bar

Go through the entire flow (you may be required to input your payment details).
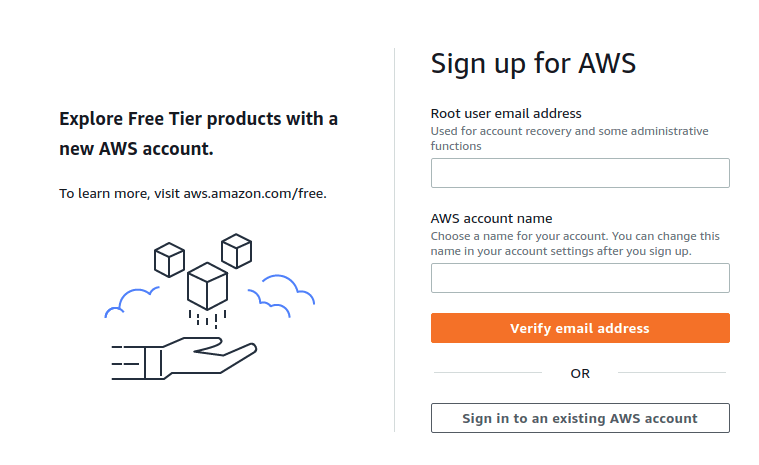
By the end of the process you should land in the following screen - don’t get too used to it:

As a first step in your AWS Account - I highly suggest you to setup a Budget Alert and Multifactor Authentication - if you already done that, you can skip to the Setup User Credentials. The account you just created is called “root” account and has Administrator powers by default.
AWS Budget Alert
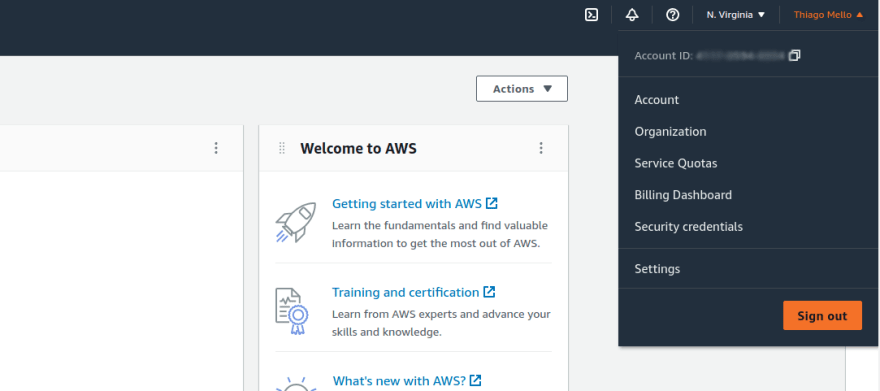
Go to “Billing Dashboard” on the Top Right menu:
Then on the right-side menu click on “Budgets” and then click on “Create Budget”. You are gonna be presented the following Wizard:

My recommended options are:
- Budget type: Cost Budget
- Budget Name: Personal Budget
- Period: Monthly
- Budget renewal type: Recurring budget
- Start Month: (the current month)
- Budgeting method: Fixed
- Enter your budgeted amount ($): (personal preference - I usually put 20 USD, month)
- Budget Scope: All AWS services (Recommended)
And then define the alerts that make sense to you according to the budget you defined. To be quite clear, defining a budget does not mean AWS will charge you the budgeted amount and it won’t prevent you from going over-budget - it just allows you to have a better monitoring of the costs in your account.
Multi-Factor Authentication
If you haven’t setup the Multi-Factor Authentication while registering, you can do so by accessing “Security Credentials” on the top left corner of the AWS Console:

You are then gonna be send to a page where you can Assign an MFA device:

From there it’s pretty much following the Wizard - scan the QR code with the MFA Device of your preference (ie. Google Authenticator) and you will be logged out of it afterwards.
Setup AWS User Credentials
We are going to be creating a role and a user specific for this project - this is a good practice because it allows you to have fine-grained control over all the projects you are running in terms of permissions and security.
From AWS Console - go to the IAM page:

Click on “User” and then “Create User” and then input any name for your user (ie. vinyl-catalog-user) and select “Access key - Programmatic access” and hit next.

In the next page select “Attach existing policies directly” and search and select the following policies:
- AmazonVPCFullAccess - We will probably need to configure how our VPC is configured - allowing that only our Scaleway Kubernetes cluster can have access to our database
- AmazonRDSFullAccess - This policy will allow us to create the database instance and may as well allow us to configure database users.
This are really wide policies and for now that’s alright - we don’t know exactly what we are gonna need to configure and we can later on adjust to a more granular level control and maybe add some others. For now, that’s all we will probably need - so you can hit “Next” and if desired fill in some “Tags” so you can later on have a better reference to your newly created user - hit “Next” again and you will end up in the following screen:

Click “Create User” and then you should see the following screen:
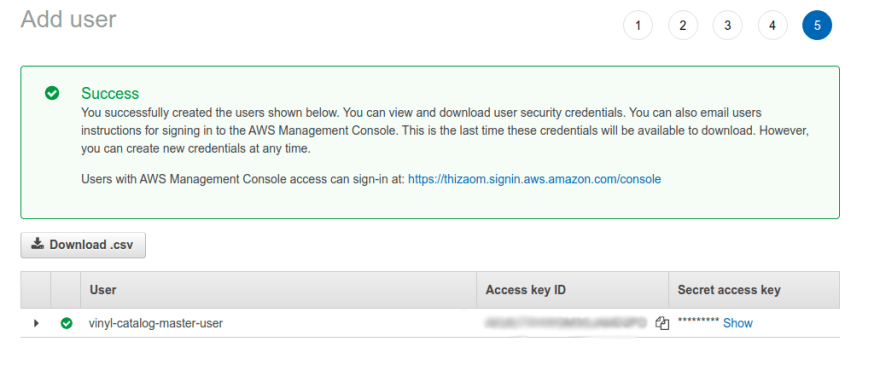
Copy both the Access Key and Secret Key and paste into an editor of your choice and save it in a text file (temporarily). We are gonna come back to it.
AWS Credentials Vault
Let’s ensure that our access key and secret key are not in plain text in our laptops - to help us with that we are gonna use AWS Vault - which is a tool that help us manage AWS profiles and credentials in a secure way - with some nifty solutions as key rotation via CLI and etc. But before we do that, we need to install the AWS CLI (if you don’t have it yet):
- Install AWS CLI - visit the CLI website and you will see on the right side links to install for your OS.

- Install AWS Vault - visit the Github repository and follow the installing instructions in the README.
Once you are done with it - you should be able to perform the following command:
aws-vault list
Now let’s actually add our profile - and copy/paste the Access Key and Secret Key you saved in a temporary file in the last step:
aws-vault add vinyl-catalog
Enter Access Key ID: [XXXXXXXXXXXXXXXXX]
Enter Secret Access Key: [XXXXXXXXXXXXXX]
Added credentials to profile "vinyl-catalog" in vault
After this step - ensure you delete your temporary file - to confirm everything is working with our user access run:
aws-vault exec vinyl-catalog -- aws rds describe-db-instances
This command should list all our databases (at this point - we have none).
Now, let’s go back to our Terraform file - [main.tf](http://main.tf) - we are gonna specify the recently created profile and the region that better suits you - in my case it’s Frankfurt (eu-central-1). So your main.tf should look like this now:
terraform {
  required_providers {
    aws = {
      source = "hashicorp/aws"
      version = "4.11.0"
    }
    scaleway = {
      source = "scaleway/scaleway"
      version = "2.2.1-rc.3"
    }
  }
}

provider "scaleway" {
  # We are gonna change this in the next steps
}

provider "aws" {
  profile = "vinyl-catalog"
  region = "eu-central-1"
}
Scaleway Account Setup
If you already have credentials (Access Token and Secret) for your Scaleway Elements Account you can completely skip this section - it’s just important to ensure that your user has the policies described below.
Let’s create your account first - go to Scaleway website. And go through the registration process - when presented the account type option - I would suggest you to pick the “Build” option - it will require you to input your Billing Information and verify your identity - it’s a bit lengthy process and the Identity check might take some minutes/hours - but by the end you should be able to reach the main page:

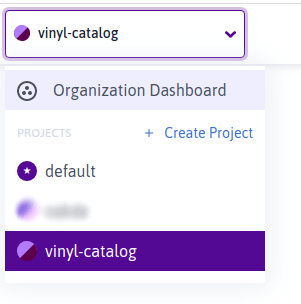
The first thing we are going to do is create a new Project - click on the drop-down menu on the top and click “Create Project”:
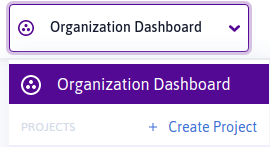
Fill in the project name:

That’s it for now - let’s just ensure our account is properly setup so we don’t have any major surprises with the billing and security of it.
Scaleway Budget Alert
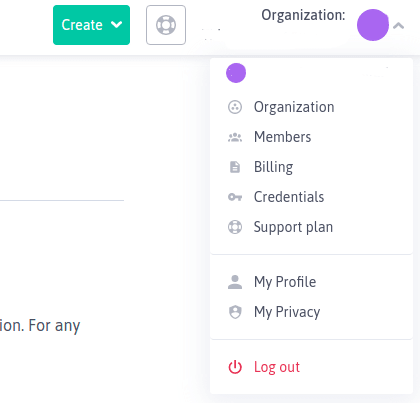
Click on the menu button the top right corner and select “Billing”:
Just like the AWS Budget Alert - set yourself a budget that you believe it’s good enough for you and don’t forget to add the Alert triggers:

This way - if you go over budget at least you know you can act upon.
Setup Scaleway User Credentials
Now we will be creating the credentials to enable us to communicate through the Scaleway API via Terraform. To do so - ensure that you are within our project - in my case I named it “vinyl-catalog”:
Click on the right-hand top corner menu button and then click on “Credentials”:
You should be presented the following screen:

Click on “Generate new API key” - you will be asked the purpose - you can put anything here - I will specify “Terraform”:
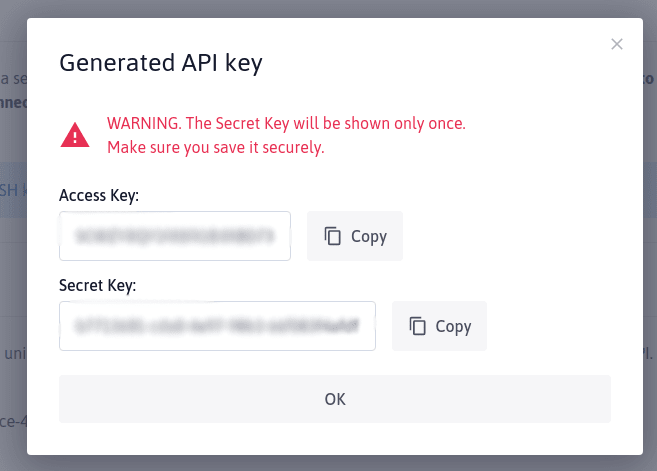
Copy both Access Key and Secret Key into a temporary text file - we are gonna back to it.
Scaleway Client Configuration
Different than AWS - Scaleway does not have right now a lot of tooling surrounding it’s ecosystem - and there is no tool comparable to AWS Vault as well. For that reason, we are gonna take the safest approach recommended by Scaleway - utilizing the a Shared Configuration created by the Scaleway CLI.
First of all - you can install the Scaleway CLI by following the installation steps within this Github Repository. By the end of it you should be able to perform the following command in your terminal:
scw version
#### BuildDate  unknown
#### GoVersion  go1.17.2
#### GitBranch  unknown
#### GitCommit  unknown
#### GoArch     amd64
#### GoOS       linux
Now let’s initialize CLI with our credentials - utilize the Secret Key shown in the previous step (remember to delete the temporary file). :
scw init --profile vinyl-catalog
Enter a valid secret-key or an email: [XXXXXXXXXXXXXXXXXXXXXX]
### To improve this tool we rely on diagnostic and usage data.
### Sending such data is optional and can be disabled at any time by running "scw config set send-telemetry=false".
Do you want to send usage statistics and diagnostics? (Y/n): [n]
### To fully enjoy Scaleway CLI we recommend you install autocomplete support in your shell.
Do you want to install autocomplete? (Y/n): [Y]
### Creating new config at /home/thiago/.config/scw/config.yaml
### Config saved at /home/thiago/.config/scw/config.yaml:
### send_telemetry: false
### profiles:
###   vinyl-catalog:
###     access_key: [XXXXXXXXXXXXX]
###     secret_key: [XXXXXXXXXXXXX]
###     default_organization_id: [XXXXXXXXXXXXX]
###     default_project_id: [XXXXXXXXXXXXX]
###     default_region: fr-par
###     default_zone: fr-par-1
### To enable autocomplete, scw needs to update your shell configuration.
What type of shell are you using (default: zsh): [zsh]
We found an SSH key in ~/.ssh/id_rsa.pub. Do you want to add it to your Scaleway account? (Y/n): [Y]
### Initialization completed with success.
If you already have an SSH Key available you might get asked to link it to your account - you should accept that! Later on, it will be quite convenient. If you don’t know how to create an SSH Key - follow this tutorial. For this specific series, we are gonna utilize the “vinyl-catalog” profile - but in the future, if you wish to have different users or credentials you can set different profiles and active profile in $HOME/.config/scw/config.yaml (Unix) / %USERPROFILE%/.config/scw/config.yaml ****(Windows).
And as the last step - let’s add our newly created profile to our Terrraform file (main.tf) - you can also pick the region/zone that makes more sense to you. By the end of the setup the file should look like so:
terraform {
  required_providers {
    aws = {
      source = "hashicorp/aws"
      version = "4.11.0"
    }
    scaleway = {
      source = "scaleway/scaleway"
      version = "2.2.1-rc.3"
    }
  }
}

provider "scaleway" {
  profile = "vinyl-catalog"
  zone   = "fr-par-1"
  region = "fr-par"
}

provider "aws" {
  profile = "vinyl-catalog"
  region = "eu-central-1"
}
Back-end Service
With all the Cloud and credentials setup done and out of the way (for now) we can now start looking into code 🚀! So - as mentioned before we are going to be building a Golang Service - at this stage it’s intentions are really basic: receive a request in localhost:8080/up and return a simple status 200 with any content.
Golang Setup
You can utilize for the development of the service VS Code with the Golang extension or, like me, utilize JetBrains GoLand which is an IDE specific for Golang. Before we start creating files and going crazy with some Go development - let’s install GoLang - the easiest and simplest way I found is by utilizing gvm - you can find of it as the JavaScript nvm but for GoLang.
So you can install it, first of all - check the requirements/dependencies according to your OS here and after you have its requirements/dependencies installed run the following commands:
### Download the GVM installer (Bash)
bash < <(curl -s -S -L https://raw.githubusercontent.com/moovweb/gvm/master/binscripts/gvm-installer)
### Or Download the GVM installer (zsh)
zsh < <(curl -s -S -L https://raw.githubusercontent.com/moovweb/gvm/master/binscripts/gvm-installer)
By the end you should be able to run the following command to validate your installation:
gvm version
### Go Version Manager v1.0.22 installed at /home/thiago/.gvm
After that you can install Golang version 1.18:
gvm install go1.18
### In some OS the command above might fail (ie. Ubuntu 20.04),
### in that case you can can try downloading the binary with the -B flag
gvm install go1.18 -B
And to start using the newly installed version and validate your installation run:
### start using and set the Go 1.18 as the default version
gvm use go1.18 --default
### Now using version go1.18
go version
### go version go1.18 linux/amd64
Golang Application Scaffolding
Open a terminal in the services/api folder and run the following command. Replace the string with your Github username. It’s important to note that this repository does not have to exist and you can host your code in a different repository if you wish - this will only play a role if you would like to eventually distribute your application as a package for other people to consume. This command will create a go.mod file (Go Modules file) - which will later on be used for us to manage our Golang package dependencies.
go mod init github.com/{YOUR_GITHUB_USERNAME}/vinyl-catalog
### ie. go mod init github.com/thiduzz/vinyl-catalog
Create a main.go file within services/api/cmd/vinyl_catalog/ folder. This file will be the entrypoint of our Backend application. Let’s make our application (main.go) print out something to see if our local Golang setup is working properly.
// Main package
package main

//import a package fmt that enable us to print things to the stdout (console)
import "fmt"

// Entry function of the application
func main() {
    fmt.Println("Hey! My name is Thiago")
}
And then from the services/api directory run the following command:
go run cmd/vinyl_catalog/main.go
### Hey! My name is Thiago
Cool, if you saw the Print in your console it means that the setup is fine and we can move on to start defining a basic Golang web server. Lucky for us, Golang have one that we are gonna be using across this series and you can utilize it even for production purposes.
So let’s start by adapting our main function and imports:
import (
    "log"
    "net/http"
)

func main() {
    log.Println("Starting server at port 8080")
    if err := http.ListenAndServe(":8080", nil); err != nil {
        log.Fatal(err)
    }
}
If we run the application again (go run cmd/vinyl_catalog/main.go) we will get something like the log below and the terminal will hold (to quit you can do CTRL+C within the terminal) - what is happening is basically our web server is listening for connections but no handler for our routes have been created - you can even access in your browser [localhost:8080](http://localhost:8080) (but you will get only 404s):
2022/04/23 12:03:35 Starting server at port 8080
So let’s add a handleFunc mapped to the /up route - for now we are gonna be using this simple setup with the DefaultServeMux only but we are gonna incrementally optimize it to make it easier to manage when we have more routes and to better treat authentication, dependencies, validation and SSL:
func main() {
    log.Println("Starting server at port 8080")

    // Adds a HandleFunc to the DefaultMux
    http.HandleFunc("/up", func(w http.ResponseWriter, r *http.Request) {
        // Utilize fmt.Fprintf that accepts a io.Writer
    // and write the content of the page
        fmt.Fprintf(w, "God save the Queen!")
    })

    if err := http.ListenAndServe(":8080", nil); err != nil {
        log.Fatal(err)
    }
}
If you are curious to know a bit more about handleFunc, Handlers and DefaultServeMux I recommend you to give a read on this post.
Just to validate if everything works run the application (go run cmd/vinyl_catalog/main.go) and access the [localhost:8080](http://localhost:8080) from your browser - you should see the following:

Front-end Service Scaffolding
We are almost done with the basic setup of our project - the last remaining piece is the easiest part given the amount of documentation on how to do that. We are gonna be quickly creating a Next.JS application which eventually will allow us to interact with our Golang Backend.
I assume that you already have NodeJS and Yarn installed by now - if not, just follow the instructions within this links: NodeJS installation and Yarn installation. I am going to be using Node version v16.13.1 and Yarn version 1.22.4. You may as well use nvm in case you already have an installation of Node/NPM/Yarn.
I highly recommend you to use VS Code or JetBrains Webstorm as your IDE for this part of the solution.
Next.js Application Scaffolding
Let’s start by going into the clients folder and running in the terminal the following command:
### creates the application with typescript support
### and Tailwindcss pre-installed in the "web" directory
yarn create next-app --example with-tailwindcss web
cd web
### Runs the NodeJS webserver
yarn dev
### $ next dev
### ready - started server on 0.0.0.0:3000, url: http://localhost:3000
### wait  - compiling...
### event - compiled client and server successfully in 1728 ms (124 modules)
And if you visit the http://localhost:3000 in your browser you will be presented the default Next.js homepage:

Any change that you perform when running the Next.js application while running yarn dev will be (almost) instantly applied in your browser - keeping the development cycle lean and fast.
But now, let’s clean up all this boilerplate before we wrap this Part of the series. You can safely delete the following files:
- /public/vercel.svg
- /pages/api (entire folder with its content)
And you can completely replace the entire /pages/index.tsx file with the following content:
import type { NextPage } from 'next'
import Head from 'next/head'

const Home: NextPage = () => {
  return (
    <div className="w-full h-screen p-0 flex flex-col">
      <Head>
        <title>Vinyl Catalog</title>
        <link rel="icon" href="/favicon.ico" />
      </Head>
      <header className="flex justify-center bg-white py-4 fixed w-full z-10 border-b">
          Header
      </header>
      <main className="flex flex-col grow flex-nowrap">
          <div className="flex flex-col min-h-full w-full justify-center items-center container mx-auto py-10">
              <div className="flex flex-col min-h-full items-center justify-center flex-nowrap bg-cool-gray-700">
                  <h1 className="text-9xl font-black text-white text-center">
                    <span className="bg-gradient-to-r text-transparent bg-clip-text from-green-400 to-purple-500">
                            Vinyl Catalog
                          </span>
                  </h1>
              </div>
          </div>
      </main>
      <footer className="flex w-full items-center justify-center border-t">
          <span className="py-5">Footer</span>
      </footer>
    </div>
  )
}

export default Home
This should provide us already a somewhat responsive page with a header and footer for us to play around and it should look like so:

Conclusion
If you followed along each of the steps you should have by now:
- A running Golang application
- A running NextJS application
- Terraform properly configured with AWS Provider and Scaleway Provider
I know it’s a tiring process and for now, not so much coding - but one of the more annoying parts of the project is done - the initial setup. In the next post of this series we will be starting with our Infrastructure. If you want to get everything we’ve done so far — apart from the Cloud Providers setup, that inevitably you will have to do in your own machine — you can clone tag version 1.0.0 of the repository:
git clone --depth 1 --branch v1.0.0 git@github.com:thiduzz/vinyl-catalog.git

Top comments (1)
Exactly what I needed to get starting! Thank you!
I also skimmed through the part 2 and it looks very promising. I might skip AWS and Terraform for now, I'm managing my own cluster, but I might move to a bigger CSP at a later point. My philosophy is to be provider agnostic, so it needs to work anywhere.