Introduction
In this article, we are going to build a simple CRUD decentralized application on the Ethereum blockchain.
Github repo
Prerequisites
- 1.Basic understanding of solidity or general programming. Solidity Doc to read
- 2.Metamask extension on chrome or Firefox. (To connect with web3)
- 3.Basic understanding of Web3.
- 4.Get INFURA KEY Infura. create account and project
- 5.Wallet on Metamask with some ether(coins)for a Ropsten network. You can get free testnet ether app.mycrypto.com You can go to app.mycrypto.com/faucet, or go to Tools > Use Testnet Faucet in the left-hand side menu on MyCrypto.com
- 6.Nodejs or Typescript understanding.
Smart Contract Deployment
- This is a simple curd smart contract, which deals with students’ data.
- Let’s deploy the contract in a remix environment
- First, navigate to address https://remix.ethereum.org/
- Add new curd.sol file and copy-paste the code from the repository.
- create account in metamask wallet and connect to Ropsten.
- Compile code using remix ide 3rd button solidity compiler
- From the left side click on the 4th deploy and run button deployment window will appear.
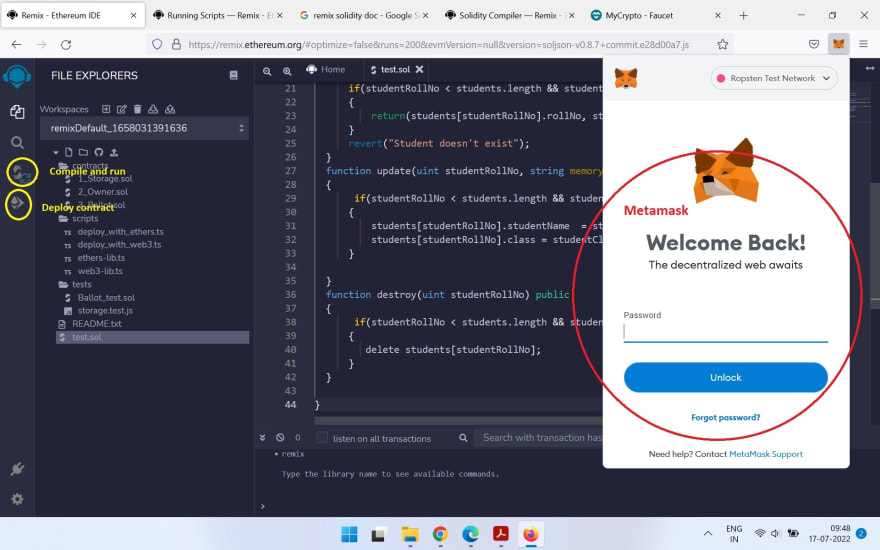
- Enter your password in metamask and you will get connected with the remix environment.
- You can see your metamask wallet address on a remix account.
Select ropsten test-network in metamask extension and your wallet should looklike this.
Now the metamask prompt will appear as follows and will ask you to confirm the transaction.
Now you can see the debug logs in the remix environment that the contract is creating and after successful deployment, the transaction log will appear as follows.

- Let’s verify contract deployment on ropsten explore by navigating to this addresshttps://ropsten.etherscan.io.
- Copy and paste the transaction hash from the log to the etherscan website. Deploy doc

- In the above picture, we can see who created the transaction, It should match with your metamask wallet address.
- Now our contract is ready we can test the all functions of the contract.

Build the decentralized application (dAPP)
- First, create an account on https://infura.io
- Then create a project and navigate to the project settings.

- Select the endpoint as a Ropsten. Note: We have deployed our contract on ropsten netwrok that why we are selecting Ropstenendpoint.
- Copy the project id and paste it into INFURA_KEY in the dapp.js
- Copy your metamask wallet address and paste it into account in the dapp.js
- Export metamask private key and paste it into privateKey in the dapp.js.

*Paste the copied ABI array in the
import Web3 from 'web3';
import Common, { Chain } from '@ethereumjs/common'
import { Transaction } from '@ethereumjs/tx'
// INFURA_KEY // Replace your infura-key
const web3 = new Web3('wss://ropsten.infura.io/ws/v3/' + process.env.INFURA_KEY);
const account = ''; // Replace wallet address with metamask wallet address

const contract_Address = ""; //replace deployed contract address
const abi: any[] =[];
const chck = web3.utils.toChecksumAddress(contract_Address)
const contract = new web3.eth.Contract(abi, contract_Address); // Instantiating smart contract`
dapp.js
Run the test dAPP
- Install dependencies using the below command.
npm install - Run the application using the following command
npx ts-node src/index.ts - After executing the application student will get created on the blockchain and we will get a receipt as follows
{
  from: '0x8aeaexxxxxxxxxxxxxxxxxxxxxx',
  gasUsed: 101374,
  logs: [],
  logsBloom: '0x00000000000000000000000000000000000000000000000000000000000000000000000000000000000000000000000000000000000000000000000000000000000000000000000000000000000000000000000000000000000000000000000000000000000000000000000000000000000000000000000000000000000000000000000000000000000000000000000000000000000000000000000000000000000000000000000000000000000000000000000000000000000000000000000000000000000000000000000000000000000000000000000000000000000000000000000000000000000000000000000000000000000000000000000000000000',
  status: true,  to: '0x83977bf3e9xxxxxxxxxxxxxxxx',  transactionHash: '0x37169068b6606193XXXXXXXXXXXXXXXXXXXXX',
   transactionIndex: 25,
    type: '0x0'
}
Comment create function call and enable read function then re-run dapp.
{0:0,1:"vinod",2:"Msc"}
Summary
We have seen how to create smart contracts and how to deploy smart contracts on the remix and test-network environment. We learn how to build the dapp using web3js and interact with the ethereum blockchain.

Top comments (0)