
In this tutorial, we are going to take two Pycom LoPy's, set the first one as a LoRaWAN Gateway and register it as a Gateway with The Things Network. Then with the second LoPy, we set it up to talk to our LoRaWAN gateway and have the The Things Network push Events to Wia.
Components
- 2 x Pycom LoPy
- 2 x LoRa compatible antenna
Prerequisites
If you are completely unfamiliar with the Pycom LoPy and Wia, you should try our getting started tutorial on how to connect the LoPy over WiFi and publish an Event to Wia here.
Basic setup of the LoRaWAN Nano Gateway
We are going to use Pycom's LoRaWAN Nano Gateway example for our basic LoRa Gateway.
- Create a new folder in Atom and name it
lorawan-nano-gatewaythis is the main folder for our Nano Gateway - Go to the Pycom library examples in the
lorawan-nano-gatewayfolder, the files can be found here - Copy the
main.py,config.pyandnanogateway.pyinto our main folder in Atom - Copy the code below into a file named
boot.py
The code is run on boot up of the Pycom board and starts the Nano Gateway automatically when the board is connected to the power.
from machine import UART
import machine
import os

uart = UART(0, baudrate=115200)
os.dupterm(uart)

machine.main('main.py')
Now your folder structure for your LoRaWAN Nano Gateway should look like below:
- main.py
- boot.py
- config.py
- nanogateway.py

Click Upload in the Pymakr plugin at the bottom of your window in Atom and send the code to your Pycom board.
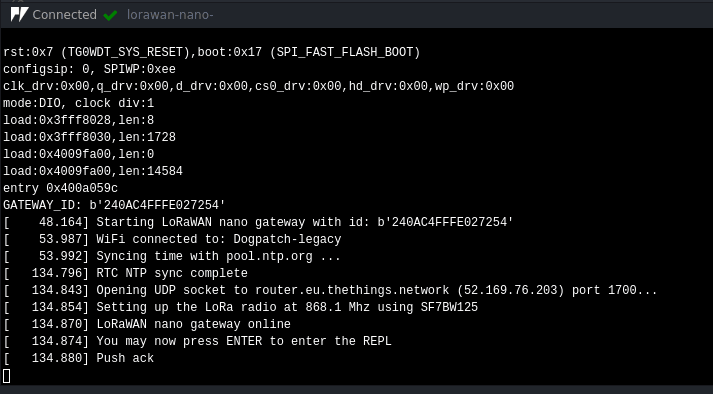
- The Gateway ID will be used later when registering the Gateway with The Things Network
Registering with The Things Network (TTN)
To set up the Gateway with The Things Network, you'll need to register/create an account with them. The link to their registration page is here. Once registered, you'll be taken to the TTN console where you register Gateway's and Applications, monitor Device activity and set uplinks to push the data to other services.
Registering a Gateway with The Things Network (TTN)
Inside the TTN Console, there are two options, Applications and Gateways. Select Gateways and then click on register Gateway. This will allow for the setup and registration of a new Gateway.
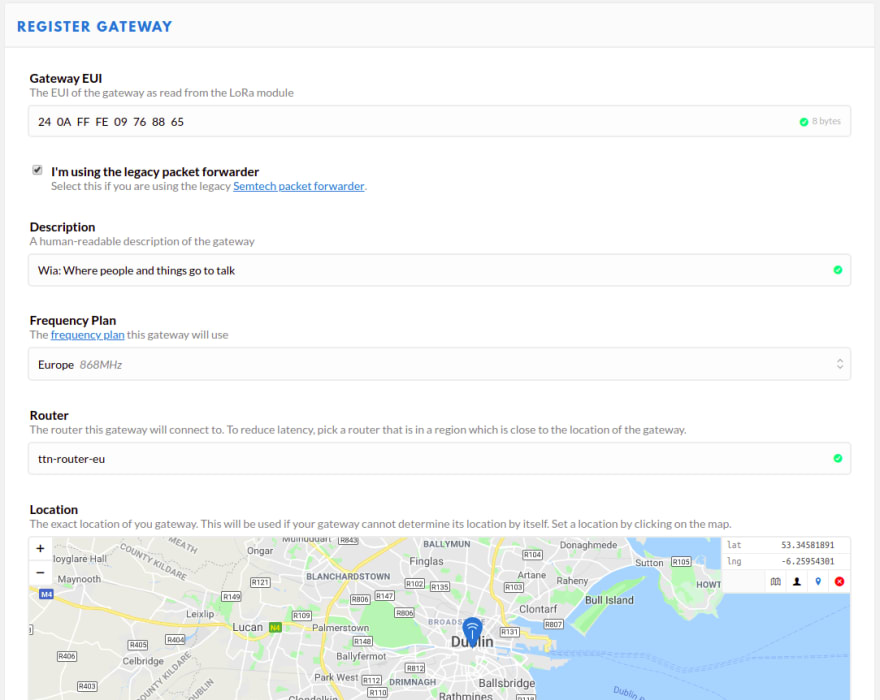
- The tick box from
I'm using the legacy packet forwardermust be ticked - The
Gateway EUIis from when we ran the Nano Gateway earlier - The
Descriptioncan be what you like your Gateway to be used for - The
Frequency Planis for your region is the geographical area you are based - The
Routerthat should be picked should be the closest to your area as well - Once you are finished inputting all the fields, click on
Register Gateway
On registering your Gateway, you should have everything you need to have your Gateway communicate with TTN.

Configuring your LoRaWAN nano Gateway with The Things Network (TTN)
Now that your Gateway has been fully registered with TTN, you should see the push and pull acknowledgements in your atom terminal.

Setting up an application with The Things Network (TTN)
Applications are used to group a collection of device's that have similar functions.
In the TTN Console, click on the applications tab and click on add applicationyour application will need to have:
- A random unique
Application IDwhich you just generate yourself - A
Descriptionof your application - For the
Handler Registration, add the handler that best suits your geographical region
Click on Add application to add an Application to TTN.
Adding a Device to your Application in The Things Network (TTN)
In the TTN Console, click on the Applications tab and click on the Application that we created earlier.
In the Application overview tab:
- Click on
register deviceon the Device's section - Add a unique
Device ID(Device ID can only exist of lowercase alphanumeric characters, nonconsecutive - and _ and it cannot start or end with a - or a _) - Click on the pencil icon for
Device EUI - Click on the
Registerbutton to add a Device

Activating The Things Network (TTN) integration in Wia
In your Wia dashboard, click on the Space you would like to add you and click on the settings icon on the left manu bar to see your Space's settings page.
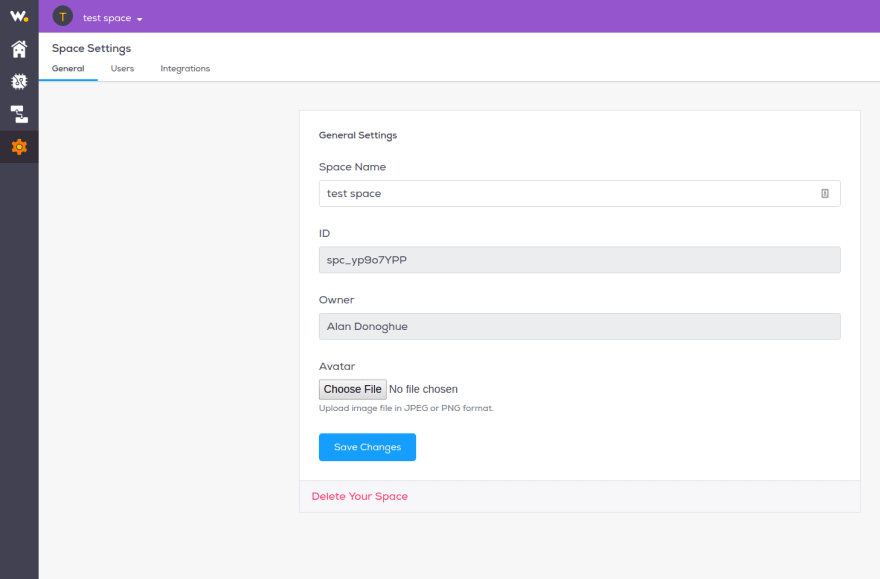
Now click on the Integrations tab to see a list of the available Integrations:
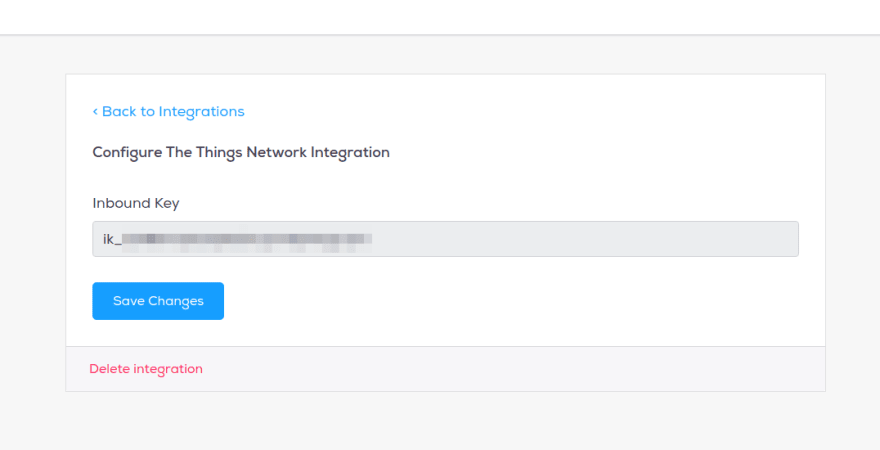
- FInd the
The Things Networkintegration and click to add it - An Integration key will be generated for and should start with
ik_
Go back to your TTN console and in you Application you just created, click on the Integrations tab:
- Click on
Get started by creating a new oneto see the available integrations - Click on
HTTP Integration - Add a random
Process ID - Click on the
Access Keythat was generated earlier in your Application - Enter
https://integrations.wia.io/api/ttn/uplinkas the url - Select
POSTas the HTTP method - Add
Bearer ik_your_integration_key, replacing theik_your_integration_keywith the Integration generated in your Wia Space - Nothing needs be added for
Custom Header NameandCustom Header Value - Click on save so that TTN will push all Event data from your LoRa Devices to Wia

Now with setup everything with need to connected our LoRa Device's to The Things Network and publish our Events to Wia. Now we need to setup a LoRa client node. We'll need the second LoPy to complete this task.
Setup of an over the air activation LoRa node
In Atom, create a new folder and call it otaa_lora. In this folder add the config file from the LoRaWAN nano Gateway and copy it into the folder.
Create a main.py file and copy the code from below into it.
""" OTAA Node example compatible with the LoPy Nano Gateway """
from network import LoRa
import socket
import binascii
import struct
import time
import config
import random
# Initialize LoRa in LORAWAN mode.
# Please pick the region that matches where you are using the device:
# Asia = LoRa.AS923
# Australia = LoRa.AU915
# Europe = LoRa.EU868
# United States = LoRa.US915
lora = LoRa(mode=LoRa.LORAWAN, region=LoRa.EU868)
# create an OTA authentication params
dev_eui = binascii.unhexlify('your-ttn-dev-eui')
app_eui = binascii.unhexlify('your-ttn-app-eui')
app_key = binascii.unhexlify('your-ttn-app-key')
# set the 3 default channels to the same frequency (must be before sending the OTAA join request)
lora.add_channel(0, frequency=config.LORA_FREQUENCY, dr_min=0, dr_max=5)
lora.add_channel(1, frequency=config.LORA_FREQUENCY, dr_min=0, dr_max=5)
lora.add_channel(2, frequency=config.LORA_FREQUENCY, dr_min=0, dr_max=5)
# join a network using OTAA
lora.join(activation=LoRa.OTAA, auth=(dev_eui, app_eui, app_key), timeout=0, dr=config.LORA_NODE_DR)
# wait until the module has joined the network
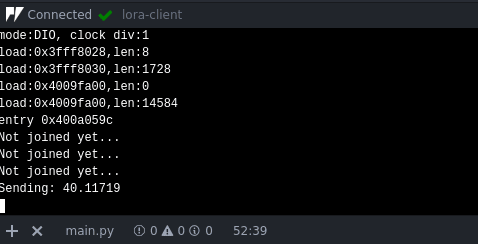
while not lora.has_joined():
time.sleep(2.5)
print('Not joined yet...')
# remove all the non-default channels
for i in range(3, 16):
lora.remove_channel(i)
# create a LoRa socket
s = socket.socket(socket.AF_LORA, socket.SOCK_RAW)
# set the LoRaWAN data rate
s.setsockopt(socket.SOL_LORA, socket.SO_DR, config.LORA_NODE_DR)
# make the socket blocking
s.setblocking(False)
time.sleep(5.0)
temperature = random.randint(0, 40)
for i in range (200):
pkt = b'{}'.format(temperature)
print('Sending:', pkt)
s.send(pkt)
time.sleep(4)
rx, port = s.recvfrom(256)
if rx:
print('Received: {}, on port: {}'.format(rx, port))
time.sleep(20)
You'll need to add the following keys obtained from TTN earlier into the tutorial code:
- dev_eui (Device EUI)
- app_eui (Application EUI)
- app_key (The access key)
The LORAWAN mode should be set to the region that matches your region and the one you set for the LoRaWAN nano Gateway.
Add a boot.py file into the and copy the code for below into the file:
from machine import UART
import machine
import os

uart = UART(0, baudrate=115200)
os.dupterm(uart)

machine.main('main.py')
Now your folder: otaa_lora should contain:
- main.py
- boot.py
- config.py
Note: If you have both your LoRaWAN nano Gateway and your otaa LoRa Node
running for your USB ports, you'll need to set project-level settings for one of the projects and change the address to the port that your second device is connected with. Click on Settings on the Pymakr plugin and click on project settings to add a pymakr.conf. This is where you add the port for your second device.
Click Upload in the Pymakr plugin at the bottom of your window in Atom and send the code to your Pycom board.
In your Wia Dashboard, click on your LoRa Device and switch to the Debugger tab to see the Events that your LoRa Device published coming through in real-time. To view all, click on the Events tab.

Handling your LoRa data in Wia
Now for the next step, we must parse the data we received from The Things Network and do something useful with it. For this we need to build a Flow.
Head over to your Wia dashboard and in the Space where your LoRa device is held. From there click on the Flow icon in the left hand menu to go your Flows.
Now to create your Flow, you can name it whatever you like. Once you have created a Flow, you should be taken to the Flow studio.
In the Flow studio:
Drag the trigger
Eventnode from the left hand side onto the canvasClick on the node and enter
ttnUplinkas the event nameEnable your LoRa Device as the event source
[upl-image-preview url=https://s3-eu-west-1.amazonaws.com/wia-flarum-bucket/2018-06-26/1530006282-733766-lora-flow-event.png]
Now drag over a function node from the logic section (We’ll parse the data here)
Click on the function node and add the following code:
function parseLoRaEvent(loraData) {
  return Buffer.from(loraData, 'base64');
}

if (input.body) {
  output.body.data = parseLoRaEvent(input.body.data.payload_raw);
}
This code parses the LoRa data from base64 format to ascii.
Start publishing data and your Flow should trigger.
That's it!

Latest comments (0)