
You need to create a website for a client --- and the client has a whole bunch of projects that they want to show on their website. Not only that but there are over 30 projects --- and each project portfolio has over 40 images and its own page. Sounds like a lot of work right? Luckily, using WordPress along with WP All Import Pro and Meta Box, this is a piece of cake. In this tutorial, I will walk you through how to do this.
To see what a completed project portfolio may look like, please check out this image, which is an example of a gas company project.
What I wanted to do in this tutorial was to go through not only the technical steps but also to look behind the curtain, about how I requested the data from the client.
So let's get started!
The Needed Tools
For this tutorial, you will need the following tools --- some of these will be free and some of these will be paid. Note that some of the plugins that I specify as free have paid versions. However, I did not use the paid versions to do this particular project.
- Elementor Pro (paid) --- you will need the paid version of Elementor for this --- this is because you will need to create templates for custom post types.
- WP All Import (paid) --- this will be used to import our projects into WordPress.
- SiteGround Hosting (paid) --- in this example I use SiteGround hosting --- which is a popular WordPress hosting solution in order to upload project images, but you can use any other cPanel solutions.
- MB Custom Post Types & Custom Taxonomies --- this is a free plugin that allows you to create custom post types.
- Meta Box (free) --- this is a plugin that allows you to create custom fields --- as we will be creating custom fields for our Projects' custom post types.
- Meta Box --- Elementor Integrator (free) --- this will allow us to position the custom fields that we create with Meta Box plugin on our custom post types.
- Google Sheets (free) --- this is what we will use to create the spreadsheet that we will import into the website with WP All Import plugin.
Ok, go on to the next step.
Create a Custom Post Type
The first thing we'll need to do is creating a custom post type named Project. Please note that I have already set up a front page for this site. However, this tutorial will be looking at creating the Project post type and importing a Google Sheet of projects.
But first the custom post type.
Go to Plugins > Add New and type in MB Custom Post Types & Custom Taxonomies, install and activate the plugin.

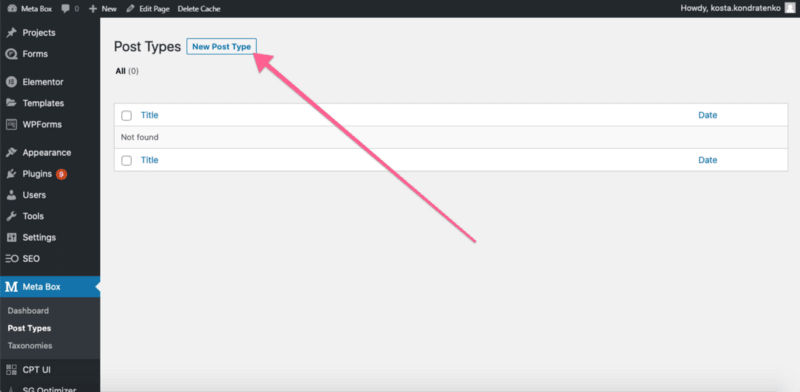
Then, go to Meta Box > Post Types and click New Post Type.
Enter the Plural name, Singular name, and Slug as follows:
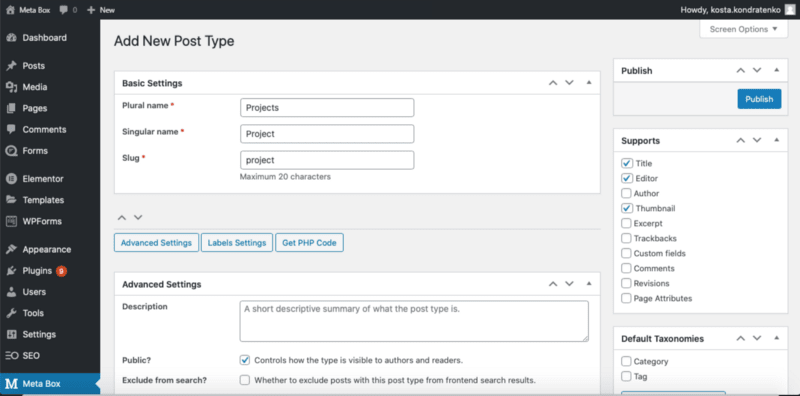
Finally, make sure that the Hierarchical? checkbox is selected:

Now click Publish and you're ready for the next step.
Creating a Template in Elementor for the Custom Post Type
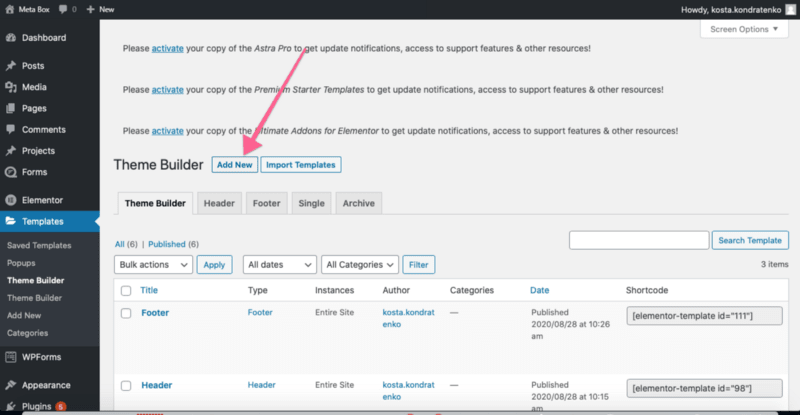
Since I assume you have Elementor Pro installed --- you'll need to go to Templates > Theme Builder.

Click Add New on the next window.
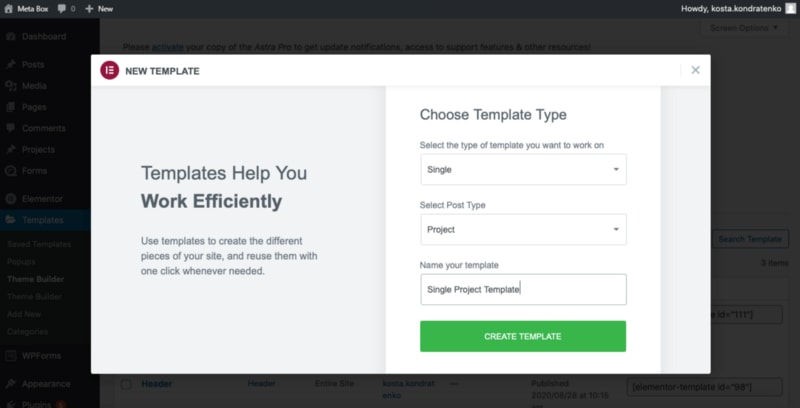
Make sure you select Single as the template type and Project as the post type.
Now you're ready to create your layout --- I won't go through too much of what it would take to create the layout. Here is what I have: sample_project_template.png.
I won't go into the header and footer --- which already existed. However, when I created the single project template I used a number of elements that already exist as template blocks in Elementor.
Below are screenshots of two blocks:
The top project block:
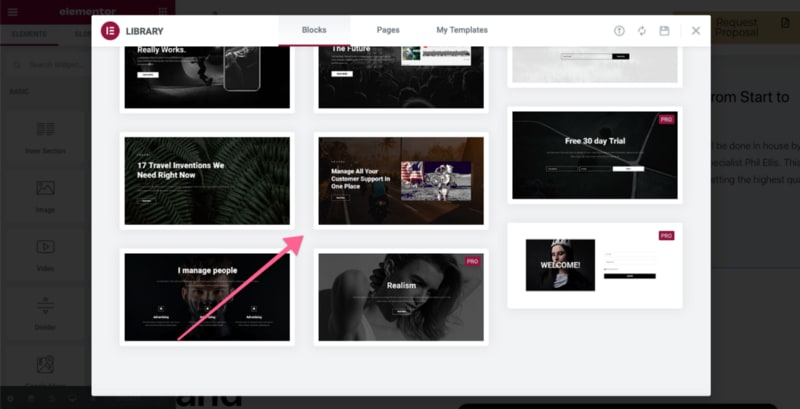
And there are various options for Gallery sections:

Setting up Custom Fields
The first thing we'll need to do is setting up some custom fields. For our purposes, we can use the title of the post as the project name and the main context as the description of the project.
Also, the images that will be displayed for the project will be post image attachments:

So we won't need custom fields for this.
We will only need two custom fields below:
- Project Budget.
- Medical Gas Installation Budget.
In order to set up these two custom fields with Meta Box plugin, you can use the free Online Generator tool and set up the two custom fields using the UI tool.

In the Settings tab, you can give your custom fields a title and a unique ID and choose Post for the Post Types.
Finally, click Generate Code at the bottom and paste this into our functions.php file.

But there are a few changes we'll need to make in the code.
First, change post to our project post type:
'post_types' => ['project'],
Change the prefix to mb_
$prefix = 'mb_';
You can see the full code I used to import below:
https://gist.github.com/HeadStudios/a03bcf698a42c91b2a0338d797108ecb
Voila!
The custom fields are now visible on the Projects post type:

Note: you will only need to do this if you have the free Meta Box plugin --- if you upgrade to the premium version you'll be able to create the custom fields in a UI from the backend with Meta Box Builder extension. Otherwise, if you are a coder, you can code yourself.
We now need to link these custom fields to our Elementor template --- in order to do this we'll need to install the Meta Box --- Elementor Integrator extension.
Once this is done let's go back to edit our single Project post type:
Now we simply need to set the custom field from the text field and make sure to add the prefix for what we want --- you can see how we do this in the video below:
https://i.imgur.com/BCNuWPc.mp4
So now we have some custom fields in our project!
Importing the Project List
This will be a little challenging. Firstly there are around 27 projects which the client has provided on a spreadsheet.
You can see the spreadsheet below:

There are a number of challenges that we'll need to address before we import this list --- which will be done with WP All Import.
To start off with --- you'll notice that the Featured Image column is a Google Drive link --- there is a trick to importing a spreadsheet into your WordPress site when the links are Google Drive.
This is going to make things challenging for us --- there are two reasons:
- Google Drive folders cannot be imported using WP All Import.
- There are A LOT of images --- some folders have 70+ images --- so we're dealing with quite a bit of volume.
Here is how I overcame these issues.
Step 1: Download all Google Drive Folders and Rename Files
To be fair, this may not be the fastest way --- but I just went ahead and did it anyway. Basically, I went into Google Drive and downloaded the folders. You can right-click a folder in Google Drive and click Insert here or when you are in a folder you can Click here.
Now once I had all the project folders in one place, I went through each folder and renamed all the files. So in the end, each folder had a list of files as so:
1.jpg\
2.jpg\
...\
40.jpg\
41.jpg
Now apparently --- looking back, there are tools you can use to batch rename a bunch of files in a folder. To do it, refer to this guide.
Once the images have been renamed every folder looks like this:

Also, I needed to setup some featured image --- I had this in the root of the folder that contained the folder with the projects --- you can see how it looked like below:

Now move on to the next step.
Step 2: Upload Files to SiteGround and Setting up Import
The next step is to upload the files to a remote server. In my example, I used SiteGround. However, you can really use any host --- as long as you can --- at the end have a direct link to the uploaded files like so:
mysite.com/p_uploads/project1/1.jpg
In my case, I created a new folder called p_uploads and then in that folder, I plan to put in all the projects.
This part is easy --- I simply right-clicked on the folder which held all my projects on Mac and selected What selected to zip up the folder.
Then, I logged into my SiteGround File Manager and simply uploaded that zip file as appropriate until all the renamed project images were now on a remote server.
Now I had everything I needed to upload the projects using WP All Import.
Step 3: Setup WP All Import
To set up the WP All Import --- assuming you have installed the premium plugin --- you'll need to go to All Import > New Import, and then once you are on that screen, click Download from URL.

Now, after you click Download from URL, you'll see a text field that will ask you to input the URL of the file you're imported. Since in my case I used a Google Sheets file from my Google Drive, I pasted in the public URL of the spreadsheet.
Note: make sure your link is set to Anyone with the link can view --- since if it's a private link it won't work

Now, there's one other thing I forgot to mention here --- and it's extremely important.
Long story short --- you can't just give WP Import a URL of a folder and have WP All Import download every image from that folder. Instead, you need to give WP All Import a comma-separated list of URLs which it would then import into your custom post.
Now as you can imagine --- in this particular project --- having to manually create the complete file path for every image in every project folder would be an absolute nightmare. Here is what I did to get around this, please note this may not be the fastest way but it worked for me --- if you have a faster solution feel free to share it.
Create a new column in the Google Sheet and fill it with default values
So I created a new column in the Google Sheet and called it Photos --- then I created a string which basically looked like this:

And so on all the way up to about 60.jpg, I believe. Now you'll notice in the list above that each image is separated by a comma.
Then, I simply took this line --- put it into the first record of my Google Sheet spreadsheet, and replicated this for every row.
Now from here is where a little bit of regex magic happens. You see --- having 1.jpg etc. is not enough, I now need to rename every single one of those records from 1.jpg to https://mysite.com/p_uploads/project_folder/1.jpg.
So in order to do this, you will need to use regex --- now don't worry if you're not even sure of what that is or how to use it because I will walk you through this.
For my case, I used the Atom app --- which is a code editor --- to perform the regex replace --- however, any code editor should have a regex function.
Here is all I did --- I would take each individual row and paste it into the Atom app. Then I used the regex expression which you can find here.
In this case, all you would need to do is replace the URL [what the regex said] with your own URL. Then, I would copy the entire contents and paste it back into Google Sheet --- you can see a video below of me using the regex expression:
So now, we have a Photos column along with a comma-separated list of the direct URLs for each project (you would of course change the folder of the project).
Now if you have only 10 images for certain projects then don't worry --- WP All Import is smart enough to realize when no image exists at the specified URL and simply skips those images --- so really all you need is what the maximum amount of images that could be in a folder would be.
Now that we have the import it's time to import using WP All Import, let's go!
Step 4: Set up Import Settings
Once you enter in the URL for Google Drive, make sure to select the custom post type you want to import the projects into --- in my case it's Projects, of course

On the next step, simply click Continue to Step 3.

Step 5: Set up Import Settings (The Second Step)
Now on the next step is when we map the columns from Google Sheet into our Project post type.
This is fairly straightforward for the most case --- all you need to do is drag the title of the column in the appropriate field.
However, we will need to import some data into the custom fields we had created earlier as well as import the images.
So first the custom fields.
Custom Fields Import
This --- again is straightforward. As you may remember we had created two custom fields earlier --- the project budget and the gas installation budget field.
All we need to do is scroll down to the custom fields section and click See Detected Fields.
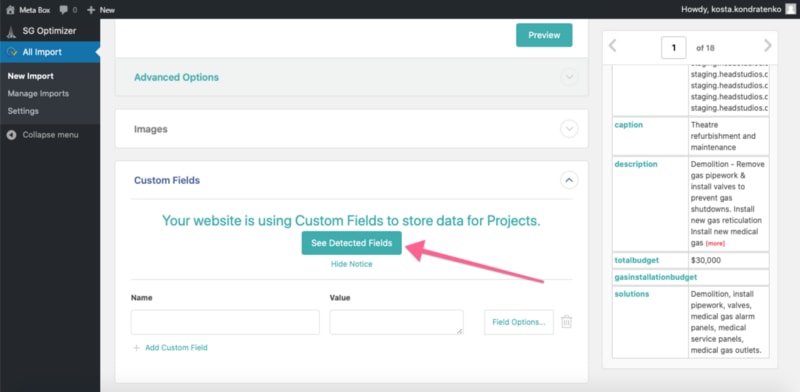
Then simply drag and drop the values that are necessary on to those fields:

Make sure to delete whatever value is in there at the moment (not sure why it is showing default values)
That's it! We have our custom meta fields filled out. Now let's move on to the images.
Images Import
Since we have already set up our images in the previous step, this is fairly straightforward.
Firstly, open up the Images drop-down and drag the column that has your images into the Download Images Hosted Elsewhere section.
Now, here is where the trick comes in --- WP All Import will download the images one by one and attach them to the post --- and it will make the first image it downloads to be the featured image.
Now the featured image is important however we don't want it to be 1.jpg --- in my case I have a featured image column which has the filename of the featured image --- all I do is add that prior to the images along with the URL of the site --- the final text field will look like so:
https://mysite.com/p_uploads/{featuredimage[1]},{images[1]}
As you can see, I have the site URL uploads folder followed by the featured image column, followed by a comma, and then the images column which will have all the images.
Step 6: Final Touches
For the final step, you can leave everything as it is --- you can add a unique ID identifier if necessary, but it's not required.
One thing I would recommend is --- if you have folders with a lot of images, open the Advanced Settings and change the In each interaction section from 20 to 1.
Once all the steps above are completed, you will have a number of project pages from your import.

Well, we've completed creating a project portfolio.
Conclusion
This tutorial is useful when a client has a spreadsheet of past projects that they've worked on and you want to create a page template and then import them. As you can imagine this can be quite time-consuming, especially if (as in this case) some of the projects have over 60 images attached to them.
Make sure that every project has at least a featured image so there are no missing projects.
And good luck with your site --- let me know if this has helped you with your project portfolio at all!
--- --- ---
The publication at Meta Box.

Top comments (0)