
Category Thumbnails may familiar with someone using a theme that supports this feature. However, for someone who loves something highly customized, you might create it yourself. So, today I bring you a simple solution to not only have this feature but also have beautiful featured images on Archive pages as well. Especially, it may be a good way to have high-quality images without slowing your website loading speed.
This is my example for the tutorial today:
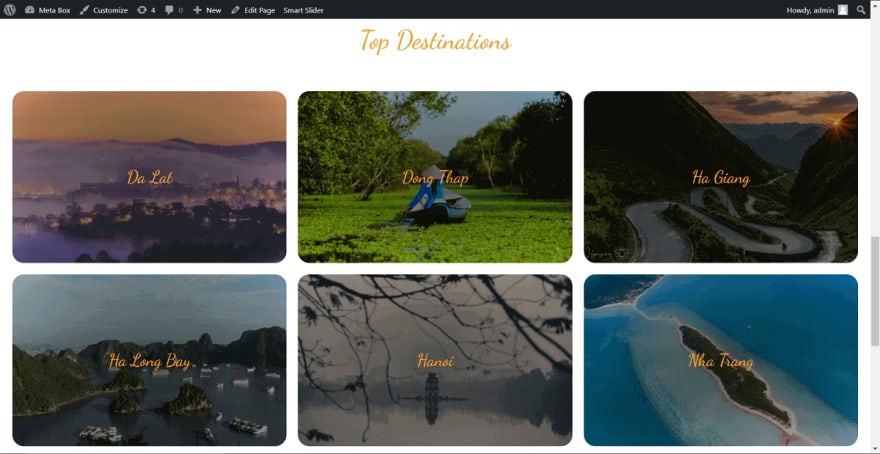
 Category Thumbnails (look at the Top Destinations section at the bottom)
 A Category Featured Image on an Archive page
Do they worthy for you to try? Let's go!
Video Version
Before Getting Started
As the title of the post, I will use custom fields. Of course, Meta Box is on the list. Along with the core framework, which is free on wordpress.org, we also need the following extensions:
- Meta Box Builder: provides UI to create custom fields;
- MB Term Meta: allows to create custom fields for categories or taxonomies;
- MB Views: in this tutorial, we will use this extension to create a shortcode to display category thumbnails;
- MB Custom Post Types & Custom Taxonomies: (optional) you need this extension when you are creating thumbnails for custom taxonomies of a custom post type. Please be noticed that if you are looking for something for taxonomies, please wait for the next tutorial. This tut is for Category only.
These all extensions are available in the Meta Box AIO, which the Developer and Lifetime licenses included.
Create Custom Fields for Saving Image
After activating the Meta Box Builder, you will have a UI to create custom fields right from the Admin Dashboard.
Go to the Custom Fields menu then create a new field group. Here I created two fields. One is URL to save URL. And, one is Single Image which allows you to upload an image to the media library.

There is no special in settings of them. In case you haven't been familiar with creating custom fields using Meta Box, we have a video tutorial on it.
You can choose to use one of these fields or both like I did here. It doesn't matter. The URL field allows you to put links from any website so that your site will not carry those images. Otherwise, the single image field allows you to upload images to the media library. They may have a faster loading speed. But, if you have a significant number of categories or you need high-quality images, that sounds not good for your server.
One more thing, you must pay attention to the IDs of the fields. We will use them in the next steps. So, let it be something easy to recall and distinguish.
In the Settings tab of the field group, remember to set the Location as Taxonomy and Category to assign these fields for Categories.
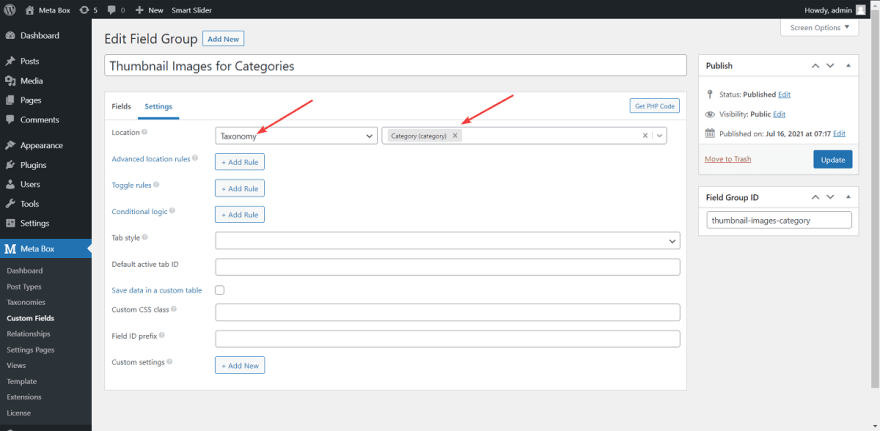
Then, go to a Category Editor page, you will see the fields. I filled in the URLs for all the categories instead of uploading images.

Display List of Categories with Thumbnails in the Frontend
We will need support from the MB Views for this task. Go to Views and create a new view.
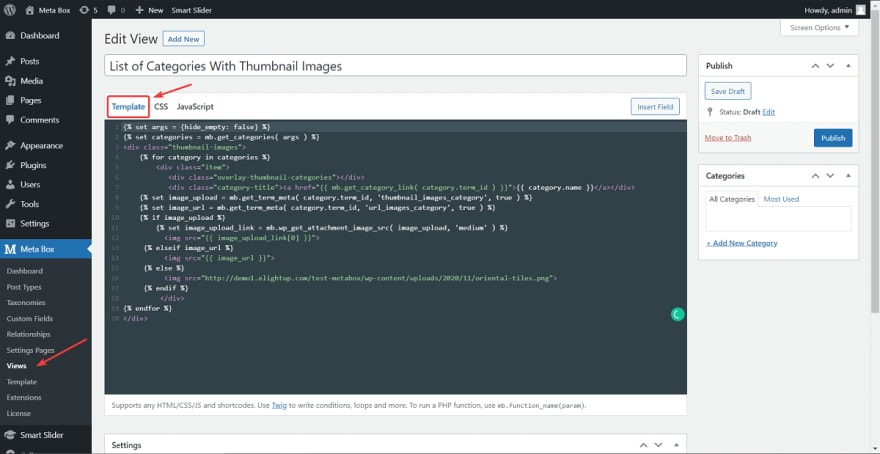
In the Template tab, I used this code:
{% set args = {hide_empty: false} %}
{% set categories = mb.get_categories( args ) %}
<div class="thumbnail-images">
    {% for category in categories %}
        <div class="item">
            <div class="overlay-thumbnail-categories"></div>
            <div class="category-title"><a href="{{ mb.get_category_link( category.term_id ) }}">{{ category.name }}</a></div>
    {% set image_upload = mb.get_term_meta( category.term_id, 'thumbnail_images_category', true ) %}
    {% set image_url = mb.get_term_meta( category.term_id, 'url_images_category', true ) %}
    {% if image_upload %}
        {% set image_upload_link = mb.wp_get_attachment_image_src( image_upload, 'medium' ) %}
        <img src="{{ image_upload_link[0] }}">
    {% elseif image_url %}
        <img src="{{ image_url }}">
    {% else %}
        <img src="http://demo1.elightup.com/test-metabox/wp-content/uploads/2020/11/oriental-tiles.png">
    {% endif %}
        </div>
{% endfor %}
</div>
In there:
-
get_categories( args ): to know which category is getting data; -
<a href="{{ mb.get_category_link( category.term_id ) }}">{{ category.name }}</a>: to get the link of the corresponding category by ID. At the same time, display the category name and hyperlink it; -
get_term_meta (): to get values of the fields from the corresponding category bycategory.term_id.'thumbnail_images_category'and'url_images_category'are IDs of fields; -
wp_get_attachment_image_src (): to get the link of the uploaded image of the corresponding category; -
<img src="{{ }}">: to display the image by the link assigned to the variable.
In the event that I did neither insert a link nor upload an image, the last line of code will display a default image.
This view will be set in the type of Shortcode so that it will auto-generate a shortcode. You can use this shortcode to easily display the list of the category with thumbnails everywhere you want. It seems like simplify the process a lot.

Paste the shortcode to my homepage.

Then, here are the thumbnail images and titles of the categories on the homepage.

Back to the view, add some code to the CSS tab to style this section.
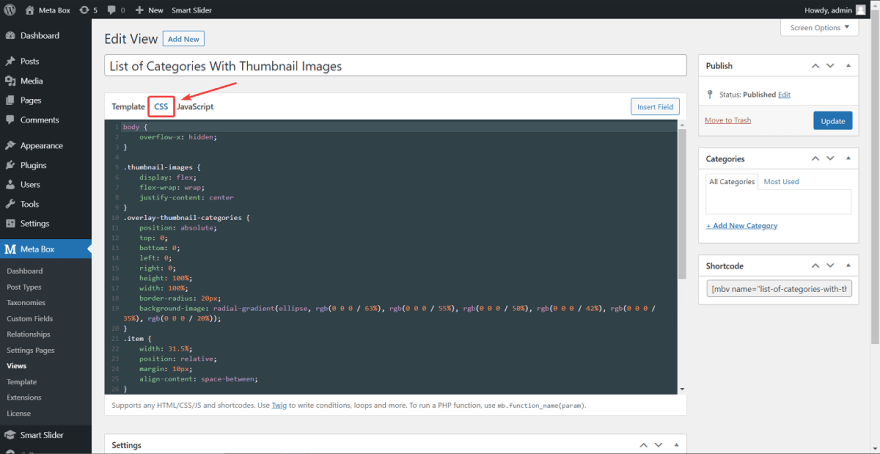
Here is the code I used:
body {
    overflow-x: hidden;
}

.thumbnail-images {
    display: flex;
    flex-wrap: wrap;
    justify-content: center
}
.overlay-thumbnail-categories {
    position: absolute;
    top: 0;
    bottom: 0;
    left: 0;
    right: 0;
    height: 100%;
    width: 100%;
    border-radius: 20px;
    background-image: radial-gradient(ellipse, rgb(0 0 0 / 63%), rgb(0 0 0 / 55%), rgb(0 0 0 / 50%), rgb(0 0 0 / 42%), rgb(0 0 0 / 35%), rgb(0 0 0 / 20%));
}
.item {
    width: 31.5%;
    position: relative;
    margin: 10px;
    align-content: space-between;
}
.item img {
    width: 100%;
    height: 300px;
    object-fit: cover;
    border-radius: 20px;
}
.category-title {
    position: absolute;
    left: 50%;
    top: 50%;
    transform: translate(-50%, -50%);
    padding: 10px;
    font-family: 'Dancing Script', cursive;
    font-size: 30px;
}
.category-title > a {
    text-decoration: none !important;
    color: #f0a030;
}
All the above classes are created in the code which I put into the Template tab.
After that, the Top Destinations has a new better look. You see!
Display the Featured Images for Categories on Archive Pages
This is an Archive page before adding the featured image.

We need to touch the theme file to display the images from the fields to the top of this page. Go to the archive.php file. It is the template file for the archive pages.
Add this code after the header and the first div tag.

<?php
    $categories= get_the_category();
    $background_image = get_term_meta( $categories[0]->term_id, 'thumbnail_images_category', true );
    if ($background_image) {
        $link_image = wp_get_attachment_image_src( $background_image, 'full' );
        $link_image_source = $link_image[0];
    }
    else {
        $link_image_source = get_term_meta( $categories[0]->term_id, 'url_images_category', true );
    }
?>
<div class="thumbnail-container">
    <img class="thumbnail-cat" src="<?php echo $link_image_source ?>">
    <div class="thumbnail-overlay"></div>
</div>
In there:
-
get_the_category(): to know which archive page the user is; -
get_term_meta (): get the value of the field; -
'thumbnail_images_category'and'url_images_category'are IDs of the created custom fields; -
wp_get_attachment_image_src (): to get the link of the uploaded image; -
src="<?php echo $link_image_source ?>: to display the image from the link which is the value of the$link_image_sourcevariable.
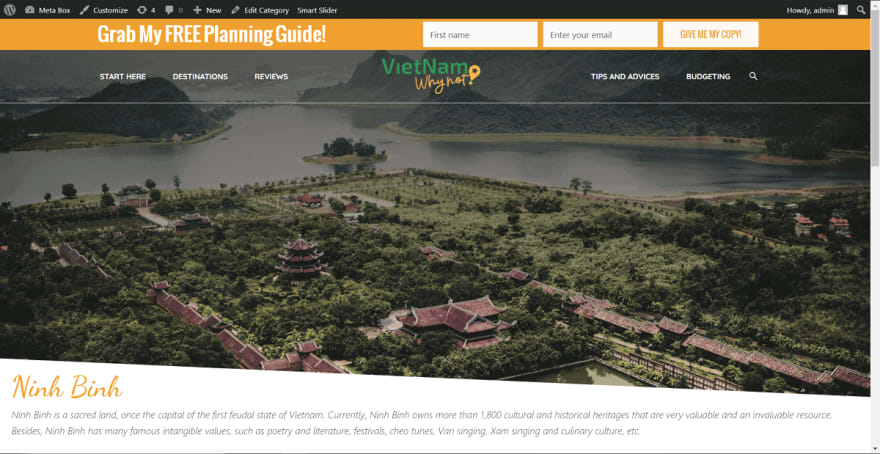
Then, the featured image will display as below:

Go back to the theme files, add some CSS code to style this section, including the featured image, the category title, and the description.
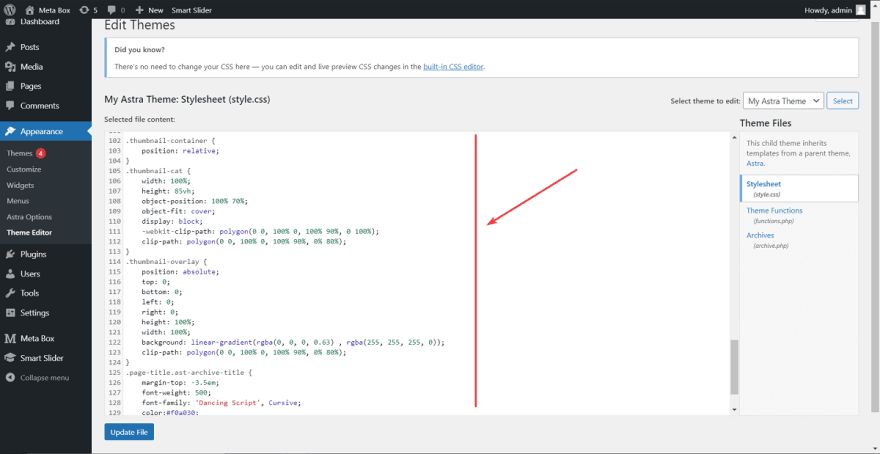
.thumbnail-container {
    position: relative;
}
.thumbnail-cat {
    width: 100%;
    height: 85vh;
    object-position: 100% 70%;
    object-fit: cover;
    display: block;
    -webkit-clip-path: polygon(0 0, 100% 0, 100% 90%, 0 100%);
    clip-path: polygon(0 0, 100% 0, 100% 90%, 0% 80%);
}
.thumbnail-overlay {
    position: absolute;
    top: 0;
    bottom: 0;
    left: 0;
    right: 0;
    height: 100%;
    width: 100%;
    background: linear-gradient(rgba(0, 0, 0, 0.63) , rgba(255, 255, 255, 0));
}
.page-title.ast-archive-title {
    margin-top: -3.5em;
    font-weight: 500;
    font-family: 'Dancing Script', Cursive;
    color:#f0a030;
}
.ast-archive-description > p {
    font-size: 17px;
    font-style: italic;
}
So now, it turns to this look:
That's all for today's tutorial. What do you think?
Last Words
FYI, if you want to apply thumbnails or featured images for taxonomies of a custom post type, even with the different website builders, the solution is quite the same. Most cases will be easier when you have MB Views. We're having a comprehensive tutorial on it in the upcoming post. Keep track of our blog to get its notice soon!
Furthermore, if you have any suggestions, let us know. We're so happy to have any idea from you!

Top comments (0)