
You Got This is a community conference series which focuses on the non-technical, often emotionally-labourious skills needed to be successful at work. In June, they ran their first online conference - You Got This From Home. They decided to provide a little sticker joy to all attendees during these tough times, and collected addresses during sign up for those that wanted a little surprise to arrive on their doorstep.


The event was run by Shy and Kevin, and while Shy handled the sticker distribution throughout the Americas, I was the person who handled all of the shipments across Europe and Asia. Shipping 300 sets of stickers gave me a good excuse to (potentially) overengineer a solution to make it happen, and here's how it went down...
Sanitizing Data
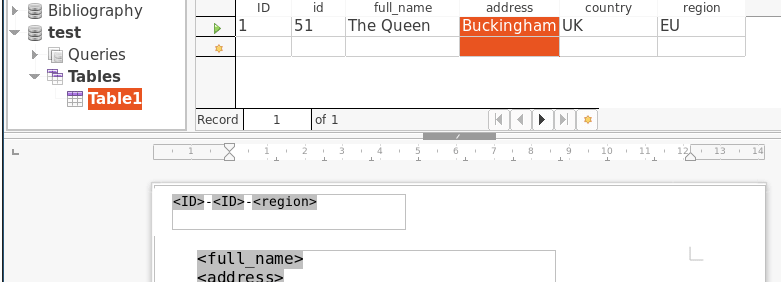
First step was to sanitise the address data. This had already been sorted by country and region via SmartyStreet's API and the data looked like this:
id,full_name,address,country,region
51,The Queen,"Buckingham Palace, London, SW1A 1AA, UK",UK,EU
The first thing to note is the address is (usually) comma delimited. Some people used full stops (others didn't use anything!) but most used commas to indicate each line of their address. As the plan was to put this through a mail merge, the first thing was to replace these commas with line breaks (I used Python):
import csv
with open('data.csv', newline='') as csvfile:
    reader = csv.DictReader(csvfile)

    with open('output.csv', 'w', newline='') as savefile:
        writer = csv.DictWriter(savefile, fieldnames=reader.fieldnames)
        writer.writeheader()

        for row in reader:
            row['address'] = row['address'].replace(',', '\n')
            writer.writerow(row)
This did what you'd expect, and replaced any "," characters in the address field with "\n".
Preparing Envelopes
Next step was to design a template to directly print onto the envelopes. Since Linux and OSS rocks, we're using LibreOffice here. Kevin came up with a beautiful design:

Once we've selected our document size with Format -> Page Style and selected C6 (the size Kevin's design was for), we can then insert some placeholders for the data we're going to mail merge:
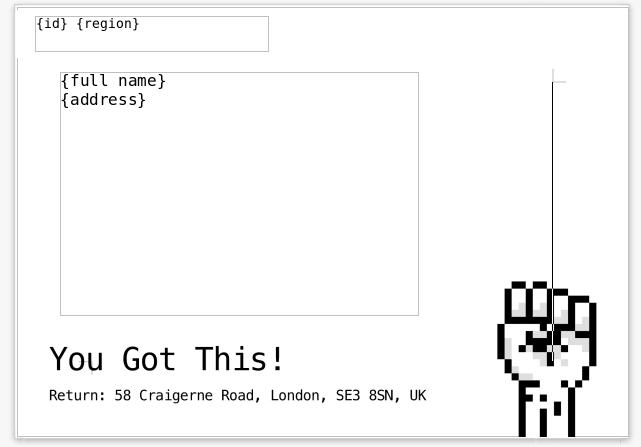
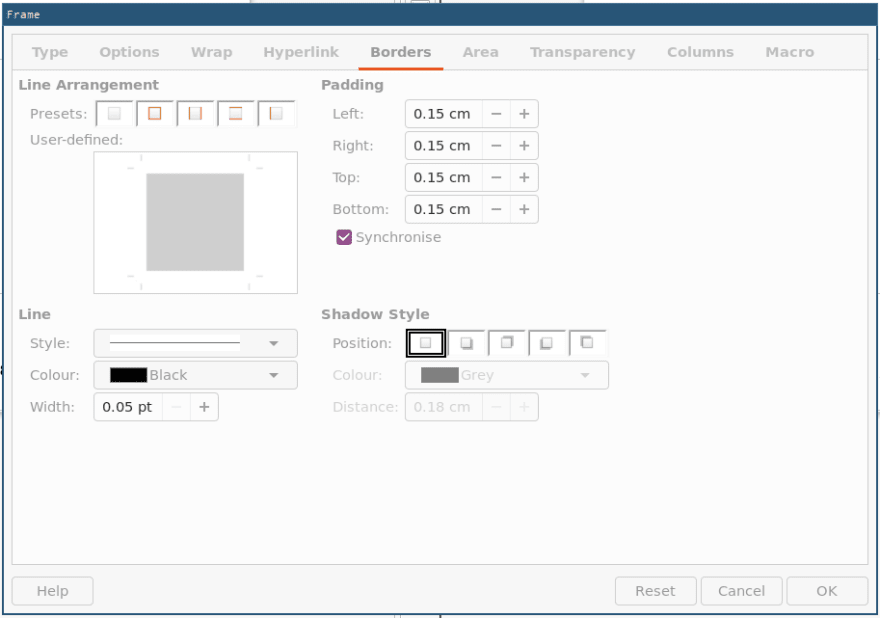
You might think those are text boxes, but they're not! LibreOffice cannot mail merge data into textboxes, so these use a LibreOffice concept called frames. You can place these via Insert -> Frame -> Frame Interactively, and then dragging out the frame like a textbox. It will have a border by default but by with Right Click -> Properties, you can customise this:
Once completed, you can modify text within the frame as normal (eg. font, colour, size etc).
If you are using LibreOffice as installed by default on a Linux distro, it's likely you won't have their database package, Base, installed. With apt you need to type sudo apt install libreoffice to get the all the missing components. (You can install just Base, but it does have a few dependencies you'll need to install as well).
You will also be likely missing the database engine Base needs (you will later get "General input/output error" when trying to interact with a database). This is also installable via apt: sudo apt install libreoffice-sdbc-hsqldb.
Importing our CSV into Base is a bit weird (you can't directly use a CSV to mail merge).
- Open Base and create a new database
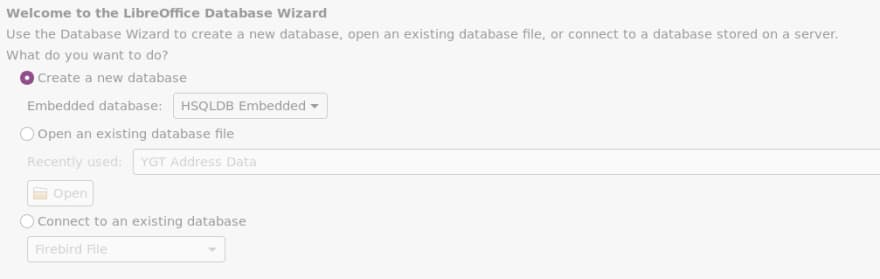
- You do want Base to "register" the database (this makes it available to other LibreOffice applications automatically), and by clicking Finish you should be promped to save it

- You should now have the database open in Base. You now open your CSV alongside it in Calc

- You now select all your data and copy it to your clipboard. In Base you go to Edit -> Paste and a menu will appear!

The rest is fairly self-explanatory. You will need to create a new primary key field (which Base will autoincrement for you) - I wasn't able to get it to accept the existing one.
Going back to you LibreOffice Writer template, by selecting View -> Data Sources you will now see your database you just created:
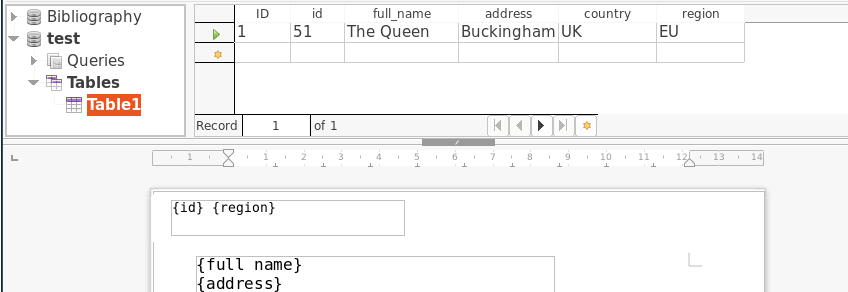
Drag on the column names, and drop into your frames where you'd like that column to appear:
Phew. Almost there.
Printing Envelopes
Use the standard print dialogue in LibreOffice and select Yes when it asks if you want to print a form letter. I did try printing directly to the printer from LibreOffice but it crashed during the process, however small I made the job.
However, you can instead ask LibreOffice to merge the data to individual files; I chose PDFs:

Depending how big your database is, LibreOffice will think for a while. You'll find some very nice looking envelopes in your destination folder:

(spot the error: I didn't run the line break script on this CSV)
I then wrote a little Bash script to queue all the PDFs for printing:
for ((i=1;i<=278;i++));
do
    lp "$i.pdf"
done
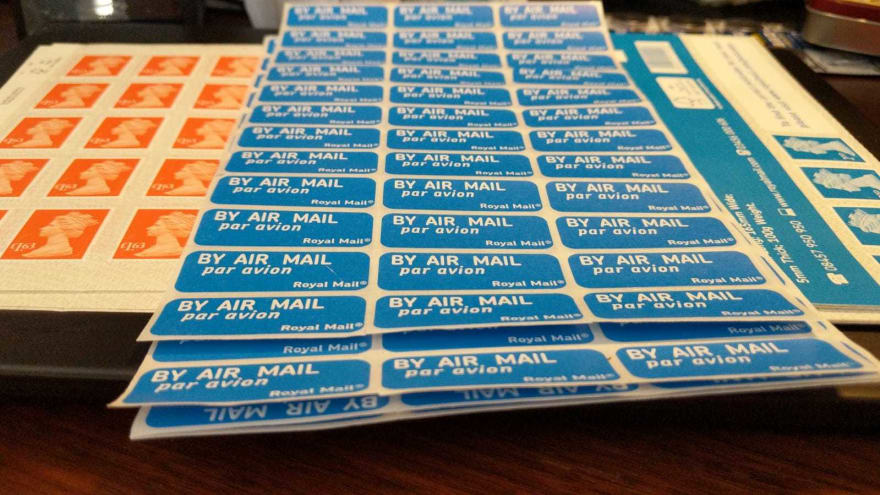
And you'll just need to sit and wait then! It took around 4 hours to print all 278 envelopes on an HP inkjet. You can then use your database to query how many of each region you're sending to, which is useful when buying stamps (we were going to use a franking machine, but it broke).
Then time to stuff all those envelopes and stick very expensive special stickers (aka stamps) on the front!
I hope you enjoy your stickers, and I also hope this guide is helpful to anyone else using LibreOffice for mailmerge :-)
~ Hugh


PS. You're incredibly welcome. I had a lot of fun doing it!

Top comments (0)