
Hello friends.
It’s me (Zino) again with another JavaScript article on the above topic.
But Before we dive in, I would like to say that this is one of the projects in my 100Days of JavaScript Course which is aimed at helping beginner/intermediate level JavaScript Developers sharpen their JavaScript skills.
Check it out here – 100Days Of JavaScript
What is a Password Visibility Toggle?
A password visibility toggle is a feature that allows users to see and confirm their password before they log in.
It is a feature that improves user experience and has become commonplace on many web apps today.
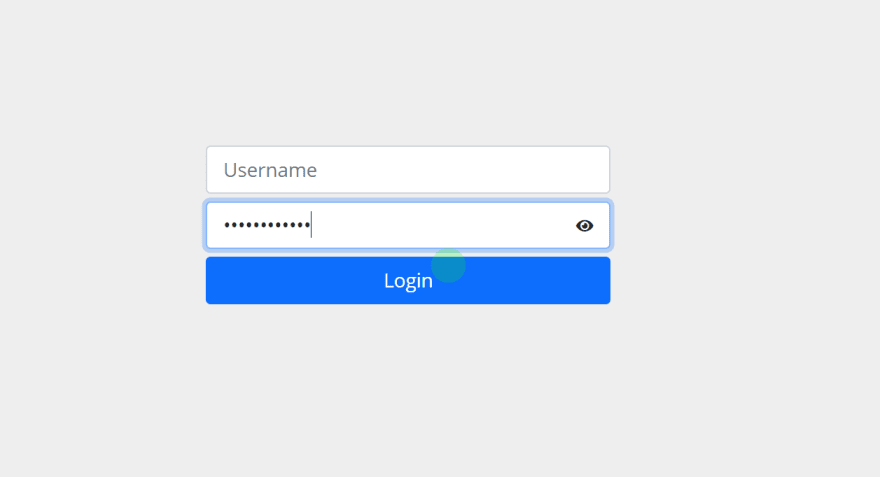
To get started we would create a simple login form with Bootstrap 5 ( Quick Bootstrap 5 Crash Course – HERE ), the form would contain a username input, password input and a login button.
What we really need though, is the password input field which would contain a font awesome eye icon.
Here is the markup.
<!DOCTYPE html>
<html lang="en">
  <head>
    <meta charset="UTF-8" />
    <meta name="viewport" content="width=device-width, initial-scale=1.0" />
    <title>Password Visibility Toggle</title>
    <script
      src="https://kit.fontawesome.com/1935d064dd.js"
      crossorigin="anonymous"
    ></script>
    <link
      href="https://cdn.jsdelivr.net/npm/bootstrap@5.0.0-beta3/dist/css/bootstrap.min.css"
      rel="stylesheet"
      integrity="sha384-eOJMYsd53ii+scO/bJGFsiCZc+5NDVN2yr8+0RDqr0Ql0h+rP48ckxlpbzKgwra6"
      crossorigin="anonymous"
    />
    <link rel="stylesheet" href="styles.css" />
  </head>
  <body>
    <div class="container">
      <div class="row box">
        <div class="col-md-4">
          <form action="">
            <div class="form-item">
              <input
                type="text"
                class="form-control form-control-lg"
                placeholder="Username"
              />
            </div>
            <div class="form-item">
              <input
                type="password"
                class="form-control form-control-lg"
                id="password"
                placeholder="password"
              />
              <i class="fas fa-eye" id="eye"></i>
            </div>
            <div class="d-grid">
              <button class="btn btn-primary btn-lg">Login</button>
            </div>
          </form>
        </div>
      </div>
    </div>
    <script src="script.js"></script>
  </body>
</html>
Here is the CSS.
@import url("https://fonts.googleapis.com/css2?family=Open+Sans:wght@300;400;600;700&display=swap");

* {
  margin: 0;
  padding: 0;
  box-sizing: border-box;
}

html {
  font-size: 10px;
}

body {
  font-family: "Open Sans", sans-serif;
  background: var(--color-grey);
}

.box {
  width: 100%;
  height: 100vh;
  display: flex;
  justify-content: center;
  align-items: center;
}

.form-item {
  position: relative;
  margin: 5px 0;
}

.fas {
  position: absolute;
  right: 1.1rem;
  top: 1.1rem;
  cursor: pointer;
}
Now we have our simple form in place it's time to add the JavaScript logic for the project.
Let's create two variables, one to target the password field and another to target the eye Icon within it.
Next, we would add a click event listener to the eye icon.
Before we slot some code in the event listener, it helps to list out what we want to achieve when the eye icon is clicked.
Here we go
- Convert the hidden password to plain text
- Hide the eye icon
- Display another icon (eye icon with a slash)
So, these are the three actions we want to occur when we click on the eye icon.
Also, we want them reversed when we click on the new icon that is displayed.
Let me say at this point that the steps outlined above is a typical example of how to think like a programmer.
It's not just about getting the code for this functionality, it is about being able to break down what you want to achieve into tiny pieces and make sense of it all as you code.
So here is the JS code.
const password = document.querySelector("#password");
const eyeIcon = document.querySelector("#eye");

eyeIcon.addEventListener("click", () => {
  if (eyeIcon.classList.contains("fa-eye")) {
    password.setAttribute("type", "text");
    eyeIcon.classList.remove("fa-eye");
    eyeIcon.classList.add("fa-eye-slash");
  } else {
    password.setAttribute("type", "password");
    eyeIcon.classList.remove("fa-eye-slash");
    eyeIcon.classList.add("fa-eye");
  }
});
So, within the event listener, we used an if, else statement to check for the presence of a class on the eye icon variable (fa-eye) and based on that we changed the attribute (type) on the password field to text and we flipped the class on the Icon from fa-eye to fa-eye-slash.
The else block simply reverses the above events.
Well with the code above we have achieved our goal, but we can make this code a bit shorter by using JavaScript string replace method.
const password = document.querySelector("#password");
const eyeIcon = document.querySelector("#eye");

eyeIcon.addEventListener("click", () => {
  if (eyeIcon.classList.contains("fa-eye")) {
    password.setAttribute("type", "text");
    eyeIcon.classList.replace("fa-eye", "fa-eye-slash");
  } else {
    password.setAttribute("type", "password");
    eyeIcon.classList.replace("fa-eye-slash", "fa-eye");
  }
});
Thanks for reading.
If you enjoyed this article, feel free to check out my 100Days of JavaScript Course where you build a project every day for 100Days.
Cheers.

Top comments (0)