When I decided to leave Windows Desktop App Development for Web Development, I opened up to a whole new world. First of all, learning Ruby, improving my HTML and CSS knowledge, but also working on Mac + Linux instead of Windows.
On Windows, I deployed applications to either a Network Share or an IIS (Internet Information Services, Microsoft’s Internet Web Server, competing with Apache and NGINX) instance. Both required either the Windows explorer or a Remote Desktop Connection.
In this new job, we deployed our Ruby applications to Linux Servers. I had used Linux before on my computer, but this was different. As it turned out, Linux servers don’t have any graphical user interface. The only available interface is the command line. To connect to a remote Linux server, we also wouldn’t use Remote Desktop but SSH (Secure Socket Shell). For me, SSH was a steep learning curve because it came with so many things all at once.
General SSH Concepts
SSH allows us to connect to a remote computer. Usually, that remote computer is a Linux machine, but it also works with macOS and even Windows. When we connect to that remote machine, we have terminal access to it, and can execute commands. It looks and feels like executing commands on our local machine.
One of the key features of SSH is that the entire connection is encrypted. If somebody was to listen in on the network traffic, they couldn’t see the commands you executed or any of the results that came back. Previous remote access protocols didn’t have this feature (e.g. telnet).
To ensure this level of security, SSH uses Key Pairs. An SSH Key consists of two files, a public, and a private file. The private file stays on your computer, and the public part lives on the remote machine you want to connect to.
Why two files though? The reason for that is that SSH uses asymmetric encryption (Read more here about asymmetric encryption).
Step 1: SSH Keys
Before we can log in to any remote computer, we need to generate a new SSH key pair. Linux and macOS have tools preinstalled, for Windows you either need to install ssh manually or use WSL (Windows Subsystem for Linux) as I do in these examples.
Open a new terminal and make sure that you’re in your home directory:
$
Now, we use a command to generate a new key pair:
$ ssh-keygen -t rsa -b 4096 -C "your_email@example.com"
Once you hit return, ssh-keygen will ask a few questions:

Let’s look at this a bit closer:
- At first, it’ll ask for the absolute filename. In this case, it suggests
/home/jan/.ssh/id_rsa. If that looks good, press return, otherwise specify a new path. - An SSH Key can be protected by a passphrase. Then, whenever you want to use it, you need to type in the password first. It adds an additional layer of security on top and I highly recommend using a password.
- That’s it! Now, your key is ready to use.
Where does it live though? By default, all SSH Keys are stored in .ssh, which is located in your home directory:

Before we move on to the next step, let’s example the screenshot above a bit closer. You see, that both id_rsa and id_rsa.pub have very restrictive file permissions. Why is that?
These restrictive permissions protect the key from any unauthorized use. That means, the key can only be used by us and not anyone else who might be using this computer. Otherwise, another user on this computer could log in, copy the keys out of our home directory, and impersonate us. Therefore, SSH Keys by default are restricted to our own use only. In fact, the ssh command refuses to use these keys if the file permissions are too permissive.
Connecting to a remote machine
What do we need to connect to a remote server?
- Its address, which can be either an IP Address (e.g.
192.168.0.1) or a host name (myserver.example.com) - A user on that machine
- A key configured on the machine
Let’s connect:
$ ssh myuser@myserver.example.com -i ~/.ssh/id_rsa
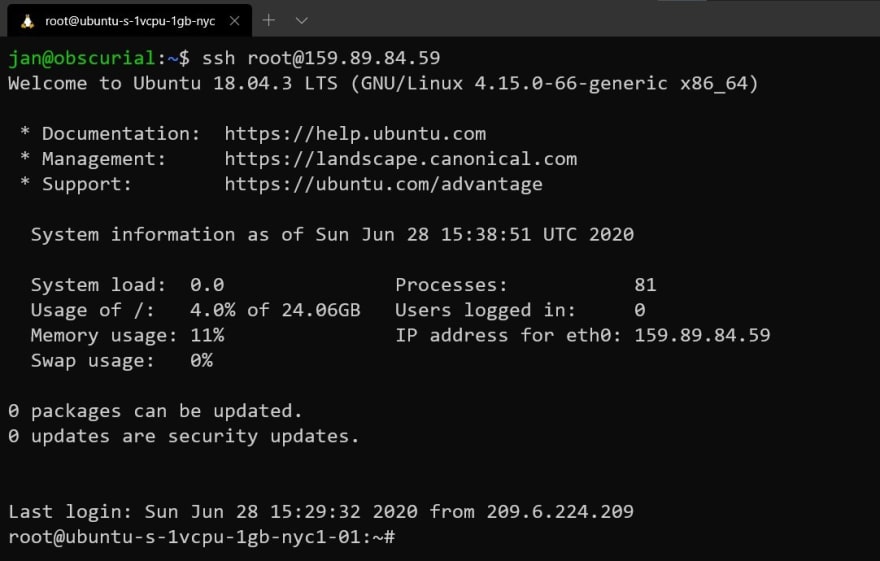
This will open a new connection to myserver.example.com and create a terminal session as myuser. We tell the ssh command which key to use via -i ~/.ssh/id_rsa.
From then on, we can run commands on that server.
Associate an SSH Key with a User
Before we can connect to a new server for the first time, we have to associate our key with a user on that machine. Otherwise, every connection attempt will result in a “Permission Denied” error.

The server rejects all connection attempts with keys it doesn’t recognize to prevent malicious activity.
How do we configure an SSH Key though? On the server, each user has a .ssh directory within their home directory. On our local machine, .ssh has all our SSH keys. On the server, we find a single file: authorized_keys.
This file contains a list of all public keys that are allowed to connect. Our key needs to be in this file as well.

How do we get it in there though? On an existing server, we ask somebody who already has an account who then configures the public key for us.
If this is a brand-new server, you can add it through your hoster’s web interface (in my case, DigitalOcean). They then will take care of adding the key to the machine once it’s created.
I’m curious, did this guide help you? What other questions about do you have? Let me know down in the comments.
This post was published first on 21 Lessons

Top comments (0)