Puppeteer! The cadillac of web automation. This is our fourth post in the Learn to Web Scrape series and in this one we will go over Puppeteer.
Puppeteer is a library developed by the Chrome developer tools team. I do find it more complicated to use than Axios but it offers a lot of power when you need to take actions on the website your are trying to scrape. There is extensive documentation on Puppeteer here.
In this post I will just be going over the basics of puppeteer use. Some of the times I prefer to use puppeteer over Axios is when I need to interact more with the page. Let’s say I want to paginate through a list or select a drop down to populate more data. Puppeteer actually opens a browser and interacts with the desired web page just like a user would.
The tools and getting started
This section I will include in every post of this series. It’s going to go over the tools that you will need to have installed. I’m going to try and keep it to a minimum so you don’t have to add a bunch of things.
Nodejs – This runs javascript. It’s very well supported and generally installs in about a minute. You’ll want to download the LTS version, which is 12.13.0 at this time. I would recommend just hitting next through everything. You shouldn’t need to check any boxes. You don’t need to do anything further with this at this time.
Visual Studio Code – This is just a text editor. 100% free, developed by Microsoft. It should install very easily and does not come with any bloatware.
You will also need the demo code referenced at the top and bottom of this article. You will want to hit the “Clone or download” button and download the zip file and unzip it to a preferred location.
Once you have it downloaded and with Nodejs installed, you need to open Visual Studio Code and then go File > Open Folder and select the folder where you downloaded the code.

We will also be using the terminal to execute the commands that will run the script. In order the open the terminal in Visual Studio Code you go to the top menu again and go Terminal > New Terminal. The terminal will open at the bottom looking something (but probably not exactly like) this:
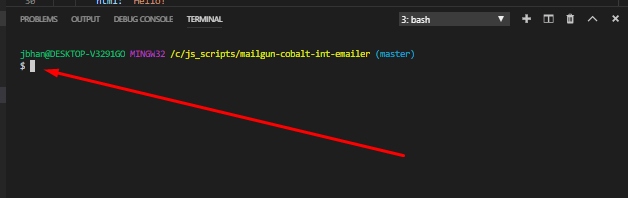
It is important that the terminal is opened to the actual location of the code or it won’t be able to find the scripts when we try to run them. In your side navbar in Visual Studio Code, without any folders expanded, you should see a > src folder. If you don’t see it, you are probably at the wrong location and you need to re-open the folder at the correct location.
After you have the package downloaded and you are at the terminal, your first command will be npm install. This will download all of the necessary libraries required for this project.
Javascript promises

Before we start I reference the part about promises that we discussed in the post on Axios. Here it is:
I don’t want to go into this in depth but a large tenant of Axios is that is promise based. Nodejs by default is asynchronous code. That means that it doesn’t wait for the code before it to finish before it starts the next bit of code. Because web requests can take varying times to complete (if a web page loads slowly, for example) we need to do something to make sure our web request is complete before we try to parse the html…that wouldn’t be there yet.
Enter promises. The promise is given (web request starts) and when using the right keywords (async/await in this case) the code pauses there until the promise is fulfilled (web request completes). This is very high level and if you want to learn more about promises, google it. There are a ton of guides about it.
The last part about promises the keyword part. There are other ways to signal to Nodejs that we are awaiting a promise completion but the one I want to talk quickly about here is async/await.
Our code this time is surrounded in an async block. It looks like this:
(async () => {
    // awesome code goes here

})();
This tells node that within this block there will be asynchronous code and it should be prepared to handle promises that will block that code. Important! At the very end of the block it’s important to notice the (). That makes this function call itself. If you don’t have that there, you’ll run your script and nothing will happen.
Enter puppeteer land

Doing simple things with Puppeteer largely depends on a strong foundation of css selectors. You have to be able select the data you want from the HTML and so if you are feeling shaky with your css selectors, I recommend going and checking out the first post where we want over using css selectors and something like w3schools tutorial to brush back up.
In order to get started we just initiate a browser and then a new page. From the new page, we can navigate to any url we want to go. Like this:
    const browser = await puppeteer.launch({ headless: false });
    const page = await browser.newPage();

    await page.goto('http://pizza.com');
I’m passing the headless: false argument here in order to make sure the browser pops up so we can see what it is doing. If you don’t want it to show up, you can just remove that argument altogether or pass it as headless: true.
In order to get text, we leverage css selectors on top of the page we initiated like this:
    // Search by element
    const title = await page.$eval('title', element => element.textContent);

    console.log('title', title);

    // Search by class
    const homeButton = await page.$eval('.home_link', element => element.textContent);;

    console.log('Home button', homeButton);
I don’t want to go into too much detail about how exactly it works but know that you can use this and a simple css selector to get some text. Where this gets more complicated is when you want to grab a url from a link or there are multiple of the same type of selector.
Let’s start with selecting an attribute from the html element, like the url from a link.
    // Get propery from element
    const funFactsLink = await page.$eval('.last a', element => element.getAttribute('href'));

    console.log('fun facts link', funFactsLink);
We just add whatever attribute we are looking to pluck from element.getAttribute and it’ll return it into our variable we declare at the beginning of the line; const funFactsLink in this case.
Selecting a list of items

It’s extremely common in web scraping to want to select a list of data. You’ll have a table and just want to pluck everything out of it. I think for this reason it’s important to talk a little more about how to do this with puppeteer.
    // Get a list of all 'li a' text
    const listElements: any[] = await page.evaluate(() => Array.from(document.querySelectorAll('li a'), element => element.textContent));

    console.log('list elements', listElements);
That line of code looks a little bit intimidating but it’s not as bad as it seems. It’s evaluating the page and making an array from all of the 'li a' elements. We then pluck each one and take the textContent from them and return it all into the const listElements variable.
Leveraging Puppeteer for web automation

Let’s say you have a page where you want to get data from the first page and then navigate to another. Puppeteer can do that! Let’s show you how.
    await page.click('a[href="/pizza-news"]');
    // Wait for 3.5 seconds
    await page.waitFor(3500);
You just use the css selector for the link (or button, or whatever you want to interact with) and .click it! I set a pause in the script for 3.5 seconds in the above example so you can easily see that the page has changed but that can be adjusted or removed.
The end
This concludes the post on Puppeteer. Remember, Puppeteer is amazing but its main strengths lie in the fact that it can operate a web page just how a user would. It can wait for data to load, interact with it, and do anything else you need or want with it.
I have one final trick you can use if you find getting text content with puppeteer a little more cumbersome than doing so with Cheerio is. You can always just grab all of the html from the page, load that into Cheerio, and then leverage the power of Cheerio from there. Here’s an example:
    const $ = cheerio.load(bodyHtml);
    console.log('pizza news type-post', $('.type-post b').text());
This is selecting data that is on the page we navigated to, the pizza news page, and it works great.
Good luck with puppeteer!
Looking for business leads?
Using the techniques talked about here at javascriptwebscrapingguy.com, we’ve been able to launch a way to access awesome business leads. Learn more at Cobalt Intelligence!
The post Puppeteer. Jordan Teaches Web Scraping appeared first on JavaScript Web Scraping Guy.

Top comments (0)