Layout is the way in which the parts of something are arranged or laid out. When designing user interfaces in swift, we have to consider how the elements are arranged, and how it will be rearranged on different screen sizes. To layout user interfaces such that they can adapt to changes based on different screen sizes in swift, we have to use autolayout.
Auto layout simple means we describe the position where our interfaces should be, then the system will automatically position the interfaces for us.
Auto layout is a constraint base descriptive system whereby the relationship between two views can be represented as a linear equation
A1 = (M * A2) + C
where the A1 and A2 refer to views' attribute,
M refer to multiplier and
C refer to as a constant
A constraint allows us to establish a relationship between the attributes of a single view or to the attribute of another view.
What is an attribute?
An attribute is a position on a view’s alignment rectangle. In the equation above, A1 will be an attribute on view 1, and A2 will be an attribute on view 2. A view’s attribute(s) is use to establishes relationship with another view’s attributes. The first set of attributes correspond to the edges of the view’s alignment rectangle which are the top, bottom, right and left attributes.
The second set of attributes are the leading, trailing, left and right attributes.
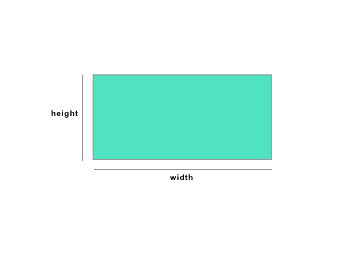
The next set of attributes are the height and width, the height and width attributes allow us to create relationship with the height and width of our view or another view.
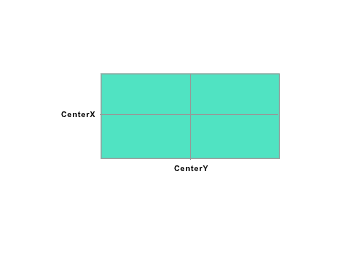
The next set are the CenterX and CenterY attributes which are use to align a view horizontal and vertical axis.
We also have the baseline attribute, first baseline and last baseline. The baseline is like an imaginary line where text sits on, if there are multiple baselines, the first one is the first baseline and the last is the last baseline.
Every view contain margins that allow you to modify how much space exists between the edges of the view and any subview added, the attributes that govern this relationship are mostly the top, right, bottom and left margin. In addition to the margin attributes, we also have the leading margin, trailing margin, centerX with margin, centerY with margin. We also have NotAnAttribute that allow us to not use constrain on other view named . This attributes are the options we can use when establishing relationship between views.
Type of relationship
Since we already know we have to use attributes to create relationship between two views, the next decision is the type of relationship that should exist between these views. There are three possible relationship that can exist between the views, but we can only use one at a time: Equal, Less than or equal and Greater than or equal.
Equal means the viewA’s particular attribute should be equal to viewB’s particular attribute.
Less than or equalmeans the viewA’s particular attribute should only be less than or equal to viewB’s particular attribute.
Greater than or equal means the viewA’s particular attribute should only be greater than or equal to viewB’s particular attribute.
Multiplier
The multiplier which is represented as M in the equation is use to multiply (adjust) the relation by a certain of floating point value. We can say viewA.height should be *2 (two times) of viewB.height.
Constant
The constant is use to offset a view away from another, it is basically use to create space between two views.
Adding Auto Layout in Code
We have three choices when it comes to programmatically creating constraints, you can use NSLayoutConstraint class, layout anchors, or you can use the Visual Format Language. We are going to use NSLayoutConstraint class and layout anchors.
The let horizontalConstraint = NSLayoutConstraint() is use to initialise a new constraint, where item: newValue is the element we want to add the constraint on, attribute: NSLayoutAttribute.centerX on line 4 tells us which attribute on the item in line 1 we wish to add the constraint on. The relatedBy: NSLayoutRelation.equal is use to tell the type of relationship, toItem: view is use to tell the other view’s attribute we want to establish the constraint with. In our case, it is the window view. attribute: NSLayoutAttribute.centerX on line 7 is use to tell the attribute on the other view we want to create the relationship with. Then the multiplier and the constant. Immediately after creating the constraints, we need to add the constraint(s) to the parent view which was done on line 12. We can use Layout anchor to repeat the same like below:
where newView.centerXAnchor is the view we want to add a centerXAnchor constraint that is equal to window view centerXAnchor.
If you do not understand some of the concept explained here yet, please be patient. I am writing another article on some view properties used by auto layout, then UIStackview, after which I will show ways to programmatically code different views.


Top comments (0)