No libraries. No canvas. Pure React + DOM + math. Here's every decision I made and why.
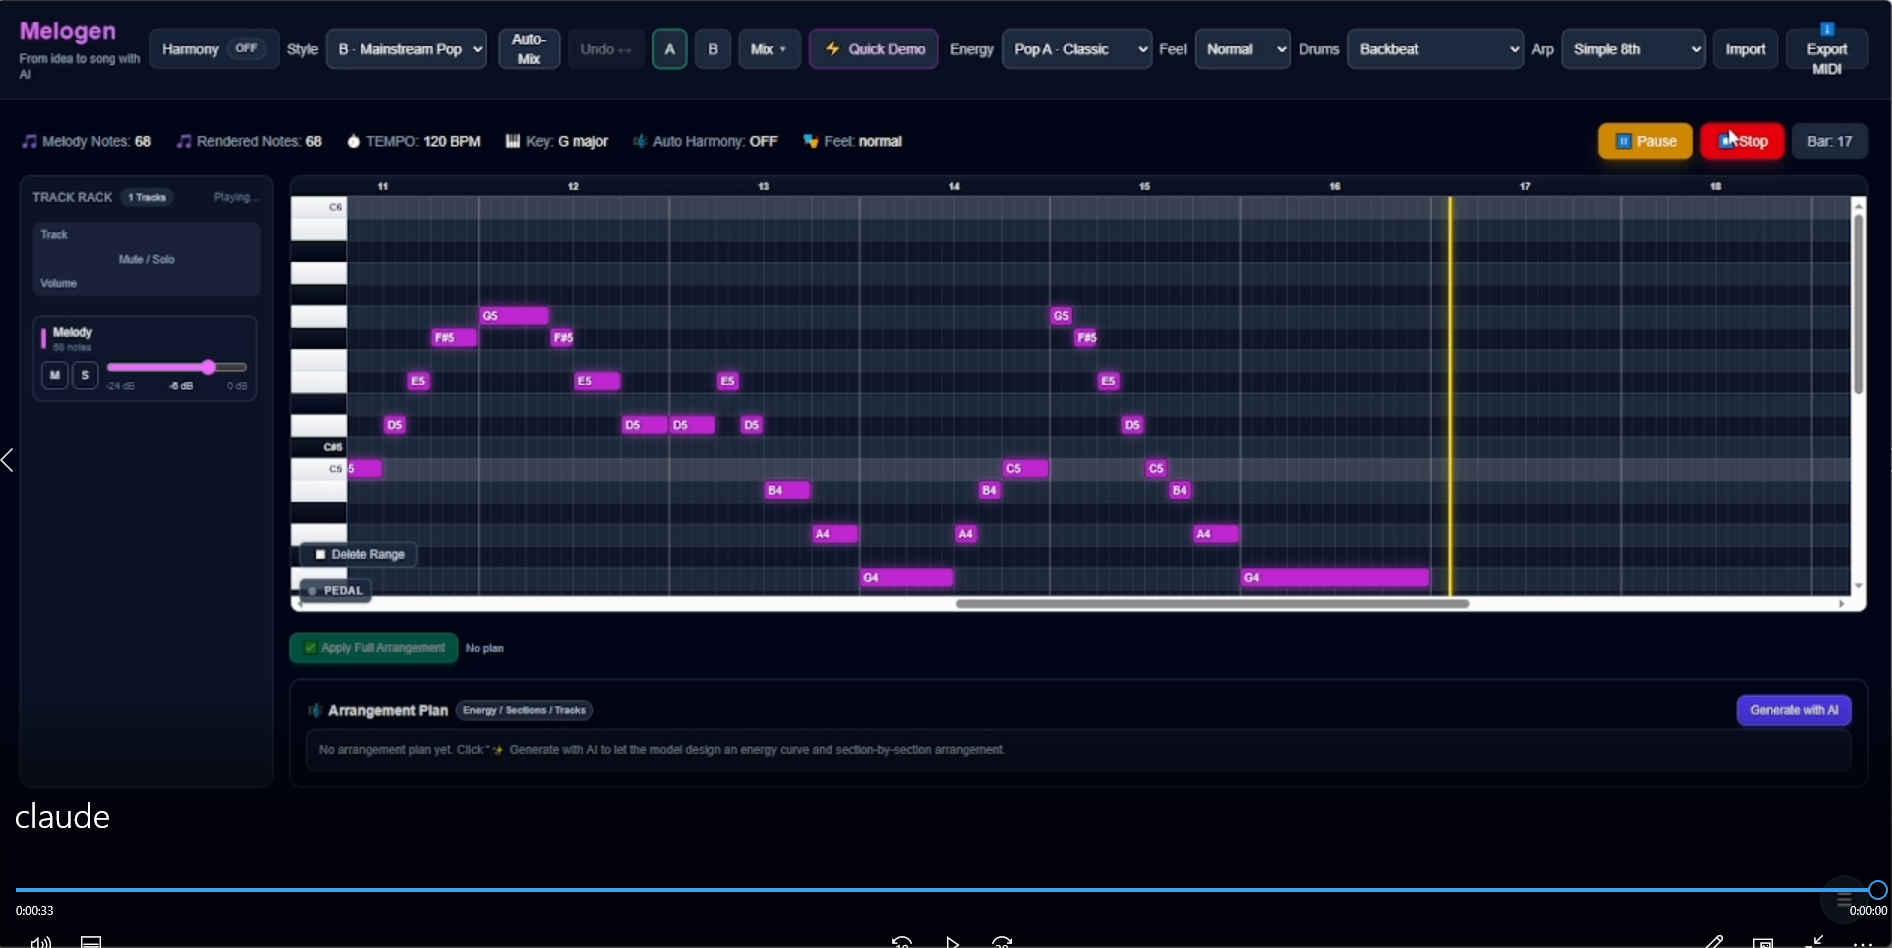
I'm building Melogen — a web editor that turns AI-generated music into editable MIDI. The centerpiece of the UI is a piano roll: the same grid-based note editor you'd find in FL Studio, Ableton, or Logic Pro.
Except I built mine from scratch in React, using nothing but div elements, pointer events, and coordinate math.
This is how it works, what went wrong, and what I'd do differently.
Why Not Use a Library?
I tried. Here's what I found:
abcjs — Renders sheet music notation, not a piano roll grid. Meant for displaying, not editing. I initially used it for parsing ABC notation but ended up replacing it with a custom parser because the library had rendering side effects I couldn't control.
MIDI.js / Tone.js — Audio playback libraries, not visual editors. Tone.js handles the sound. I needed something to handle the screen.
Canvas-based editors — A few exist on GitHub. But canvas means you lose React's component model, accessibility, and the ability to style notes with CSS. Every interaction becomes manual hit-testing.
I wanted notes to be real DOM elements. Clickable, draggable, style-able, inspectable in DevTools. So I built it with divs.
The Coordinate System
A piano roll is a 2D grid:
- X axis = time (beats / bars)
- Y axis = pitch (MIDI note numbers)
The fundamental challenge is converting between three coordinate spaces:
Musical space:  { bar: 3, offset_beats: 1.5, midi: 67, dur_beats: 0.5 }
         ↕
Grid space:     { col: 14, row: 5, width: 2_columns }
         ↕
Pixel space:    { left: 672px, top: 110px, width: 96px, height: 22px }
Every interaction — click, drag, resize, playhead sync — requires round-trips between these three spaces.
Musical → Pixel
const PX_PER_BEAT = 48;    // each beat = 48 pixels wide
const PIANO_WIDTH = 56;     // left sidebar for key labels
const HEADER_HEIGHT = 20;   // top bar for bar numbers

function noteToPixel(note: FlatNote, rowHeight: number, beatsPerBar: number) {
  const totalBeat = note.bar * beatsPerBar + note.offset_beats;
  return {
    left: PIANO_WIDTH + totalBeat * PX_PER_BEAT,
    top:  HEADER_HEIGHT + (maxMidi - note.midi) * rowHeight,
    width: note.dur_beats * PX_PER_BEAT,
    height: rowHeight,
  };
}
Notice maxMidi - note.midi: higher pitches go up on screen (lower Y value), which means the MIDI axis is inverted. I got this wrong the first time and spent an hour wondering why all my notes were upside down.
Pixel → Musical (for drag operations)
function pixelToMusical(clientX: number, clientY: number, gridRect: DOMRect) {
const relX = clientX - gridRect.left - PIANO_WIDTH + scrollLeft;
const relY = clientY - gridRect.top - HEADER_HEIGHT + scrollTop;
const beat = relX / PX_PER_BEAT;
const midi = maxMidi - Math.floor(relY / rowHeight);
// Snap to grid
const snappedBeat = Math.round(beat / snapBeat) * snapBeat;
const bar = Math.floor(snappedBeat / beatsPerBar);
const offset = snappedBeat - bar * beatsPerBar;
return { bar, offset_beats: offset, midi };
}
The snapBeat parameter controls quantization. 0.25 snaps to sixteenth notes. 0.5 snaps to eighth notes. Users don't see this math — they just feel their notes "locking" into place.
Rendering the Grid
The grid has several visual layers, rendered bottom-to-top:
- Row stripes — alternating colors for white/black piano keys
- Vertical lines — beat divisions (thicker every bar)
- Horizontal lines — pitch rows
- Notes — colored rectangles
- Playhead — vertical line during playback
- Selection marquee — rubber-band rectangle
All of these are absolutely positioned divs inside a scrollable container.
Black Key Detection
const NOTE_NAMES = ["C","C#","D","D#","E","F","F#","G","G#","A","A#","B"];

function isBlackKey(midi: number): boolean {
  return NOTE_NAMES[midi % 12].includes("#");
}
Black-key rows get a darker background. This is pure cosmetics but makes the piano roll instantly readable — you can see octave boundaries at a glance.
Beat Lines
const totalBeats = bars * beatsPerBar;
const lines = [];

for (let b = 0; b <= totalBeats; b++) {
  const isBarLine = b % beatsPerBar === 0;
  lines.push(
    <div
      key={b}
      style={{
        position: 'absolute',
        left: b * PX_PER_BEAT,
        top: 0,
        width: 1,
        height: fullHeight,
        background: isBarLine
          ? 'rgba(148,163,184,0.4)'   // strong line at bar boundaries
          : 'rgba(51,65,85,0.6)',     // subtle line at beats
      }}
    />
  );
}
I also add sub-beat lines at sixteenth-note intervals (every PX_PER_BEAT / 4 pixels) with very low opacity. They're invisible until you zoom in, but they give the grid a "real DAW" feel.
Note Rendering
Each note is a rounded rectangle with three interaction zones:
┌──────────────────────────┐
│ ◄──── body (drag) ────► ▐│ ◄── right edge (resize)
└──────────────────────────┘
function NoteBlock({ note, index }: { note: FlatNote; index: number }) {
  const pos = noteToPixel(note, rowHeight, beatsPerBar);
  const isSelected = selected.includes(index);

  return (
    <div
      style={{
        position: 'absolute',
        left: pos.left,
        top: pos.top,
        width: Math.max(pos.width, 6), // minimum visible width
        height: pos.height - 2,        // 1px gap between rows
        borderRadius: 3,
        background: isSelected ? SELECTED_COLOR : trackColor,
        cursor: 'grab',
      }}
      onPointerDown={(e) => handleNotePointerDown(e, index)}
    >
      {/* Resize handle */}
      <div
        style={{
          position: 'absolute',
          right: 0,
          top: 0,
          width: 6,
          height: '100%',
          cursor: 'ew-resize',
        }}
        onPointerDown={(e) => {
          e.stopPropagation();
          startResize(e, index);
        }}
      />
    </div>
  );
}
The Math.max(pos.width, 6) is critical. Very short notes (a thirty-second note at normal zoom) would be 6 pixels wide — too small to click. The minimum width ensures every note is always grabbable.
Drag & Drop: The Hard Part
Dragging notes requires tracking three distinct modes:
type DragMode = 'none' | 'move' | 'resize' | 'create' | 'marquee';
Move vs. Click Disambiguation
When a user presses down on a note, they might want to:
- Click it (select)
- Drag it (move)
I distinguish these with a dead zone:
const DRAG_THRESHOLD = 4; // pixels

function handlePointerMove(e: PointerEvent) {
  if (dragMode === 'none' && dragStartRef.current) {
    const dx = e.clientX - dragStartRef.current.x;
    const dy = e.clientY - dragStartRef.current.y;

    if (Math.hypot(dx, dy) > DRAG_THRESHOLD) {
      setDragMode('move');
    }
    return;
  }

  if (dragMode === 'move') {
    // Calculate new position with snap
    const newPos = pixelToMusical(e.clientX, e.clientY, gridRect);

    // Apply delta from original position
    updateNote(dragIdx, {
      bar: newPos.bar,
      offset_beats: newPos.offset_beats,
      midi: newPos.midi,
    });
  }
}
Without the dead zone, every click would turn into a tiny drag, and notes would jump by one pixel on every selection.
Resize
Resizing changes only the duration, not the position:
if (dragMode === 'resize') {
  const relX = e.clientX - gridRect.left - PIANO_WIDTH + scrollLeft;
  const endBeat = relX / PX_PER_BEAT;
  const startBeat = note.bar * beatsPerBar + note.offset_beats;

  let newDur = endBeat - startBeat;
  newDur = Math.max(snapBeat, Math.round(newDur / snapBeat) * snapBeat);

  updateNote(dragIdx, { dur_beats: newDur });
}
The Math.max(snapBeat, ...) prevents notes from being resized to zero or negative length.
Creating Notes
Clicking on empty grid space creates a new note:
function handleGridClick(e: PointerEvent) {
  if (e.target !== gridRef.current) return; // only on empty space

  const pos = pixelToMusical(e.clientX, e.clientY, gridRect);

  const newNote: FlatNote = {
    bar: pos.bar,
    offset_beats: pos.offset_beats,
    midi: pos.midi,
    dur_beats: snapBeat * 4, // default: one beat
    vel: 80,
  };

  setLocal([...local, newNote]);
}
Deleting Notes
Double-click or Delete key. I chose both because DAW users have different muscle memory:
// Double-click on note
function handleNoteDoubleClick(index: number) {
  const next = local.filter((_, i) => i !== index);
  setLocal(next);
  onChange?.(next);
}

// Delete key for selected notes (ripple delete)
function handleKeyDown(e: KeyboardEvent) {
  if (e.key === 'Delete' || e.key === 'Backspace') {
    const next = local.filter((_, i) => !selected.includes(i));
    setLocal(next);
    setSelected([]);
    onChange?.(next);
  }
}
Multi-Select with Marquee
Rubber-band selection was the most technically fiddly feature. The marquee is a translucent rectangle that appears when you drag on empty space:
const [marquee, setMarquee] = useState<{
  x0: number; y0: number; x1: number; y1: number;
} | null>(null);

// During drag on empty space:
setMarquee({
  x0: startX,
  y0: startY,
  x1: currentX,
  y1: currentY,
});

// Render:
{marquee && (
  <div style={{
    position: 'absolute',
    left: Math.min(marquee.x0, marquee.x1),
    top: Math.min(marquee.y0, marquee.y1),
    width: Math.abs(marquee.x1 - marquee.x0),
    height: Math.abs(marquee.y1 - marquee.y0),
    background: 'rgba(99,102,241,0.2)',
    border: '1px solid rgba(99,102,241,0.6)',
    pointerEvents: 'none',
  }} />
)}
On pointer-up, I check which notes intersect the marquee rectangle:
function getNotesInMarquee(marquee, notes) {
  const rect = normalizeRect(marquee);

  return notes.filter((note, i) => {
    const noteRect = noteToPixel(note, rowHeight, beatsPerBar);
    return rectsOverlap(rect, noteRect);
  });
}
Shift+drag adds to the existing selection. Plain drag replaces it.
The Piano Keyboard (Left Sidebar)
The left sidebar shows piano key labels. It scrolls vertically with the grid but stays fixed horizontally:
<div style={{
  position: 'sticky',
  left: 0,
  zIndex: 10,
  width: PIANO_WIDTH
}}>
  {Array.from({ length: maxMidi - minMidi + 1 }, (_, i) => {
    const midi = maxMidi - i;
    const isBlack = isBlackKey(midi);
    const label = midiToLabel(midi); // "C4", "F#5", etc.

    return (
      <div
        key={midi}
        style={{
          height: rowHeight,
          background: isBlack
            ? 'linear-gradient(to bottom, #111827, #020617)'
            : 'linear-gradient(to bottom, #f9fafb, #e5e7eb)',
          display: 'flex',
          alignItems: 'center',
          justifyContent: 'flex-end',
          paddingRight: 4,
          fontSize: 10,
          fontWeight: label.startsWith('C') ? 700 : 400,
          color: isBlack ? '#e5e7eb' : '#111827',
        }}
      >
        {label}
      </div>
    );
  })}
</div>
C notes are bold — they mark octave boundaries and help with visual orientation. It's a tiny detail but every DAW does it for a reason.
Playhead Synchronization
During playback, a vertical line sweeps across the grid, synchronized to Tone.js:
useEffect(() => {
  if (!isPlaying) return;

  const playheadX = PIANO_WIDTH + playBeat * PX_PER_BEAT;

  // Auto-scroll to keep playhead visible
  const viewport = viewportRef.current;
  if (viewport) {
    const viewLeft = viewport.scrollLeft;
    const viewRight = viewLeft + viewport.clientWidth;

    if (playheadX > viewRight - 100 || playheadX < viewLeft) {
      viewport.scrollLeft = playheadX - 200;
    }
  }
}, [playBeat, isPlaying]);
The playBeat value comes from the parent component, which uses Tone.Transport.position converted to beats. The piano roll doesn't know about audio — it just receives a number and draws a line.
{isPlaying && (
  <div style={{
    position: 'absolute',
    left: PIANO_WIDTH + playBeat * PX_PER_BEAT,
    top: 0,
    width: 2,
    height: fullHeight,
    background: 'gold',
    zIndex: 20,
    pointerEvents: 'none',
  }} />
)}
Scrolling: The Performance Trap
With 16+ bars and a 3-octave range, the grid can be thousands of pixels wide. Scrolling must be smooth.
My first approach: a giant container with all notes rendered. This worked until about 200 notes, then React's reconciliation got slow.
The fix: viewport culling. Only render notes that are visible:
const visibleNotes = local.filter((note) => {
  const px = noteToPixel(note, rowHeight, beatsPerBar);
  return (
    px.left + px.width > scrollLeft - 100 &&
    px.left < scrollLeft + viewportWidth + 100
  );
});
The 100px buffer prevents pop-in at the edges during fast scrolling. Grid lines still render for the full width (they're cheap), but notes only render when visible.
I also switched from scroll events to tracking scrollLeft via a ref:
const [scrollLeft, setScrollLeft] = useState(0);

const onScroll = useCallback(() => {
  const el = viewportRef.current;
  if (el) setScrollLeft(el.scrollLeft);
}, []);
This avoids re-rendering on every pixel of scroll — the state only updates when React needs it for note culling.
Dynamic Grid Sizing
The grid should always be wide enough to show all notes plus room to add more:
const EXTRA_EMPTY_BARS = 8;

const maxBarFromNotes = local.reduce(
  (max, n) => Math.max(max, n.bar + Math.ceil(n.dur_beats / beatsPerBar)),
  0
);

const totalBars = Math.max(
  bars,                          // minimum from props
  maxBarFromNotes + EXTRA_EMPTY_BARS,  // extend past last note
  16                             // absolute minimum
);

const gridWidth = totalBars * beatsPerBar * PX_PER_BEAT;
The 8 extra empty bars mean you can always scroll past your last note and add more. As you add notes at the end, the grid grows automatically.
Row Height Auto-Scaling
The row height adapts to the container size and pitch range:
const rowsCount = maxMidi - minMidi + 1;
const availableHeight = containerHeight - HEADER_HEIGHT;
const rowHeight = Math.max(ROW_MIN_PX, availableHeight / rowsCount);
ROW_MIN_PX (22px) prevents rows from becoming too tiny when the pitch range is large. If there are too many rows to fit, the container scrolls vertically.
What I'd Do Differently
Use useReducer instead of useState for notes. The local state management got complex with undo/redo potential. A reducer with action types (MOVE_NOTE, RESIZE_NOTE, DELETE_NOTES, CREATE_NOTE) would be cleaner.
Implement virtual scrolling for grid lines too. With 64+ bars, rendering thousands of grid-line divs is wasteful. A canvas underlayer for the grid with DOM overlays for notes might be the best of both worlds.
Add touch support earlier. Pointer events mostly work on mobile, but pinch-to-zoom and two-finger scroll needed special handling that I bolted on late.
Consider position: sticky for the header bar. My current implementation manually tracks scroll position for the bar-number header. CSS sticky positioning would have been simpler.
The Numbers
The final component is about 800 lines of TypeScript. It handles:
- Rendering 16-64 bars of music
- 3-5 octave pitch range
- Click, drag, resize, create, delete, multi-select
- Playhead sync with external audio engine
- Keyboard shortcuts
- Scroll-based viewport culling
- Snap-to-grid quantization
- Multiple selection with marquee
No external editor library. No canvas. No contentEditable. Just React, TypeScript, pointer events, and a lot of coordinate math.
The component is a controlled input — it receives notes and onChange, just like a text field. The parent component owns the data. The piano roll just renders it and reports edits.
If you want to see it in action, paste any AI-generated melody into melogen.app and start clicking around.
This is Part 3 of a series on building Melogen. Part 1: How I Built a Web Editor for AI Music. Part 2: Parsing Music JSON from 4 Different LLMs. Next: Using LLMs as a Music Mix Engineer — With Fallback Chains.
Tags: react typescript music webdev

Top comments (0)