
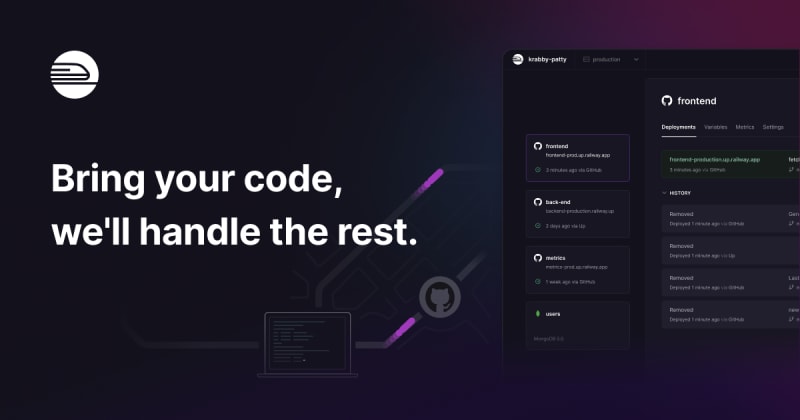
Railway is a modern PaaS solution that makes deploying code easier. I’ve had a bit of time to experiment with it and was keen to write up my findings for how it worked with Go projects. In this post, I explore the magic of its deployment mechanisms and demonstrate how to use GitHub Actions to deploy code to Railway. Spoiler alert: I loved learning about Railway and will be building with it more in the future!

What is Railway? 🛤️
Railway is often compared to Heroku because it makes the provisioning of infrastructure and deployment of code much easier than other public cloud providers. This is perfect for me, a backend engineer who wants to build stuff!
Here are some of the key headline features of the platform:
- Zero configuration builds : the Railway team have started the Nixpacks project. This project builds OCI compliant images based on the source repository. They currently support a variety of popular languages out of the box, including Go ⭐️ of course! For other languages, you can supply your own Docker file and still run on Railway.
- In-built GitHub support : Railway services can be tied to a GitHub repository. Then, changes committed to configured branches automatically trigger services to be re-deployed. The cherry on top 🍒 is that the Railway CLI also makes it easy to configure GitHub Actions workflows. I will show you how this works later on in this post.
- Secrets management : once deployed, Railway services are organised into environments, which then belong to projects. You can easily configure project secrets which are shared between different services in the same project. Services can also have their own defined secrets. This approach to secrets management gives you a lot of configuration flexibility.
- Templates : the Railway team and community have created templates for even easier code deployment. You can create a project from a template, which then creates a public GitHub repo using your GitHub user. This repository is then linked to a Railway service using the previously mentioned GitHub support. At the time of writing, there are templates for the most popular Go web frameworks: fiber, gin, gorilla/mux and chi. The big advantage of using a template is that you will also receive updates when the template itself is updated. Railway also runs an OSS kickback programme which gives back 25% of template usage revenue to the template creators. That’s a great incentive for the Go community to extend Railway support! 🤑
Now that I have covered the fundamentals of Railway, let’s get hands on and see how easy it really is to run on Railway! 🚆
Signing up & setting up 🛠️
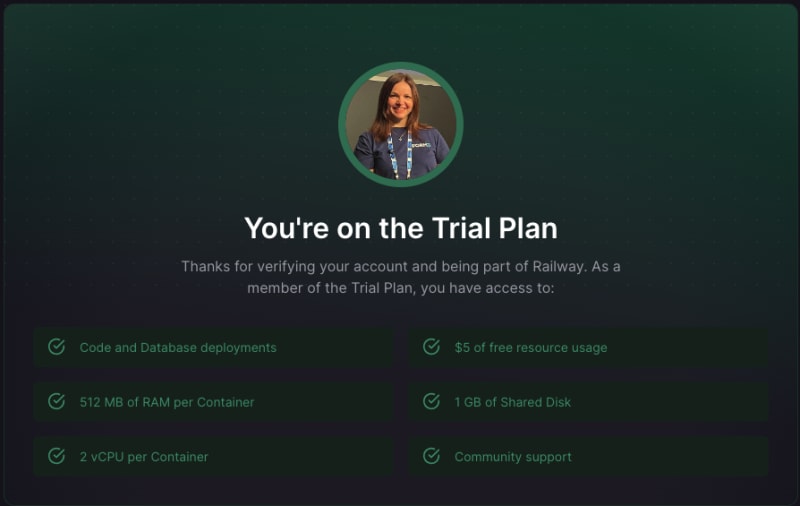
As you might imagine, signing up and onboarding are pretty painless. When creating an account, you can choose to sign up via email or using your GitHub account. I would recommend using your GitHub account, as that will also add Railway as a GitHub app, which will make it easier for you to leverage GitHub integrations later on. Once signed up, you will be put on the Trial plan which will give you a free $5 allowance to explore Railway with. Pricing then starts from $5 a month with the Hobby plan.
Once you’re all set up, you can create a new project from your dashboard or through the Railway CLI. Since I’ve never been a fan of ClickOps, I’ll do as much as possible using the CLI, even though the dashboard is easy to use and inspect. The CLI can be installed in a variety of ways depending on your OS. I installed it using homebrew:
$ brew install railway
Once installed, you will need to authenticate your CLI session in your terminal:
$ railway login
This command will authenticate you by launching a new browser window, but there is also a -browserless option.
As previously mentioned, Railway organises your work in projects. I must now create a new project which can be the home of my upcoming deployments:
$ railway init
> Project Name Will be randomly generated
Created project sneaky-window on Personal
https://railway.app/project/ee5d0509-b356-4581-a5af-d4dfcce84001
You can provide a name for your project or have a random one generated as above. A URL to inspect your project on the dashboard is also printed out. By the time this blogpost publishes, this project will have already been torn down, but it might be a good idea to keep this key secret!
By default, all projects have a generated production environment. All Railway environments contain the same services, but give you isolated instances that you can experiment on separately. You can create new environments using the Railway dashboard, but can then change between them from the CLI. A really neat feature is that environments can be forked and merged as well. Going forward, I'll only be working in the default production environment.
That’s all the setup you need for now: you’ve signed up to Railway, set up your CLI for easier management and created a new project that you can deploy your work to. It’s time to get some Go code ready for deployment! 🚀
The Go European Weather checker 🇪🇺
I’ve written a small Go app that displays the weather in the European capitals as part of this Railway experiment. You can see it on GitHub at addetz/go-weather-checker. I have written this app from scratch, but I could have used one of the Railway Go templates as the starting point.
This little application uses the following technologies:
- labstack/echo is my chosen web framework. I’ve recently started using this framework and I really like how easy it is to configure routes, as well as construct JSON responses.
- GopherJS compiles Go code to JavaScript. I built a very small frontend to make the demo more visually appealing. This library allowed me to build the entire demo in Go, except for some simple HTML. The frontend is styled with bootstrap.
- OpenWeatherMap is the third-party service that I use to fetch weather data. This service provides you with 1000 free API calls per day. As part of sign up, you will be issued with an API key that you can use for querying.
The application is configured with 2 environment variables: the OpenWeatherMap API key mentioned above is mandatory and the port is optional, with a default value of 8080.
$ export WEATHER_API_KEY=XXX
$ export PORT=XXX
After setting our variables, the server runs like any old server:
$ go run server.go
Once the server starts up, you can navigate to it in the browser at localhost:8080 or whatever port you have configured. Now you can see what the weather is in any European capital! 😎
Deploying to Railway 🚆
As mentioned above, the source for my app is at addetz/go-weather-checker. The repo does not have a Dockerfile, but it does contain a go.mod file which will signal to Nixpacks that this is a Go application.
Back in my terminal, I link the repo root directory of the weather app with the previously created sneaky-window project and its default created production environment:
$ railway link
> Select a project sneaky-window
> Select an environment production
Linking my CLI session to this project allows me to run all future commands against this project and environment. I can then easily deploy the weather app using the up command:
$ railway up
At this point, Nixpacks will build and publish an image for my app and Railway will attempt to start a service running its built image. However, this service will immediately crash because I have not set up any secrets for my application. The deploy logs simply print the following and the application exits. 😱
2023/08/24 14:22:33 WEATHER_API_KEY must be set
At the time of writing, the Railway team are rethinking the secrets workflow within the CLI, so I am not be able to add the mandatory secret from the terminal. Instead, I add it as a shared variable to the project by navigating to the Railway dashboard and adding it to the project settings, then sharing it with the newly created weather service.

Once this variable is shared, the service will be successfully redeployed:

The running deployment shows us two things:
- Railway is able to detect that I am attempting to expose a webserver.
- The app is now listening on port
:5784, even though this has not been configured at all.
How on earth is this all happening? 🧐
The secret lies in the magic 🪄 of Railway, of course… and the PORT environment variable. In order to expose web apps, Railway needs an IP and port. The IP is provided through configured domains, while the port is configured through a Railway provided PORT environment variable. If any apps you write are configured to use this variable, they will be able to expose endpoints to the internet without any further configuration.
There are 2 options for domain configuration: generate one or add a custom domain from the service settings. In this instance, I have generated a domain and my app will be exposed at https://sneaky-window-production.up.railway.app/. One really neat thing to notice is that Railway has also secured all traffic to my application with HTTPS without me having to configure anything in my app or create certificates. Nixpacks took care of that. 🤩

The cherry on top 🍒: GitHub Actions
As a final step, let’s talk about CI/CD with GitHub Actions. Workflow configuration and management have now become synonymous with GitHub Actions, so of course it makes sense that Railway supports this!
Railway allows the creation of project tokens in order to authenticate from remotes where even browserless login is not possible. You can create a new token from the Tokens tab of your project settings. This token will give you programmatic access to the project.

On the GitHub side, I add this token as a secret to the weather app repository addetz/go-weather-checker by navigating to Settings -> Secrets and Variables -> Actions. I will name this token RAILWAY_TOKEN as advised. I have also added a further secret called RAILWAY_SERVICE, which will allow me to instruct which service to deploy this repository to.

You are now ready to run GitHub Actions with Railway! A simple workflow which builds our app, runs our tests and then deploys the code using Railway can be seen below:
name: Deploy to Railway

on:
  push:
    branches: [main]

jobs:
  deploy:
    runs-on: ubuntu-latest

    steps:
      - name: Checkout
        uses: actions/checkout@v2

      - name: Setup Go
        uses: actions/setup-go@v4
        with:
          go-version: '1.21.x'

      - name: Install dependencies
        run: go get ./...

      - name: Build
        run: go build -v ./...

      - name: Test with the Go CLI
        run: go test ./... -v

      - name: Deploy Railway
        uses: bervProject/railway-deploy@main
        with:
          railway_token: ${{ secrets.RAILWAY_TOKEN }}
          service: ${{ secrets.RAILWAY_SERVICE }}
I deploy to Railway using an existing railway-deploy GitHub Action, which wraps around the installation aspects of the CLI. I make use of the configured repository variables to pass the token and the deployment service.
That’s all you need to seamlessly deploy your application to Railway with GitHub Actions. One aspect I have not covered is the ability to specify a GitHub repository as the service source, which will allow Railway to monitor the repository for changes on a configured branch, typically main, and then redeploy when new commits are made. You can read more about service sources and triggers on the Railway docs. I prefer to have control of deployments using GitHub Actions.

Parting words
This brings me to the end of my exploration with Railway! It’s been so interesting to learn about this great platform. There is a lot here that can make our lives easier and help us ship projects faster, so I hope this post will inspire you to explore Railway on your own as well.
I’ll be following up with a post on how databases & storage work in Railway, so stay tuned for that. And who knows… I might put forward an echo Railway template as well! 🤩
Happy coding, Gophers!❤️

Top comments (0)