
This is a series of articles about Database Change Management with Amazon Aurora.
- Database Change Management with Amazon Aurora (this one)
- Database Change Management with Amazon Aurora and GitHub
Amazon Aurora is a fully managed relational database engine that's compatible with MySQL and PostgreSQL.
This tutorial is a step-by-step guide to set up Database Change Management for Amazon Aurora MySQL in Bytebase. With Bytebase, a team can have a formalized review and rollout process to make Amazon Aurora database schema change and data change.
Bytebase provides a GUI for teams to perform database changes and retain full change history. You can use Bytebase free version to finish the tutorial.
At the end, there is a bonus section about Schema Drift Detection for those advanced users.
Features included
- Change Workflow
- Schema Editor
- SQL Editor
- Change History
- DML Rollback
- Drift Detection
Prerequisites
Before you start, make sure you have:
- An Amazon Aurora MySQL instance.
- Docker installed.
Step 1 - Deploy Bytebase via Docker
- Make sure your Docker is running, and start the Bytebase Docker container with following command:
docker run --init \
  --name bytebase \
  --platform linux/amd64 \
  --restart always \
  --publish 5678:8080 \
  --health-cmd "curl --fail http://localhost:5678/healthz || exit 1" \
  --health-interval 5m \
  --health-timeout 60s \
  --volume ~/.bytebase/data:/var/opt/bytebase \
  bytebase/bytebase:1.13.0 \
  --data /var/opt/bytebase \
  --port 8080
Bytebase is now running via Docker, and you can access it via
localhost:5678.

Visit
localhost:5678in your browser. Register the first admin account which will be grantedWorkspace Owner.

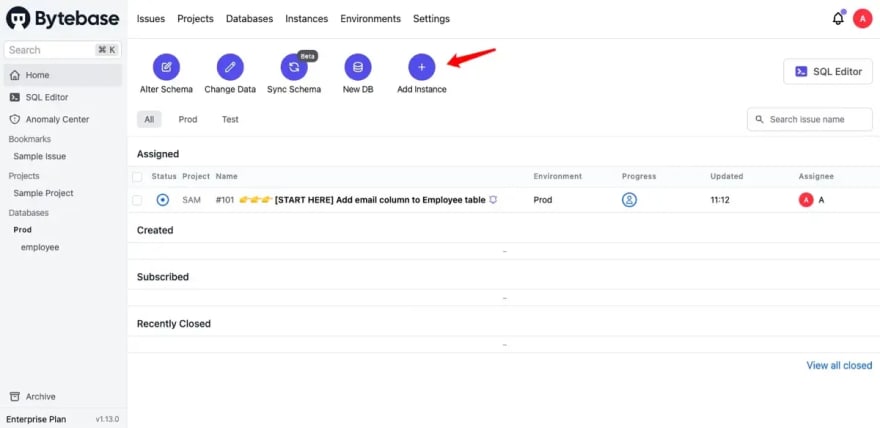
Step 2 - Add an Amazon Aurora Instance to Bytebase
In Bytebase, an Instance could be your on-premises MySQL instance, an AWS RDS instance etc, in this tutorial, an Instance is your Amazon Aurora MySQL instance.
Visit
localhost:5678and log in asWorkspace Owner.
Click Add Instance.
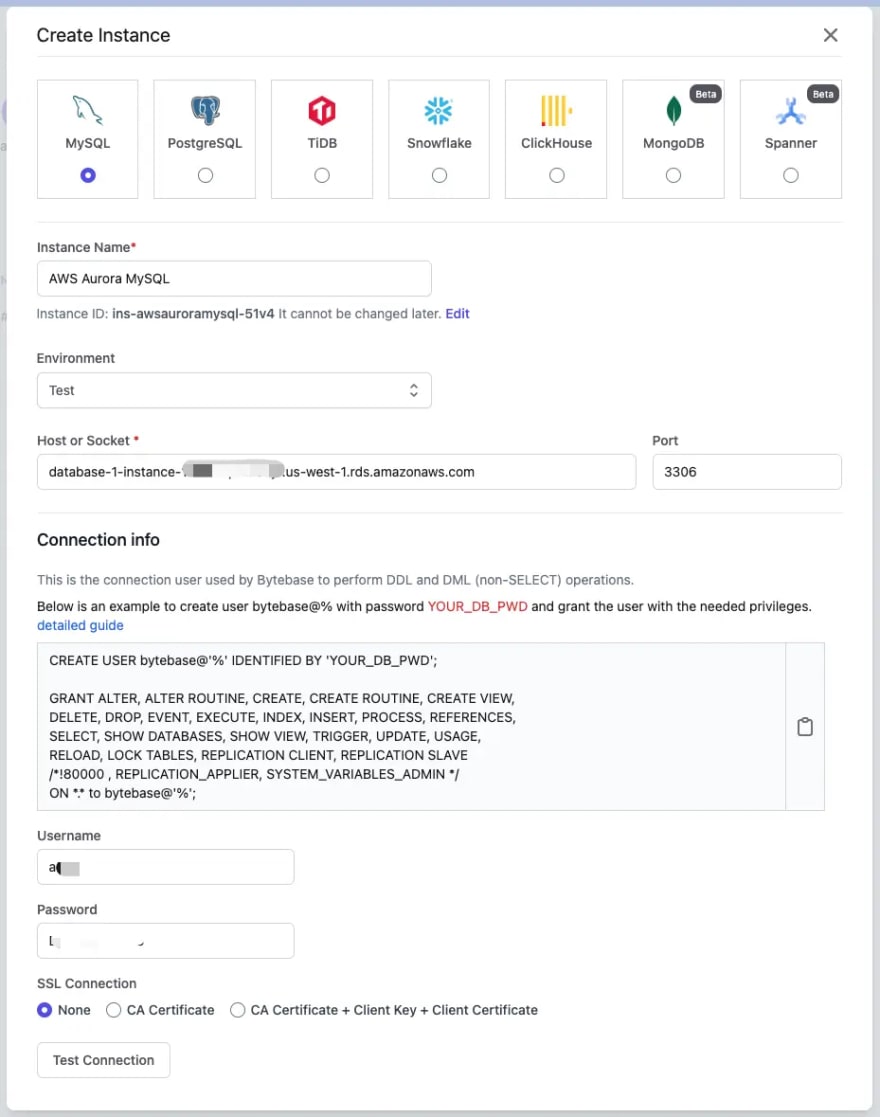
Fill in the fields and click Create. Pay attention to these fields:
Type: MySQL, if you use Aurora PostgreSQL, choose PostgreSQL instead.
Environment: choose Test, if you choose Prod, you'll need manual approval for all future change requests by default, let's keep it simple for this tutorial.
Step 3 - Create a Project
In Bytebase, Project groups logically-related Databases, Issues and Users together, which is similar to the project concept in other DevTools such as Jira and GitLab. So before you deal with the database, a Project must be created.
Click Projects on the top navigation bar.
Click New Project to create a new project
TestAurora, key isTAR, mode isstandard. Click Create.

Step 4 - Create an Amazon Aurora Database via Bytebase
In Bytebase, a Database is created by CREATE DATABASE xxx. A database always belongs to a single Project. An Issue represents a specific collaboration activity between Developer and DBA for when creating a database, altering a schema. It's similar to the issue concept in other issue management tools.
Click Projects >
TestAuroraon the left sidebar. Click New DB to create a new database. You can transfer your existingFill the form with Name -
db_demo, Environment -Test, and Instance -Amazon Aurora MySQL. Click Create.Bytebase will create an issue to create the database automatically. As it's the
Testenvironment, the issue will run without waiting for your approval by default. Click Resolve, and the issue isDone.

Step 5 - Create a Table in Amazon Aurora MySQL
In Step 4, you created an issue to create a database using UI workflow and then executed it. Let’s continue to create a table.
Visit your project, and click on Alter Schema.
Choose
db_demoand click Next.

This is where you get to try out the Schema Editor. It’s a visual editor for schema changes. Create a table called
t1with 2 columns:idandname.

Click Preview issue, and Bytebase will automatically preview an issue with the corresponding SQL statement. Verify it's right, and click Create.

The issue is automatically approved by default since it’s for the
Testenvironment. Meanwhile, Bytebase has run several task checks before executing the SQL, and one such task check is called SQL Reivew. You may customize your own SQL Review policies.

Click Resolve issue. The issue will become
Done.

From the issue page, click View change, and you can see schema diff.

Step 6 - Add Some Data and Query via SQL Editor
- Go to the project
TestAurora, and click Change Data. - Choose
db_demoand click Next. - Fill in the SQL as follows and then click Create.
INSERT INTO
  t1
VALUES
  (1, 'Adela');
After its execution, Click Resolve.

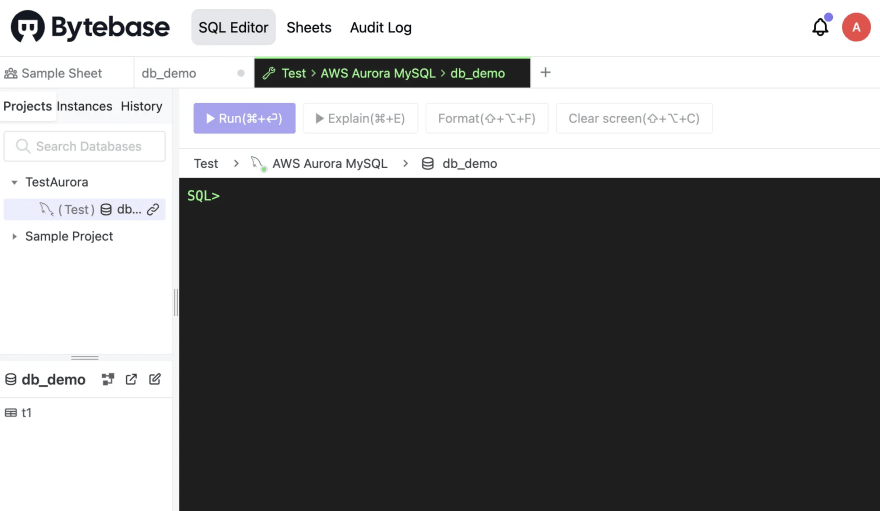
Click SQL Editor on the left side bar. Input the query and click Run. You can see the new row is there.

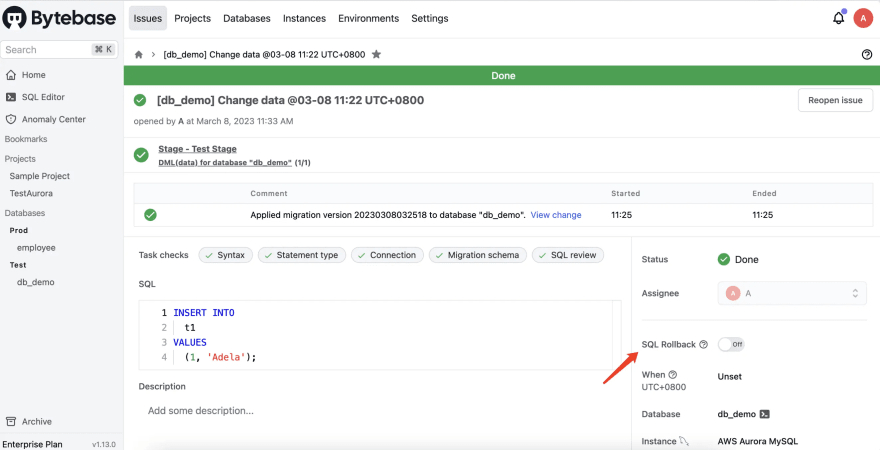
Step 7 - Rollback the Data Change
Bytebase support Rollback for MySQL.
After a data change completes, Bytebase can parse MySQL binary logs and build rollback SQL statements from the logs. This allows you to revert that data change if needed.
Go back to the issue, turn the SQL Rollback on.
It may fail if the instance hasn't set
binlog_format = ROW.

Go to Amazon RDS, click Parameter groups to create a new parameter group and set binlog_format to
ROW.
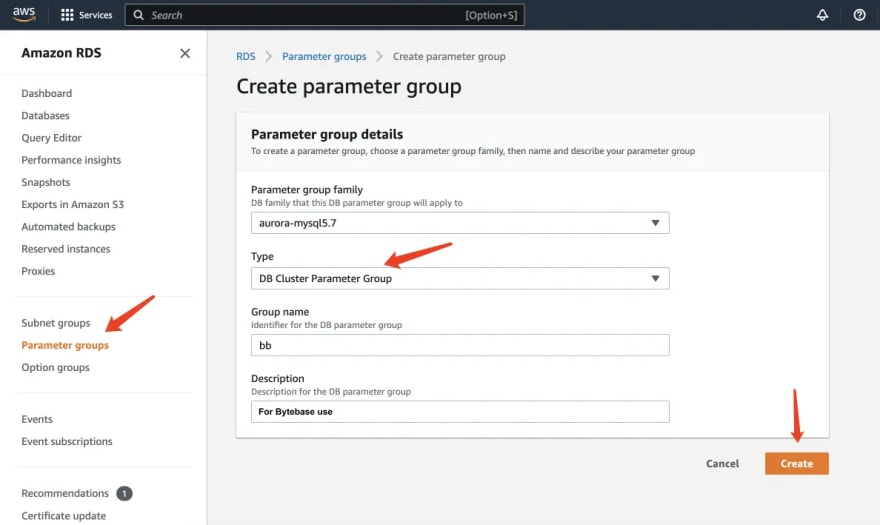

Apply the parameter group to your database instance.

Go back to Bytebase SQL Editor, and switch to Admin Mode.
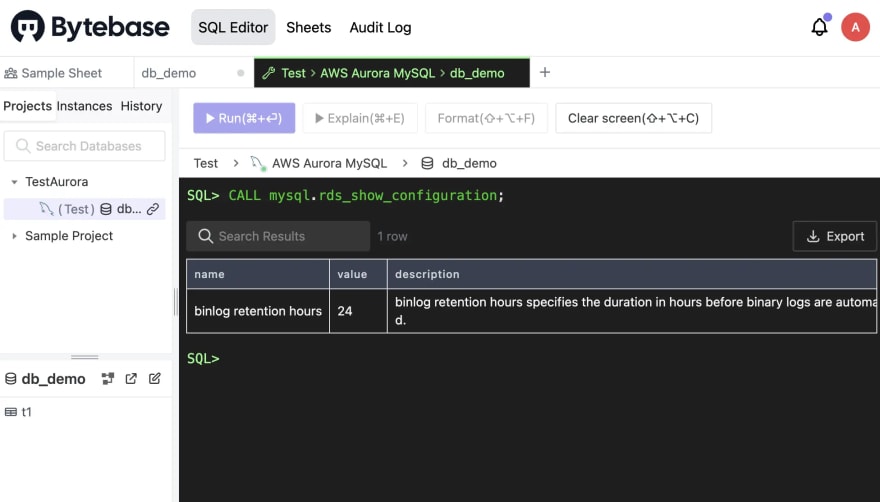
According to Amazon documentation. Type as following to set the binlog retention hours to 24.
call mysql.rds_set_configuration('binlog retention hours', 24);
- Type as following to check it's set successfully.
CALL mysql.rds_show_configuration;
Reboot the Aurora MySQL instance.

Repeat the Step 6, but this time, we can see the Preview rollback issue. Click it and then click Create on the issue page.


Rollback always requires explicit approval.

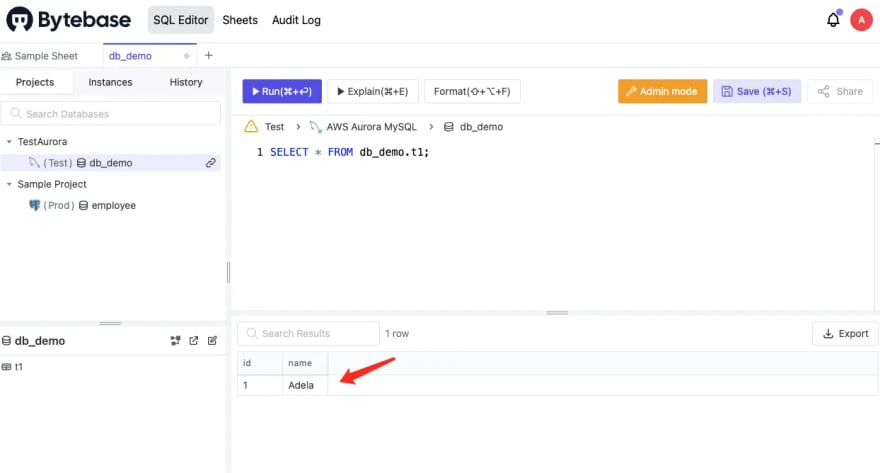
Before approving rollback, let's go to SQL Editor and query.
Bellais there.

Go back to the issue page and click Approve. The rollback SQL will execute.

Go to SQL Editor and query again.
Bellais no longer there - The rollback is successful. You may rollback the rollback too, and yes, rollback the rollback for rollback... As long as the binlog is within the 24-hour retention period.
Bonus Section - Schema Drift Detection
To follow this section, you need to activate the Enterprise Plan (you can start a 14-day trial directly, no credit card required).
Now you can see the full change history of database db_demo. However, what is Establish new baseline? When to use it?
By adopting Bytebase, we expect teams to use Bytebase exclusively for all schema changes. Meanwhile, if someone has made Amazon Aurora schema change out side of Bytebase, obviously Bytebase won’t know it. And because Bytebase has recorded its own copy of schema, when Bytebase compares that with the live schema having that out-of-band schema change, it will notice a discrepancy and surface a schema drift anomaly. If that change is intended, then you should establish new baseline to reconcile the schema state again.
In this section, you’ll be guided through this process.
- You can use an external GUI or terminal to make a change to
db_demo. In this tutorial, we use Bytebase SQL Editor’s Admin mode which also counts when we say change outside of Bytebase. Go to SQL Editor, and switch to Admin mode.
When you make a change in Admin Mode, it will not record any history as in a normal process www.bytebase.com/docs/sql-editor/admin-mode
- Paste the following and then press Enter:
ALTER TABLE t1
ADD COLUMN age integer;
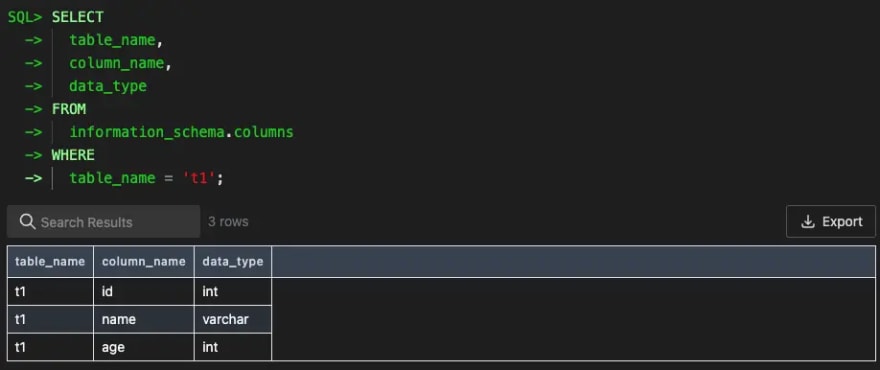
- Paste the following and then press Enter to verify it’s there:
SELECT
  table_name,
  column_name,
  data_type
FROM
  information_schema.columns
WHERE
  table_name = 't1';
Wait for 10 mins (as Bytebase does the check roughly every 10 mins). Go to Anomaly Center, and you can find the Schema Drift.

Click on View diff, you will see the exact drift.

You may also find the drift by clicking Databases > db_demo.

Go to Databases > db_demo > Change History and click Establish new baseline, this step establishes a new baseline to reconcile the schema state from the live database schema.

Bytebase will create an issue to establish the new baseline, click Create, and then Resolve to mark it done.
Go back to Databases > db_demo or Anomaly Center, and you will find the drift is gone.
Summary and What's Next
Now you have connected Amazon Aurora with Bytebase, and used the UI workflow to accomplish schema change and data change. Bytebase will record the full change history for you. Furthermore, the Enterprise Plan is equipped with Schema Drift Detection to detect out-of-band schema changes performed outside of Bytebase.
In the next post, you’ll try out GitOps workflow: store your Amazon Aurora schema in GitHub and Bytebase will pick up the changes to the repo, bringing your Amazon Aurora change workflow to the next level, aka Database DevOps - Database as Code.

Top comments (0)