Introduction
Every cloud provider supports open source stacks for web development, and Alibaba Cloud is no different in this manner. Alibaba Cloud provides hosting support for major frameworks like .NET Core, Python, Node.js, Ruby and more. Node.js is the most loved and most used web development stack for JavaScript programming language. It powers some of the most used front-end development libraries too, including React.js, Vue.js, and Angular (Angular uses NPM to distribute the Angular CLI). Several community-driven and developer-friendly web development runtimes/frameworks have shown up in the last few years, including Express.js.
In this article, we will walk you through the deployment and hosting of a Node.js based web application on the Linux environment.
The source code used in this article is available on GitHub.
Prerequisites
This article will cover the deployment and hosting aspects of Node.js, so you will need to:
- Know the basics of Node.js web development. Node.js is very easy to learn and get started with, you can read this article to get to know the basics of Node.js.
- Know the basics of the
gitversion control system and its command-line interface. This article uses beginner levelgitcommands only. - Set up an Alibaba Cloud account to create a hosting service for the Simple Application Server.
You can create a free account with Alibaba Cloud with $20 free credit and create your web server. You can also use a local virtual machine if you find it helpful.
Next sections assume that you have a Node.js web application. You can use the code for the Node.js app from the GitHub link provided above.
Simple Application Server by Alibaba Cloud
Alibaba Cloud provides multiple services to customers for hosting purposes. Ranging from ECS to Scalable Kubernetes services, customers can decide how to deploy their applications. Simple Application Server is a managed ECS service by Alibaba Cloud. It offers:
- Managed ECS instances in a cheap package.
- One-click deployment for open-source products; WordPress, Drupal, and more.
- Custom domains and SSL certificates.
- Web firewall rules to prevent unauthorized access.
- Service backups and restoration.
- In-browser VM access software; Rescue Connect.
These options make this service a suitable candidate for hosting needs. Simple Application Server supports virtual machines in all major Linux distros and Windows Server 2008, and 2016 editions (at the time of this authoring, and it might change in future).
Step 1 — Creating a Deployment Environment
We recommend using the Ubuntu LTS image for the hosting environments as they provide a stable environment, and major web runtimes support them. To create a new instance, go to Simple Application Server on Alibaba Cloud. You can search for Simple Application Server on the main page:
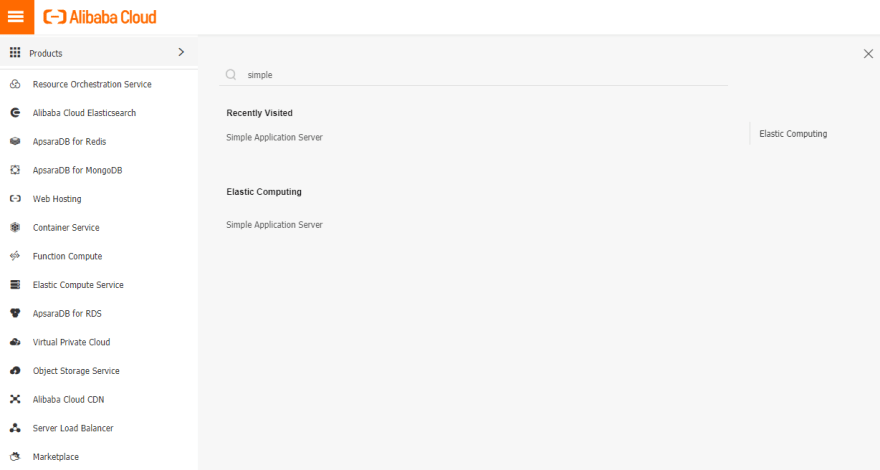
You can also visit the service directly using the link we provided above. Depending upon your orders you might find your resources listed on the page or an empty page. We have created a few virtual machines, so we are provided with two virtual machines.

Adding a Service Subscription
You can create a new instance using the "Create Server" button in the top right corner of the page.
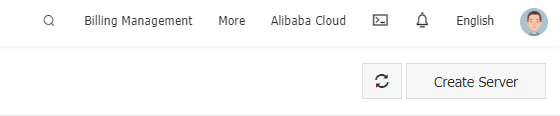
Click on this button to visit the service purchase page. This page will show a list of all services and products. You can create an application using open-sourced products, such as WordPress.
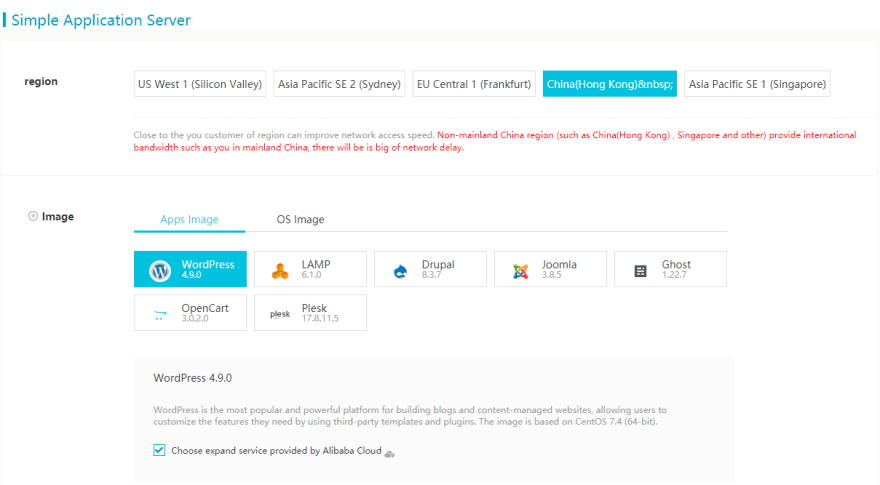
You can also create a vanilla virtual machine using OS images, such as Windows Server or Linux distros.
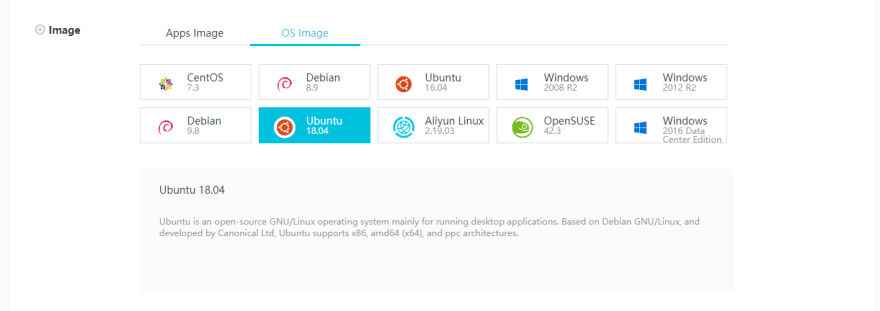
Select a Ubuntu 18.04 image for your service.
At the time of this authoring Ubuntu 18.04 is the LTS release.
In the next step, you should select the instance size for your machine.

For development/testing purposes, you can use a 1 vCPU and 1 GB RAM instance. For production environments, we recommend using at least 2 vCPU and 8 GB RAM for optimal performance. Your virtual machine contains a data disk where the data does not persist. You should consider adding an extra data disk to your subscription. This extra data disk will help your applications persist the data in case of a crash or a reboot. After this, you can place the order, and Alibaba Cloud will create a new resource for you.
Linux machines are half the prices compared to Windows machines and provide better performance on Node.js and .NET Core instances.
If you want to use a virtual machine, then you can visit this link and learn How To Install Ubuntu Using VirtualBox On Windows 10.
Step 2 — Setting up Deployment Environment
After you have created the deployment environment, you need to install the required packages to host a Node.js application. On a fresh machine, you will need to use the git version control to get your source code from a remote repository. First, connect to the virtual machine instance using Rescue Connect service inside the portal or via SSH.
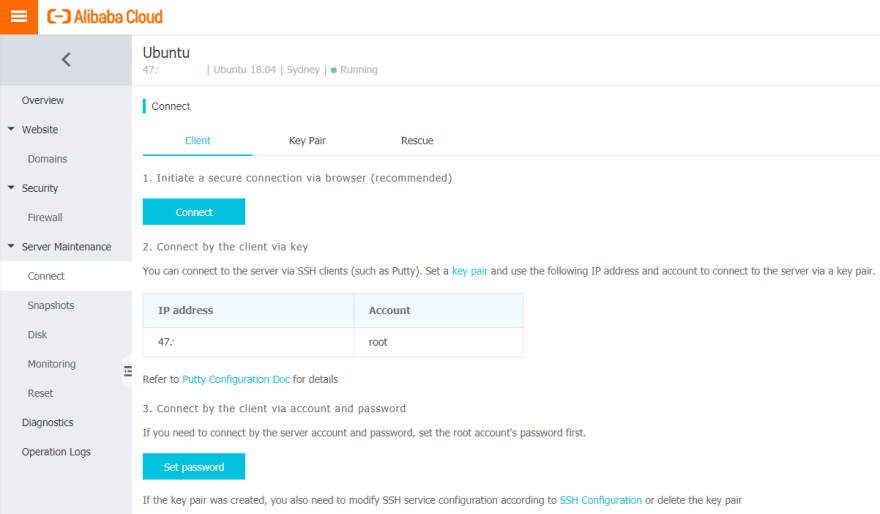
You can use the "Set password" to reset the password for your SSH account. Then you can use any SSH client to connect to the virtual machine. PuTTY is one of such clients that are widely used. You can learn how to use PuTTY from this link.
Once you have established the connection, SSH will show you this screen on PuTTY — or your favorite SSH client.

First of all, we need to refresh the repositories that Ubuntu uses for our packages and applications. Run:
$ sudo apt-get update
Now execute the following command to set up basic build SDKs on Ubuntu.
$ sudo apt-get install build-essential
This command installs C++ and other native SDKs on Ubuntu. Node.js uses these SDKs to install and set up the NPM packages upon npm install.
Now we need to install git, so we can fetch the source code and host it. To install, run:
$ sudo apt-get install git
Now we only need Node.js on our environment. Ubuntu 18.04 comes shipped with a repository for the Node.js package. We can just execute:
$ sudo apt-get install nodejs npm
We also installed the NPM — Node Package Manager — that will help us in managing the Node.js packages and generate scripts to run Node.js apps. After this command, verify your Node.js and NPM package versions. Run:
$ nodejs --version
$ npm --version
You will see the following output:
root@iZp0w3npg0fhgu06dyhmboZ:~# nodejs --version
v8.10.0
root@iZp0w3npg0fhgu06dyhmboZ:~# npm --version
3.5.2
root@iZp0w3npg0fhgu06dyhmboZ:~#
This confirms that our hosting environment is ready to accept our Node.js web app.
Step 3 — Deploying Node.js App
There are many ways in which you can deploy a Node.js app. You can use DevOps and automation tools to create a CI/CD pipeline, or you can deploy the files directly on a server using FTP. We will not talk about any of those in this — as we have planned for more articles that will talk about automation and CI/CD. We will use git CLI to fetch source code and then host it manually.
Now, we can create a directory to contain our web application and host it using the nodejs process. Execute the following commands to create a directory:
$ mkdir hosting
This will create a directory called hosting in the root of your virtual machine's file system. Enter the repository:
$ cd hosting/
You can copy the content of the Node.js application here. Since code is available on the Git repository, we use the git command to pull the source files:
$ git clone https://github.com/afzaal-ahmad-zeeshan/nodejs-dockerized app
Cloning into 'app'...
remote: Enumerating objects: 125, done.
remote: Total 125 (delta 0), reused 0 (delta 0), pack-reused 125
Receiving objects: 100% (125/125), 236.51 KiB | 396.00 KiB/s, done.
Resolving deltas: 100% (43/43), done.
This command will create a new directory app inside the hosting directory with your code. You can do ls -la to get a list of files in the app directory:
$ cd app/
$ ls -la
total 52
drwxr-xr-x 4 root root 4096 Nov 19 11:32 .
drwxr-xr-x 3 root root 4096 Nov 19 11:32 ..
-rw-r--r-- 1 root root  349 Nov 19 11:32 docker-compose.yml
-rw-r--r-- 1 root root   75 Nov 19 11:32 Dockerfile
-rw-r--r-- 1 root root   32 Nov 19 11:32 .dockerignore
drwxr-xr-x 8 root root 4096 Nov 19 11:32 .git
-rw-r--r-- 1 root root   32 Nov 19 11:32 .gitignore
-rw-r--r-- 1 root root 1076 Nov 19 11:32 LICENSE
-rw-r--r-- 1 root root  663 Nov 19 11:32 package.json
-rw-r--r-- 1 root root 1407 Nov 19 11:32 README.md
drwxr-xr-x 7 root root 4096 Nov 19 11:32 src
-rw-r--r-- 1 root root 4303 Nov 19 11:32 UPDATES.md
You can review the code for this repository on GitHub, here is the code for app.js. Our application's source code is in the src/ directory. The Node.js bootstrapping is done in less than 50 lines of code in the app.js file.
// Server
let Express = require("express");
let bodyParser = require("body-parser");
let app = new Express();

// Configuration
app.set("view engine", "pug");
app.set("views", "./src/views");
app.use(Express.static("./src/public"));

// Body parsers are needed now.
app.use(bodyParser.json());
app.use(bodyParser.urlencoded({ extended: false }));

// Log the request before passing on
let logger = require("./services/logging");
app.all("*", function(req, res, next) {
    logger.logRequest(req);

    // Move onward and process the request in pipeline.
    next();
});

// Home page
let homeRouter = require("./routers/home");
app.use("/", homeRouter);

// Songs API
let songsRouter = require("./routers/api/songs");
app.use("/api/songs", songsRouter);

let tasksRouter = require("./routers/api/tasks");
app.use("/api/tasks", tasksRouter);

// Process information
let processApi = require("./routers/api/process");
app.use("/api/process", processApi);

// Catch-all
app.all("*", (req, res) => {
    res.render("/shared/lost", { pageTitle: "404"});
});

let serverConfigurations = require("./serverconfig");
app.listen(serverConfigurations.serverPort, () => {
    let serverStatus = `Server listening on localhost:${serverConfigurations.serverPort}.`;
    logger.logEvent("server start", serverStatus);
    console.log(serverStatus);
});
Node.js web apps run on packages, and currently, we do not have the packages on our system. We can download the packages using NPM CLI. Execute:
$ npm update
This command is part of the NPM suite of commands to manage the Node.js app lifecycle. You will see a message stating which packages were downloaded and installed for you. For my case, the output was:
root@iZp0w3npg0fhgu06dyhmboZ:~/hosting/app# npm update
npm WARN deprecated core-js@2.6.10: core-js@<3.0 is no longer maintained and not recommended for
usage due to the number of issues. Please, upgrade your dependencies to the actual version of
core-js@3.

> core-js@2.6.10 postinstall /root/hosting/app/node_modules/core-js
> node postinstall || echo "ignore"

express-nodejs@1.3.1 /root/hosting/app
├── applicationinsights@1.6.0
├── body-parser@1.19.0
├── express@4.17.1
├── pug@2.0.4
└── uuid@3.3.3

npm WARN express-nodejs@1.3.1 No repository field.
This output will be different in your case, and that is fine. Once the packages are downloaded, you can run the application locally on the virtual machine. Run:
$ npm start
This command executes the start command from the scripts section in package.json file. This file is available in the root directory.
{
  "name": "express-nodejs",
  "version": "1.3.1",
  "description": "Sample Express based Node.js app for containerization samples and demos.",
  "main": "./src/app.js",
  "scripts": {
    "test": "echo \"Error: no test specified\" && exit 1",
    "start": "node ./src/app.js",
    "debug": "export PORT=3456|| set PORT=3456&& npm start"
  },
  "dependencies": {
    "applicationinsights": "^1.0.4",
    "body-parser": "^1.18.3",
    "express": "^4.16.4",
    "pug": "^2.0.3",
    "uuid": "^3.3.2"
  },
  "keywords": [
    "express",
    "nodejs",
    "afzaalahmadzeeshan",
    "docker",
    "image"
  ],
  "author": "Afzaal Ahmad Zeeshan",
  "license": "MIT"
}
The start command only forwards the execution control to node ./src/app.js part. This starts our web application and we are provided with a message for our server. The output of this command is:
root@iZp0w3npg0fhgu06dyhmboZ:~/hosting/app# npm start

> express-nodejs@1.3.1 start /root/hosting/app
> node ./src/app.js

Cannot start Application Insights; either pass the value to this app or use the App Insights
default environment variable.
[Event] server start: Server listening on localhost:5000..
Server listening on localhost:5000.
This output is generated by our application. You can safely ignore the warning message of "Cannot start...", as that is a helpful warning message stating that Application Insights has not been set up and also hints on how to do so. The important part of this output is the localhost:5000. That is where our application is running.
If you have access to the virtual machine or have a web browser in the virtual machine, you can access the web app on localhost:5000. For those on the terminal, you can use the
lynxtool to access the website.
Exposing Web App on the Internet
This section assumes that the web app is running on the virtual machine.
We can expose the website on Simple Application Server's IP address in 2 ways:
- Modify the website and make it listen on port 80.
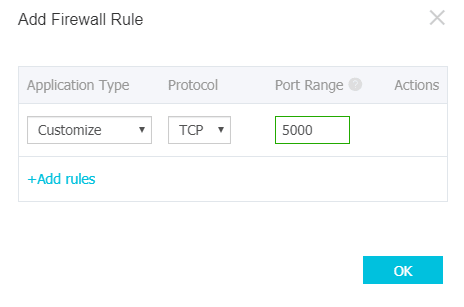
- Add a firewall rule to enable traffic on port 5000.
We will use the second option and create a firewall rule for port 5000. For option 1, you can use an environment variable PORT and pass 80 as a value — see the debug script in package.json file to learn how to do that.
Go to Firewall tab on your service:
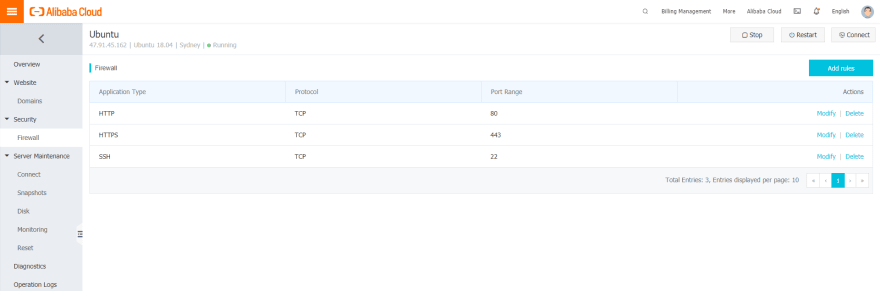
Add a new rule to enable port 5000 on TCP:
Now you can access the resource from the internet, we can hit the web app from a browser by accessing it's IP (or hostname) on port 5000:

Port 5000 on this web site's IP address does not look production-friendly, to solve this you can use option 1 and use port 80 for your server.
Always host your website behind a firewall or a proxy. Several software-based load balancing apps can help manage service provisioning. See Nginx for example.
Conclusion
This brings us to the wrap for this post, first post in the Cloud and Node.js series, that was about the deployment of the Node.js app and exposing the app on the internet. We created an instance of Simple Application Server on Alibaba Cloud and set up git, nodejs and npm for environment setup. We used GitHub based Node.js app for source code.
We tested the application on the virtual machine to successfully run as a process. After that, we exposed a firewall port on Alibaba Cloud for the internet connection with the web app.

Top comments (0)