
👋 Introduction
Hi everyone!
I recently hosted my first ever static website using AWS S3, and I wanted to share my experience in this blog. This is a beginner-friendly guide to help anyone take their first step into cloud web hosting—even if you don’t have any advanced coding or DevOps skills.
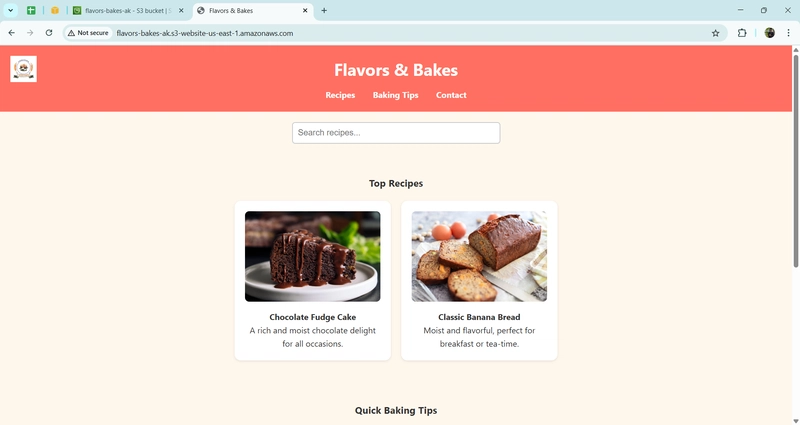
The project is called Flavors & Bakes—a simple website sharing delicious baking recipes like chocolate fudge cake and banana bread. 🍌🍫
🪜 Step-by-Step Guide: Hosting on AWS S3
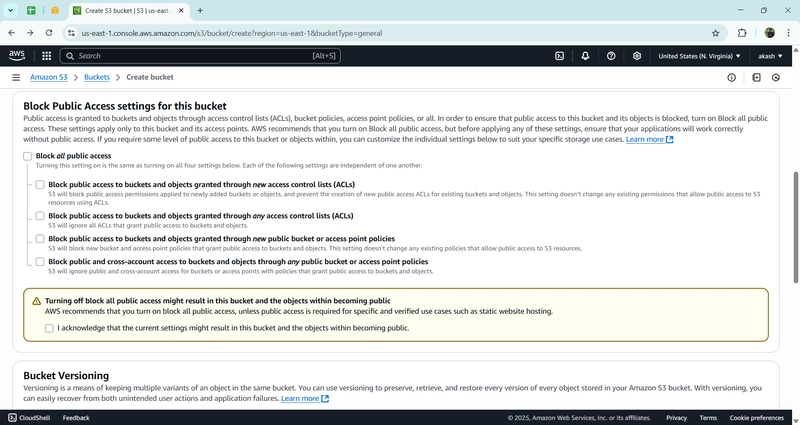
Step 1: Create an S3 Bucket:
- Go to S3 Console: https://s3.console.aws.amazon.com/
- Click on Create bucket
- Enter a unique Bucket name (e.g., flavors-bakes-portfolio)
- Region: Choose your region (e.g., Asia Pacific (Mumbai) or US East (N. Virginia))
- Uncheck "Block all public access" → Acknowledge the warning
Click Create bucket
Setting config of S3 Bucket

Un check the Block all public access and check the acknowledge.
- Check the Bucket is created Successfully.

Step 2: Upload Website Files
- Click on your bucket name
- Go to Objects → Click Upload
- Upload all files: index.html, style.css, images, etc.
- After uploading → Click Upload

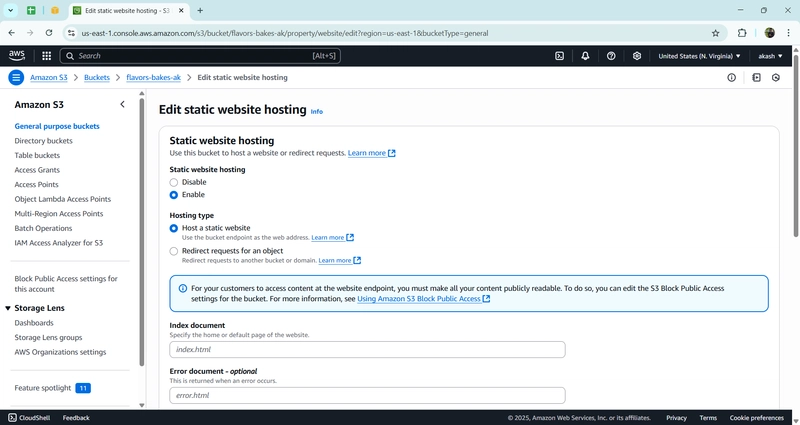
Step 3: Enable Static Website Hosting
- Go to Properties tab in your bucket
- Scroll to Static website hosting
- Click Edit
- Enable: Enable → Hosting type: Host a static website
- Index document: index.html
- (Error document is optional: error.html)
- Click Save changes
- select and upload all the files in object section
Step 4: Make Files Public
- Go to Permissions tab
- Scroll to Bucket policy → Click Edit
- Paste this public read policy (replace ):
{
  "Version": "2012-10-17",
  "Statement": [
    {
      "Sid": "PublicReadForWebsite",
      "Effect": "Allow",
      "Principal": "*",
      "Action": "s3:GetObject",
      "Resource": "arn:aws:s3:::<your-bucket-name>/*"
    }
  ]
}
- Click Save changes
- Set and save the bucket policy

Step 5: Test the Website
- Go to Properties → Copy the Endpoint URL

- Paste it in your browser
- Your website should be live and public!
🔒 Optional But Recommended:
Avoid Future AWS Charges
If you’re done with the project or want to be 100% safe from billing:
- Delete the S3 bucket once finished
- Or set up billing alerts using AWS Budgets
💡 Future Improvements & Ideas:
- Add a custom domain like flavorsandbakes.com
- Enable HTTPS for secure access
- Add a feedback/contact form using AWS Lambda or Formspark

Top comments (3)
pretty cool seeing you actually did it, stuff like this always motivates me to try new things - you ever hit a wall or was it smoother than you thought?
Love this recipe for website success! Who knew AWS S3 could be so sweet and simple—almost as easy as baking banana bread (with fewer dishes to wash). Thanks for making cloud hosting a piece of cake!
@akashabish , the post looks awesome man. Keep it up