
We love it when tools are connectable. It lets us reduce repetitive tasks, free up resources, and share data across workflows. We're also an early-stage startup with tight resources. If there's an opportunity to remove regular work, it makes sense to do it.
One area that almost every startup will need to spend their resource on is lead management. Whilst it's a simple concept, tracking every interested person, qualifying them, and prioritizing outreach can become complicated. We choose to use a full no-code stack to manage our leads. We've taken zero engineering hours away from the product, and have automated everything from lead capture, through to qualification and outreach.
1. Capture a lead's interest
The first place we make contact with potential leads is on our marketing site. It's completely built in Webflow and all the call-to-actions are made with the native form element. Whenever someone submits their details they're sent to a big table on our project's dashboard.

It's impossible to manage submissions here though, and the only real way to manipulate them is to download everything as a CSV. I'm not a fan of manually downloading CSVs every week so looked at how we could automate it.
Webflow and event tracking
We also wanted to track the number of times our CTAs are clicked to help us analyze conversion rates. However, Webflow's native Google Analytics integration only tracks default metrics like page visits and acquisition source. If you want to go further and track events, you need to include a couple of code snippets in your site. If you want to add event tracking to your site, you can find a simple copy-and-paste tutorial here.
2. Connect your tools
Since we need to email our leads at some point, connecting Webflow and our email tool, Mailchimp, made sense. There are quite a few products out there that can connect tools together without code. Two of the best are Zapier and Integromat.
Zapier has by far the highest number of connectable apps which is a big draw. Integration tools are marketplaces and users want as many options as possible. The likelihood that you'll be left wanting for an app with Zapier is slim. Zapier also pushes apps towards providing templates for their most common use cases. Even if you've never used an integration tool before, you can get going in minutes.
What Integromat may (currently) lack in number of apps, it makes up for in flexibility. You can build much more complicated flows than in Zapier, even on the base plan. A large part of this is thanks to the visualization of flows. Zapier restricts you to a simple step 1, step 2, step 3 layout whereas Integromat is free flowing. You visually connect nodes together on an open canvas, branching and condensing paths as you wish. Integromat also exposes the underlying JSON format of your flows to a greater degree than Zapier. Combined with support for common excel-style formulae, the possibilities are endless.
We chose Zapier because the team already had prior experience and our requirements are pretty vanilla. You can't go wrong with either.
The skeleton of our Webflow → Mailchimp connection is simple:
- When Webflow receives a form submission
- Make sure it's from a CTA
- Create a subscriber in Mailchimp
- Add them to a pre-made Group called 'Lead'
- If they're already in the list, update their details
- Send a notification to Slack
Every time someone puts their email into one of our CTAs it runs. They're immediately added to our Mailchimp audience. And the team gets a Slack notification saying there's another interested person.
Webflow, Zapier, and form names
Step 1. of our flow is only triggered when a form with the nameCTAis submitted to Webflow. If you want this to work consistently across all CTAs, you need to make sure they all have the same form name. Webflow can make this trickier than necessary because it automatically adds a suffix to similarly named forms when they're created - so keep an eye out. It's happened more than once where a deep-rooted CTA was actually namedCTA-7rather than justCTA.
Now it's all well and good having a long list of new-found emails in Mailchimp, but it's not the best platform for managing relationships. Luckily, Attio is. If we could make it so our leads end up in both Mailchimp and Attio then we'd have the best of both worlds. The ability for bulk outreach, and granular relationship management.
To get there, we needed to add two more steps to the end of the previous flow:
- Create a Person in Attio
- Create an Entry in our Alpha Program Collection
3. Qualify the lead
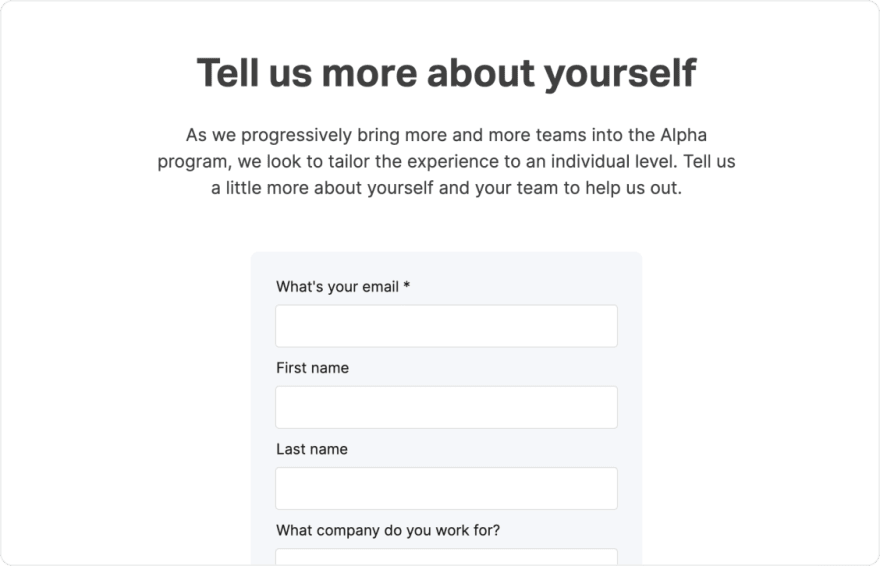
Now our leads are automatically piped into our tools, but it's difficult to know who to reach out to first. The more you know about your leads, the easier it is to segment and prioritize them. Things like team size, their industry, and their company's name would all be useful to our team. To kill two birds with one stone, we composed an email that confirmed the leads submission and added the option to provide more info if they wished to skip the line.
The email's copy has three components. A small thank you. A line letting them know we notified our team that their hard work is paying off. And a link to a form on our marketing site with a few more (optional) questions.
The reason we wait until people have signed up to ask a few more questions is due to initial friction. People's attention is fleeting and adding extra steps to a task can break the deal for some. By asking questions later you lower the amount of interest needed to complete your CTA - increasing the total number of leads generated.
To keep this all automatic we made use of Mailchimp's Automations feature. A simple setup makes sure that when someone is first added to our 'Lead' Group, we send our welcome email out.
Mailchimp automations
It's important to note that when you're using automations like Mailchimp's you need to be wary of duplicate sending. If our automation triggered any time theLeadgroup was added (rather than only the first), leads could receive multiple identical welcome emails.
To complete the flow we needed a way to pipe people's additional info back into Mailchimp and Attio. Since the constituent parts are very similar to our original Webflow → Mailchimp + Attio flow, I used that as a base.
- When Webflow receives a form submission
- Make sure it's from the Tell Us More form
- Update an existing subscriber in Mailchimp
- If no subscriber is found create one (to cover the edge case that someone found the Tell Us More form before a CTA)
- Give that subscriber a new 'Qualified' tag
- Send a notification to Slack
- Find the lead in Attio
- Update their Alpha Program Entry
Mailchimp audience fields and accuracy
It's key that the data formats of your form and Mailchimp audience fields are identical. If you've got a dropdown on your form, then you need a dropdown with the exact same values in Mailchimp. Even differences in capitalization can make your connection fail.
4. Outreach to the best
Since Attio is in early access, we invite small cohorts and work closely whilst onboarding them. The additional info people provide helps us choose who we think we can learn the most from. To make sure that the teams we choose are a definite fit, we ask them to fill out a detailed survey before onboarding.
Selecting and sending this survey is the only manual part of our process. Outreaching to a team before onboarding should be a personal experience - especially when we plan to work so closely with them in the following weeks.
We host the survey on Typeform. It's a mixture of restricted and freeform questions on how your team currently manages their relationships, and how you'd like to use Attio.
Freeform questions are great when you want to understand someone's thoughts, but they don't allow you to segment responses. Sure, you could go through each one and summarize them with tags, but that is a lot of manual work for an automated system!
Restricted questions are a different story. Because they only have so many options, we can use them to add further value to our Mailchimp audience. For instance, a question like 'What's your top device?' with the options Desktop Laptop Tablet Mobile allows you to segment your audience by device type. About to release a new mobile app? You know exactly who to reach out to first.
Whilst Typeform does a great job of collecting data, they only do a decent job of analysis. To get our results into a manipulatable format we used Typeform's native Google Sheets integration. Every time someone completes the form, it sends their results to a new row on our response Sheet. From there we can filter, sort, and analyze our responses.
Nicely, we can also use Google Sheet's 'New Spreadsheet Row' to trigger another automation. This time we take the restricted answers from our survey and pipe them into Mailchimp and Attio.
- When a new row is added to our Typeform Google Sheet
- Update an existing subscriber in Mailchimp
- Find the lead in Attio
- Update their Alpha Program Entry
Now things like device type, company size, and business function are all stored alongside our email contacts. Our team has the best information possible to make outreach decisions. And we've segmented our audience enough to produce tailored marketing campaigns.
Final thoughts
Automating your lead management can be a daunting task, especially without any engineering expertise. But if you use the right tools, and know how to connect them, it's much more manageable than it first seems. Our flow takes us from a small show of initial interest and an email address, all the way to a comprehensive profile with almost zero manual work.
Tools like Zapier and Integromat are the glue in all this. Even if you don't plan on doing something permanent right now, I would encourage you to test them out. You'll be able to understand all the possibilities much more easily afterwards.
If you enjoyed this post and found it useful please show our rundown thread some love!
 We're big on no code tools.
They let engineering focus solely on product, and empower our non-technical team.
See how we use no code to automate our lead management 👇09:49 AM - 30 Jun 2020
2
5


Top comments (0)