
In this article I'll explain how to deploy your website, no matter if is simple like a personal blog or more complex like a small e-commerce, using a low budget and deploying like a CI/CD fine tuned.
I've been used this stack for many websites, and is very useful because the code for the website and the content itself is stored in the same VCS (Version Control System), and for so there's also a track of the changes in the content.
The steps in this article can be followed by developers of all levels who knows JavaScript and React.
Previously I wrote an article in which I created a project using Gatsby and Netlify CMS, then here we are going to work in process of deployment of that project in the way of a website application.
Configure Netlify with GitLab
Netlify present itself as
An intuitive git-based workflow. A powerful serverless platform.
In deed all you need to do is to connect your repository and explain how to build your app. And the Starter tier gives you enough features for a personal project or a small site, then you can grow and use different paid services according your needs.
In the first place is needed to store the project in a Git service which could be GitHub, GitLab or Bitbucket; all of them are supported for Netlify. I've been using GitLab for this duties because it allowed me unlimited private repositories for free while GitHub not, but recently that changed and GitHub has private repos for free also. The reason is, sometimes you don't want the content of the site and the structure of it in a public repository.

Then upload the code as explained by GitLab
git remote add origin git@gitlab.com:username/projectpath.git
git push origin master
Now create your account in Netlify, if you chose to Sign Up using your GitLab account then will be easy to inspect your projects in GitLab.
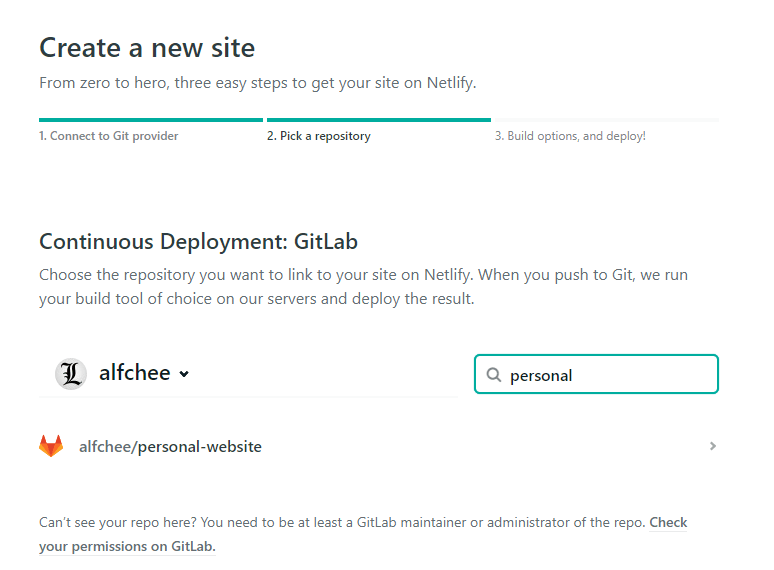
Once in your Dashboard or in the Sites tab you'll find the button New Site from Git, and it'll lead you to a page where you'll select the Git service where your repository is stored. Selecting the source a pop up will be opened to request your credentials and authorize Netlify access the repositories.

Now you may search and pick the repository with the source of the website to publish.
In the third step Netlify will fetch the branches of your repository, by default master will be selected but you can select any other. Then a very important step is to write the command used to build the application, and as ours is a Gatsby application, the build command is
gatsby build
Also write in the input the Publish directory, which is public

When you click Deploy Site Netlify will to start the process of build and deploy the application, and now you'll have a Dashboard to manage that specific site. By default Netlify will create a random name for your website and that name is also used in the subdomain of type https://*.netlify.app, and they can be configured later.

Also, you may see that for your website there are other services more than hosting, that Netlify offers like: Plugins, AWS Lambda Functions, Authentication (Identity), Forms, Media Storage and Analytics.
Configure Domain
As you may see, my website is called objective-fermi-eca7f7 but it can be changed to something easier to remember. Going to Site Settings > Domain Management

The new name is always for a subdomain of netlify.app and as such, your website uses HTTPS by default.
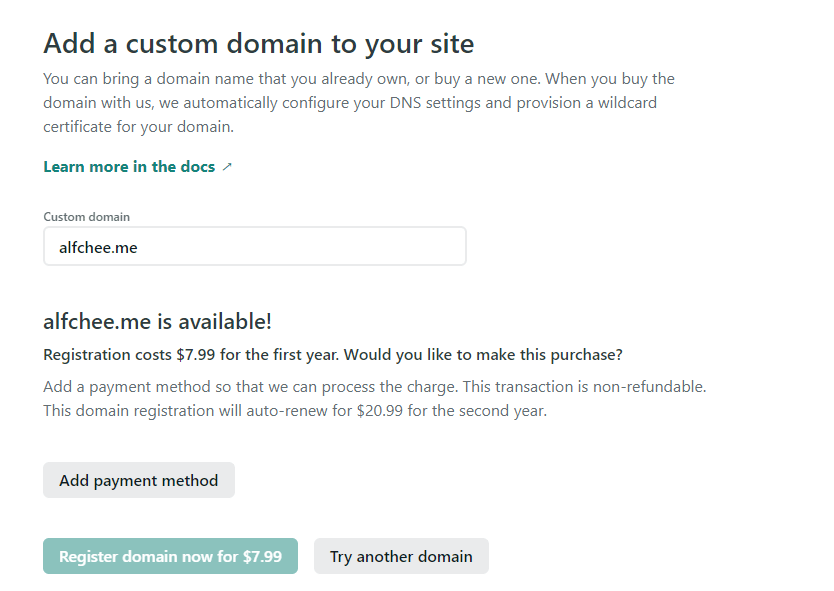
You may also use your own domain which can be done in two ways. You may buy the domain through Netlify and doing this Netlify will handle the Domain Records starting to point your Custom domain to your Netlify subdomain.
But if you already have a domain or you use other DNS provider, then you must configure an A record (apex domain) as described in the documentation of Netlify regarding that configuration, which can be done in two different ways in dependence of your DNS provider.

Environment Variables
Now let's say that in our app we consume data from an API, and as we know, we musn't store secrets in the code, then, how we pass the secrets to the build?
For so we'll use the Environment Variables, just going to Site Settings > Build & Deploy > Environment and after click Edit Variables we'll be able to add, edit or delete environment variables. As our project is developed with Gatsby, the variable names must be prefixed with GATSBY_.

Using Netlify Forms
One thing very useful in any website is that the visitors can get in touch with the site owners, usually that happens with a "Contact" form or maybe we need a poll, but those forms must be processed at somewhere in backend, and as we know currently we haven't one.
In the case there's a custom business logic that we must implement, then we could use the Functions feature, which is based on AWS Lambda Functions; but we are not gonna cover them in this article, because we want to use a more simple form processing.

According Netlify Documentation you only need in your <form> tag the addition of an attribute data-netlify="true", also the tag needs a name attribute so you can name the form, each form must have a different name because it is used by Netlify to track the information received, and include a hhidden input with the name="form-name and using as value the name of our form.
Fight against spam
But in this way you'll receive lot of spam, so we need to add more config to our form, always in the HTML. At your <form> tag add another attribute netlify-honeypot="bot-field" where the value bot-field is something you chose but that value must be present in a hidden input in the form. At the end the form will looks like:
<form name="contact-form" action="/form-success/" method="POST" netlify-honeypot="bot-field" data-netlify="true">

<!-- Any other fields and HTML markup -->

  <input type="hidden" name="form-name" value="contact-form" />
  <input type="hidden" name="bot-field" />

  <div>
    <button type="submit">Send</button>
  </div>
</form>
I also added an action attribute, this is in order Netlify redirects the users to that route after process the form, in that way I create a page in Gatsby and display a custom success message.
You may also submit your form using AJAX, just check out this or use reCAPTCHA 2 challenge if you want a bit more of security.
Note: Forms has usage limits, so please check out the pricing.
Deploy Preview for additional branches
And lastly! Maybe you don't want to publish directly to production any change you are doing to your site, maybe because for unconcluded content or unfinished work in the code, but you still need to test your code on server or allow others to review your work.
For that reason we can use the Deploy Contexts allowing to build the app and create Previews from other selected branches, then anytime a merge or push affects the selected branches new builds will be triggered.

Also, after you configured a Custom Domain for the website, you can configure subdomains for any of your branches.

Conclusion
All the features covered in this article are free to use having as only cost the Domain for your site, and can be cheaper or not in dependence of your provider and top-level domain name.
I hope you enjoy it and can create many projects as you need 😃

Top comments (0)