
Disclaimer: Please note that, this article was originally published here on Jan 4, 2019.
We live in the world of a variety of mobile devices majorly dominated by two platforms, iOS, and Android. It is a two-horse race and I am sure we can all agree on that. Building a mobile application is not an easy task though.
For iOS, you write code using Objective-C or Swift and for Android, you will find yourself using Java. Apart from different programming languages used to create a mobile that can run on each of the two platforms, the toolchains are entirely different too for both of these mobile platforms.
Many modern-day developers use a specific set of technology that is used to build web applications: HTML, CSS, and JavaScript. There are different frameworks that fall under the category commonly known as Hybrid applications. You can use almost one set of source code for developing the application for both iOS and Android platforms.
In recent years, hybrid frameworks have evolved coming from web view to use native APIs. This cross-platform approach of developing a mobile application comes with its own pros and cons. Pros such as being less-time consuming and cost-effective and cons include performance issues.
One great option that falls under the umbrella of cross-platform development is React Native. Developed and used by Facebook as well others such as Tesla, Walmart, Uber Eats, Instagram, Discord, Wix and so on. React Native is based on Facebook’s web library ReactJS.
What are you going to learn?
In this tutorial, you will learn the following things:
- What is React Native?
- Setting up the Development Environment
- Use React Native CLI
- Run a React Native App
- What is App.js?
- Hot Reloading
- AppRegistry
- Build your first React Native App
- Learn about different UI components
- View Component
- StyleSheet Object
- Text Component
- Create a list with FlatList
- Learning Path for React Native
What is React Native?
In a nutshell, React Native allows you to build mobile applications that look, feel and perform much more like native applications. It uses the same fundamental UI building blocks as regular iOS and Android apps. You just put those building blocks together using JavaScript and React. Good thing for developers is that they can use almost the same concepts that are being used for building web applications.
If you are familiar with Reactjs or come from front-end development background, React uses a virtual DOM which acts as a shadow to real DOM available. When an element changes, that change is reflected on the real DOM by Virtual DOM using a node that corresponds to each element.
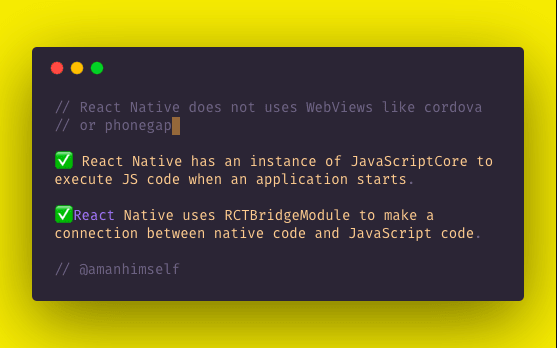
However, in React Native, there is no DOM rather than Native Components which are provided by platforms such as iOS and Android. There are no web views here. React Native has an instance of JavaScriptCore to execute JS code when an application starts. React Native uses RCTBridgeModule to make a connection between native code and JavaScript code.
In simple words, React Native brings the React to mobile app development. Its goal isn’t to write the code once and run it on any platform. The main goal here is to learn once and write-anywhere. An important distinction to make. React Native is still relatively new, as at the time of writing this post, it is in its version 0.57.
Pre-requisites: Setting Up Development Environment
To dive deeply in React Native’s ecosystem, we need to install a few things first to get started. Let us go through one of them.
Nodejs & Watchman
React Native uses Node.js, a JavaScript runtime, to build your JavaScript code. If you do not already have Node.js installed, it’s time to get it from its official website here. I recommend installing LTS (long-term support) 10.x.x version which is also I am using personally.
Watchman is a tool developed by Facebook for watching file changes. It is highly recommended you install it for better performance. For Mac users, You will need the homebrew macOS package to install watchman: brew install watchman.
For Windows users, there is no watchman so you can skip this step but you need to have Nodejs as well as python2 as React Native's recent version requires it.
Lastly, everyone (irrespective of the OS you are using) need to install theJava SE Development Kit (JDK) that can be found here. Make sure the version you install is at least or more than >= 8.
Native SDKs
For macOS developers, you can install Xcode which is free to develop iOS applications.
If you want to develop for Android, setting up its development environment can be a bit tedious if you are new to this. You will be installing Android Studio which is a completely free tool to develop Android apps in its native language. You will be installing a list of utilities for this process and then setting path variables for the first time, so I am recommending to go through the exact link here which are official setup instructions provided by Facebook.
React Native CLI
Once you are done with the development environment setup process and necessary tools, you can take a deep breath right now. We are going to start building our first REACT NATIVE APP. In order to start, we need one more tool. Using npm (a package manager, which you installed using Node.js) you are now going to install react-native-cli. Open your terminal and run the following command.
npm install -g react-native-cli
This CLI tool is used to scaffold a starter project containing everything you need to build and run a React Native app. npm installs this CLI tool as a global module.
To verify that the installation process was a success, you can run the command below and it will output you the current version of the CLI tool.
react-native --version

## output
react-native-cli: 2.0.1
Running a React Native App
To get started we need to create a project directory using the CLI tool just installed. Open up your terminal and run the following.
react-native init EmojiDictRN
You can name it whatever you want. Once the process is done, traverse inside the project directory. You will be welcomed by a set of files like below.

From above let us now take a brief look at the files or directories that are essential for us to understand:
- App.js the first file in any React Native app that is the entry point of the app development process. Whatever you write inside this file, it will get displayed on the mobile device.
- node_modules/ is a folder which contains all the dependencies (or packages) that are used to develop and run this application.
-
index.jsis the entry point to trigger the app on a device or simulator - ios is the folder containing an Xcode project and the code required to bootstrap this app for iOS devices
- android is the folder containing android related code to bootstrap this app for Android devices
-
package.jsonwhere every dependency installed gets listed You can ignore the other files as of now.
Running the Application
The react-native-cli tool comes with some default snippets of code. To see it in action, you will have to run the application using a terminal. I am going to use an iOS simulator and an Android emulator for this purpose. Windows developers can ignore the iOS part.
Do note that, we have not made any changes in the source code of the application. To run the app, we need to trigger the below command first.
npm start
This will start the metro bundler to watch for any file changes in a .js file in your project. Make sure this command is running in a separate terminal window or a tab when you are building your project for iOS or Android.
Running on iOS
To run the app with whatever current content it has on an iOS simulator, you can run the following command below in the second terminal window.
react-native run-ios
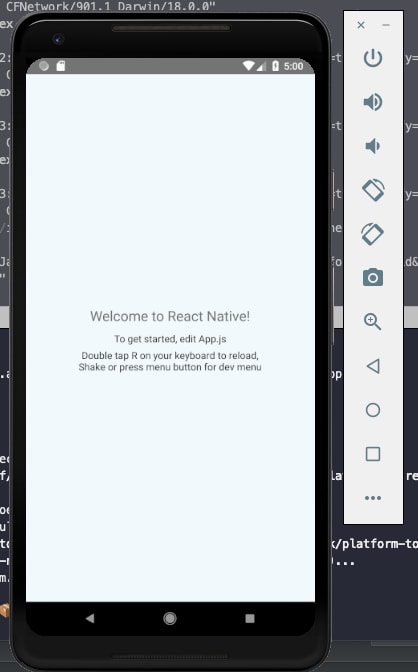
This command builds your app and starts it on iOS simulator. This process consumes some good amount of time when building the necessary iOS files for the first time for any React Native app. It will also open up a simulator device for you like below when the process is done.

This iOS simulator is the default one with current Xcode version you have. However, you can run any sim device by adding a flag. By running the command:xcrun simctl list devices you can check out which devices you have available as simulators.

The last Booted or Shutdown against each listed device in above image tells you which devices are currently running. To build and run for another device, you can run the following command.
react-native run-ios --simulator="iPhone 8 Plus"
where "iPhone 8 Plus" is the value that you can look up through the last command I mentioned.
Running on Android
You will need an Android device to run your React Native Android app. This can be either a physical Android device or more commonly, you can use an Android Virtual Device which allows you to emulate an Android device on your computer.
If you wish to run it on a real device, you can follow the complete set of instructions here. For running on an Android emulator, open the Android Studio, and choose the option to ‘open an existing project/folder’. Once the project gets opened and is indexed, you will see an icon looking exactly like below image in the right corner.

This is an option for enabling an Android Virtual Device (AVD). If you have just installed Android Studio, you will likely need to create a new AVD. After the virtual device is running, you can run the command react-native run-android from your terminal window to open up the application.
How to Modify App.js?
To see the app in action on both the devices, let us modify App.js with the code below.
import React, { Component } from 'react';
import { Platform, StyleSheet, Text, View } from 'react-native';

export default class App extends Component {
    render() {
        return (
            <View style={styles.container}>
                <Text style={styles.instructions}>Hello World!</Text>
            </View>
        );
    }
}

const styles = StyleSheet.create({
    container: {
        flex: 1,
        justifyContent: 'center',
        alignItems: 'center',
        backgroundColor: '#F5FCFF'
    },
    instructions: {
        textAlign: 'center',
        color: '#333333',
        marginBottom: 5
    }
});
The result of the following modification can be seen if you press Cmd + R on iOS and double press R on Android.

Enable Hot Reloading
Hot Reloading feature in react native application helps to display any updates occur in UI, whenever you save anything in react native app-code. On enabling this feature, you do not have to press Cmd + R on iOS and double press R on Android again for seeing the changes on the UI you just made.

To enable this feature, all you have to do is press Ctrl + M/Cmd + M depending on your OS, and select Enable Hot Reloading from the popup menu that appears as shown above.
What is AppRegistry?
The file that renders this App component is index.js in the root directory which has the following code.
/** @format */

import { AppRegistry } from 'react-native';
import App from './App';
import { name as appName } from './app.json';

AppRegistry.registerComponent(appName, () => App);
AppRegistry is the entry point to run a React Native application. App component or any other root component in the app should register by using AppRegistry.registerComponent such that the native system can load the bundle of the app and run the app by starting AppRegistry.runApplication.
You can read more about AppRegistry in-detail here.
Baby Steps: First React Native App
In this section, you are going to build your first React Native app. To get started, we have already generated a React Native project using the cli tool. The only thing now you have to understand is what are components?
Components are the visual elements that you see on the screen in a React Native app. There are several components made available for you to use by the React Native core. To understand this better, we can categorize these components in six broad categories:
- Basic or Core components such as View, Text, Image, ScrollView, TextInput, StyleSheet
- List components such as FlatList and SectionList
- User Interface or Form Control components such as Picker, Slider, Button, Switch
- iOS Specific components such as ActionSheetIOS, SegmentedControlIOS, AlertIOS, PushNotificationsIOS
- Android Specific components such as DatePickerAndroid, TimePickerAndroid, -
- ViewPagerAndroid, ToastAndroid, PermissionsAndroid
- Other/Miscellaneous components such as Alert, Animated, CameraRoll, Dimensions, Clipboard, StatusBar, Linking, Keyboard, ActivityIndicator, WebView, and Modal
Getting in detail about each of them is out of the scope of this article and will be a tedious way to learn things initially. Instead, we are going to use a project-based approach to learn your way through them. There are many more components and APIs available in React Native core that you can look at the official documentation and from time to time you will need to.
What are we building?
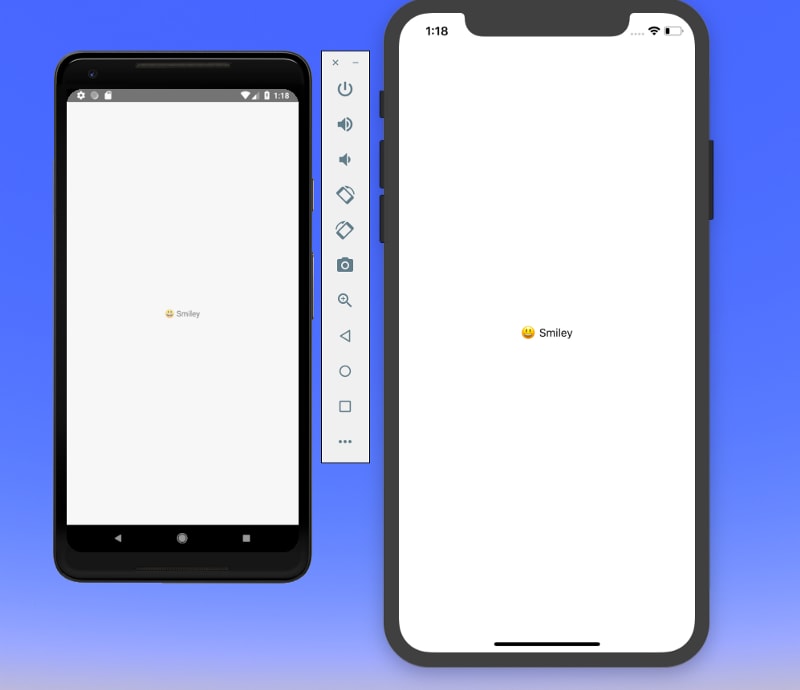
You are going to build a small application to just familiarize yourself with basic components. The app is shown in the image below is going to be the end result.

The above is nothing but a list of text coming directly from the component’s state. Create a new src/components directory in the root of the project and inside components/ create a new file called EmojiDict.js with the following snippet of code.
import React, { Component } from 'react';
import { View, Text, StyleSheet } from 'react-native';

class EmojiDict extends Component {
    state = {
        '😃': '😃 Smiley',
        '🚀': '🚀 Rocket',
        '⚛️': '⚛️ Atom Symbol'
    };

    render() {
        return (
            <View style={styles.container}>
                <Text>{this.state['😃']}</Text>
            </View>
        );
    }
}

const styles = StyleSheet.create({
    container: {
        flex: 1,
        justifyContent: 'center',
        alignItems: 'center'
    }
});

export default EmojiDict;
view raw
Accordingly, we have to modify App.js file in order to display the result of this component.
import React, { Component } from 'react';

import EmojiDict from './src/components/EmojiDict';

export default class App extends Component {
    render() {
        return <EmojiDict />;
    }
}
Now if you take a look at the simulator screen you will see the following result.
What is going on? Take a look at the EmojiDict file first. We are importing basic components from React Native. We start by declaring a View component, which is the basic building block in React Native file. It maps to fundamental native iOS (UIView) and Android (View) components, hence the name. You can think this component as mere div element from HTML where all other elements are placed inside. Hence, a View component can contain nested components.
View component puts a container element that supports layout styling with flexbox and other styles through CSS. We are providing styles to View via StyleSheet. Hence, you can say that View components are primarily used for styling and layout of children elements.
StyleSheet in React Native provides an API to create styles inside the component file. It takes a JavaScript object as it does above, and returns a new Stylesheet object from it. There are no classes or ids in React Native like in web development. To create a new style object you use StyleSheet.create() method.
The way we have defined styles by creating an object is the preferred way. Not only it helps you organize styles and keep them separate, but these styles when defined in this manner are also sent through the native render bridge only once.
The Text component is in many ways just like the View component, except that it is specifically available to display text. Also, like the View component, it supports styling. Right now we are using flexbox to style and center the anything inside the View component. Flexbox is an algorithm to specify the layout for a component for its children to follow the same pattern. Suppose if we modify it as below:
render() {
        return (
            <View style={styles.container}>
                <Text>{this.state['😃']}</Text>
                <Text>{this.state['🚀']}</Text>
            </View>
        );
    }
You will get the following result on refreshing the simulator.

The way we are creating a list of emojis isn’t a pragmatic approach to handle data whether it comes from a third party API or manage by the component’s state and render it as a list as we do above. Let us convert our simple view into FlatList.
<FlatList
    contentContainerStyle={styles.container}
    data={[
        { key: '😃', value: '😃 Smiley' },
        { key: '🚀', value: '🚀 Rocket' },
        { key: '⚛️', value: '⚛️ Atom Symbol' }
    ]}
    renderItem={({ item }) => <Text>{item.value}</Text>}
/>
FlatList is cross-platform, by default vertical way to display a list of data items. It requires two props: data and renderItem. data is the source of information for the list. renderItem takes one item from the source and returns a formatted component to render. Styles that can be applied to a FlatList component is done by the prop contentContainerStyle that accepts the value of Stylesheet object. What we have above is the simplest version of flatlist. Moreover, FlatList in React Native has support to pull to refresh interaction and horizontal display mode.
This completes our first React Native App. I am sure, you might have learned a thing or two. It is a just a basic component that renders a list of items.
More on Learning React Native
With lack of up to date resources or not many resources you will find on React Native concretely, I urge to stick with you learn by doing process and get as much as hands on experience in this field as you can. I did struggle when I started learning React Native, coming from a Web Development background.
Here is what I think you can do to advance with React Native development.
Start with basics
This article just provides you with an overview of what inside the React Native app development process and how things work behind the scenes, briefly. I often come across (especially through #100DaysOfCode campaign) developers who struggle to learn a new framework with little no background in specific the programming language. My advice, before you leap to make gigantic projects, start with the basics. Learn the concepts as each specific component to the curve, make sure to apply them as much as you can and build small things.
For example, today learned about using FlatList component in this article. Try creating a list with your own dataset or find a mock/fake data set on the internet and try to build a small app out of it. Always remember the feeling you got from creating your first Hello World program. Do you remember that sense of accomplishment?
Take small steps, build small things at first before dip your toes deep in the complexity of state management libraries such as Redux and Mobx, or persisting data, using third party APIs, using TypeScript or Flow, and so on. These are just tools, you do not need to know them on day one (but I am not saying you have to never learn about them. The keyword here is that they are TOOLS). If you are new to JavaScript, make sure you are clear with the basic ES6 features such as classes, arrow functions etc. Then, you must go through the basic ReactJS concepts such as props, state, and stateless components in general.
In summary, take a look at:
- ES6 Features
- ReactJS Components API
- Setting up a development environment for React Native
- Flexbox
Advance your way
Once you have basic concepts clear in your mind and have played around a bit to get some amount of hands-on experience, it is time to advance further. Start building bigger apps that work or behave like a real application and interact with real-time data. Here is a list of things you can learn to advance in your journey.
- Offline data storage with
AsyncStorage - Working with third-party APIs
- Maps
- Splash Screens
- Navigation
- Redux (for state management)
- Redux Saga and Persist
- Tests and TDD
- Push notifications
- UI Animations
- Build and publish your app
- Continuous Delivery or CI
Do note that, these are just broad topics to get you started. There are many other things you will learn along the way. Don’t get overwhelmed by that.
Personal Challenges: What do you want out of it?
Maybe you to become professional a React Native developer and work in an organization that uses this tech framework or maybe you want to build apps for your clients/customers. Setting your own personal challenges in the way is a great way to learn. Make a commitment to yourself and work on it. Find apps on your phone or on stores that you want to clone or add an extra feature as a functionality, or learn about the user interface.
Do not get overwhelmed by the number of mistakes you do or the errors you get. Getting frustrated and ranting/complaining about it over the internet all day is easy but understand this is that, it will not solve your problems or make you a better developer. All of this is a part of your journey. Keep reminding yourself that.
Conclusion
If you are getting started in React Native development, let us do this together. I am available on Twitter
I often write on web technologies, but these my main concern is to provide content on React Native. You can either follow me on Medium or you can subscribe to my weekly newsletter below to receive all my tutorials straight in your inbox 📧

Top comments (0)