
Version control is a term widely used in software engineering. In the software field, it is defined as the way of keeping track of changes and managing those changes in terms of computer programs, files, software, etc.
💡In simple words, it is a system to keep track of changes.
🕸️Introduction
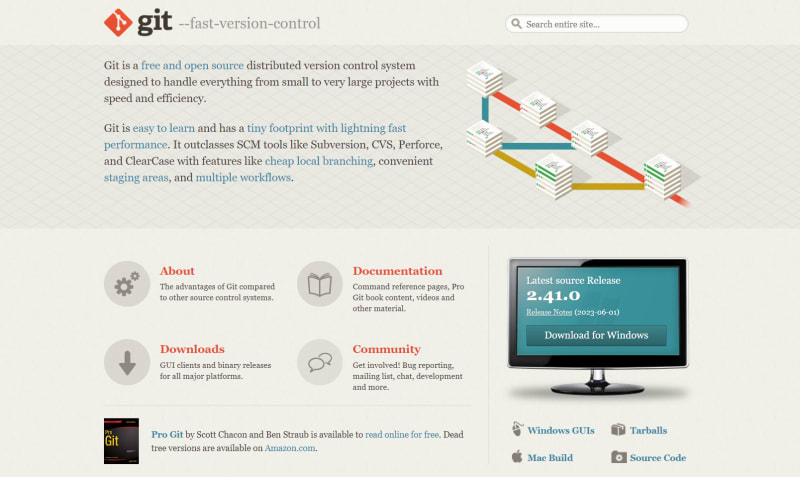
Git is one of the version control systems. It is a free and open-source distributed version control system. It was developed by Linus Torvalds (the same legend who is behind the creation of Linux).
Git is designed to handle small-scale to large-scale projects with greater efficiency and speed. GitHub on the other hand is a cloud platform that uses Git for version control which is currently owned by Microsoft.

🎖GitHub = Git + Additional Features such as bug tracking, task management, wikis, automation workflows, etc.
One of the first Git terminologies which we have to understand is Repositories.
_Repository _- The place where the data is stored and managed. Think of it like an imaginary huge box where all of the files/folders can be stored and managed.
👩🏽💻👨🏽💻So why is Git a distributed system?
Software is NOT built by a single person. It is a collaborative effort. Be it open source, service software, or some cool awesome software products which you are developing in your free time. Git is the main enabler in building software from scratch in a collaborative environment. It is a distributed system that holds the code repositories where multiple people can jump in to develop software by holding the entire copy of the source code.

I found this interesting image on the internet (credits to the creator) which explains the reason simply.
Git is designed in such a way that every user who uses it has complete control over the repository.
As mentioned previously, Git is the technology and GitHub is a cloud platform offering a managed version control system. Some other famous alternative platforms include GitLab, Atlassian’s Bitbucket, AWS CodeCommit, etc which are used among the community.
💻Installing Git
Git can be directly installed from this website. (https://git-scm.com/)
Windows users can download the installer shown on the landing page and follow the on-screen instructions to install the software.
Mac users can use homebrew to install git or follow the instructions on this page for the preferred method of installation (https://git-scm.com/download/mac)
🎯Let's Learn Some Git Commands
Learning different git commands can be intimidating but at the same time, it is a required skill set for most of the developers. These are some of the important and heavily used git commands by the developers in their day-to-day workflow.
🗒 This can also be considered as a cheat sheet for interview prep or just for reference in future
Prerequisites: Remember to download and install git in your system before executing these commands.
🗒️Git Commands - Section 1
This is an introductory section that explains very basic Git commands and steps to get started.
To display the version of the git installed on your system,
git --version
To display the help menu for the git,
git --help
To list out the configurations of git installed on your system in a list format,
git config --list
We can set up the user name and email for our git repository. This can be configured for the repository level or global level. The below command sets the username and email in the global scope. (Remember to change your respective user name and email in the config command below)
git config --global user.name "Bruce Wayne"
git config --global user.email "brucewayne@gotham.com"
To check whether the configs are set properly as in the previous step we can use the below commands to display the respective key-value pairs.
git config user.email
git config user.name
To list all the commands available in git. Do check the output of this command and you will be surprised by the results.
git help -a
The commands in git are divided into 5 main categories such as,
- Main Porcelain commands
- Ancillary Commands - Manipulators and Interrogators
- Interacting with others
- Low-level commands - Manipulators, Interrogators, sync repos, and internal helpers
- External Commands
Probably most of us would not have dug deep into Git commands before. This may be a starting point for us to explore a bit more.
To get help or read a manual about a command which interests you the most, then type out the following command,
git help <command>
git help init // to get help about the init command
git help help // to get help about the help command
Let’s say you plan to work on a project and you have decided to use a version control system to keep track of the changes in your project files - Git is the place where you should start first.
Let’s create a new folder for the project called as my-awesome-project
Now navigate into the project folder and open git-bash or any terminal of your choice in the project folder.
To initialize a git repository,
git init
To check the status of the git repository or shows the files which have to be committed,
git status
Now let's assume you are creating some files inside the my-awesome-project folder.
In Git, there are 3 main stages that a developer should be aware of.
- Local - refers to the local repository location (i.e.) your personal computer folder where you are currently working with your files.
- Staging - An intermediate area where you have added files that you want to commit.
- Remote - Refers to the remote repository location which is the distributed version of your repository. (i.e.) GitHub or any other cloud service which stores the files and folders which the team of developers will work on.
To add a file to the repository you need to use the below command,
git add <FILE_NAME>
To show the difference in the files between the current state and v/s previous (committed) state.
git diff
To show the difference between the files that are committed and v/s files that are staged (in the staging area),
git diff —staged
To stage all files in a single cmd,
git add .
If you change the staged file now at this stage → You will have 3 copies of the file.
- One in local which has the latest changes - this is not committed yet
- One in the staging area - this is git added but not committed yet
- The final one is the committed file itself
To understand how the add command works we can simulate its behaviour. This is a simple simulation command which shows what happens when git add . is performed.
git add —dry-run .
To perform a commit of the added files to the repository,
git commit -m "MSG"
The -m flag denotes the message for your commit. There are more flags that we can attach with commit commands.
Perform git add and git commit in a single command can be done as shown below,
git commit -am “MSG”
🗒️Git Commands - Section 2
In this section, we should commit ourselves to learning important commands in Git.
To display the logs (the distributed activity log for the repository),
git log
To show the log with files changed,
git log -- stat
To display logs in a single line,
git log --oneline
To show git history per commit in a single line for each commit,
git log --shortstat --oneline
To list files in the git repository,
git ls-files
Some of the git gui commands (which you may never use) are listed here as well for reference. The reason why we are not seeing common usage of these commands is mainly because of the powerful GUI clients and IDE integrations which are present today. Most of the developers, don’t even need these GUI clients/IDE integrations 😉
git gui // to start the GUI for git
gitk // start the log viewer for the git repo
git citool // start git gui to commit files
If you have added a file to the stage area and need to remove it, then use the following command,
git restore --staged FILE_NAME
(or)
git reset FILE_NAME
To remove the file from git indexing (after adding it to the staging area),
git rm -f FILE_NAME
To remove the file which is already committed (including removal of git indexing),
git rm FILE_NAME
// deleted: index.css - git will track this file as deleted
If we want to rename the file and git to track those changes then do the following,
git mv main.css index.css // rename arg1 to arg2
// renamed: main.css -> index.css
Translate the branch or tag into its SHA ID,
git revparse <BRANCH_NAME>
I hope by this time you are very tired of typing commands. Don't give up. Take a small break 🍵
💡Let's learn a small trick that can save us from typing longer commands.
git config can help us set store some useful aliases. This will help us replace very long commands such as below,
To print the logs in a beautiful format 💅🏽 we will use this long command !!!
git log --graph --decorate --pretty=oneline --all --abbrev-commit
Now set the key as lol for the log command specified above,
git config --global alias.lol='log --graph --decorate --pretty=oneline --all --abbrev-commit'
Now the alias should be configured successfully. From now on we can just type,
git lol
If you are so lazy or tired to even type checkout then use shorter commands like this,
git config --global alias.co 'checkout'
git co <branch-name>
The below snippet shows the summary of Setting Command Aliases 📸
ORIGINAL_COMMAND:
git log --graph --decorate --pretty=oneline --all --abbrev-commit

CONFIGURING_ALIAS_COMMAND: (Here the configured alias is lol)
git config --global alias.lol "log --graph --decorate --pretty=oneline --a
ll --abbrev-commit"

EXECUTING_ALIAS_COMMAND:
git lol

REMOVING_ALIAS_COMMAND:
git config --global --unset alias.lol
🗒️Git Commands - Section 3
Let's diverge a bit here 😂 to learn about branches and tags !!!
Branching means you diverge from the mainline of development and continue to do work without messing with that mainline. Tags on the other hand are simple pointers that represent the significant point in the project development timeline.
To list all the branches in Git,
git branch
To create a new branch in Git,
git branch BRANCH_NAME
To checkout to the branch,
git checkout BRANCH_NAME
To delete the created branch,
git branch -d BRANCH_NAME
NOTE: The user cannot delete the branch in which the user is currently checked out. So need to first checkout to another branch and then perform the deletion.
git tag TAG_NAME -m TAG_MESSAGE SHAID
git tag V1.0 -m "This is the release 1.0 version" 5083a560
git show V1.0 // display the tag details
git tag // lists all the tags
Checkout using SHAID
git checkout SHAID -> We can checkout to any SHAID
this will create a detached HEAD state
(because the current HEAD is changed on pointed to the newly checked out SHAID)
better to create new branches and perform the changes
Create and checkout a branch in a single command,
git checkout -b BRANCH_NAME
Create a sub-branch from the parent branch,
git checkout -b sub_branch master
Here the parent branch is the master or main. Usually, the parent can be anything and not necessarily be the master branch. The sub_branch is the subordinate branch created from the parent branch.
To track the steps we have taken in our local git bash terminal we can use the reflog command. It helps us to show the number of times we have switched between different branches and track our activities in the git repository.
git reflog
To stash out all of the work done in the local branch we can use the following command.
git stash
NOTE: After stashing we can still retrieve the stashed code and no need to worry. The changes are not removed permanently but instead stashed in the holding area of Git.
To display the list of stashed changes in our system,
git stash list
To stash the most recent version back to life use the below command,
git stash pop
To display the difference between the two branches,
git diff BRANCH1 BRANCH2
NOTE: This command displays the detailed changes along with the chunk.
To view limited changes or differences between 2 branches, we can use a flag called —name-status. Let's take a look at an example to understand the concept a bit more,
git diff --name-status master sub_branch
Here were are adding the —name-status flag for the git diff command. Now the terminal shows only the difference in files instead of detailed changes or chunks between the 2 branches which are specified.
This command helps to merge the changes between the branches.
git merge BRANCH2
As per this example the changes from BRANCH2 are merged into the current branch.
🗒️Git Commands - Section 4
So far, as you have observed we have never pushed or pulled code from the internet i.e.) remote repository. We have been locally working on our copy of the repository.
Software development is a collaborative process and to make it happen we have famous platforms such as GitHub. So to understand this in detail let’s take an example of how to push the code we created in our local repository and push it to the remote (GitHub).
In GitHub UI, let’s create a new repository and name it the same as our project folder my-awesome-project. Mark the repository as public and click on Create a new repository button. Leave other options as default.

Now you have created the big empty box (distributed repo) on the cloud which you can later on share with your teammates for collaboration. But first, you need to link your local with the remote.
To do that first, you must run the following command,
git remote add origin <https://github.com/OWNER/REPOSITORY.git>
This command will add a new upstream origin point for your repository pointing to the URL.
Now we can publish or push the code to the GitHub repository.
git push -u origin master
Here the -u shorthand flag represents upstream. By adding this we tell our local git to always push my upstream code to the configured GitHub origin URL. Do note we are allowed to add multiple remotes and set different upstream based on our project complexity. But from a beginner learning perspective let’s stick to a single upstream source.
One of your friends now wants to work on your project as well. You pass the GitHub URL and ask to clone the repository. This can be done by the following command,
git clone <https://github.com/OWNER/REPOSITORY.git>
Once the repository is cloned they can make their changes to the files in the repository and push those changes to the GitHub. Later on, if you want their changes also to be in your system, Yes you have guessed it right. You need to pull those changes from the remote to your local.
git pull
Woah!!! 🤸🏻♂️ Such an exhaustive list of git commands we have learned so far.
These are some of the important commands which a developer should know and be familiar with. But the list does NOT end here. There is always room for improvement and we can extend the learning to more complex commands.
🚀Next Steps
Up until now, we have learned a few important git commands, their usages, and practical use cases. For the next steps, I shall link a few resources which I have used for my preparation to learn about Git and GitHub.
In the list of resources, one of the very useful books I read was the book written by Rick Umali. It helped me to understand Git from a totally different perspective which inspired me in writing this article. For software developers like us reading books may not be the quickest form of knowledge gain compared to other resources, but it helps us to sit down, relax and inspire us about what and why we want to learn.

Top comments (0)