
Authentication more frequently works as identity aggregation. This means that it provides a central point to combine any number of user identity management or federated login providers in a single place. For example Google and Facebook login. Providing a solution that works with just one is easy, but to support both and then normalize the data, this becomes more complex.
Providers such as Authress normalize these providing standard OIDC complaint JWTs which includes secure session management.
In this guide we’ll use Google login as an example of how to connect. Setting up authentication requires the following parts:
- Custom Domain
- Authress-Google OAuth configuration
- New application setup
- User login flow
- Service API token verification
Custom Domain
- Prerequisite: You need DNS provider access
For security reasons every Authress tenant operates on a unique subdomain of your product’s domain. You need to have access to your domain’s CNAME records to add the relevant ones necessary for Authress. These are required to alias to our authentication server and create a certificate restricted to the relevant domain. Once you have access to your DNS provider’s zone, follow the instructions for setting up a custom domain.
Google OAuth configuration
- Prerequisite: You will need a Google Developer account
Select the first login provider you wish to integrate. For this example we’ll pick Google.

- Create a new Authress Connection
- Specify Authorization URL as: https://accounts.google.com/o/oauth2/v2/auth
- Specify the token URL as: https://oauth2.googleapis.com/token
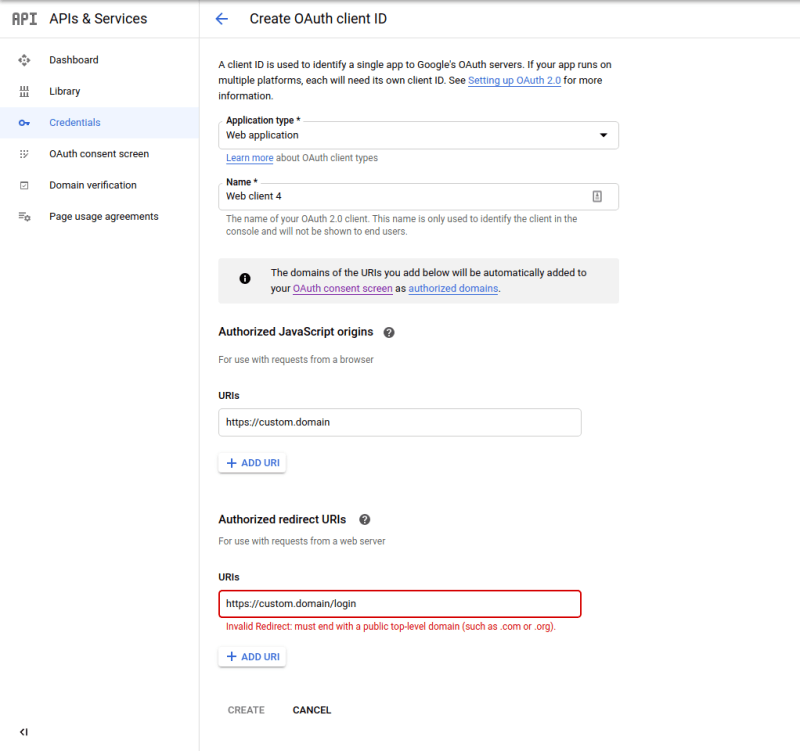
- Follow Google’s instructions to set up an OAuth 2.0 app credentials, and then when creating your OAuth 2.0 credentials, specify
- Authorized Javascript origins : https://custom.domain (Replacing the custom.domain with the domain specified above.)
- Authorized redirect URIs : https://custom.domain/login (Replacing the custom.domain with the domain specified above.)
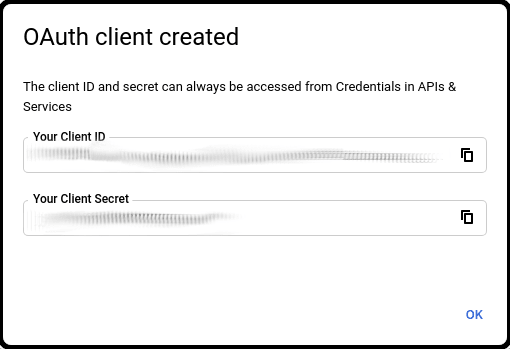
Obtain the OAuth Client ID and Client Secret from your Google Developer dashboard.
Paste the Client ID and Client Secret from Google to your Authress Connection
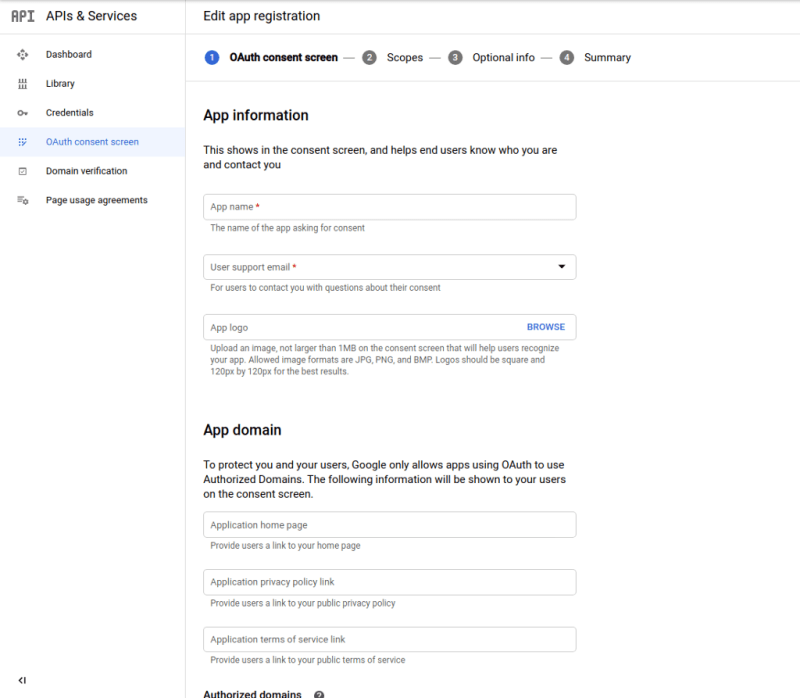
- [Optional] Update the OAuth consent screen with your application’s information.
New application setup
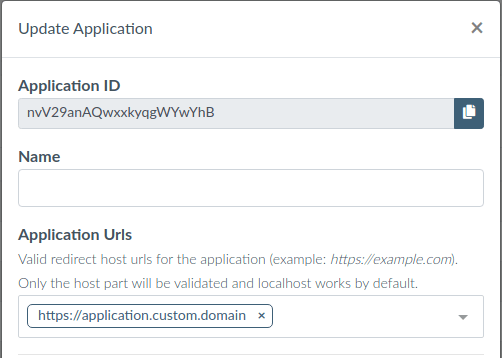
A provider connection creates the user’s identity, and applications consume them. Connecting applications allows them to consume credentials. To prevent compromised user credentials, only listed applications are allowed to connect to your providers.
Specify an internal name for the application and the allowed domains for the application to run. Only these fully-qualified domain names will be allowed to use your connections. More specifically these applications must have top level domains that match your custom domain that you created.
User login flow
With the configuration in place, your website app can configure the login experience you want.
- Install the site javascript package for managing user credentials: npm install authress-login.
Users should be able to select which connection they want. Since we only have google, offer them a branded Google Login Button. When users click the button activate the authenticate() method in the library:
Service API token verification
The site is now successfully sending tokens from your website to your service API, but the service needs to verify those tokens are valid. The easiest way to do this is send the tokens to the Authress Authorization apis, as Authress will automatically verify the tokens or return back a 401. However, it can be more secure (and faster) to verify the tokens on the service side, on every API request verify the user token before continuing.
To do this use the TokenVerifier in the authress-sdk service package: npm install authress-sdk
Originally published at https://authress.io on November 9, 2020.

Top comments (0)