API is the backbone of any website, now when you develop and API then documenting the API would be a very important part. Now manual documentation is good but interactive documentation with tests always better than the previous. So what if there are some tools that are already present which do your job almost automatically.
"Swagger"(https://swagger.io/) does this work very swiftly. It's an Open Source product, it takes care of the following areas of an API Project very swiftly
API Design
API Development
API Documentation
API Testing
API Mocking and Virtualization
It can be integrated with any of the languages that supports API development.
Today we’ll be going through the steps through which we can add swagger in our API Project.
We will see the implementation of the swagger on an AspNetCore API project using vs-code.
Now, let’s Open the .NET CLI or console and write the following command
dotnet new webapi
This will create a web API project without swagger added.
Directory Structure will look something like below since I'm using vs-code to develop the API the screenshot is showing the vs-code explorer window
Now let's follow the steps below to add swagger Nuget in our project.
Step 1: Add NuGet Package
Open the vs-code terminal and run the following command
dotnet add TodoApi.csproj package Swashbuckle.AspNetCore
Step 2: Add & Configure Swagger to Middleware
Now we have to modify the ConfigureServices Method
public void ConfigureServices(IServiceCollection services)
{
services.AddMvc();
services.AddSwaggerGen(c =>
{
c.SwaggerDoc("v1", new Info { Title = "My API", Version = "v1" });
});
}
Now add using Swashbuckle.AspNetCore.Swagger; so that compiler could know from where the reference of Info class should be taken.
Step 3: Letting the middleware know about the swagger UI and the endpoint information
Navigate to the configure method of Startup.cs and add the following code
app.UseSwagger();
// Enable middleware to serve swagger-ui (HTML, JS, CSS, etc.), specifying the Swagger JSON endpoint.
app.UseSwaggerUI(c =>
{
c.SwaggerEndpoint("/swagger/v1/swagger.json", "My API V1");
});
And we are done, so let's test our implementation, open the vs-code terminal again and then run the following command:
dotnet run
This should run the application, once it starts running we can see how swagger is managing the API documentation.
Open Chrome or any other browser of your choice and post the following URL
http://localhost:/swagger/
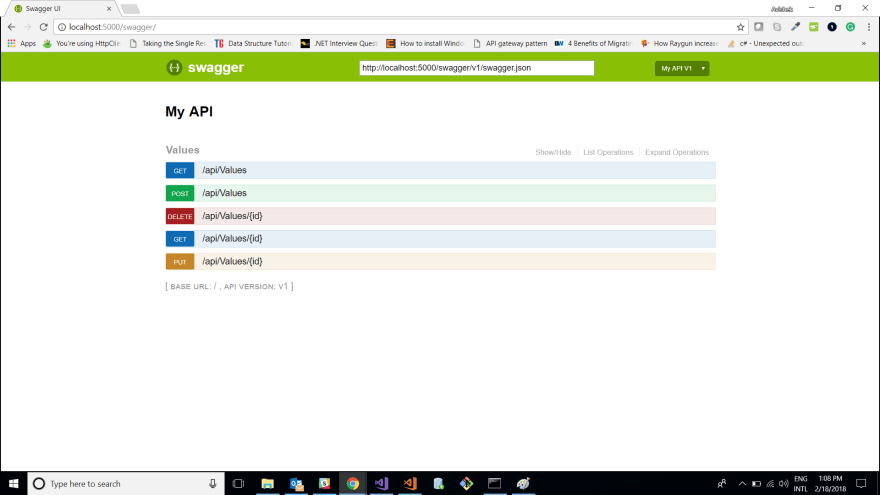
you should be using the port number on which your application has been started. Now on your browser you should see the swagger documentation like below
So simple right. If you've liked this tutorial then please follow me on twitter and dev.to


Latest comments (1)
If Anybody is looking for the source code of the same then use this git repo
github.com/patravishek/swagger-ui-...