
Introduction
Did you ever want to create an e-commerce platform and earn through it?

One of the most tricky parts would be accepting payments. So let's see how you can do it 😉

Setting up
Creating a Next app with TailwindCSS
I am going to use tailwind for the basic stylings needed in the app
npx create-next-app next-stripe-demo -e with-tailwindcss
Cleanup
Delete everything in pages/index.js after the Head till the footer it should look like this
import Head from 'next/head'

export default function Home() {
  return (
    <div className="flex flex-col items-center justify-center min-h-screen py-2">
      <Head>
        <title>Create Next App</title>
        <link rel="icon" href="/favicon.ico" />
      </Head>

    </div>
  )
}
Starting the app
npm run dev # npm
yarn dev # yarn
Installing the required dependencies
npm i stripe @stripe/stripe-js axios
yarn add stripe @stripe/stripe-js axios
Creating a dummy product
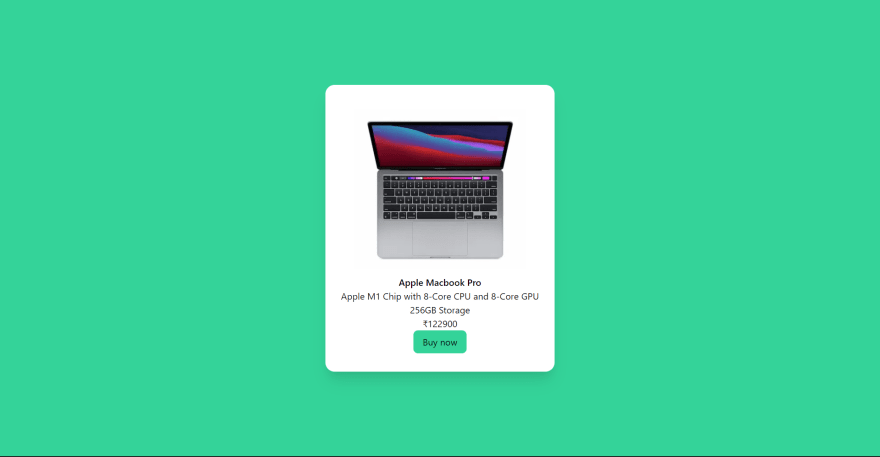
I am going to create a MacBook component card as a product, you might already have many products for your app.
import Head from "next/head";
import Image from "next/image";

export default function Home() {
  const items = [
    {
      title: "Apple Macbook Pro",
      description: "Apple M1 Chip with 8‑Core CPU and 8‑Core GPU 256GB Storage",
      image:
        "https://store.storeimages.cdn-apple.com/4668/as-images.apple.com/is/mbp-spacegray-select-202011_GEO_IN?wid=904&hei=840&fmt=jpeg&qlt=80&.v=1613672874000",
      price: 122900,
    },
  ];

  return (
    <div className="flex flex-col items-center justify-center min-h-screen  bg-green-400">
      <Head>
        <title>Create Next App</title>
        <link rel="icon" href="/favicon.ico" />
      </Head>

      {items?.map((item) => (
        <div className="bg-white rounded-2xl h-[500px] w-[400px] p-3 shadow-xl flex flex-col justify-center items-center">
          <Image
            width={300}
            height={300}
            objectFit="contain"
            src={item.image}
            alt={item.title}
          />
          <h2 className="text-center font-semibold">{item.title}</h2>
          <h2 className="text-center">{item.description}</h2>
          <h3>₹{item.price}</h3>
          <button role="link" className="bg-green-400 px-4 py-2 rounded-lg">
            Buy now
          </button>
        </div>
      ))}
    </div>
  );
}
Whitelisting the image
As we are using the next Image we will need to whitelist it in next.config.js
So, create a file next.config.js and add this
module.exports = {
  images: {
    domains: ["store.storeimages.cdn-apple.com"],
  },
};
After adding it you will need to restart your server. Kill the old server and run
npm run dev # npm
yarn dev # yarn
This will give a product card like this
Adding an onClick to the button
   <button
       onClick={createCheckOutSession}
       role="link"
       className="bg-green-400 px-4 py-2 rounded-lg"
   >
     Buy now
   </button>
Creating the createCheckOutSessionfunction
const createCheckOutSession = async () => {};
Getting the credentials
Go to Stripe and sign up for an account and create an application.
After it is created, click on developers in the header
![]()
then click on API keys in the sidebar.
You will see these your keys there.
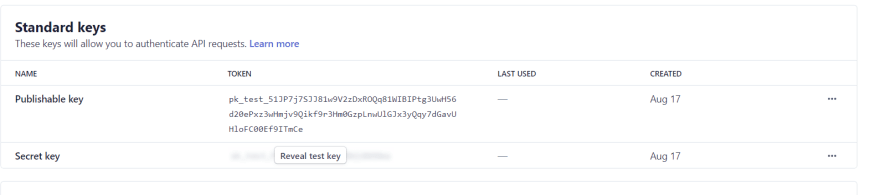
Now, create a .env.local file and add your public and secret key there instead
STRIPE_PUBLIC_KEY=public_key
STRIPE_SECRET_KEY=secret_key
We will also add the env key in next.config.js like this
module.exports = {
  images: {
    domains: ["store.storeimages.cdn-apple.com"],
  },
  env: {
    stripe_public_key: process.env.STRIPE_PUBLIC_KEY,
  },
};
You will need to restart your server after you do this. So kill the server and run
npm run dev # npm
yarn dev # yarn
Loading stripe
Add this snippet at the top of index.js.
import { loadStripe } from "@stripe/stripe-js";
const stripePromise = loadStripe(process.env.stripe_public_key);
Creating the backend
Inside pages/api folder create a file named create-checkout-session.js
Add this in the file
const stripe = require("stripe")(process.env.STRIPE_SECRET_KEY);

export default async (req, res) => {
  const { item, email } = req.body;
};
Here, we are getting the item and the email via a post method that we will call on our front end.

So, let's make a test post request and console log the details.
  const createCheckOutSession = async () => {
    const stripe = await stripePromise;

    const checkoutSession = await axios.post("/api/create-checkout-session", {
      items: items,
      email: "test@gmail.com",
    });
  };
You will need to import Axios like this
import axios from "axios"
This will make a post request to our backend and will pass the item, email along with it. I am hard coding the values here, but you should have an authentication system and you will need to pass the email here.
Console logging the data we get
export default async (req, res) => {
  const { item, email } = req.body;

  console.log(item);
  console.log(email);
};
Now if you click on the button you will be able to see the details in the terminal like this

Creating the shape for the item needed by Stripe.
There is a particular type of object which Stripe expects to get, this is the object. I have created this in such a way that even if you add multiple items to the cart and make the request it would work. You should use your local currency instead of "inr".
    const transformedItem = {
    description: item.description,
    quantity: 1,
    price_data: {
      currency: "inr",
      unit_amount: item.price * 100,
      product_data: {
        name: item.title,
        image: [item.image],
      },
    },
  };
Creating the Stripe Session in the backend
You will need to create a stripe session object where you need to define some data.
  const session = await stripe.checkout.sessions.create({
    payment_method_types: ["card"],
    shipping_address_collection: {
      allowed_countries: ["IN"],
    },
    line_items: transformedItems,
    mode: "payment",
    success_url: "http://localhost:3000/success",
    cancel_url: "http://localhost:3000/cancel",
    metadata: {
      email,
      images: JSON.stringify(items.map((item) => item.image)),
    },
  });

  res.status(200).json({ id: session.id });
};
Allowed countries: You can add as many and whichever allowed countries you want to add.
Success URL: In success URL you define where the user will go after the payment is successful.
CancelURL: In the cancel URL you define where the user will go if the user clicks the back button. It can be a cancel page or the checkout page as well.
Metadata: In metadata, we will add the email and images. You can add more metadata if you want.
This is how the final create-checkout-session.js looks like
const stripe = require("stripe")(process.env.STRIPE_SECRET_KEY);

export default async (req, res) => {
  const { items, email } = req.body;

  console.log(items);

  const transformedItems = items.map((item) => ({
    price_data: {
      currency: "inr",
      product_data: {
        images: [item.image],
        name: item.title,
      },
      unit_amount: item.price * 100,
    },
    description: item.description,
    quantity: 1,
  }));

  const session = await stripe.checkout.sessions.create({
    payment_method_types: ["card"],
    shipping_address_collection: {
      allowed_countries: ["IN"],
    },
    line_items: transformedItems,
    mode: "payment",
    success_url: "http://localhost:3000/success",
    cancel_url: "http://localhost:3000/cancel",
    metadata: {
      email,
      images: JSON.stringify(items.map((item) => item.image)),
    },
  });

  res.status(200).json({ id: session.id });
};
Redirecting the user to the checkout page
Inside the createCheckOutSession function add this below the post request
    const result = await stripe.redirectToCheckout({
      sessionId: checkoutSession.data.id,
    });

    if (result.error) {
      alert(result.error.message);
    }
The final createCheckOutSession should look like this
  const createCheckOutSession = async () => {
    const stripe = await stripePromise;

    const checkoutSession = await axios.post("/api/create-checkout-session", {
      items: items,
      email: "test@gmail.com",
    });

    const result = await stripe.redirectToCheckout({
      sessionId: checkoutSession.data.id,
    });

    if (result.error) {
      alert(result.error.message);
    }
  };
The index.js file should be similar to this
import Head from "next/head";
import Image from "next/image";
import axios from "axios";
import { loadStripe } from "@stripe/stripe-js";
const stripePromise = loadStripe(process.env.stripe_public_key);

export default function Home() {
  const items = [
    {
      title: "Apple Macbook Pro",
      description: "Apple M1 Chip with 8‑Core CPU and 8‑Core GPU 256GB Storage",
      image:
        "https://store.storeimages.cdn-apple.com/4668/as-images.apple.com/is/mbp-spacegray-select-202011_GEO_IN?wid=904&hei=840&fmt=jpeg&qlt=80&.v=1613672874000",
      price: 122900,
    },
  ];

  const createCheckOutSession = async () => {
    const stripe = await stripePromise;

    const checkoutSession = await axios.post("/api/create-checkout-session", {
      items: items,
      email: "test@gmail.com",
    });

    const result = await stripe.redirectToCheckout({
      sessionId: checkoutSession.data.id,
    });

    if (result.error) {
      alert(result.error.message);
    }
  };

  return (
    <div className="flex flex-col items-center justify-center min-h-screen  bg-green-400">
      <Head>
        <title>Create Next App</title>
        <link rel="icon" href="/favicon.ico" />
      </Head>

      {items?.map((item) => (
        <div
          key={item.title}
          className="bg-white rounded-2xl h-[500px] w-[400px] p-3 shadow-xl flex flex-col justify-center items-center"
        >
          <Image
            width={300}
            height={300}
            objectFit="contain"
            src={item.image}
            alt={item.title}
          />
          <h2 className="text-center font-semibold">{item.title}</h2>
          <h2 className="text-center">{item.description}</h2>
          <h3>₹{item.price}</h3>
          <button
            onClick={createCheckOutSession}
            role="link"
            className="bg-green-400 px-4 py-2 rounded-lg"
          >
            Buy now
          </button>
        </div>
      ))}
    </div>
  );
}
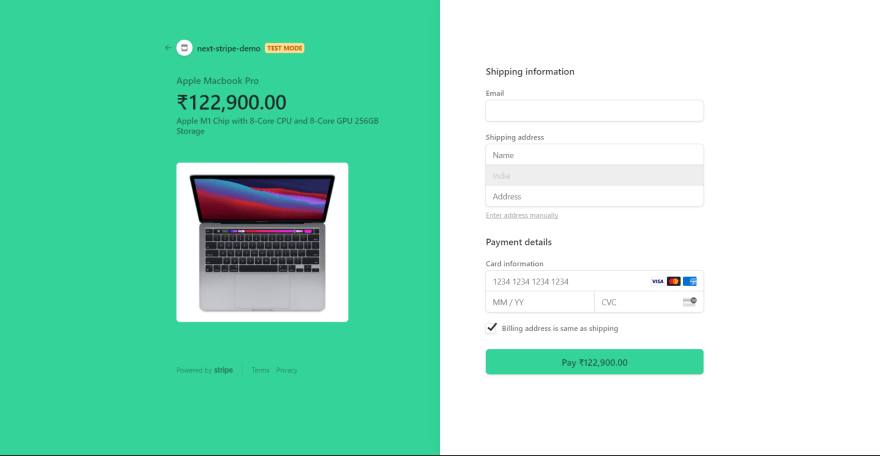
Now let's see if it works.
Stripe gives us a test card where you need to enter 4242 everywhere.
https://www.loom.com/embed/7869990b6aa64721945ca2f5076c7839

If you now go to the payments in the header you can see that the order came in.
Creating the success and the cancel page
Creating the success page
Create success.js in the pages folder
I am creating a very simple page, feel free to customize it as needed.
function success() {
  return (
    <div className="flex flex-col items-center justify-center min-h-screen  bg-green-400">
      <h2 className="text-4xl font-semibold">Thanks for shopping with us</h2>
    </div>
  );
}

export default success;
Creating the cancel page
Create cancel.js in the pages folder
Add this snippet to get a simple cancel page.
import Link from "next/link";

function cancel() {
  return (
    <div className="flex flex-col text-4xl font-semibold items-center justify-center min-h-screen  bg-green-400">
      <h2>Looks like you canceled the order.</h2>
      <Link href="/" className=" bg-white bg-opacity-30 px-4 py-2 rounded-2xl">
        Go to home page
      </Link>
    </div>
  );
}

export default cancel;
Looking at the pages in action
https://www.loom.com/share/413deed251e344658fad4028e8d1abad
Customizing the checkout page
If you want to change the colors of the checkout page follow these steps-
- Click on settings
- Scroll down and you will find branding under Your business
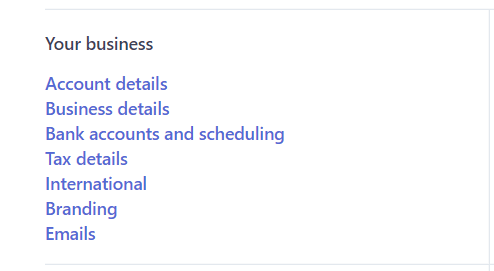
- You can add your brand colors, logo, and icon here. After changing the color click on save and you will be able to see a customized login screen!

You have added stripe payment to your app!
Let me know what you want to see next 😉👇🏻
Useful links -

Top comments (0)