Welcome back, guys, to Part #2. In this post, we will set up a Lightsail instance for WordPress. Type the Lightsial into the AWS console search bar and select the Lightsail, as shown in the below screenshot.

You will see the new page on a separate tab. Just click on the "Create instance"

Now you will see the long configuration page for Lightsail. There are different options available, which I marked with numbers.
1# Select the region where you want to deploy your instance. I am choosing Virginia, Zone A.
2# Select the OS, for WordPress Linux OS is the best option, but you can choose Windows according to your requirements. In my case, I am choosing Linux.
3# Select the application from the collection, but I am going to choose WordPress.

Next, scroll down the page, and it's time to select the instance type according to price or compute power depending upon your requirements.
4# If you don't know the processing load, then I will recommend you choose the USD 5 instance, which offers 1GB of RAM, 2 V CPUs, including a 40 GB SSD, and 2 TB of bandwidth.
5# Assign the name to the instance. It's a good option to assign your instance name according to your domain name.
6# Finally, click on the "Create instance" button.

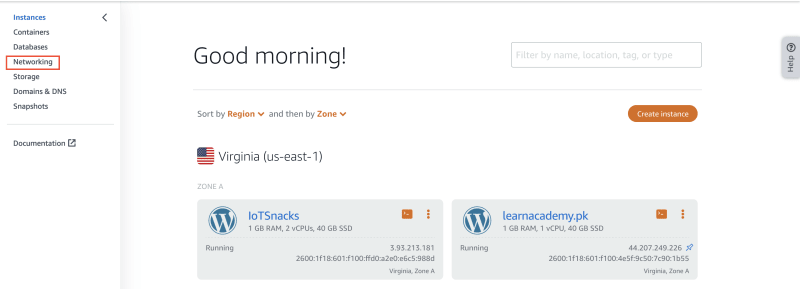
Now it's time to take some coffee, as AWS takes a little time to create and make your instance live. Congratulations! Your instance is live after a few minutes, and now it's time to assign a static IP to your Lightsail instance, as it's required for cloudfront. Click on the "Networking" link, which is marked in the below picture.
Click on the "Create static IP" button, as shown in the below screenshot.

On this page, as shown in the below screenshot, you can select your IP location, but I didn't change it. Next, you need to select your Lightsail instance to allot a static IP address, and in the last, assign the name to your static IP address. And in the end, click on "Create," and you are good to go.

Congratulations! A static IP has been assigned to the Lightsail instance, as shown in the below screenshot.

Once again, congratulations, guys. Your AWS Lightsail instance for WordPress is up and running, and we also assigned the static IP to that instance. In the next post, we will set up the cloudfront and distribution for our instance.
In the next post you will learn how to setup the distribution for Lightsail instance. Click here to read Part#3.

Top comments (0)