
Background
In a previous post I described how to stream data from QLDB to DynamoDB to support single-digit latency and infinitely scalable key-value enquiries.
Another common use case is to support rich text search and downstream analytics such as aggregation or metrics across records. For this, I look to build on the previous post and stream data from QLDB into Amazon Elasticsearch (ES). To try this out for yourself, the code is available on GitHub - QLDB Simple Demo.
The goal of this blog post is to run through all the steps involved in setting up the working prototype. Skip over sections that you are already familiar with.
- Component Architecture
- Configuring Elasticsearch
- Configuring QLDB Stream Resource
- Interacting with Elasticsearch
- Searching and Vizualisation with Kibana
- Learn more
Component Architecture
The AWS services being used for the demo are shown below. The point to note is that both Elasticsearch and Lambda are configured to connect to your VPC by establishing an Elastic Network Interface (ENI).

Configuring Elasticsearch
Elasticsearch is a leading open source search and analytics solution. For the demo, I use the Amazon Elasticsearch Service. This is a fully managed service, which has Kibana built in for visualisations. When I started building the prototype, I configured Elasticsearch with public access and an open access policy for simplicity. However, just a few days ago this failed to deploy with the following error:
Serverless Error ---------------------------------------

An error occurred: ElasticSearch - Enable fine-grained access control
or apply a restrictive access policy to your domain (Service:
AWSElasticsearch; Status Code: 400; Error Code: ValidationException;
Request ID: 6bad496c-c097-447f-b047-353ef02fccb0).
This meant a change to use the AWS recommended approach of deploying ES with VPC access. This uses private IP addresses from your VPC, and you control access using security groups, so is inherently more secure. This means that connectivity between ES and other services within the VPC don't require an internet gateway, NAT device or VPN connection. All traffic remains securely within the AWS Cloud. This is the rationale for connecting the Lambda function to the VPC as well.
I used the following configuration in the serverless.yml file to create a new VPC, a single subnet, and a security group that has a nework ingress rule for port 443 to allow connectivity to the Elasticsearch domain.
ElasticVPC:
  Type: AWS::EC2::VPC
  Properties:
    CidrBlock: "10.0.0.0/16"
    EnableDnsSupport: "true"
    EnableDnsHostnames: "true"
    Tags:
      - Key: Name
        Value: qldb-streams-vpc

ElasticSubnetA:
  DependsOn: ElasticVPC
  Type: AWS::EC2::Subnet
  Properties:
    VpcId:
      Ref: ElasticVPC
    AvailabilityZone: ${self:provider.region}a
    CidrBlock: "10.0.2.0/24"
    Tags:
      - Key: Name
        Value: qldb-streams-subneta

ElasticSecurityGroup:
  DependsOn: ElasticVPC
  Type: AWS::EC2::SecurityGroup
  Properties:
    GroupDescription: SecurityGroup for Elasticsearch
    VpcId:
      Ref: ElasticVPC
    SecurityGroupIngress:
      - FromPort: '443'
        IpProtocol: tcp
        ToPort: '443'
        CidrIp: 0.0.0.0/0
    Tags:
      - Key: Name
        Value: qldb-streams-sg
The AWS VPC is setup with enableDnsSupport option set to true to ensure the Amazon ES endpoint will succeed. There is only a single subnet created. The security group is used by both the Lambda function and Amazon ES, and opens up port 443 to allow connection to the Amazon ES domain.
I used the following configuration to setup the ES domain, which I walk through below:
ElasticSearch:
  Type: AWS::Elasticsearch::Domain
  Properties:
    DomainName: "#{AWS::StackName}"
    ElasticsearchVersion: 7.7
    ElasticsearchClusterConfig:
      DedicatedMasterEnabled: false
      InstanceCount: "1"
      InstanceType: r5.large.elasticsearch
      ZoneAwarenessEnabled: false
    EBSOptions:
      EBSEnabled: true
      Iops: 0
      VolumeSize: 10
      VolumeType: standard
    EncryptionAtRestOptions:
      Enabled: true
      KmsKeyId: arn:aws:kms:${self:provider.region}:#{AWS::AccountId}:alias/aws/es
    NodeToNodeEncryptionOptions:
      Enabled: true
    DomainEndpointOptions:
      EnforceHTTPS: true
    AccessPolicies:
      Version: "2012-10-17"
      Statement:
        - Effect: Allow
          Principal:
            AWS: "*"
          Action: es:ESHttp*
          Resource: arn:aws:es:${self:provider.region}:#{AWS::AccountId}:domain/#{AWS::StackName}/*
    VPCOptions:
      SubnetIds:
        - !Ref ElasticSubnetA
      SecurityGroupIds:
        - !Ref ElasticSecurityGroup
In the ElasticsearchClusterConfig section I specify a single instance. This is the most basic setup for development and testing, which will run in just a single availability zone (hence only configuring a single subnet). For production workloads, AWS recommend three dedicated primary instances and at least three data nodes spread across three AZ's.
For my initial development I was using a t2.medium.elasticsearch instance (on demand - $0.05 per Hour). I changed this to an r5.large.elasticsearch instance to enable encryption at rest. (on demand - $0.141 per Hour)
I am using an open access policy. This does not mean that anyone on the internet can access the Amazon ES domain as it is locked down to the VPC. It does mean that if a request reaches the Amazon ES domain and the security group permits it, there are no further security checks. Access policies can be locked down to specific IAM users or roles, which requires requests being signed with valid credentials. It is also possible to implement fine grained access control.
To demonstrate addition features to protect data, the ES domain is configured with:
-
EnforceHTTPSenabled inDomainEndpointOptions. This ensures that the domain only accepts requests over HTTPS -
NodeToNodeEncryptionOptionsenabled where all node-to-noe encryption within the ES domain uses TLS -
EncryptionAtRestOptionsenabled using the KMS ES master key. This ensures that the indices and automated snapshots associated with the domain are encrypted.
Finally, the Amazon ES service requires an IAM service-linked role to set up connectivity with your VPC. This is carried out as follows:
ElasticStreamRole:
  Type: 'AWS::IAM::Role'
  Properties:
    AssumeRolePolicyDocument:
      Version: '2012-10-17'
      Statement:
        - Effect: Allow
          Principal:
            Service:
              - es.amazonaws.com
          Action:
            - 'sts:AssumeRole'
    Path: /
    ManagedPolicyArns:
      - !Ref ElasticStreamManagedPolicy

ElasticStreamManagedPolicy:
  Type: 'AWS::IAM::ManagedPolicy'
  Properties:
    PolicyDocument:
      Version: '2012-10-17'
      Statement:
        - Sid: ElasticVPCPermissions
          Effect: Allow
          Action:
            - 'ec2:CreateNetworkInterface'
            - 'ec2:DeleteNetworkInterface'
            - 'ec2:DescribeNetworkInterfaces'
            - 'ec2:ModifyNetworkInterfaceAttribute'
            - 'ec2:DescribeSecurityGroups'
            - 'ec2:DescribeSubnets'
            - 'ec2:DescribeVpcs'
          Resource: "*"
Configuring QLDB Stream Resource
Since the last blog post, CloudFormation support for QLDB Streams has been released. The following basic configuration is used to set up the stream. There are a number of required properties:
- InclusiveStartTime - the start date and time from which to start streaming journal data, and which cannot be in the future
- KinesisConfiguration - the configuration settings for the destination Kinesis data stream, which specifies whether aggregation should be enabled and the ARN of the stream
- LedgerName - the name of the ledger
- RoleArn - the ARN of the IAM role to grant QLDB permission to write to data to Kinesis
- StreamName - the name of the QLDB journal stream
ESQLDBStream:
  Type: AWS::QLDB::Stream
  Properties:
    InclusiveStartTime: "2020-05-29T00:00:00Z"
    KinesisConfiguration:
      AggregationEnabled: true
      StreamArn:
        Fn::GetAtt: [KinesisDataStream, Arn]
    LedgerName: qldb-simple-demo-dev
    RoleArn:
      Fn::GetAtt: [QLDBStreamRole, Arn]
    StreamName: QLDBStream-elastic-${self:provider.stage}
Similar to ES, QLDB requires a service-linked role to setup the integration with Kinesis. This can be done as follows:
QLDBStreamRole:
  Type: 'AWS::IAM::Role'
  Properties:
    AssumeRolePolicyDocument:
      Version: '2012-10-17'
      Statement:
        - Effect: Allow
          Principal:
            Service:
              - qldb.amazonaws.com
          Action:
            - 'sts:AssumeRole'
    Path: /
    ManagedPolicyArns:
      - !Ref QLDBStreamManagedPolicy

QLDBStreamManagedPolicy:
  Type: 'AWS::IAM::ManagedPolicy'
  Properties:
  PolicyDocument:
    Version: '2012-10-17'
    Statement:
      - Sid: QLDBStreamKinesisESPermissions
        Effect: Allow
        Action:
          - 'kinesis:PutRecord*'
          - 'kinesis:DescribeStream'
          - 'kinesis:ListShards'
        Resource:
          Fn::GetAtt: [licenceQldbStreamsES, Arn]
Interacting with Elasticsearch
Signing requests to Elasticsearch
In some cases, you may need to sign an HTTP request for Amazon ES to accept it. AWS Lambda has an IAM role to execute the function called the execution role. This role provides the Lambda function with the credentials it needs, and they are used to sign the request. You can find more details on this in the developer guide.
The sample code I used is below:
const creds = new AWS.EnvironmentCredentials('AWS');
const request = new AWS.HttpRequest(endpoint, REGION);
request.method = httpMethod;
request.headers['Content-Type'] = 'application/json';
...
const signer = new AWS.Signers.V4(request, 'es');
signer.addAuthorization(creds, new Date());
If the wrong role is used, then the request will be rejected by ES with a message returned like the one below:
{
    "Message": "User: arn:aws:sts::{AccountId}:assumed-role/abc/xyz
    is not authorized to perform: es:ESHttpPut"
}
Creating and Updating Documents
Elasticsearch is distributed. Whenever a document is created, updated or deleted, the new version is replicated to other nodes in the cluster. Elasticsearch is also aynchronous and concurrent, and so requests may arrive out of sequence. To ensure an older version of a document doesn't update a newer version, every operation is assigned an incrementing sequence number. By default, internal versioning is used that starts at 1.
There is also a challenge around sequencing with QLDB streams:
QLDB streams provide an at-least-once delivery guarantee. Each data record that is produced by a QLDB stream is delivered to Kinesis Data Streams at least once. The same records can appear in a Kinesis data stream multiple times. So you must have deduplication logic in the consumer application layer if your use case requires it.
There are also no ordering guarantees. In some circumstances, QLDB blocks and revisions can be produced in a Kinesis data stream out of order.
Luckily, there is a really elegant solution to solve these problems.
Elasticsearch supports the use of an external value as a version number by setting version_type to external. With this, the system checks that the version number passed in to the index request is greater than the version of the currently stored document, else the update will fail with a version conflict.
QLDB automatically generates a unique identifier for each document created, which includes a version number that is incremented on each subsequent revision. The unique identifier is the id field found in the metadata section. Every REVISION_DETAILS message in the QLDB stream will have the id and version of the document in the metadata section. The id must be used as the identifier as an empty data section is sent if a document is deleted.
The code to both create and update a document in Elasticsearch is identical, and shown below:
const doc = {
    "licenceId": licenceId,
    "points": points,
    "postcode": postcode,
    "version": version,
    "name": name
};
response = await sendRequest({
    httpMethod: 'PUT',
    requestPath: `/licence/_doc/${id}?version=${version}&version_type=external`,
    payload: doc
});
The code uses the Index API to add a JSON document to the specified index (in this case 'licence'), and make it searchable. If the document doesn't exist it is created. If it does exist and the version number passed in is greater, then the document is updated. For creates and updates, QLDB sends through the whole document in the REVISION_DETAILS section, so it is a case of overwriting all the data.
When a document is successfully created or updated, you will get back a response message such as:
{
  "_index": "licence",
  "_type": "_doc",
  "_id": "7YQHLWaY7RE23T7NBSG2B6",
  "_version": 4,
  "_score": 0,
  "_source": {
    "licenceId": "7YQHLWAY7RE23T7NBSG2B6",
    "points": 11,
    "postcode": "AB123DE",
    "version": 4,
    "name": "Matt Lewis"
  }
}
Testing showed that records would be received out of order when processing the Kinesis data stream. Using the external version_type prevented overwriting newer versions with older versions as can be seen by the following version conflict error message that is returned.
{
  "error": {
    "root_cause": [
      {
        "type": "version_conflict_engine_exception",
        "reason": "[7YQHLWaY7RE23T7NBSG2B6]: version conflict,
            current version [4] is higher or equal to the one
            provided [2]",
        "index_uuid": "4dhIyzS1TY6HCyTNNKKLQg",
        "shard": "1",
        "index": "licence"
      }
    ],
    "type": "version_conflict_engine_exception",
    "reason": "[7YQHLWaY7RE23T7NBSG2B6]: version conflict,
        current version [4] is higher or equal to the one
        provided [2]",
    "index_uuid": "4dhIyzS1TY6HCyTNNKKLQg",
    "shard": "1",
    "index": "licence"
  },
  "status": 409
}
Another advantage of using the id and version values from the QLDB metadata section is that you can use the values returned in the reason field to look up either the latest current version on QLDB:
SELECT * FROM _ql_committed_BicycleLicence AS b
WHERE b.metadata.id = '7YQHLWaY7RE23T7NBSG2B6'
or else look up all revisions for the specific id:
SELECT * FROM history( BicycleLicence ) AS h
WHERE h.metadata.id = '7YQHLWaY7RE23T7NBSG2B6'
One thing to be aware of is that extracting values from the ION document in the Kinesis data stream will return a String, which gets mapped to Text in Elasticsearch. It was necessary to explicitly convert numberic fields such as version and points as shown below:
const points = parseInt(ion.dumpText(ionRecord.payload.revision.data.PenaltyPoints));
Deleting Documents
The Delete API is used to remove a document from an index in Elasticsearch using the index name and id.
  // Check to see if the data section exists.
  if (ionRecord.payload.revision.data == null) {
    await sendRequest({
        httpMethod: 'DELETE',
        requestPath: `/licence/_doc/${id}?version=${version}&version_type=external`
    });
  }
This results in the following output:
"body": {
    "_index": "licence",
    "_type": "_doc",
    "_id": "KWBz8bvzErEA5Sv12l0YiJ",
    "_version": 1,
    "result": "deleted",
    "_shards": {
        "total": 2,
        "successful": 1,
        "failed": 0
    },
    "_seq_no": 5,
    "_primary_term": 1
}
Searching and Visualization with Kibana
The AWS documentation states:
To access the default installation of Kibana for a domain that resides within a VPC, users must have access to the VPC. This process varies by network configuration, but likely involves connecting to a VPN or managed network or using a proxy server.
There are a number of options for how to achieve this using an SSH Tunnel, Nginx proxy or Client VPN. For more details, check out the following articles:
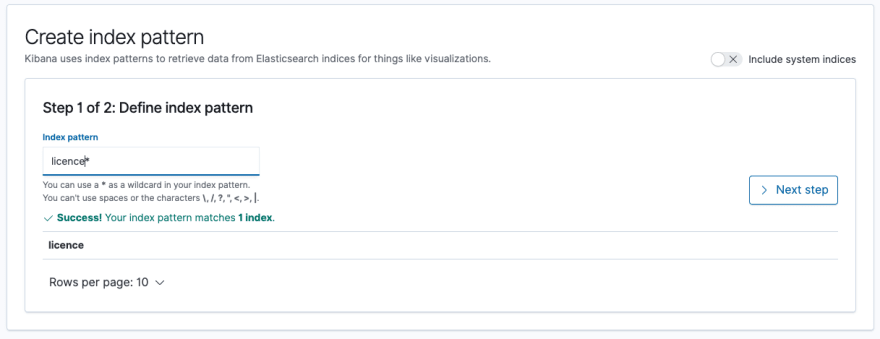
Once data has been loaded into ES, it is time to open Kibana and carry out some searches and visualisations. The URL for Kibana can be found in the overview section of the Elasticsearch domain. Once opened, it is necessary to define the index pattern.
Now you can go into Dev Tools and run queries, such as retrieving all licences in a specific postcode:
GET licence/_search
{
  "query": {
    "match": { "postcode": "AB123DE" }
  }
}
You can use metrics aggregation to retrieve the maximum points of a fictional bicycle licence:
GET licence/_search?size=0
{
  "aggs": {
    "max-points": { "max": { "field": "points" } }
  }
}
You can combine filter and query contexts, with the following search retrieving all records that contain the name Lewis in a specific postcode that have at least 3 points on their licence:
GET /_search
{
  "query": {
    "bool": {
      "must": [
        { "match": { "postcode": "AB123DE"  }},
        { "match": { "name": "Lewis" }}
      ],
      "filter": [
        { "range": { "points": { "gte": 3 }}}
      ]
    }
  }
}
Finally, you can create visualisations from the data, such as the one below showing the average points by postcode for dummy test data.

Now the data is loaded, you can have fun playing around with the power of Elasticsearch.
Want to know more
A curated list of guides, development tools and resources for QLDB can be found at awesome-QLDB
An online guide to QLDB which is continually updated can be found at QLDB Guide

Top comments (0)