
This article is part of #PythonFunBites.
When I decided to shift my career focus to Extended Reality (XR), I had only brushed the surface of what was happening in the industry. I knew that if I wanted to get more comfortable speaking about hot-topics and industry trends, I had to stay up to date on the latest news. I personally don't keep up with tech news sites so I had to find a way that would keep me informed without the need to engage on yet another social media platform. That's when I had the idea to bring the news to me! Rather than seek new articles, I figured I could automate the process instead.
Using Python, Azure Functions, Bing News Search, and Twilio SMS, I created a daily SMS that sends me the latest articles related to XR. Check out how I made it below!
Requirements:
- Python 3.7 or newer
- An Azure subscription - sign up to create a free account!
- Visual Studio Code (also install the Python and Azure Functions extensions)
- A smartphone with an active number
- A Twilio account (be sure to purchase a phone number and validate your personal number)
Tutorial
1. Create a Project Folder and Open in Visual Studio Code
Create a folder to store all the project files and save to your preferred location. In Visual Studio Code, open the folder by navigating to File > Open (Ctrl+o/Cmd+o).
2. Sign in to Azure in Visual Studio Code
In the left Activity Bar of Visual Studio Code, click on the Azure icon to open the Azure view. Select Sign In to Azure. You will be taken to the browser to sign-in. Enter the credentials to your Azure account. Back in Visual Studio Code, you can confirm whether you're signed in if your username appears in the Status Bar.
3. Create a Bing Resource
In the Azure Portal, navigate to Create a resource. In the search bar, search for Bing Search v7. Select the resource and click Create. On the Create page, enter/select the following:
Name: Name of the resource
Subscription: Your Azure subscription
Pricing Tier: Free (if available, otherwise select your preferred pricing)
Resource Group: Either create a new resource group or select an existing one.
Region: Location where the function is used

4. Install Azure Functions Core Tools
Azure Functions Core Tools enables you to create and test Azure Functions from the command line or terminal prompt. Review the docs to determine the proper installation process according to your OS.
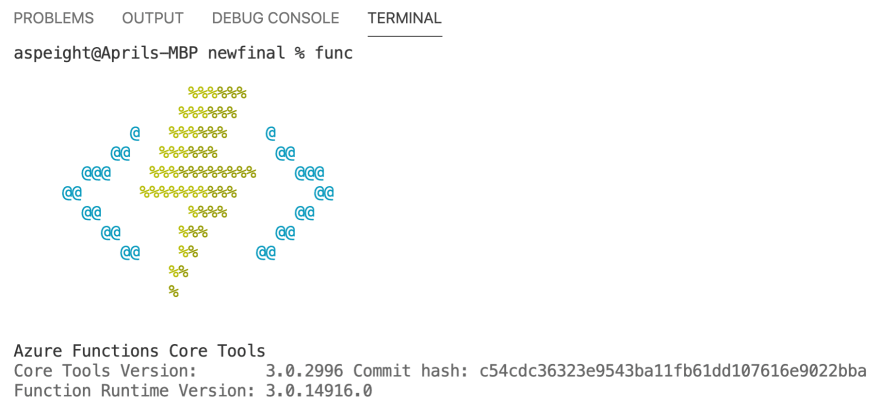
To verify whether Azure Functions Core Tools is instead, run the command func in the Visual Studio Code integrated terminal (Ctrl+~). If Azure Functions Core Tools is successfully installed, the Azure Functions logo appears in the terminal (you may need to scroll up to see).
5. Create a New Project
In the Azure view, click the Create New Project icon. Visual Studio Code takes you through a workflow to create a new project. Enter/select the following for each step:
Folder: Folder created earlier in the tutorial
Language: Python
Python alias or Full Path: Your Python interpreter
Template: Timer Trigger
Function Name: Name the function whatever you'd like
CRON expression: 0*/1**** (this runs the functions every minute)
After Visual Studio Code creates the function, a few files are added to the project folder. The init.py file opens in the editor.
Make sure to activate the virtual environment if Visual Studio Code does not do so for you.
Windows: .venv\Scripts\activate
Mac/Linux: source .venv/bin/activate
6. Install and Import Required Modules
Install the following modules:
Python-dotenv (access environment variables): pip install python-dotenv
Requests (for GET requests to Bing News Search API): pip install requests
Twilio Python Helper library: pip install twilio
At the top of the init.py file, enter the following import statements:
import datetime
import logging
import azure.functions as func
import json
import requests
from twilio.rest import Client
from dotenv import load_dotenv
load_dotenv()
import os
7. Create and Access Environment Variables
In the Explorer view (Shift+Ctrl+e/Shift+Cmd+e), create a new .env file at the root of the folder. In the .env file, enter the following:
TWILIO_ACCOUNT_SID=<Replace with Twilio Account SID>
TWILIO_AUTH_TOKEN=<Replace with Twilio Auth Token>
MY_TWILIO_NUMBER='<Replace with your Twilio phone number>'
RECEIVER_NUMBER='<Replace with your personal phone number>'
BING_SUBSCRIPTION_KEY=<Replace with your Bing Search v7 resource subscription key>
BING_ENDPOINT=https://api.bing.microsoft.com/v7.0/news/search
Replace the values with your credentials. All Twilio credentials and phone numbers are accessible in the Twilio Console. The Azure credentials are available in the Azure Portal within the Bing Resource.
Note: Be sure to include the country code before the phone number. Ex: +13235555555
In the init.py file, enter the following below the import statements:
account_sid = os.getenv("TWILIO_ACCOUNT_SID")
auth_token = os.getenv("TWILIO_AUTH_TOKEN")
my_twilio_number = os.getenv("MY_TWILIO_NUMBER")
receiver_number = os.getenv("RECEIVER_NUMBER")
subscription_key = os.getenv("BING_SUBSCRIPTION_KEY")
my_endpoint = os.getenv("BING_ENDPOINT")
8. Create Bing New Search GET Request
In the init.py file within the main function, enter the following:
'''
    This sample makes a call to the Bing News Search API with a text query and returns relevant news webpages.
    Documentation: https: // docs.microsoft.com/en-us/azure/cognitive-services/bing-web-search/
    '''
    query = "<Replace a search term. Ex: Microsoft>"

    # Construct a request
    mkt = 'en-US' # change if necessary
    params = {'q': query, 'mkt': mkt}
    headers = {'Ocp-Apim-Subscription-Key': subscription_key}

    # Call the API

    response = requests.get(my_endpoint, headers=headers, params=params)
    response_json = response.json()

    title = response_json['value'][1]['name']
    description = response_json['value'][1]['description']
    article_url = response_json['value'][1]['url']
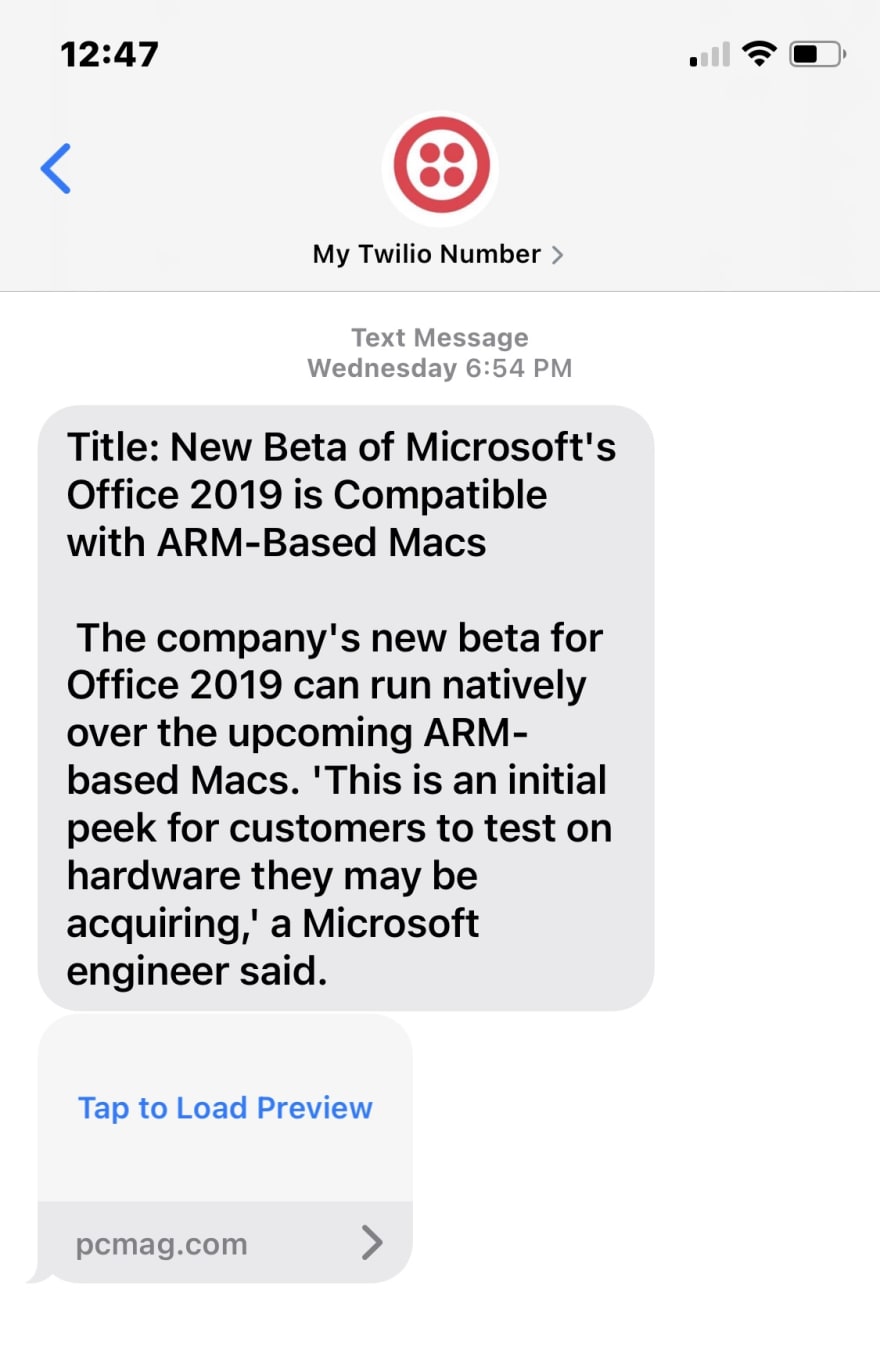
9. Create Twilio Message
Below the block of code for the Bing News Search GET request, enter the following:
# Twilio account credentials
    twilio_client = Client(account_sid, auth_token)


    message = twilio_client.messages \
        .create(
            body=f"Title: {title} \n\n {description} \n\n {article_url}",
            from_=my_twilio_number,
            to=receiver_number
        )

    print(message.sid)
Note: Feel free to update the message body!
10. Add Requirements to requirements.txt
Update the requirements.txt file with the following:
azure-functions
requests
twilio
python-dotenv
11. Run in the Debugger
You can now test the function! Before you proceed, make sure that the init.py file reflects the following:
import datetime
import logging
import azure.functions as func
import json
import requests
from twilio.rest import Client
from dotenv import load_dotenv
load_dotenv()
import os

account_sid = os.getenv("TWILIO_ACCOUNT_SID")
auth_token = os.getenv("TWILIO_AUTH_TOKEN")
my_twilio_number = os.getenv("MY_TWILIO_NUMBER")
receiver_number = os.getenv("RECEIVER_NUMBER")
subscription_key = os.getenv("BING_SUBSCRIPTION_KEY")
my_endpoint = os.getenv("BING_ENDPOINT")

def main(mytimer: func.TimerRequest) -> None:

'''
    This sample makes a call to the Bing News Search API with a text query and returns relevant news webpages.
    Documentation: https: // docs.microsoft.com/en-us/azure/cognitive-services/bing-web-search/
    '''
    query = "<Replace with a search term. Ex: Virtual Reality>"

    # Construct a request
    mkt = 'en-US' # change if necessary
    params = {'q': query, 'mkt': mkt}
    headers = {'Ocp-Apim-Subscription-Key': subscription_key}

    # Call the API

    response = requests.get(my_endpoint, headers=headers, params=params)
    response_json = response.json()

    title = response_json['value'][1]['name']
    description = response_json['value'][1]['description']
    article_url = response_json['value'][1]['url']
    # Twilio account credentials
    twilio_client = Client(account_sid, auth_token)


    message = twilio_client.messages \
        .create(
            body=f"Title: {title} \n\n {description} \n\n {article_url}",
            from_=my_twilio_number,
            to=receiver_number
        )

    print(message.sid)
Start the Debugger by navigating to Run > Start Debugging (F5). The first time you run the Debugger, Visual Studio Code prompts you to select an Azure Storage Account. Follow the prompts to create a storage account (or use one that you may already have created).
After the storage account is created/selected for the function, Visual Studio Code starts the debugger. If you receive an error, stop the debugger and enter func host into the terminal.
You should receive a SMS generated every minute to your phone if all is successful. If you do not receive a message, review all of the steps to check what may have been missed.
12. Update the CRON Expression
You're just about ready to deploy the function to Azure! But just before you do that, update the CRON expression in the function.json file. By default, the Azure Function uses the UTC timezone. Therefore, you need to set a time in that timezone that equates to 9AM in your specific timezone. Since I'm in California, I follow Pacific Daylight Time. Therefore, my CRON expression for everyday at 9AM would be: 0 * 17 * * *. For those on the East Coast, the CRON expression would be: 0 * 14 * * *.
If you fall outside either of those timezones, you can use a time zone converter to figure out the equivalent to 9AM for UTC in your time zone.
13. Deploy to Azure
You're now ready to deploy the function to Azure! In the Azure view, select the deploy icon (it's an up arrow). Visual Studio Code provides a workflow to complete deployment. Enter/select the following for each step of the workflow:
Select Function App: Create new Function App in Azure
Globally Unique Name: Provide a unique name for the function
Version of Python: Select the version that was selected earlier when creating the function
Location for New Resources: Select the location selected for the storage account
Azure then begins to deploy the function. After the function is deployed, you can anticipate receiving a SMS at your desired time interval. If you need to modify anything related to the function, you can do so within the project files in Visual Studio Code.
Need to stop the function? You can do so in the Azure portal. Navigate to Resource Groups and select the resource group used for the function. Select Delete resource group and follow the instructions to delete the resource.
And that's it! If you're feeling a little shaky on Azure Functions or would like to learn more about the service, check out the Microsoft Learn module.
Watch for content on all things Python at Microsoft between the 16th and 20th of November. Stay tuned here at dev.to for all kinds of content ranging from IoT, to Machine Learning and much more! 🐍

Oldest comments (0)