
In May this year at //Build, Azure Functions OpenAPI support feature (preview) was officially announced. At that time, it supported up to the v3 runtime – .NET Core 3.1 version. Recently, it has released .NET 5 isolated worker supporting package as a preview. Throughout this post, I'm going to review how to use it and deploy it to Azure.
NOTE: You can find the sample code used in this post at this GitHub repository:
justinyoo / azfunc-openapi-dotnet
This is the sample code repository for Azure Functions apps with the OpenAPI extension enabled in both .NET Core 3.1 and .NET 5.
Creating Azure Functions App in .NET 5
Let's use Visual Studio for this exercise. While creating the app, use the ".NET 5 (Isolated)" runtime and "Http trigger".

Then you'll find out the HTTP endpoint with default codes. Now, select the NuGet Package Manager menu at Solution Explorer.

In the NuGet Package Manager screen, tick the "Include prerelease" checkbox and search up the Microsoft.Azure.Functions.Worker.Extensions.OpenApi package. As of this writing, the NuGet packager version is v0.8.1-preview.

OpenAPI extension has now been installed.
Configuring HostBuilder
After installing the OpenAPI extension, let's configure the HostBuilder. First, open the Program.cs file and remove the existing ConfigureFunctionsWorkerDefaults() method. It's because this method uses System.Text.Json by default, which we're not going to use.
Then, add both ConfigureFunctionsWorkerDefaults(worker => worker.UseNewtonsoftJson()) and ConfigureOpenApi() method in this order. The first method explicitly declares to use the Newtonsoft.Json package and the next one imports the additional OpenAPI related endpoints.
NOTE: Currently, using
System.Text.Jsondoesn't guarantee whether the app works appropriately or not. Therefore,Newtonsoft.Jsonis highly recommended.
Now, the configuration is over. Let's move on.
Adding OpenAPI Decorators
Add OpenAPI related decorators like below. It's precisely the same exercise as the existing approach, so I'm not going too deep.
Once you complete adding the decorators, you're all done! Let's run the app.
Running Swagger UI
Run the Function app by entering the F5 key or clicking the debug button on Visual Studio.

You'll see the OpenAPI related endpoints added in the console.

Run the http://localhost:7071/api/swagger/ui endpoint on your web browser, and you'll see the Swagger UI page.
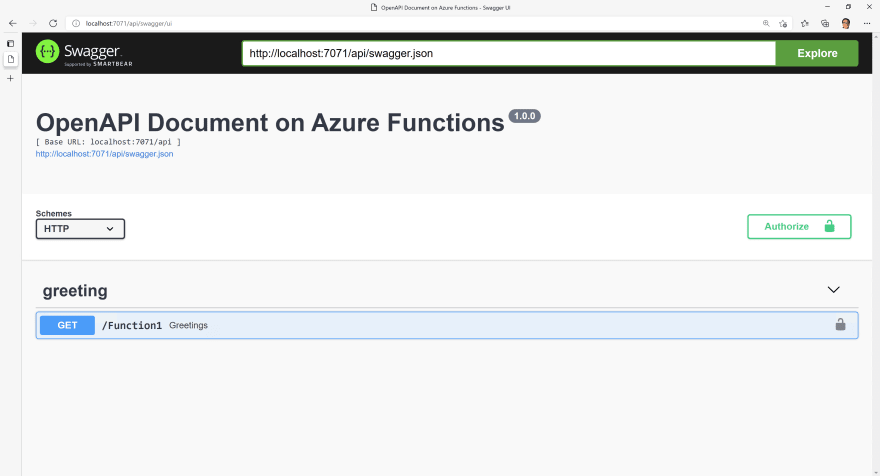
Your Azure Function app with OpenAPI capability has now been implemented correctly.
Deploying Azure Function App – Windows
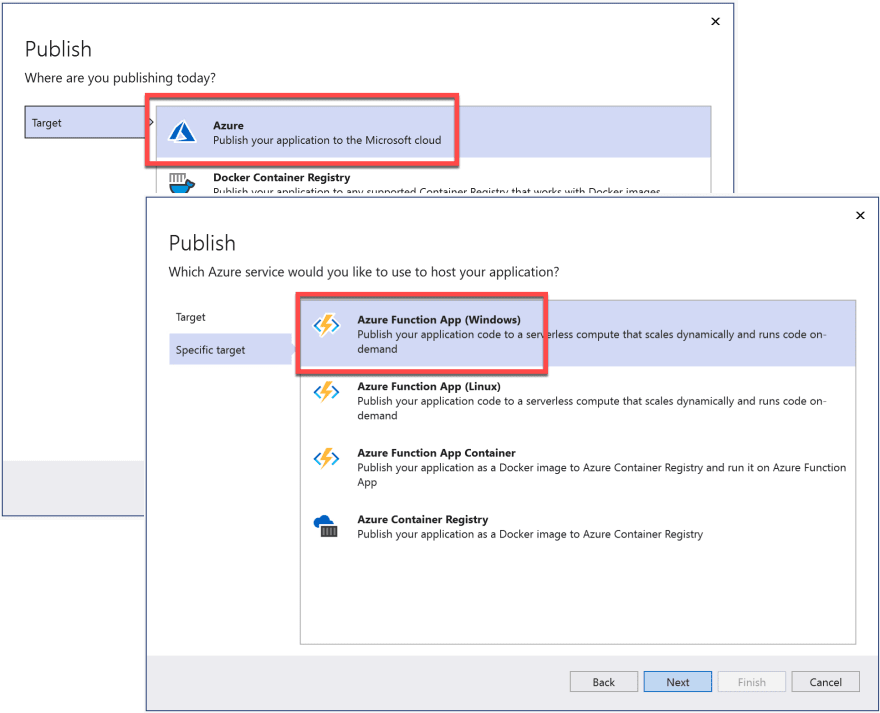
You confirmed that your Azure Function app is working fine. It's time for deployment. First of all, click the "Publish" menu at Solution Explorer.

Choose "Azure", followed by "Azure Functions App (Windows)".
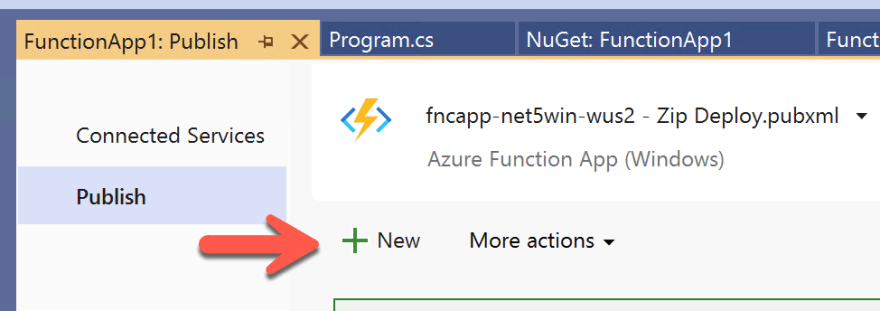
You can use the existing Function app instance or create a new one by clicking the ➕ button. This time, let's use the current instance.

Once deployment is done, open the Azure Functions URL on your web browser, and you'll see the Swagger UI page.

Deploying Azure Function App – Linux
This time, let's deploy the same app to the Linux instance. In addition to that, let's use GitHub Actions. In order to do so, you must upload this app to a GitHub repository. So, move to the "Git Changes" pane and create a Git repository.

If you've already logged in to GitHub within Visual Studio, you'll be able to create a repository and push the codes.

Once pushed all codes, visit GitHub to check your repository whether all codes have actually been uploaded.

Let's go back to the publish screen and click the "➕ New" button to create a new publish profile.
Then a similar pop-up appears to before. This time let's use the "Azure Function App (Linux)" menu.
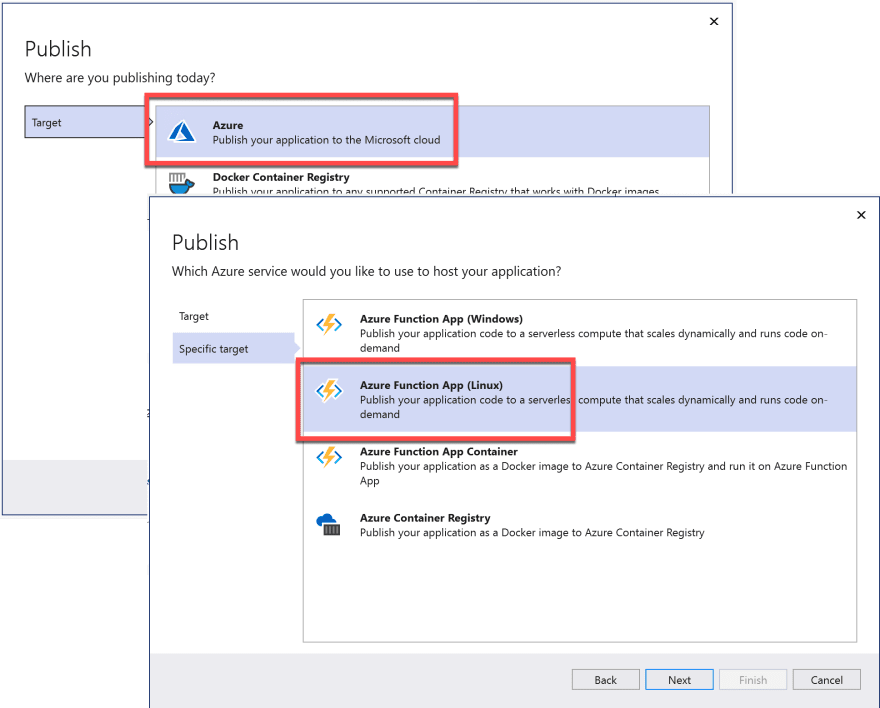
As mentioned before, you can use an existing instance or create a new one. Let's use the existing one.

In the previous deployment exercise, we haven't got a GitHub repository. Therefore, we had to use the local deployment method. But this time, we've got the GitHub repository, meaning we've got choices. Therefore, instead of choosing the same deployment method, let's choose GitHub Actions for this time.

GitHub Actions workflow has now been automatically generated. But this needs a new commit.

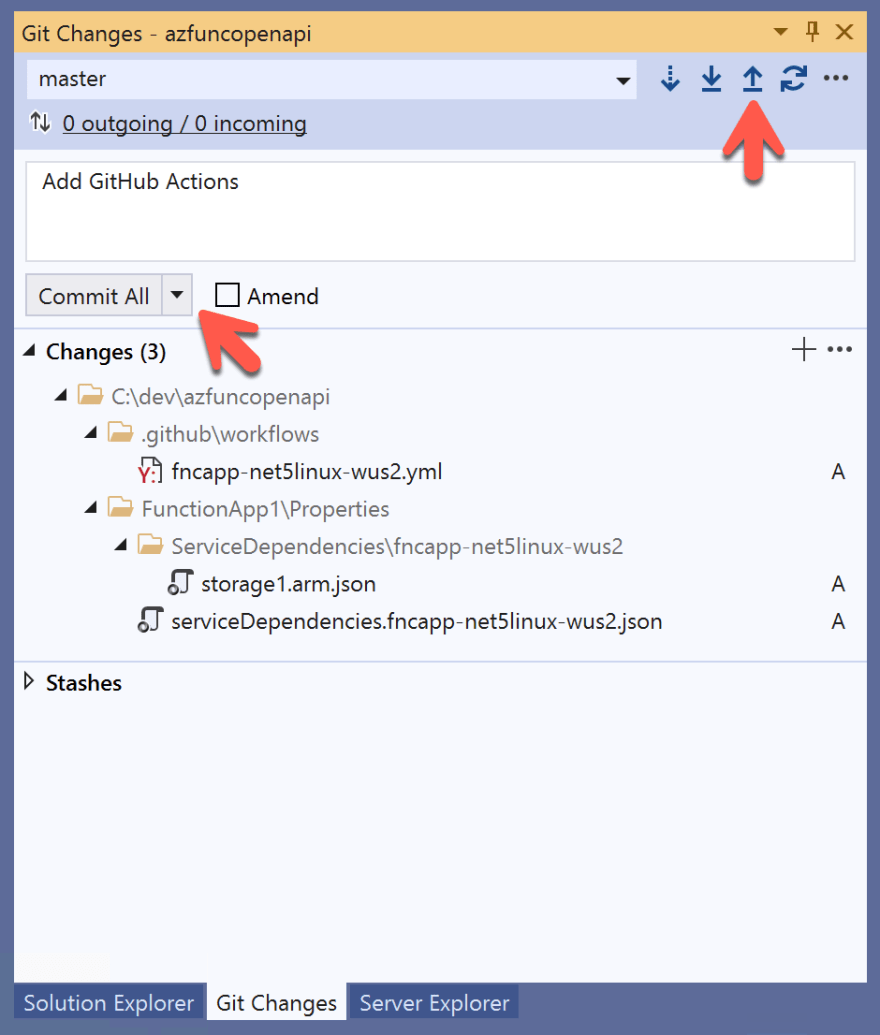
Move to the "Git Changes" pane, enter the commit message like below, click the "Commit All" button, and push the change.
When you actually visit your GitHub repository, your GitHub Actions workflow runs the build and deployment.

Once the deployment is over, open a new web browser, visit the Azure Functions app URL, and find out the Swagger UI page is correctly rendered.

So far, we've walked through how to create an OpenAPI enabled Azure Functions app, running on .NET 5 isolated worker environment, and deploy it to Azure without having to leave Visual Studio. I'm guessing that it will run OK on .NET 6, theoretically. If you're curious, please deploy it and let me know!

Top comments (0)